D-Link DGS-3130-30S/B1 - User Manual
D-Link DGS-3130-30S/B1 Switch – User Manual, read for free online in PDF format. We hope this helps you resolve any issues you may have. If you have further questions, please contact us through the contact form.
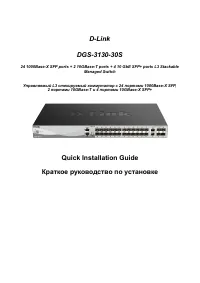
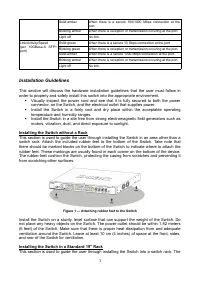
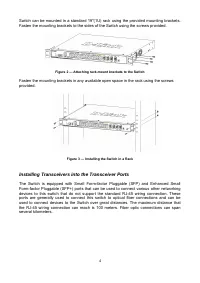
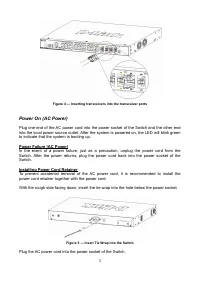
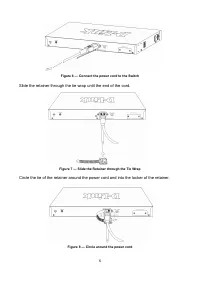

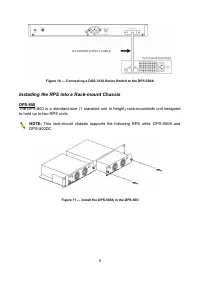
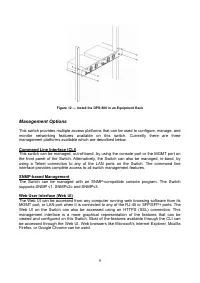
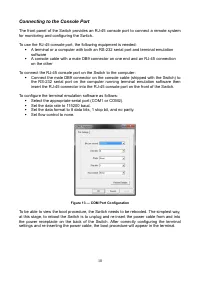
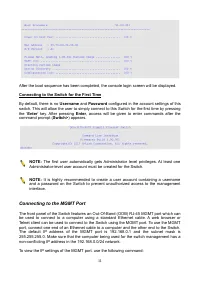
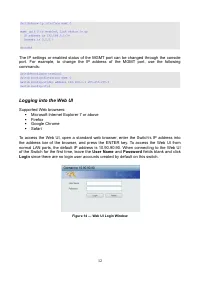

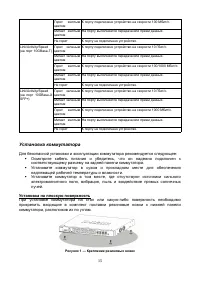
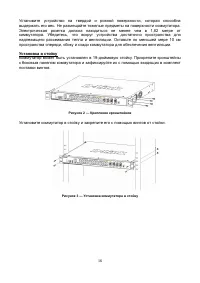
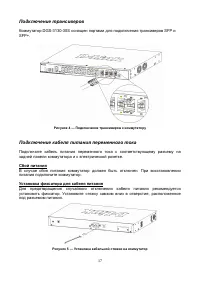
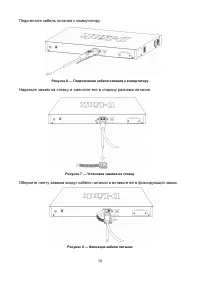

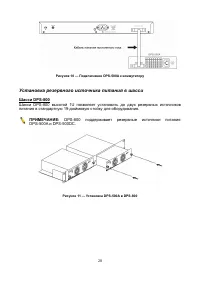
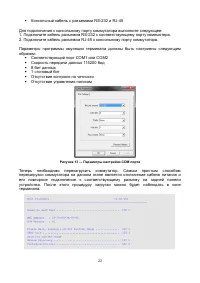
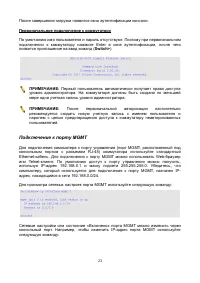
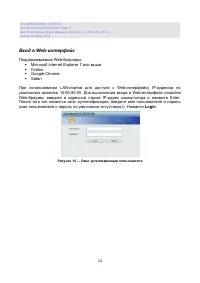
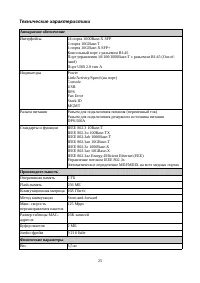
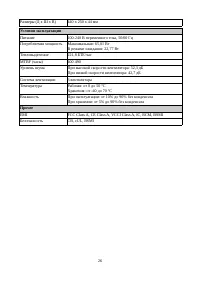
Table of Contents:
- Page 2 – Package Contents; One AC power cord; LEDs; LED
- Page 3 – Installation Guidelines; Installing the Switch without a Rack; Figure 1 — Attaching rubber feet to the Switch; Installing the Switch in a Standard 19'' Rack
- Page 4 – Installing Transceivers into the Transceiver Ports
- Page 5 – Figure 4 — Inserting transceivers into the transceiver ports; Installing Power Cord Retainer; Figure 5 — Insert Tie Wrap into the Switch; Plug the AC power cord into the power socket of the Switch.
- Page 6 – Figure 6 — Connect the power cord to the Switch; Slide the retainer through the tie wrap until the end of the cord.; Figure 7 — Slide the Retainer through the Tie Wrap
- Page 7 – Fasten the tie of the retainer until the power cord is secured.; Figure 9 — Secure the power cord; Installing the Redundant Power Supply (RPS); Do not connect the RPS to AC power before the DC power cable is; DPS-500A Redundant Power Supply
- Page 8 – Figure 10 — Connecting a DGS-3130 Series Switch to the DPS-500A; Installing the RPS into a Rack-mount Chassis
- Page 9 – Figure 12 — Install the DPS-800 in an Equipment Rack; Management Options; SNMP-based Management
- Page 10 – Connecting to the Console Port; To use the RJ-45 console port, the following equipment is needed:; Figure 13 — COM Port Configuration
- Page 11 – Connecting to the MGMT Port
- Page 12 – Logging into the Web UI; User Name; Figure 14 — Web UI Login Window
- Page 13 – Правила и условия безопасной эксплуатации; Срок службы устройства – 5 лет.
- Page 14 – Индикатор
- Page 15 – Установка коммутатора; Установка на плоскую поверхность; Рисунок 1 — Крепление резиновых ножек
- Page 16 – Установка в стойку; Рисунок 2 — Крепление кронштейнов
- Page 17 – Подключение трансиверов; Рисунок 4 — Подключение трансиверов к коммутатору; Подключение кабеля питания переменного тока; Сбой питания; Рисунок 5 — Установка кабельной стяжки на коммутатор
- Page 18 – Подключите кабель питания к коммутатору.; Рисунок 6 — Подключение кабеля питания к коммутатору; Наденьте зажим на стяжку и сместите его в сторону разъема питания.; Рисунок 7 — Установка зажима на стяжку
- Page 19 – Затяните ленту зажима для надежной фиксации кабеля питания.; Рисунок 9 — Фиксация кабеля питания; Подключение резервного источника питания; НЕ ПОДКЛЮЧАЙТЕ резервный источник питания к; Резервный источник питания DPS-500A
- Page 20 – Рисунок 10 — Подключение DPS-500A к коммутатору; Установка резервного источника питания в шасси; DPS-800 поддерживает резервные источники питания
- Page 22 – Рисунок 13 — Параметры настройки COM-порта
- Page 23 – Первоначальное подключение к коммутатору; Первый пользователь автоматически получает права доступа; Подключение к порту MGMT
- Page 24 – Login; Рисунок 14 — Окно аутентификации пользователя
- Page 25 – Технические характеристики; Аппаратное обеспечение
- Page 27 – Техническая поддержка через Интернет:; לארשי
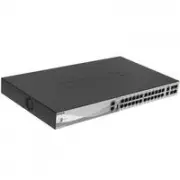
D-Link
DGS-3130-30S
24 1000Base-X SFP ports + 2 10GBase-T ports + 4 10 GbE SFP+ ports L3 Stackable
Managed Switch
Управляемый L3 стекируемый коммутатор с 24 портами 1000Base-X SFP,
2 портами 10GBase-T и 4 портами 10GBase-X SFP+
Quick Installation Guide
Краткое руководство по установке
"Loading the manual" means you need to wait until the file loads and becomes available for online reading. Some manuals are very large, and the time they take to appear depends on your internet speed.
Summary
Information in this document is subject to change without notice.© 2021 D-Link Corporation. All rights reserved. Package Contents Open the shipping carton of the Switch and carefully unpack its contents. The cartonshould contain the following items: One DGS-3130-30S switch One AC power cord On...
Solid amber When there is a secure 100/1000 Mbps connection at theport. Blinking amber When there is reception or transmission occuring at the port. Light off No link. Link/Activity/Speed (per 10GBase-X SFP+port) Solid green When there is a secure 10 Gbps connection at the port. Blinking green When ...
Switch can be mounted in a standard 19"(1U) rack using the provided mounting brackets.Fasten the mounting brackets to the sides of the Switch using the screws provided. Figure 2 — Attaching rack-mount brackets to the Switch Fasten the mounting brackets in any available open space in the rack usi...