Champion 4000 RLD4 - User Manual
Champion 4000 RLD4 Evaporative Cooler – User Manual, read for free online in PDF format. We hope this helps you resolve any issues you may have. If you have further questions, please contact us through the contact form.


Table of Contents:
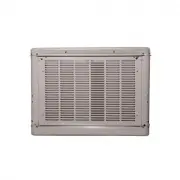
- Page 2 – LOUVERED SIDE PANELS.; and secure panel in place.; ELECTRICAL CONNECTION; wiring conforms to local standards.; connection diagrams for 120V or 240V installations.; INSTALLATION; PARTS AND TOOLS NEEDED:; /16 Wrench or Crescent Wrench; Before installing the cooler, note the following items:; Installation inside attic areas is NOT recommended.; and DO NOT reconnect until installation is complete.
- Page 3 – thermostat electrical box. This cable is not supplied.; ELECTRICAL WIRING DIAGRAMS - STANDARD MODEL 4000RLD4
- Page 4 – WATER CONNECTION; Do not connect the water supply to any soft water applications.; OVERFLOW INSTALLATION; pan and the head of the drain nipple.; WATER SUPPLY INSTALLATION; and tightening the nut until water tight.; FLOAT VALVE INSTALLATION (Refer to illustration below); tighten until water tight.; ELECTRICAL WIRING DIAGRAM - CONTRACTOR 4000CRLD4 COOLER
- Page 5 – AMPERAGE DRAW AND BELT TENSION; listed on the specification label on motor.; DO NOT operate cooler with larger amperage draw than; SCALE BUILDUP PREVENTION; end out of the cooler through the overflow pipe.
- Page 6 – OPERATION; THERMOSTAT OPERATION (CONTRACTOR MODEL 4000CRLD4); from Off to Auto to Manual and back to Off.; Manual Operation; The fan speed and pump are set by the user.
- Page 7 – Delayed start or finish in ‘Auto’ or ‘Manual’ mode.; In The Event Of A Power Outage; AIR EXHAUST; WINDOW AREA/CFM METHOD; For; TISSUE SUCTION METHOD; Turn your cooler on high cool.
- Page 8 – MAINTENANCE
- Page 9 – GENERAL SPECIFICATIONS; MODELS; MOTOR SPECIFICATIONS
- Page 10 – REPLACEMENT PARTS LIST; Cooler model number
- Page 11 – PARTS DRAWING
- Page 12 – LIMITED WARRANTY POLICY; This; Exclusions from this warranty; exclusions may not apply to you.; How to obtain service under this warranty; Withi; Champion Cooler / Essick Air Products
CHAMPION ELITE LOW PROFILE COOLER
INSTALLATION & OPERATION MANUAL
4000 RLD4
4000 CRLD4
Circle the model of your cooler and record the serial number.
Encierrre con un circulo el modelo de su enfriador y escribe el
número de série.
Serial Number:
Número de série:
TABLE OF CONTENTS
Safety Instructions .........................................................1
How Evaporative Coolers Work .....................................1
Installation .....................................................................2
Operation .......................................................................6
Air Balancing Methods ...........................................7
Maintenance ..................................................................8
Specification Tables
.......................................................9
Troubleshooting
.............................................................9
Illustrated Parts List .....................................................10
Limited Warranty .........................................................12
Date of Purchase:
Fecha de compra:
READ AND SAVE THESE INSTRUCTIONS
SAFETY RULES
1. Read all instructions carefully.
2. El
ectrical connections should be done by a qualified electrician,
so that all electrical wiring will conform to your local codes.
3. Always turn OFF POWER and UNPLUG motor and pump inside
the cooler before installing or performing any maintenance.
4. Your cooler will run on either 120V or 240V A.C., single phase,
60 Hz (cycle) current.
5. Motor and pump h
ave a grounded, molded plug and an automatic
thermal overload switch which will shut motor off when it
overheats. The motor will restart automatically when it coo
ls
down.
WARNING:
To reduce the risk of fire or electric shock, do not use
this fan with any “solid-state fan speed control device.”
PN 110524-1
REV. 11-17
READ CAREFULLY ALL OF THIS MANUAL BEFORE INSTALLING THE UNIT
Evaporative cooling is nature’s way of cooling. When air is
moved over a wet surface, water is evaporated and heat is
absorbed. When stepping out of swimming pool with the
wind blowing, evaporative cooling makes you feel cool, even
though the air may be warm.
This unit
works on the same principle. Air is drawn across
wet filter pads where the air is cooled by evaporation and then
circulated throughout the building. It is this combination of
cooled air and the movement of air over the skin which makes
it feel cool.
Unl
ike refrigeration systems which recirculate the air, an
evaporative cooler continually brings in fresh air while
exhausting old air. You are completely replacing the air every
2 to 4 minutes by opening windows or doors, by using Up-
Dux
®
ceiling vents, or a combination of both. The air is always
fresh, not stale, laden with smoke and odors as happens with
refrigerated air conditioning.
HOW EVAPORATIVE COOLERS WORK
"Loading the manual" means you need to wait until the file loads and becomes available for online reading. Some manuals are very large, and the time they take to appear depends on your internet speed.
Summary
110524-1 2 LOUVERED SIDE PANELS. The louver panels have a locking latch on each top corner to secure it in place. To remove the louvered panel you will need to loosen the latch screws on either side of the panel. Loosen the screws enough to rotate the latch handle, but do not remove completely. Rota...
110524-1 3 Contractor Model 4000CRLD4 Note: This unit comes with the motor, pulley, and thermostat control box installed. The unit is factory wired and for 120V power. The supply power should be adequately protected against overloads and short circuits. Supply Power to Unit 1. A disconnect switch (n...
110524-1 4 WATER CONNECTION Note: Do not connect the water supply to any soft water applications. OVERFLOW INSTALLATION 1. Remove nut and place nipple through the hole in the pan with the rubber washer between the pan and the head of the drain nipple. 2. Screw nut onto nipple and draw up tight again...