Page 2 - Instructions; IMPORTANT SAFETY INSTRUCTIONS; General safety instructions
Instructions 4 1 Instructions IMPORTANT SAFETY INSTRUCTIONS PLEASE READ CAREFULLY AND RETAIN FOR FUTURE USE. 1.1 General safety instructions Risk of personal injury • WARNING: If the door or the door seal is damaged, the oven must not be used until it has been repaired by authorised persons. • WARNI...
Page 3 - Risk of damaging the appliance; Improper use
Instructions 5 EN • Do not try to repair the appliance yourself or without the intervention of authorised persons. • If the power supply cable is damaged, contact technical support immediately and they will replace it. Risk of damaging the appliance • Do not use abrasive or corrosive detergents on g...
Page 5 - Manufacturer liability; Power voltage
Instructions 7 EN 1.3 Manufacturer liability The manufacturer declines all liability for damage to persons or property caused by:• Use of the appliance other than the one envisaged; • Non-observance of the user manual provisions; • Tampering with any part of the appliance; • Use of non-original spar...
Page 6 - How to read the user manual
Instructions 8 1.7 This user manual This user manual is an integral part of the appliance and must therefore be kept in its entirety and within the user’s reach for the whole working life of the appliance.• Read this user manual carefully before using the appliance. 1.8 How to read the user manual T...
Page 7 - Description; General Description; Control panel
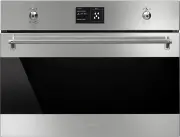
Description 9 EN 2 Description 2.1 General Description 1 Control panel 2 LH light 3 Seal 4 Door 5 Oven fan 6 Rack/tray support frames Frame shelf
Page 8 - Return knob
Description 10 2.2 Control panel 1 Return knob Using this knob you can return to the appliance's previous menu item. It also lets you manually turn the oven light on and off. 2 Display Displays the current time, the cooking parameters, and all the appliance’s functions. 3 Control knob This knob allo...
Page 9 - Shelves
Description 11 EN 2.3 Other parts Shelves The appliance features shelves to position trays and racks at different heights. The insertion heights are indicated from the bottom upwards (see 2.1 General Description). Cooling fan The fan cools the oven and comes into operation during cooking.The fan cau...
Page 10 - Available accessories; Rack
Description 12 2.5 Available accessories Rack Useful for supporting containers with food during cooking. Glass dish Useful for any type of cooking and collecting fat from foods resting on the rack above. Tray rack To be placed over the top of the oven tray; for cooking foods which may drip. Boiling ...
Page 11 - Use; Danger of burns
Use 13 EN 3 Use 3.1 Instructions High temperature inside the oven during use Danger of burns • Keep the oven door closed during cooking. • Protect your hands wearing heat resistant gloves when moving food inside the oven. • Do not touch the heating elements inside the oven. • Do not pour water direc...
Page 12 - Place the cookware to be tested into the; Glass jars; Unsuitable cookware
Use 14 Materials suitable for microwaves In general, in order for all of the food to be reached, the materials used for microwave cooking must be transparent to microwave energy.Below is a table of materials to use and those not to use: Testing dishes To check whether or not cookware is suitable for...
Page 13 - Remove any protective film from the; Using the accessories; Racks and trays
Use 15 EN 3.2 First use 1. Remove any protective film from the outside or inside of the appliance, including accessories. 2. Remove any labels (apart from the technical data plate) from the accessories and from the oven cavity. 3. Remove and wash all the appliance accessories (see 4 Cleaning and mai...
Page 14 - Boiling rod
Use 16 Boiling rod When using the microwave to heat or reheat liquids, the boiling process may be delayed while the liquids nevertheless exceed 100 degrees. To avoid this dangerous phenomenon, it is necessary to insert the supplied boiling rod (or a heat-resistant plastic spoon) in the container whi...
Page 15 - Microwave functions
Use 17 EN Microwave functions 1. Press the control knob to activate the appliance. 2. From the main menu, turn the control knob to select “cooking functions”. 3. Select “cooking functions” from the menu by pressing the control knob. 4. Turn the control knob to select the required function. For micro...
Page 17 - Microwave power levels
Use 19 EN Microwave power levels Below is a list of the power levels that can be selected: QUICK START microwave function 1. Press the return knob with the appliance in stand-by. 2. Press the control knob to confirm the QUICK START function. The appliance will start the microwave oven with the defau...
Page 20 - Traditional cooking functions
Use 22 Traditional cooking functions 1. Press the control knob to activate the appliance. 2. From the main menu, turn the control knob to select “cooking functions”. 3. Press the control knob to confirm the selection. 4. Turn the control knob to select a “traditional” function. 5. Press the control ...
Page 21 - Traditional functions list
Use 23 EN Traditional functions list To extend the cooking time manually, press the control knob again. The appliance will resume its normal operation with the previously selected cooking settings. Cooking can be interrupted at any time by pressing and holding the control knob for a few seconds. For...
Page 22 - Fan grill
Use 24 Fan grill The air produced by the fan softens the strong heatwave generated by the grill, perfectly grilling even very thick cuts of meat such as steaks, pork chops etc. Baker's function The combination of the fan with just the lower heating element allows cooking to be completed more rapidly...
Page 23 - Timer during function
Use 25 EN Timer during function 1. Press the control knob during a cooking function. 2. Turn the control knob right or left to set the duration (from 1 minute to 4 hours). After a few seconds, the symbol stops flashing and the countdown starts. 3. Wait for the buzzer to indicate that the time has fi...
Page 24 - Delayed cooking
Use 26 4. At the end of the cooking cycle, “function ended” appears on the display and a buzzer will sound that can be deactivated by pressing the control knob. Modifying the data set during timed cooking During operation, it is possible to modify timed cooking duration: 1. When the symbol is steady...
Page 26 - Traditional cooking tips
Use 28 Modifying the data set during programmed cooking During operation, it is possible to modify programmed cooking duration: 1. When the symbols and are lit steadily and the appliance is waiting for cooking to start, press the control knob. The symbol will start flashing. 2. Turn the control knob...
Page 27 - To save energy; Special functions; List of special functions
Use 29 EN Advice for cooking desserts/pastries and biscuits • Use dark metal moulds: They help to absorb the heat better. • The temperature and the cooking time depend on the quality and consistency of the dough. • To check whether the dessert is cooked right through: At the end of the cooking time,...
Page 28 - Timer
Use 30 Timer 1. Turn the control knob to the right or left to select timer from the “special functions” menu. Then press it to confirm. 2. Turn the control knob right or left to set the duration (from 1 minute to 4 hours). After a few seconds, the symbol stops flashing and the countdown starts. Rehe...
Page 29 - Defrost by weight
Use 31 EN 3. If you leave the timer setting screen, the symbol will be displayed at the top left, indicating that a timer is active. Defrost by weight 1. Place the food inside the appliance.2. Turn the control knob to the right or left to select defrost by weight from the “special functions” menu. T...
Page 30 - Defrost by time
Use 32 5. Press the control knob to confirm the set parameters. 6. Press the control knob to start defrosting, or select change to further modify the set parameters. 7. At the end of the function, “function ended” appears on the display and a buzzer will sound that can be deactivated by pressing the...
Page 31 - “Turn” procedure
Use 33 EN 4. Press the control knob to confirm the parameters then press it again to start defrosting. 5. While the function is in progress, it is possible to further modify the defrosting duration. Turn the control knob to the right or left to make the required changes. 6. Press the control knob to...
Page 32 - open door and
Use 34 4. Close the door and press the control knob to resume operation. 5. If necessary the appliance will again ask for rotation of the dish. The display will show the instruction “ open door and rotate dish ”. 6. For the second rotation the door will need to be opened and the dish turned by 180°....
Page 33 - It will then proceed with the selected
Use 35 EN 4. The appliance will begin preheating. 5. It will then proceed with the selected function. While the function is in progress, it is possible to set a timer for a maximum of 4 hours (see “Microwave functions”), a proving duration (see “Timed cooking”) or delayed proving (see “Delayed cooki...
Page 34 - Reheat
Use 36 Reheat 1. Place the food to be heated inside the oven. 2. Turn the control knob to the right or left to select reheat from the “special functions” menu. 3. Press the control knob to confirm. 4. Turn the control knob to modify the reheating duration. 5. Press the control knob to confirm the pa...
Page 35 - sabbath mode
Use 37 EN 1. Turn the control knob to the right or left to select sabbath mode from the “special functions” menu. Then press it to confirm. 2. Turn the control knob to the right or left to change the heating temperature. 3. Press the control knob to confirm the parameters and start Sabbath mode. 4. ...
Page 36 - Predefined programs table
Use 38 Predefined programs table MEAT Subcategory Cooking Weight (Kg) Function MW (W) Shelf Temp. (°C) Time (minutes) Roast beef Rare 1 - 1 200 50 Medium 1 - 1 200 60 Well done 1 - 1 200 90 Pork loin fresh 1 300 1 190 60 Lamb Medium 1.2 300 1 190 55 Well done 1.2 300 1 190 60 Veal fresh 1 300 1 190 ...
Page 37 - FISH
Use 39 EN FISH VEGETABLES Subcategory Cooking Weight (Kg) Function MW (W) Shelf Temp. (°C) Time (minutes) Fish fresh 0.5 300 1 160 30 Fish frozen 0.5 300 1 160 40 Firm fish fresh 0.5 300 1 160 20 Delicate fish fresh 0.5 300 1 160 35 Snapper fresh 1 300 1 160 40 Flounder fresh 0.5 300 1 160 30 Subcat...
Page 38 - BREAD
Use 40 DESSERTS/PASTRIES BREAD Subcategory Cooking Weight (Kg) Function MW (W) Shelf Temp. (°C) Time (minutes) Ring cake fresh 1 - 1 160 60 Biscuits fresh 0.6 - 1 160 18 Muffins fresh 0.5 - 1 160 18 Profiteroles fresh 0.5 - 1 180 70 Meringues fresh 0.3 - 1 120 90 Sponge cake fresh 1 - 1 160 60 Strud...
Page 39 - PIZZA
Use 41 EN PIZZA PASTA SLOW COOKING Subcategory Cooking Weight (Kg) Function MW (W) Shelf Temp. (°C) Time (minutes) Pan baked pizza fresh 1 - 1 250 9 Pizza frozen 0.3 - 1 250 8 Stone baked pizza fresh 0.5 - 1 250 6 Subcategory Cooking Weight (Kg) Function MW (W) Shelf Temp. (°C) Time (minutes) Pasta ...
Page 40 - Adding a recipe
Use 42 3.6 Personal recipes This menu allows you to enter a personal recipe with the parameters you wish to use. On first use, the appliance will only offer to let you add a new recipe. After storing your personal recipes, these will then be available in the relative menu. Adding a recipe 1. Select ...
Page 41 - weight
Use 43 EN 3. Turn the control knob to the right or left to select the weight of the dish to associate with the recipe. Press the control knob to confirm. 4. Turn the control knob to the right or left to select the cooking duration to associate with the recipe. Press the control knob to confirm. 5. T...
Page 42 - YES
Use 44 7. Pressing the control knob again will return to point 2 of the change sequence. You must press the return knob to save the recipe. The appliance will ask you to enter a name for the recipe you have just created. 8. Enter the name of the recipe. Turn the control knob to select the characters...
Page 45 - Language
Use 47 EN 3. Turn the control knob to the right or left to select the cooking end time with the control knob. The symbol flashes. 4. Press the control knob to confirm. 5. After a few seconds the symbol will stop flashing. The appliance waits for the delay start time. 3.7 Settings The product is conf...
Page 46 - Clock
Use 48 Clock Sets the time displayed. 1. Turn the control knob right or left to set the hours. 2. Press the control knob to change to setting the minutes. 3. Turn the control knob right or left to set the minutes. 4. Press the return knob to confirm. Control lock Allows the appliance to automaticall...
Page 48 - Sound
Use 50 Sound Whenever one of the knobs is pressed, the appliance beeps. This setting disables these sounds. To disable sounds when the knobs are pressed, select NO . Keep warm This mode allows the appliance to keep cooked food warm (at low temperatures) after cooking finishes with a cooking cycle fo...
Page 50 - Cleaning and maintenance; Cleaning the surfaces
Cleaning and maintenance 52 4 Cleaning and maintenance 4.1 Instructions 4.2 Cleaning the surfaces To keep the surfaces in good condition, they should be cleaned regularly after use. Let them cool first. 4.3 Ordinary daily cleaning Always use only specific products that do not contain abrasives or ch...
Page 51 - Food stains or residues; Dry the interior of the appliance with a; Cleaning the door glazing
Cleaning and maintenance 53 EN 4.4 Food stains or residues Do not use metallic sponges or sharp scrapers as they will damage the surfaces.Use ordinary non-abrasive products with the aid of wooden or plastic utensils if necessary. Rinse thoroughly and dry with a soft cloth or a microfibre cloth.Do no...
Page 52 - Removing racks/trays support frames
Cleaning and maintenance 54 Removing racks/trays support frames Removing the guide frames enables the sides to be cleaned more easily. This operation should be performed each time the automatic cleaning cycle is used (on some models only).To remove the guide frames: 1. Unscrew the two fastening pins...
Page 53 - Preliminary operations
Cleaning and maintenance 55 EN 4.8 Vapour Clean Preliminary operations Before starting the Vapour Clean function:• Completely remove all accessories from inside the oven. • Pour approx. 40 cc of water onto the floor of the oven. Make sure it does not overflow out of the cavity. • Spray a water and w...
Page 54 - Vapour Clean setting
Cleaning and maintenance 56 Vapour Clean setting 1. Turn the control knob to the right or left to select the vapour clean function from the “special functions” menu. 2. Press the control knob to confirm. The duration and temperature of the cleaning cycle will appear on the display. 3. Press the cont...
Page 55 - End of the Vapour Clean cycle
Cleaning and maintenance 57 EN End of the Vapour Clean cycle 1. Open the door and wipe away the less stubborn dirt with a microfibre cloth. 2. Use an anti-scratch sponge with brass filaments on tougher encrustations. 3. In case of grease residues use specific oven cleaning products. 4. Remove the wa...
Page 56 - Installation; Electrical connection; General information; Cable replacement
Installation 58 5 Installation 5.1 Electrical connection General information Check the grid characteristics against the data indicated on the plate.The identification plate bearing the technical data, serial number and brand name is visibly positioned on the appliance.Do not remove this plate for an...
Page 57 - Position of the power cable
Installation 59 EN 5.3 Positioning Position of the power cable (rear view) Front panel seal Glue the supplied front panel seal to the lower part of the front panel to avoid water or other liquids from leaking in. Heavy appliance Crushing hazard • Position the appliance into the cabinet cutout with t...
Page 58 - Fastening bushings
Installation 60 Fastening bushings Remove the bushing covers inserted on the oven front. Mount the appliance into the recess.Secure the appliance to the piece of furniture using screws. Cover the bushings with the covers removed previously. Appliance overall dimensions (mm) (front view) (top view)


 Smeg A11X-7
User Manual
Smeg A11X-7
User Manual
 Smeg A11XPY-9
User Manual
Smeg A11XPY-9
User Manual
 Smeg A1PYID-7
User Manual
Smeg A1PYID-7
User Manual
 Smeg A1PYID-9
User Manual
Smeg A1PYID-9
User Manual
 Smeg A3AU-81
User Manual
Smeg A3AU-81
User Manual
 Smeg A5AU-81
User Manual
Smeg A5AU-81
User Manual
 Smeg ALFA1035EH
User Manual
Smeg ALFA1035EH
User Manual
 Smeg ALFA1035EHDS
User Manual
Smeg ALFA1035EHDS
User Manual
 Smeg ALFA1035EHT
User Manual
Smeg ALFA1035EHT
User Manual
 Smeg ALFA1035H
User Manual
Smeg ALFA1035H
User Manual
 Smeg ALFA1035H-2
User Manual
Smeg ALFA1035H-2
User Manual
 Smeg ALFA420EH
User Manual
Smeg ALFA420EH
User Manual
 Smeg ALFA420EHDS
User Manual
Smeg ALFA420EHDS
User Manual
 Smeg ALFA420EHT
User Manual
Smeg ALFA420EHT
User Manual
 Smeg ALFA625EH
User Manual
Smeg ALFA625EH
User Manual
 Smeg ALFA625EHDS
User Manual
Smeg ALFA625EHDS
User Manual
 Smeg ALFA625EHT
User Manual
Smeg ALFA625EHT
User Manual
 Smeg ALFA625H
User Manual
Smeg ALFA625H
User Manual
 Smeg ALFA625H-2
User Manual
Smeg ALFA625H-2
User Manual
 Smeg ALFA625HR-2
User Manual
Smeg ALFA625HR-2
User Manual