Smeg FS9010CER - Manuals
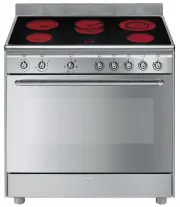
User Manual Smeg FS9010CER


Summary
Instructions 4 1 Instructions 1.1 General safety instructions Risk of personal injury • During use the appliance becomes hot. Care should be taken to avoid touching heating elements inside the oven. • Protect your hands by wearing oven gloves when handling food inside the oven cavity. • Never try to...
Instructions 6 yourself or without the intervention of authorised persons. • Do not pull the cable to remove the plug. • If the power supply cable is damaged, contact technical support immediately and they will replace it. Risk of damaging the appliance • Do not use abrasive or corrosive detergents ...
Instructions 7 EN cooktop. • Take care not to spill acidic substances such as lemon juice or vinegar onto the cooktop. • Do not put empty pans or frying pans on switched on cooking zones. • Do not use rough or abrasive materials or sharp metal scrapers. • Do not use cleaning products containing chlo...
Smeg Ovens Manuals
-
 Smeg A11X-7
User Manual
Smeg A11X-7
User Manual
-
 Smeg A11XPY-9
User Manual
Smeg A11XPY-9
User Manual
-
 Smeg A1PYID-7
User Manual
Smeg A1PYID-7
User Manual
-
 Smeg A1PYID-9
User Manual
Smeg A1PYID-9
User Manual
-
 Smeg A3AU-81
User Manual
Smeg A3AU-81
User Manual
-
 Smeg A5AU-81
User Manual
Smeg A5AU-81
User Manual
-
 Smeg ALFA1035EH
User Manual
Smeg ALFA1035EH
User Manual
-
 Smeg ALFA1035EHDS
User Manual
Smeg ALFA1035EHDS
User Manual
-
 Smeg ALFA1035EHT
User Manual
Smeg ALFA1035EHT
User Manual
-
 Smeg ALFA1035H
User Manual
Smeg ALFA1035H
User Manual
-
 Smeg ALFA1035H-2
User Manual
Smeg ALFA1035H-2
User Manual
-
 Smeg ALFA420EH
User Manual
Smeg ALFA420EH
User Manual
-
 Smeg ALFA420EHDS
User Manual
Smeg ALFA420EHDS
User Manual
-
 Smeg ALFA420EHT
User Manual
Smeg ALFA420EHT
User Manual
-
 Smeg ALFA625EH
User Manual
Smeg ALFA625EH
User Manual
-
 Smeg ALFA625EHDS
User Manual
Smeg ALFA625EHDS
User Manual
-
 Smeg ALFA625EHT
User Manual
Smeg ALFA625EHT
User Manual
-
 Smeg ALFA625H
User Manual
Smeg ALFA625H
User Manual
-
 Smeg ALFA625H-2
User Manual
Smeg ALFA625H-2
User Manual
-
 Smeg ALFA625HR-2
User Manual
Smeg ALFA625HR-2
User Manual