Smeg FA608SB - Manuals
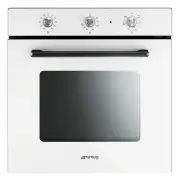
User Manual Smeg FA608SB


Summary
Instructions 4 1 Instructions 1.1 How to read the user manual This user manual uses the following reading conventions: 1. Use instruction sequence.• Single use instruction. 1.2 This user manual This user manual is an integral part of the appliance and must therefore be kept in its entirety and in an...
Instructions 5 EN For this appliance • Do not obstruct ventilation openings and heat dispersal slots. • Do not insert pointed metal objects (cutlery or utensils) into the slots in the appliance. • Do not rest any weight or sit on the open door of the appliance. • Take care that no objects are stuck ...
Description 6 2 Description 2.1 General Description 1 Control panel 2 Oven light 3 Seal 4 Door 5 Fan 6 Rack/tray support frames 7 Pizza plate Frame shelf 2.2 Control panel Timer knob (1) It allows you to use the timer or to perform manual cooking. For timed cooking, turn the knob clockwise to the re...
Smeg Ovens Manuals
-
 Smeg A11X-7
User Manual
Smeg A11X-7
User Manual
-
 Smeg A11XPY-9
User Manual
Smeg A11XPY-9
User Manual
-
 Smeg A1PYID-7
User Manual
Smeg A1PYID-7
User Manual
-
 Smeg A1PYID-9
User Manual
Smeg A1PYID-9
User Manual
-
 Smeg A3AU-81
User Manual
Smeg A3AU-81
User Manual
-
 Smeg A5AU-81
User Manual
Smeg A5AU-81
User Manual
-
 Smeg ALFA1035EH
User Manual
Smeg ALFA1035EH
User Manual
-
 Smeg ALFA1035EHDS
User Manual
Smeg ALFA1035EHDS
User Manual
-
 Smeg ALFA1035EHT
User Manual
Smeg ALFA1035EHT
User Manual
-
 Smeg ALFA1035H
User Manual
Smeg ALFA1035H
User Manual
-
 Smeg ALFA1035H-2
User Manual
Smeg ALFA1035H-2
User Manual
-
 Smeg ALFA420EH
User Manual
Smeg ALFA420EH
User Manual
-
 Smeg ALFA420EHDS
User Manual
Smeg ALFA420EHDS
User Manual
-
 Smeg ALFA420EHT
User Manual
Smeg ALFA420EHT
User Manual
-
 Smeg ALFA625EH
User Manual
Smeg ALFA625EH
User Manual
-
 Smeg ALFA625EHDS
User Manual
Smeg ALFA625EHDS
User Manual
-
 Smeg ALFA625EHT
User Manual
Smeg ALFA625EHT
User Manual
-
 Smeg ALFA625H
User Manual
Smeg ALFA625H
User Manual
-
 Smeg ALFA625H-2
User Manual
Smeg ALFA625H-2
User Manual
-
 Smeg ALFA625HR-2
User Manual
Smeg ALFA625HR-2
User Manual