Smeg F67-7 - Manuals
User Manual Smeg F67-7


Summary
Instructions for safe and proper use 1. Instructions for safe and proper use 18 THIS MANUAL IS AN INTEGRAL PART OF THE APPLIANCE AND THEREFORE MUST BE KEPT IN ITS ENTIRETY AND IN AN ACCESSIBLE PLACE FOR THE WHOLE WORKING LIFE OF THE OVEN. WE ADVISE CAREFUL READING OF THIS MANUAL AND ALL THE INSTRUCT...
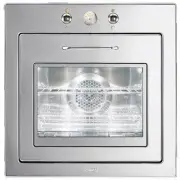
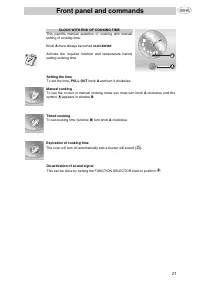
Front panel and commands 19 2. Front panel and commands 2.1 Front panel All of the commands and controls for the oven are found on the front panel. 8-FUNCTIONS MODEL 10-FUNCTIONS MODEL
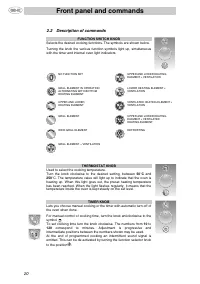
Front panel and commands 20 2.2 Description of commands FUNCTION SWITCH KNOB Selects the desired cooking functions. The symbols are shown below. Turning the knob the various function symbols light up, simultaneous with the timer and internal oven light indicators. NO FUNCTION SET UPPER AND LOWER HEA...
Manual Smeg F67-7


Summary
Instructions for safe and proper use 1. Instructions for safe and proper use 18 THIS MANUAL IS AN INTEGRAL PART OF THE APPLIANCE AND THEREFORE MUST BE KEPT IN ITS ENTIRETY AND IN AN ACCESSIBLE PLACE FOR THE WHOLE WORKING LIFE OF THE OVEN. WE ADVISE CAREFUL READING OF THIS MANUAL AND ALL THE INSTRUCT...
Front panel and commands 19 2. Front panel and commands 2.1 Front panel All of the commands and controls for the oven are found on the front panel. 8-FUNCTIONS MODEL 10-FUNCTIONS MODEL
Front panel and commands 20 2.2 Description of commands FUNCTION SWITCH KNOB Selects the desired cooking functions. The symbols are shown below. Turning the knob the various function symbols light up, simultaneous with the timer and internal oven light indicators. NO FUNCTION SET UPPER AND LOWER HEA...
Smeg Ovens Manuals
-
 Smeg A11X-7
User Manual
Smeg A11X-7
User Manual
-
 Smeg A11XPY-9
User Manual
Smeg A11XPY-9
User Manual
-
 Smeg A1PYID-7
User Manual
Smeg A1PYID-7
User Manual
-
 Smeg A1PYID-9
User Manual
Smeg A1PYID-9
User Manual
-
 Smeg A3AU-81
User Manual
Smeg A3AU-81
User Manual
-
 Smeg A5AU-81
User Manual
Smeg A5AU-81
User Manual
-
 Smeg ALFA1035EH
User Manual
Smeg ALFA1035EH
User Manual
-
 Smeg ALFA1035EHDS
User Manual
Smeg ALFA1035EHDS
User Manual
-
 Smeg ALFA1035EHT
User Manual
Smeg ALFA1035EHT
User Manual
-
 Smeg ALFA1035H
User Manual
Smeg ALFA1035H
User Manual
-
 Smeg ALFA1035H-2
User Manual
Smeg ALFA1035H-2
User Manual
-
 Smeg ALFA420EH
User Manual
Smeg ALFA420EH
User Manual
-
 Smeg ALFA420EHDS
User Manual
Smeg ALFA420EHDS
User Manual
-
 Smeg ALFA420EHT
User Manual
Smeg ALFA420EHT
User Manual
-
 Smeg ALFA625EH
User Manual
Smeg ALFA625EH
User Manual
-
 Smeg ALFA625EHDS
User Manual
Smeg ALFA625EHDS
User Manual
-
 Smeg ALFA625EHT
User Manual
Smeg ALFA625EHT
User Manual
-
 Smeg ALFA625H
User Manual
Smeg ALFA625H
User Manual
-
 Smeg ALFA625H-2
User Manual
Smeg ALFA625H-2
User Manual
-
 Smeg ALFA625HR-2
User Manual
Smeg ALFA625HR-2
User Manual