Page 3 - used by or near children.
This household sewing machine is designed to comply with IEC/EN 60335-2-28 and UL1594. IMPORTANT SAFETY INSTRUCTIONS When using an electrical appliance, basic safety precautions should always be followed, including the following:Read all instructions before using this household sewing machine. Keep ...
Page 5 - SAVE THESE INSTRUCTIONS; FOR CENELEC COUNTRIES ONLY:; shall not be made by children without supervision.
- Do not use the machine if it is wet. - If the LED lamp is damaged or broken, it must be replaced by the manufacturer or its service agent or a similarly qualified person, in order to avoid a hazard. - If the cord connected with the foot control is damaged, it must be replaced by the manufacturer o...
Page 6 - FOR NON CENELEC COUNTRIES:; SERVICING OF DOUBLE INSULATED PRODUCTS
FOR NON CENELEC COUNTRIES: This sewing machine is not intended for use by persons (including children) with reduced physical, sensory or mental capabilities, or lack of experience and knowledge, unless they have been given supervision or instruction concerning use of the sewing machine by a person r...
Page 8 - List of contents
VI List of contents Machine Basics Principal Parts of the Machine ..................................................................................................................................................1 Connecting Machine to Power Source ......................................................
Page 9 - Unpacking; Principal Parts of the Machine
11 1. Thread tension dial 2. Thread take-up lever 3. Thread cutter 4. Presser foot 5. Needle plate 6. Removable extension table/ accessory storage 7. Pattern selector dial 8. Bobbin winding stopper 9. Reverse sewing lever Unpacking - Place the box on a steady, flat surface. Lift your machine out of ...
Page 11 - Foot control; Sewing light; Connecting Machine to Power Source
3 Connect the machine to a power source as illustrated. (1) This appliance is equipped with a polarized plug which must be used with the appropriate polarized outlet. (2) Attention: Unplug power cord when machine is not in use. Foot control The foot control pedal regulates the sewing speed. (3) Atte...
Page 12 - Two Step Presser Foot Lifter
4 When sewing several layers or thick fabrics, the presser foot can be raised to a higher position for easy positioning of the work. (A) Attention: Your SINGER ® machine is adjusted to provide the best stitch result at normal room temperature. Extreme hot and cold temperatures can affect the sewn re...
Page 13 - Standard accessories; Optional Accessories:; Accessories
5 Standard accessories a. All purpose foot b. Zipper foot c. Buttonhole foot d. Button sewing foot e. L-screwdriver f. Seam ripper/ brush g. Spool pin felt (2x) h. Pack of needles (3x) i. Edge/ quilting guide j. SINGER ® Class 15 bobbins (4x) k. Darning plate l. Soft cover Optional Accessories: For ...
Page 14 - Winding the Bobbin; Threading the Machine
6 Winding the Bobbin - Place the thread and spool pin felt (a) onto the spool pin. (1) - Draw the thread from the spool through the upper thread guide. (2) - Wind the thread clockwise around bobbin winder tension discs. (3) - Thread bobbin as illustrated and place on spindle. (4) - Push bobbin spind...
Page 15 - When inserting or removing the bobbin, the needle must; Inserting the Bobbin
7 When inserting or removing the bobbin, the needle must be fully raised. - Open the hinged cover. (1) - Pull the bobbin case tab (a) and remove the bobbin case. (2) - Hold the bobbin case with one hand. Insert the bobbin so that the thread runs in a clockwise direction (arrow). (3) - Pull the threa...
Page 16 - Threading the Upper Thread
8 This is a simple operation but it is important to carry out correctly as by not doing so several sewing problems could result. - Raise the needle to its highest position by turning the handwheel towards you (counterclockwise) so that the mark on the handwheel points directly up. Raise the presser ...
Page 17 - Raising the Bobbin Thread
9 Hold the upper thread with the left hand. (1) Turn the handwheel towards you (counterclockwise) lowering, then raising needle. Note: If it is difficult to raise the bobbin thread, check to make sure the thread is not trapped by the hinged cover or the Removable Extension Table. Raising the Bobbin ...
Page 18 - Thread Tension
10 Upper thread tension Basic thread tension setting: “4”. To increase the tension, turn the dial to the next number up. To reduce the tension, turn the dial to the next number down. 1. Normal thread tension for straight stitch sewing. 2. Thread tension too loose for straight stitch sewing. Turn dia...
Page 19 - How to Choose Your Pattern; Sewing
11 To select a stitch, simply turn the pattern selector dial. The pattern selector dial may be turned in either direction. For straight stitch, select pattern " " with the pattern selector dial. For zigzag stitch, select pattern " " with the pattern selector dial. a. Pattern Selector...
Page 20 - Sewing Straight Stitch
12 Sewing Straight Stitch To begin sewing, set the machine for straight stitch. (1) Place the fabric under the presser foot with the fabric edge lined up with the desired seam guide line on the needle plate. (2) Lower the presser foot lifter, and then step on the foot control to start sewing. (3)
Page 21 - Reverse Sewing; Removing the Work; Cutting the Thread
13 To secure the beginning and the end of a seam, press down the reverse sewing lever (A). Sew a few reverse stitches. Release the lever and the machine will sew forward again. (1) Reverse Sewing Turn the handwheel toward you (counterclockwise) to bring the thread take up lever to its highest positi...
Page 22 - Blind Hem
14 For hems on curtains, trousers, skirts, etc. Blind hem for stretch fabrics. Blind hem for firm fabrics. Note: It takes practice to sew blind hems. Always make a sewing test first. Blind Hem: Turn up the hem to the desired width and press. Fold back (as shown in Fig. 1) against the right side of t...
Page 23 - Prepare; Buttonholes
15 Prepare 1. Take off the all purpose foot and attach the buttonhole foot. 2. Measure diameter and thickness of button and add 0.3 cm (1/8”) for bar tacks to obtain correct buttonhole length; mark buttonhole length on fabric (a). 3. Place fabric under the foot, so that marking on the buttonhole foo...
Page 24 - Sewing on Buttons
16 Install the darning plate. (1) Change the all purpose foot to the button sewing foot. (2) Position the work under the foot. Place the button in the desired position and lower the foot. Set the Pattern Selector Dial for the second zig-zag pattern (as shown), which should correspond to the distance...
Page 25 - Zippers and Piping
17 Set the machine as illustrated. Change to zipper foot. The zipper foot can be attached right or left, depending on which side of the foot you are going to sew. (1) To sew past the zipper tab, lower the needle into the fabric, raise the presser foot and push the zipper tab behind the presser foot....
Page 26 - Free Motion Darning, Stippling
18 * The darning/ embroidery foot is an optional accessory not included with your machine. (1) Darning: Install the darning plate. (2) Remove the presser foot shank. (3) Attach the darning/ embroidery foot to the presser foot bar. The lever (a) should be behind the needle clamp screw (b). Press the ...
Page 27 - Installing the Removable Extension Table; General Information
19 Hold the removable extension table horizontally, and push it in the direction of the arrow. (1) To remove the extension table, pull it toward the left. Installing the Removable Extension Table General Information The inside of the removable extension table can be utilized as an accessory box. To ...
Page 28 - Changing the Presser Foot
20 Removing the presser foot Push the presser foot (e) to disengage from the cut-out (c). (1) Attaching the presser foot Install the pin (d) of the presser foot (e) into the cut-out (c) of the presser foot holder. (2) Removing and attaching the presser foot shank Raise the presser bar (a) with the p...
Page 30 - Darning Plate
22 For certain types of work, (e.g. darning or free-hand embroidery), the darning plate must be used. Install the darning plate as illustrated. For normal sewing, remove the darning plate. For free-motion sewing it is recommended to use a darning/ embroidery foot, available as an optional accessory ...
Page 31 - Inserting the Needle; Maintenance and Troubleshooting
23 Change the needle regularly, especially if it is showing signs of wear and causing problems. For best sewing results always use SINGER ® Brand Needles. Insert the needle as illustrated as follows: A. Loosen the needle clamp screw and tighten again after inserting the new needle. (1) B. The flat s...
Page 32 - Maintenance
24 Attention: Disconnect the machine from the electrical supply by removing the plug from the main socket. When cleaning the machine, it must always be disconnected from the electrical supply. Remove the needle plate: Turn the handwheel until the needle is fully raised. Open the hinged front cover a...
Page 33 - Troubleshooting Guide
25 Troubleshooting Guide Problem Cause Correction Upper thread breaks 1. The machine is not threaded correctly. 1. Rethread the machine. 2. The thread tension is too tight. 2. Reduce the thread tension. (lower number) 3. The thread is too thick for the needle. 3. Select a larger needle. 4. The needl...
Page 36 - INTELLECTUAL PROPERTY
Please note that on disposal, this product must be safely recycled in accordance with relevant National legislation relating to electrical/electronic products. Do not dispose of electrical appliances as unsorted municipal waste, use separate collection facilities. Contact your local government for i...


 Singer 4423
User Manual
Singer 4423
User Manual
 Singer 4411CL
User Manual
Singer 4411CL
User Manual
 Singer 4432CL
User Manual
Singer 4432CL
User Manual
 Singer 64S
User Manual
Singer 64S
User Manual
 Singer C5200
User Manual
Singer C5200
User Manual
 Singer Confidence 7467
User Manual
Singer Confidence 7467
User Manual
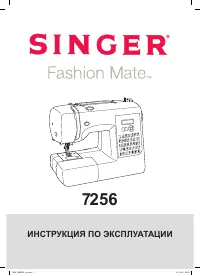 Singer Fashion Mate 7256
User Manual
Singer Fashion Mate 7256
User Manual
 Singer M3300HD
User Manual
Singer M3300HD
User Manual
 Singer M3500SINGER
User Manual
Singer M3500SINGER
User Manual
 Singer S0100
User Manual
Singer S0100
User Manual