Page 2 - WARNING; IMPORTANT SAFETY INSTRUCTIONS
When using an electrical appliance, basic safety should always befollowed, including the following:Read all instructions before using this sewing machine. 1. An appliance should never be left unattended when plugged in.2. Always unplug this appliance from the electric outlet immediately after using ...
Page 3 - CONSERVAR ESTAS INSTRUCCIONES; IMPORTANTES INSTRUCCIONES DE SEGURIDAD
Cuando se utiliza un dispositivo eléctrico, debe seguirse siempre de seguridad básica, incluyendo las siguientes: Leer las instrucciones antes de utilizar está máquina de coser. 1. Un dispositivo eléctrico nunca debe dejarse desatendido cuando está conectado. 2. Desenchufar siempre la máquina de la ...
Page 4 - GARDER CE MODE D'EMPLOI; INSTRUCTIONS IMPORTANTES DE SÉCURITÉ
Lors de l'utilisation d'un appareil électrique, il est important de toujourssuivre certaines précautions de sécurité dont certaines sont lessuivantes :Lire toutes les instructions avant d'utiliser votre machine à coudre : 1. Lorsque la machine est branchée, ne jamais la laisser sanssurveillance. 2. ...
Page 6 - List of contents; Machine Basics; Threading the Machine
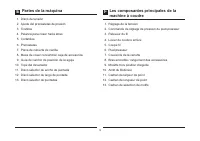
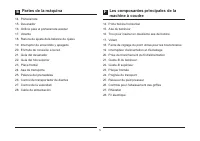
List of contents EN Machine Basics Sewing General Information Maintenance and Troubleshooting Principle Parts of the Machine ..............................................................................................................................................2/4Connecting Machine to Power So...
Page 7 - Indice; Partes de la máquina
Indice E Partes de la máquina Enhebrado de la máquina Cosiendo Información general Mantenimiento y solución de problemas ...........................................................................................................................................................3/5 .......................
Page 8 - Table des matières; L'essentiel de la machine; Enfilage de la machine
Table des matières F L'essentiel de la machine Les composantes principales de la machine à coudre Levier du Installer .........................................................................................................3/5 Branchement de la machine à une source d'alimentation ......................
Page 9 - Principal Parts of the Machine
1. Thread tension dial 2. Presser foot pressure adjustment 3. Thread take-up lever 4. Reverse sewing lever 5. Thread cutter 6. Presser foot 7. Needle plate cover 8. Removable extension table/ accessory storage 9. Three needle position dial 10. Bobbin stopper 11. Stitch width dial 12. Stitch length d...
Page 13 - Foot control; Connecting Machine to Power Source
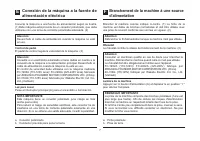
Connect the machine to a power source as illustrated. (1)This appliance is equipped with a polarized plug which must beused with the appropriate polarized outlet. (2) Unplug power cord when machine is not in use. The foot control pedal regulates the sewing speed. (3) Consult a qualified electrician ...
Page 15 - Two Step Presser Foot Lifter
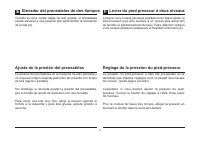
8 When sewing several layers or thick fabrics, the presser footcan be raised for easy positioning of the work. (A) to a higher position Two Step Presser Foot Lifter EN A The presser foot pressure of the machine has been pre-setand requires no particular readjustment according to the typeof fabric (l...
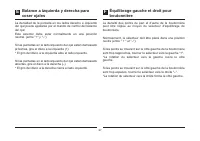
Page 16 - Ajuste de la presión del prensatelas
E F Elevador del prensatelas de dos tiempos Levier du pied presseur à deux niveaux Lorsque vous cousez plusieurs épaisseurs de tissus épais, lepied presseur peut être soulevé afin de faciliter le positionnement du tissu. Faire attention lorsquevous cousez plusieurs épaisseurs et travailler lentement...
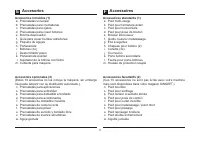
Page 17 - Accessories
1 Standard accessories 2 Optional accessories m h g e f i j l k a b c d 006806008 006905008 006914008 006909008 Standard accessories (1) Optional accessories (2) a. All purpose footb. Zipper foot c. Buttonhole foot d. Button sewing foote. Seam ripper/ brush f. Edge/ quilting guide g. Pack of needles...
Page 19 - Winding the Bobbin
- corresponding . (1/2) - Snap thread into thread guide. (3) - Wind thread clockwise around bobbin winder tension discs. (4) - Thread bobbin as illustrated and place on spindle. (5) - Push bobbin spindle to right. (6) - Hold thread end. (7) - Step on foot control pedal. (8) - Cut thread. (9) - Push ...
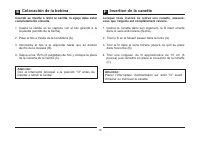
Page 21 - Inserting the Bobbin
When inserting or removing the bobbin, the needle mustbe fully raised. Attention: 1. Insert the bobbin in the bobbin case with the thread running counterclockwise direction (arrow). 2. Pull the thread through the slit (A). 3. Draw the thread clockwise until it slips into the notch (B). 4. Pull out a...
Page 23 - Threading the Upper Thread
2 1 6 8 7 5 This is a simple operation but it is important to carry out correctlyas by not doing so . - Start by raising the needle to its highest point (1), and continue turning the handwheel counterclockwise until theneedle just slightly begins to descend. Raise the presserfoot to release the tens...
Page 25 - Raising the Bobbin Thread
1 2 3 Hold the upper thread with the left hand. Turn the handwheel(1) towards you (counterclockwise) lowering, then raisingneedle. If it is difficult to raise the bobbin thread, check to make surethe thread is not trapped by the hinged cover or theRemovable Extension Table. Gently pull on the upper ...
Page 27 - Thread Tension
20 B A C D 1 Upper thread tension Lower thread tension Please note: Basic thread tension setting: "4". (1)To increase the tension, turn the dial to the next number up.To reduce the tension, turn the dial to the next number down.A. Normal thread tension for straight stitch sewing.B. Thread te...
Page 28 - Tensión del hilo
E F Tensión del hilo superior Tensión del hilo inferior No olvide que: Ajuste de la tensión del hilo básica: "4". (1)Para aumentar la tensión, girar el disco al siguiente númeromás alto. Para reducir la tensión, girar el disco al siguientenúmero más bajo.A. Tensión normal del hilo para cosid...
Page 29 - A B C D E F G H; How to Choose Your Pattern
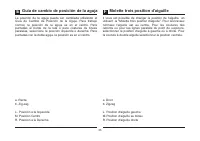
22 The diagram on this page display the stitch patterns availableon the machine. The Pattern Selector Dial may be turned in either direction. a. Reverse Sewing Leverb.c. Stitch Width Diald. Stitch Length Diale. Pattern Selector Dial Turn the Pattern Selector Dial (e) to select the desiredpattern. Us...
Page 31 - Three Needle Position Dial
24 The needle position can be altered with the "Three needleposition dial". For normal work, the needle position is middle.For edge stitching or sewing parallel lines of top stitch, selectneedle position left or right. For twin needle stitching, needleposition is middle. a. Straightb. Zig-za...
Page 33 - Stitch Width Dial & Stitch Length Dial
26 1 2 4 3 2 1 0.5 Function of stitch width dial Function of stitch length dial while zig-zag stitching Function of stitch length dial for when straight stitching The maximum zigzag stitch width for zigzag stitching is 5mm;however, the width can be reduced on any patterns. Thewidth increases as you ...
Page 35 - Sewing Straight Stitch
28 To begin sewing, set the machine for straight stitch. (1) Place the fabric under the presser foot with the fabric edgelined up with the desired seam guide line on the needle plate.(2) Lower the presser foot lifter, and then step on the footcontroller to start sewing. (3) 1 2 3 Sewing Straight Sti...
Page 37 - Removing the Work
Turn the handwheel toward you (counterclockwise) to bringthe thread take up lever to its highest position, raise thepresser foot and remove work behind (2) the needle and presser foot. Pull the threads under and behind the presser foot. Guidethe threads to the side of the face plate and into thread ...
Page 39 - Blind Hem
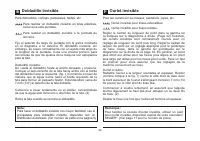
32 2 1 For hems on curtains, trousers, skirts, etc. Blind hem for stretch fabrics. Blind hem for firm fabrics. Set the Stitch Width Dial at a setting appropriate for the weight/type of fabric being sewn,within the range shown in the diagram on the right of thepage. Generally, a narrower stitch is us...
Page 41 - Prepare; Buttonholes
34 Prepare Note: Tips: 1. Take off the all purpose foot and attach the buttonhole foot. Adjust the Stitch Length Dial in the " " to set stitch density. Density varies according to the fabric.Always test sew a buttonhole on the fabric you are using tosew the buttonhole. Follow the 4-step sequ...
Page 42 - Preparación; Ojales
Préparation Remarque: Astuces: 1. Retirer le pied multi-usage et poser le pied pour boutonnière.2. Mesurer le diamètre et l'épaisseur du bouton puis ajouter 0,3cm (1/8) pour l'arrêt pour obtenir la longueur de boutonnièreappropriée; marquer la longueur de la boutonnière sur le tissu (a) 3. Placer le...
Page 43 - Left and Right Side Balance for Buttonhole
36 Left and Right Side Balance for Buttonhole Stitch density on right and left sides of buttonhole can beadjusted by buttonhole balance control dial. This dial should usually be in a neutral position (between "+"and " ") If the stitches on the left side of buttonhole are too closetog...
Page 45 - Sewing on Buttons
38 4 3 1 2 Move the drop feed control to right side to lower the feeddogs. (1) Change the all purpose foot to the button sewing foot. (2)Set the stitch length to "0". Set the machine for zig-zag stitch, then set the width tonumber "3" - "6". Turn the handwheel to check that t...
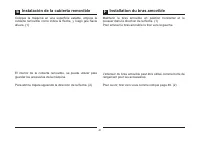
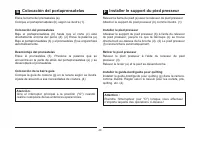
Page 47 - Installing the Removable Extension Table
1 2 40 Hold the removable extension table horizontally, and push itin the direction of the arrow. (1) To remove the extension table, pull it toward the left. The inside of the removable extension table can be utilizedas an accessory box. To open, flip cover down as shown. (2) Installing the Removabl...
Page 49 - Attaching the presser foot; Attaching the Presser Foot Shank
1 2 3 4 a c d e f b b a e g 42 Raise the presser bar dge/ quilting dge/ quilting (a) with the presser foot lifter. Attach the presser foot shank (b) as illustrated. (1) Lower the presser foot shank (b) using the presser foot lifter,until the cut-out (c) is directly above the pin (d). (2) Thepresser ...
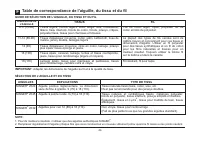
Page 51 - EXPLANATION; NEEDLE SIZE; NEEDLE, FABRIC SELECTION; Chart
44 Heavy woolen, overcoat fabrics, upholstery fabrics, someleathers and vinyls. EXPLANATION Standard sharp needles. Sizes rangethin to large. 9 (70) to 18 (110). Semi-ball point needle, scarfed.9 (70) to 18 (110). Leather needles. 12 (80) to 18 (110). SINGER ® 2020 SINGER ® 2045 SINGER ® 2032 9-11 (...
Page 52 - GUÍA DE SELECCIÓN DE AGUJAS/ TELAS/ HILOS; Guía de selección de agujas/ telas/ hilos
GUÍA DE SELECCIÓN DE AGUJAS/ TELAS/ HILOS CALIBRE DE LA AGUJA TELA HILO 9-11 (70-80) 11-14 (80-90) Telas de poco peso - algodones delgados, Voile, sarga, seda,muselina, interlocks (puntadas entrelazadas), tejidos de algodón,tricots, jerseys, crepés, poliester tejido, telas para camisas y blusas. Tel...
Page 53 - Table de correspondance de l'aiguille, du tissu et du fil
Table de correspondance de l'aiguille, du tissu et du fil GUIDE DE SÉLECTION DE L'AIGUILLE, DU TISSU ET DU FIL 9-11 (70-80) 11-14 (80-90) 14 (90) 16 (100) 18 (110) Tissus légers, cotons légers, voile, serge, soie, mousseline,Qiana, tissu interlock, tricots de coton, tricots, jerseys, crêpes,polyeste...
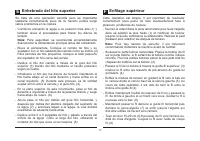
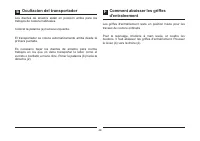
Page 55 - Ocultacion del transportador
E 48 Ocultacion del transportador Comment abaisser les griffesd'entraînement Les griffes d'entraînement reste en position haute pour lestravaux de couture ordinalre. Pour le reprisage, broderie à main levée, et coudre lesboutons. Il faut abaisser les griffes d'entraînement. Pousserle levier (b) vers...
Page 56 - Inserting & Changing Needles
49 A C B A B C D 1 2 Change the needle regularly, especially if it is showing signsof wear and causing problems. For best sewing resultsalways use SINGER Brand Needles. Insert the needle A. Loosen the needle clamp screw and tighten again after inserting the new needle. (1) B. The flat side of the sh...
Page 58 - Changing the Bulb
1 2 51 A B Disconnect the machine from the power supply by removingthe plug from the main socket! Replace bulb with same type rated 15 watts (110-120V area/ 220-240V area). - Loosen screw (A) as illustrated. (1) - Remove the face plate (B). - Unscrew the bulb and install a new one (C). (2) - Replace...
Page 60 - Troubleshooting Guide
Problem Cause Correction Upper threadbreaks Lower threadbreaks Skipped stitches Needle breaks Loose stitches Seams gather orpucker Uneven stitches,uneven feed The machine isnoisy The machinejams 1. The machine is not threaded correctly.2. The thread tension is too tight.3. The thread is too thick fo...
Page 61 - Problemas y soluciones
Problema El hilo superior serompe La aguja se rompe La costura seencoge, la tela sefrunce Puntadas no uniforme La máquina haceruido Máquina obstruida Salto de puntadas Puntadas sueltas desiguales, arrastre Causa 1. La máquina está mal enhebrada.2. La tensión del hilo es demasiado fuerte.3. El hilo e...
Page 62 - Guide de dépannage
Problème Cause Solution Le fil supérieurcasse Le fil inférieurcasse Points manqués L'aiguille casse Points lâches Entraînementirrégulier La machine seBloque enfilée. du porte bobine. 1. Le boîtier n'est pas bien inséré.2. Le boîtier n'est pas bien enfilé.3. La tension inférieure est trop élevée. Le ...
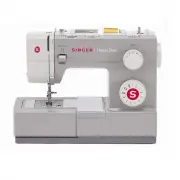


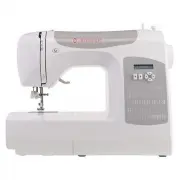
 Singer 4423
User Manual
Singer 4423
User Manual
 Singer 4432CL
User Manual
Singer 4432CL
User Manual
 Singer 64S
User Manual
Singer 64S
User Manual
 Singer C5200
User Manual
Singer C5200
User Manual
 Singer Confidence 7467
User Manual
Singer Confidence 7467
User Manual
 Singer Fashion Mate 7256
User Manual
Singer Fashion Mate 7256
User Manual
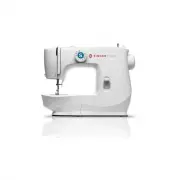 Singer M2100SINGER
User Manual
Singer M2100SINGER
User Manual
 Singer M3300HD
User Manual
Singer M3300HD
User Manual
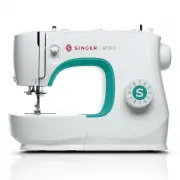
 Singer M3500SINGER
User Manual
Singer M3500SINGER
User Manual
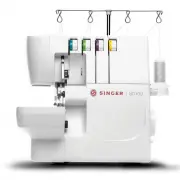 Singer S0100
User Manual
Singer S0100
User Manual