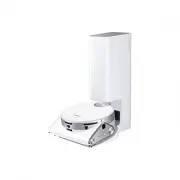
Page 2 - Contents
ENGLISH- 02 Contents 03 Safety information 08 Installation Accessories / Installation note 10 Charging Automatic charging / Recharging / Low battery (Lo) 12 Installing the Virtual guard Part name of the Virtual guard / Inserting batteries 14 Using POWERbot Turning the power on/off / Using Auto clean...
Page 3 - Safety information
ENGLISH- 03 Safety information Safety information WARNING • Before operating the appliance, please read this manual thoroughly and retain it for your reference. WARNING • Because these following operating instructions cover various models, the characteristics of your vacuum cleaner may differ slight...
Page 6 - power related; Before use; in use
ENGLISH- 06 WarninG power related f Please prevent any risk of electric shock or fire. – Do not damage the power cord. – Do not pull the power cord too hard or touch the power plug with wet hands. – Do not use a power source other than 100- 240 V~ and also do not use a multi outlet to supply power t...
Page 8 - installation; power of the charger must be on at all times.
ENGLISH- 08 1 Connect the adapter jack to the charger 2 Connect the power cord to the adapter When using the adapter, the side with the sticker attached must face down. 3 Connect the power plug to the outlet Power lamp (Red) will turn on. installation power of the charger must be on at all times. DC...
Page 10 - Charging
ENGLISH- 10 Charging lamp during charging (green) It takes approximately 160 minutes to completely charge when charging for the first time after purchase and can be used for approximately 60 minutes. Charging 1 turn on the emergency switch on the bottom You must turn on the emergency switch to turn ...
Page 11 - Steps to take if recharging is not being executed
ENGLISH- 11 When the battery indicator blinks during cleaning, poWerbot will return to the charger to charge itself automatically. automatic charging you may command poWerbot to recharge at the charger while it is in cleaning process. recharging manually charge poWerbot by placing it on the charger....
Page 12 - installing the Virtual guard; press the power
ENGLISH- 12 installing the Virtual guard infrared ray from the Virtual guard will restrict poWerbot from approaching certain area. Virtual guard 1 press the power button to turn it on Power lamp (Red) will blink. 2 install the Virtual guard where you want to restrict poWerbot's entrance Make sure th...
Page 13 - part name of the Virtual guard; inserting batteries
ENGLISH- 13 part name of the Virtual guard power button Distance detection sensor (infrared ray sensor) power lamp Power on: Red lamp blinks Power off: Lamp is off poWerbot detection sensor Battery cover inserting batteries Batteries for Virtual guard must be purchased separately. 1 Open the battery...
Page 14 - Using poWerbot; turning the power on/off; Using auto clean mode; recharging
ENGLISH- 14 Using poWerbot you must turn on the emergency switch before using poWerbot. turning the power on/off press the button for more than 3 seconds Using auto clean mode The POWERbot moves and cleans automatically until it cleans entire space once. ✻ ✻ Stop cleaning: Press the button shortly r...
Page 15 - Cleaning method for each modes; Selecting cleaning mode
ENGLISH- 15 cleaning mode How to select Displayed icon Auto clean press once Spot clean press twice Max clean press 3 times Manual clean press 4 times ✻ ✻ Direction control can be done only by the remote control. ✻ ✻ When POWERbot is being charged, you can only select the Auto clean or Max clean mod...
Page 16 - Using the remote control; Cleaning mode
ENGLISH- 16 Using the remote control 1 power/recharging [A type] [B type] Power Turn POWERbot's power on/off Recharging Select to recharge POWERbot at the charger while it is in cleaning process 2 Cleaning mode Auto clean Select to automatically clean the entire space once Spot clean Select to clean...
Page 17 - point cleaning
ENGLISH- 17 you can use the remote control to point and clean the desired spot while poWerbot is in cleaning process. point the red light on the floor within 50 cm around poWerbot's location. Press and hold the Point cleaning button to move the red light to the desired spot. The POWERbot will follow...
Page 18 - name of each part; top
ENGLISH- 18 name of each part 1 5 2 3 4 6 3 3 4 7 8 9 top 1. Display panel2. Dustbin holder3. Remote control signal receiver4. Virtual guard sensor5. Obstacle sensor6. Dustbin7. Camera8. Dustbin handle9. Bumper sensor 1 4 2 6 5 5 4 7 4 8 9 3 Bottom 1. Charge pins2. Power brush3. Power brush cover4. ...
Page 19 - Setting time/schedule; Setting the time
ENGLISH- 19 Setting time/schedule B type remote control's , , buttons works in same manner as a type remote control. Setting the time You must set the current time before using the One-time/daily schedule. Start setting Select "Hour" Select "Minute" Select "AM/PM" Setting com...
Page 20 - Cleaning and maintaining; Cleaning the dustbin; Cleaning the sensors and the camera
ENGLISH- 20 Cleaning and maintaining you must turn off the emergency switch before cleaning poWerbot. Cleaning the dustbin Clean the dustbin when filter inspection indicator ( ) turns on or if there's too much dust in the dustbin. 1 Remove the dustbin 2 Remove the dustbin cover 3 Remove dust in the ...
Page 21 - Cleaning the power brush; Cleaning the Driving wheel
ENGLISH- 21 Cleaning the power brush 1 Remove the dustbin 2 Remove the Power brush cover 3 Remove the Power brush ON OFF ON OFF 4 Clean the Power brush 5 Reassemble the Power brush 6 Reassemble the Power brush cover Cleaning the Driving wheel 1 Put a soft cloth on the floor and place POWERbot upside...
Page 22 - notes and cautions; Cleaning and maintenance; caution
ENGLISH- 22 notes and cautions Charging Note f If the battery overheats during charging, it may take longer to charge. f When automatic charging is not working, please check the followings. – Turn the emergency switch (on the bottom of POWERbot) off and on again. – Unplug the charger's power plug an...
Page 23 - about battery; about the irDa sensor
ENGLISH- 23 f Since the power brush removes dirt from the floor during cleaning, foreign matters such as thread, long hair, etc. may get caught in it. Therefore check and clean it regularly. about battery Note f Purchase batteries at service centers and check the genuine part symbol ( ) and model na...
Page 24 - error codes
ENGLISH- 24 error codes 1 Below error codes appear on the display panel 2 Turn off the emergency switch and check the below instructions and take appropriate action 3 Error code will disappear when you turn on the emergency switch error codes checklist foreign matter caught in the power brush. f Tur...
Page 25 - troubleshooting; Symptom
ENGLISH- 25 troubleshooting Symptom checklist the PoWeRbot is not working at all. f Check if the emergency switch is on. f Check if all the icons are displayed on display panel. f Check if the battery of POWERbot is depleted. – When "Lo" is displayed, carry POWERbot to the charger to charge ...
Page 26 - open Source announcement
ENGLISH- 26 open Source announcement The software included in this product contains open source software. You may obtain the complete corresponding source code for a period of three years after the last shipment of this product by sending an email to mailto:[email protected]. It is also possib...
Page 27 - Specifications; classification
ENGLISH- 27 Specifications classification Item Detail information Mechanical specifications (PoWeRbot) Size (Depth x Height x Length) 378 mm x 135 mm x 362 mm Weight 4.8 kg Sensor Ceiling shape recognition (Visionary mapping plus TM) Button type of POWERbot Touch type Power specifications Power volt...