Samsung SR10F71UB - Manuals
Samsung SR10F71UB Robot Vacuum – User Manual in PDF format online.
Manuals:
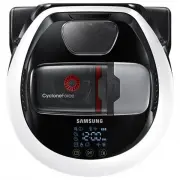
User Manual Samsung SR10F71UB


Summary
02_ safety information safety information SAFETY INFORMATION • Before operating the appliance, please read this manual thoroughly and retain it for your reference. • Because these following operating instructions cover various models, the characteristics of your vacuum cleaner may differ slightly fr...
safety information _03 IMPORTANT SAFETY INSTRUCTIONS When using an electrical appliance, basic precautions should be observed, including the following: READ ALL INSTRUCTIONS BEFORE USING YOUR VACUUM CLEANING ROBOT. Unplug from outlet when not in use and before conducting maintenance. WARNING: to red...
04_ safety information safety information • Do not pull or carry by the cord, use the cord as a handle, close the door on the cord, or pull the cord around sharp edges or corners. Keep the cord away from heated surfaces. • Do not use extension cords or outlets with inadequate current carrying capaci...
Samsung Robot Vacuums Manuals
-
 Samsung SR10M7030WW
User Manual
Samsung SR10M7030WW
User Manual
-
 Samsung SR10J5010U
User Manual
Samsung SR10J5010U
User Manual
-
 Samsung SR10M703UWW
User Manual
Samsung SR10M703UWW
User Manual
-
 Samsung SR20H9050U
User Manual
Samsung SR20H9050U
User Manual
-
 Samsung SR20K9350WK
User Manual
Samsung SR20K9350WK
User Manual
-
 Samsung SR20M707BWD
User Manual
Samsung SR20M707BWD
User Manual
-
 Samsung SR8730
User Manual
Samsung SR8730
User Manual
-
Samsung SR8750
User Manual
-
 Samsung SR8875
User Manual
Samsung SR8875
User Manual
-
 Samsung VR05R503PWG
User Manual
Samsung VR05R503PWG
User Manual
-
 Samsung VR05R5050WK
User Manual
Samsung VR05R5050WK
User Manual
-
 Samsung VR10M703PW9
Quick Guide
Samsung VR10M703PW9
Quick Guide
-
 Samsung VR30T80313W
User Manual
Samsung VR30T80313W
User Manual
-
 Samsung VR30T85513W
User Manual
Samsung VR30T85513W
User Manual
-
 Samsung VR50T95735W
User Manual
Samsung VR50T95735W
User Manual
-
 Samsung SR8895
User Manual
Samsung SR8895
User Manual