Page 2 - features of your new range; important safety instructions; WHAT YOU NEED TO KNOW ABOUT SAFETY
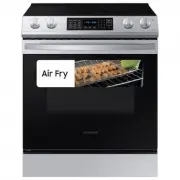
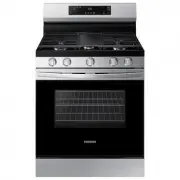
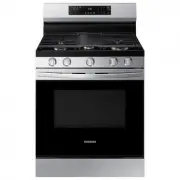
1 _ features of your new range features of your new range Enhanced convenience. Better cooking. Easy maintenance. Your new electric range has been designed to bring you these benefits and more. • True Convection Your new range has Surround Airvection™, which heating element and a fan system that cir...
Page 3 - minor; WARNING
Important safety instructions _ 2 WARNING Hazards or unsafe practices that may result in severe personal injury or death. CAUTION Hazards or unsafe practices that may result in minor personal injury or property damage . CAUTION To reduce the risk of fire, explosion, electric shock, or personal injur...
Page 4 - FOR YOUR SAFETY
3 _ Important safety instructions Do not step, lean, or sit on the doors of the range. You can cause the range to tip, resulting in burns or serious injuries.Confirm that the Anti-Tip device is installed properly. Then, to verify that the Anti-Tip device is engaged, grasp the top rear edge of the ra...
Page 5 - Storage in or on appliance.; SURFACE COOKING UNITS; Never leave surface units unattended at high heat settings.
Important safety instructions _ 4 Storage in or on appliance. Do not store flammable materials in the oven or near the surface units. Be sure all packing materials are removed from the appliance before operating it. Keep plastics, clothes, and paper away from parts of the appliance that may become h...
Page 7 - ELECTRICAL SAFETY; CHILD SAFETY
Important safety instructions _ 6 ELECTRICAL SAFETY Proper Installation- Be sure your appliance is properly installed and grounded by a qualified technician. The appliance should be serviced only by qualified service personnel. Repairs carried out by unqualified individuals may cause injury or a ser...
Page 8 - OVEN
7 _ Important safety instructions WARNING WARNING- Accessible parts may become hot during use. To avoid burns, young children should be kept away. OVEN DO NOT TOUCH THE HEATING ELEMENTS OR INTERIOR SURFACES OF THE OVEN. Heating elements may be hot even though they are dark in color. Interior surface...
Page 9 - VENTILATING HOOD
Important safety instructions _ 8 SELF-CLEANING OVENS Do not clean the door gasket. The door gasket is essential for a good seal. Care should be taken not to rub, damage, or move the gasket. Never keep pet birds in the kitchen. Birds are extremely sensitive to the fumes released during an oven self-...
Page 10 - Clean the cooktop with caution.; If a wet sponge or cloth is used to; BEFORE YOU BEGIN; Clean the oven thoroughly before using for the first time.; Remove; CRITICAL INSTALLATION WARNINGS
9 _ Important safety instructions Clean the cooktop with caution. If a wet sponge or cloth is used to wipe spills on a hot cooking area, be careful to avoid steam burns. Some cleaners can produce noxious fumes if applied to a hot surface. BEFORE YOU BEGIN Clean the oven thoroughly before using for t...
Page 11 - CRITICAL USAGE WARNING
Important safety instructions _ 10 Do not install this appliance in a humid, oily or dusty location, or in a location exposed to direct sunlight or water (rain drops). - This may result in electric shock or fire. Do not use a damaged power cord or loose wall socket. - This may result in electric sho...
Page 13 - USAGE CAUTIONS
Important safety instructions _ 12 Do not heat food wrapped in paper from magazines, newspapers, etc. - This may result in fire. Do not open the door when the food in the oven is burning. - If you open the door, it causes an inflow of oxygen and may cause the food to ignite. Do not apply excessive p...
Page 15 - CRITICAL CLEANING WARNINGS; STATE OF CALIFORNIA PROPOSITION 65
Important safety instructions _ 14 CAUTION CRITICAL CLEANING WARNINGS Do not clean the appliance by spraying water directly on to it. Do not use benzene, thinner or alcohol to clean the appliance. - This may result in discoloration, deformation, damage, electric shock or fire. Take care not to hurt ...
Page 16 - contents
15 _ Contents contents INTRODUCING YOUR NEW RANGE 16 16 Overview16 What’s included with your range SURFACE COOKING 17 17 About surface cooking19 How to set the appliance for surface cooking 21 Using the proper cookware21 Choosing the proper cookware22 Protecting the smoothtop surface OPERATING THE O...
Page 17 - introducing your new range; OVERVIEW; WHAT’S INCLUDED WITH YOUR RANGE
INTRODUCING Introducing your new range _ 16 introducing your new range OVERVIEW Oven door Convection fan Shelf position Glass surface Automatic oven light switch * Oven light Self/steam clean latch Gasket Oven control panel See page 23 for more information * Surface control knobs See page 18 for mor...
Page 18 - surface cooking; ABOUT SURFACE COOKING; About the radiant surface elements
17 _ Surface cooking surface cooking ABOUT SURFACE COOKING CAUTION BEFORE COOKING • Do not use the glass cooktop surface as a cutting board. • Do not place or store items that can melt or catch fire on the glass cooktop, even when it is not being used. • Turn the surface units on only after placing ...
Page 19 - Location of the radiant surface elements and controls; Hot surface indicator
SURF A CE COOKING Surface cooking _ 18 Location of the radiant surface elements and controls The radiant control knobs operate the radiant surface elements on the cooktop as shown below. 1 5 2 3 4 6 1. Single element: Left rear 2. Single element: Right rear 3. Dual element: Left front 4. Dual elemen...
Page 20 - HOW TO SET THE APPLIANCE FOR SURFACE COOKING; Recommended settings
19 _ Surface cooking HOW TO SET THE APPLIANCE FOR SURFACE COOKING CAUTION • The surface elements may be hot and burns may occur. Do not touch the surface elements until they have cooled down sufficiently. • At high or medium-high settings, never leave food unattended. Boilovers cause smoking and gre...
Page 21 - Using the warming center
SURF A CE COOKING Surface cooking _ 20 Using the warming center The warming center , located in the back center of the glass surface, will keep hot, cooked food at serving temperature. • The surface warmer will not glow red like the cooking elements. CAUTION • Do not warm food on the warming center ...
Page 23 - PROTECTING THE SMOOTHTOP SURFACE; Cleaning
SURF A CE COOKING Surface cooking _ 22 PROTECTING THE SMOOTHTOP SURFACE Cleaning • Clean the cooktop before using it for the first time. • Clean your cooktop daily or after each use. This will keep your cooktop looking good and can prevent damage. • If a spillover occurs while you are cooking, immed...
Page 24 - operating the oven; THE OVEN CONTROL PANEL
23 _ Operating the oven operating the oven THE OVEN CONTROL PANEL READ THE INSTRUCTIONS CAREFULLY BEFORE USING THE OVEN. For satisfactory use of your oven, become familiar with the various features and functions of the oven as described below. Detailed instructions for each feature and function foll...
Page 25 - SETTING THE CLOCK; How to set the clock; How to change between a 12-hour and 24-hour display
Operating the oven _ 24 OPERA TING THE O VEN SETTING THE CLOCK The clock must be set to the correct time of day for the automatic oven timing functions to work properly. • The time of day cannot be changed during a timed cooking, a delay-timed cooking or a self- cleaning cycle. • You can choose betw...
Page 26 - MINIMUM AND MAXIMUM SETTINGS; SETTING THE KITCHEN TIMER; How to set the timer
25 _ Operating the oven MINIMUM AND MAXIMUM SETTINGS All of the features listed in the table below have minimum and maximum time or temperature settings. A beep will sound each time a pad on the control panel is pressed and the entry is accepted. An error tone will sound in the form of a long beep i...
Page 27 - USING THE OVEN RACKS; Oven rack positions; Baking layer cakes
Operating the oven _ 26 OPERA TING THE O VEN USING THE OVEN RACKS Oven rack positions 1 2 3 4 5 6 7 The oven has 7 rack positions (1~7). TYPE OF FOOD RACK POSITION Frozen pies 4 Angel food cake 2 Bundt or pound cakes 3 Biscuits, muffins, brownies, cookies, cupcakes, layer cakes, pies 4 Casseroles 4 ...
Page 28 - BAKING; How to set the thermostat; How to adjust the thermostat while cooking
27 _ Operating the oven BAKING The oven can be programmed to bake at any temperature from 150 °F to 550 °F. How to set the thermostat 1 . Start the set up. Press the BAKE pad. The default temperature is 350 °F. 2 . Enter the temperature you want on the number pad, eg. 3, 7, 5. 3 . Start the bake fun...
Page 29 - CONVECTION BAKING; Tips for convection baking; How to set the oven for convection baking
Operating the oven _ 28 OPERA TING THE O VEN CONVECTION BAKING By using the convection bake feature, you will be able to cook faster. You can program the oven for convection baking at any temperature between 150 °F and 550 °F. Convection baking uses a fan to circulate the oven’s heat evenly and cont...
Page 30 - Recommended convection baking guide
29 _ Operating the oven Recommended convection baking guide Food Item Rack Position Set Temp.* (preheated oven) (°F) Convection bake time ** (min) Cake Cupcakes 4 325 17-19 Bundt Cake 3 325 35-43 Angel Food 2 325 35-39 Pie 2 crust, fresh, 9” 3 350-400 45-55 2 crust, frozen fruit, 9” 3 350 68-78 Cook...
Page 31 - CONVECTION ROASTING; How to set the oven for convection roasting
Operating the oven _ 30 OPERA TING THE O VEN CONVECTION ROASTING Convection roasting is good for cooking large tender cuts of meat, uncovered. Heat comes from the top heating element. The convection fan circulates the heated air evenly over and around the food. Meat and poultry are browned on all si...
Page 32 - Recommended convection roasting guide
31 _ Operating the oven Recommended convection roasting guide Meat Weight (lb) Oven temp. (°F) Roasting time* (min per lb) Internal temp. (°F) Beef Rib Roast 4-6 325 25-28 28-32 145 (med/rare) 160 (medium) Rib Eye Roast, (boneless) 4-6 325 24-29 29-34 145 (med/rare) 160 (medium) Rump, Eye, Tip Sirlo...
Page 33 - TIMED COOKING; How to set the oven for timed cooking
Operating the oven _ 32 OPERA TING THE O VEN TIMED COOKING In timed cooking, the oven turns on immediately and cooks for the length of time you select. At the end of the cooking time, the oven turns off automatically. • You can use the timed cooking feature only with another cooking operation (bake,...
Page 34 - DELAY TIMED COOKING; How to set the oven for delay timed cooking
33 _ Operating the oven DELAY TIMED COOKING In a delay timed cooking, the oven’s timer turns the oven on and off at times you select in advance. • You can use the delay timed cooking feature only with another cooking operation (bake, convection bake, or convection roast). • You can set the oven for ...
Page 35 - BROILING; How to set the oven for broiling
Operating the oven _ 34 OPERA TING THE O VEN BROILING Broil stop position Broil stop position Leave the door open at the broil stop position. The door will stay open by itself, yet the proper temperature is maintained in the oven. CAUTION Should an oven fire occur, close the oven door and turn the o...
Page 36 - Recommended broiling guide
35 _ Operating the oven Recommended broiling guide The size, weight, thickness, starting temperature, and your doneness preference will affect broiling times. This guide is based on meats at refrigerator temperature. Food Quantity and/ or thickness Shelf position First side time (min.) Second side t...
Page 37 - USING THE CUSTOM COOK FEATURE; How to record a recipe setting; How to recall a setting
Operating the oven _ 36 OPERA TING THE O VEN USING THE CUSTOM COOK FEATURE By using the custom cook feature, you can record up to 3 different recipe settings. The feature may be used for baking, convection baking, or convection roasting. It will not work with any other function, including the delay ...
Page 38 - USING THE EASY COOK FEATURE; Slow Cook
37 _ Operating the oven USING THE EASY COOK FEATURE Slow Cook The Slow Cook feature cooks food more slowly at lower oven temperatures. The extended cooking times allow better distribution of flavors in many recipes. This feature is ideal for roasting beef, pork & poultry. Slow cooking meats may ...
Page 39 - Crispy Pizza; USING THE KEEP WARM FUNCTION; How to use the keep warm feature; How to set the oven to activate the keep warm mode after a timed
Operating the oven _ 38 OPERA TING THE O VEN Crispy Pizza This pizza function is designed to give pizzas crisp, browned bottoms while keeping the topping moist. 1 . Press the Pizza pad. 2 . Press the START/SET pad to begin pizza cooking. Use only 1 rack and place the rack in position 2 or 3 for the ...
Page 40 - EXTRA FEATURES; 2 hour energy saving; Fahrenheit or Celsius temperature selection
39 _ Operating the oven EXTRA FEATURES 12 hour energy saving With this feature, should you forget and leave the oven on, the control will automatically turn off the oven after 12 hours during baking functions or after 3 hours during a broil function. How to turn 12 hour energy saving feature on or o...
Page 41 - Convection auto conversion feature; Thermostat adjustment
Operating the oven _ 40 OPERA TING THE O VEN Convection auto conversion feature When you use the auto conversion feature, the convection auto conversion feature will automatically convert entered regular baking temperatures to convection baking temperatures. If this feature is activated, the display...
Page 42 - Control lockout; TURNING THE OVEN LIGHT ON AND OFF
41 _ Operating the oven Sound on/off By using this feature, you can set the oven controls to operate silently. How to turn the sound on or off 1 . Press Oven Light and 0 on the number pad at the same time for 3 seconds. The display will show Snd On (sound on) or Snd OFF (sound off). The default sett...
Page 43 - SETTING THE SABBATH FEATURE
Operating the oven _ 42 OPERA TING THE O VEN SETTING THE SABBATH FEATURE (For use on the Jewish Sabbath & Holidays) For further assiistance, guidelines for proper usage, and a complete list of models with the Sabbath feature, please visit the web at http:\\www.star-k.org. You can use the Sabbath...
Page 45 - maintaining your appliance; Before a self-cleaning cycle
Maintaining your appliance _ 44 MAINT AINING Y OUR APPLIANCE maintaining your appliance SELF-CLEANING This self-cleaning oven uses high temperatures (well above cooking temperatures) to burn off leftover grease and residue completely or reduce them to a finely powdered ash that you can wipe away wit...
Page 46 - How to set the oven for self-cleaning; How to delay the start of self-cleaning; How to turn off the self-cleaning feature
45 _ Maintaining your appliance How to set the oven for self-cleaning 1 . Select the length of time for the self-cleaning operation, eg. 3 hours. Press the SELF CLEAN pad once for a 3 hour clean time, twice for a 4 hour clean time, or 3 times for a 2 hour clean time. The default setting is 3 hours. ...
Page 47 - How to set the oven for steam-cleaning; After a steam-cleaning cycle
Maintaining your appliance _ 46 MAINT AINING Y OUR APPLIANCE STEAM-CLEANING How to set the oven for steam-cleaning For light cleaning, the Steam-cleaning function saves time and energy. For heavier-duty cleaning grease, use the self-cleaning function. 1 . Remove all accessories from the oven. 2 . Po...
Page 48 - CARE AND CLEANING OF THE OVEN; Oven vent
47 _ Maintaining your appliance CARE AND CLEANING OF THE OVEN WARNING • Be sure all controls are OFF and all surfaces are COOL before cleaning any part of the range. • If your range is removed for cleaning, servicing, or any reason, be sure the Anti-Tip device is re-engaged properly when the range i...
Page 49 - Oven racks
Maintaining your appliance _ 48 MAINT AINING Y OUR APPLIANCE Oven racks • If the racks are left in the oven during a self-cleaning cycle, their color will turn slightly blue and the finish will be dull. After the self-cleaning cycle is complete and the oven has cooled, rub the sides of the racks wit...
Page 50 - CARE AND CLEANING OF THE GLASS COOKTOP; Normal daily use cleaning; Removing burned-on residue
49 _ Maintaining your appliance CARE AND CLEANING OF THE GLASS COOKTOP Normal daily use cleaning Use only a ceramic cooktop cleaner. Other creams may not be as effective. By following these steps, you can maintain and protect the surface of your glass cooktop. 1. Before using the cooktop for the fir...
Page 51 - Removing metal marks and scratches; Cleaning the cooktop seal
Maintaining your appliance _ 50 MAINT AINING Y OUR APPLIANCE Removing metal marks and scratches 1. Be careful not to slide pots and pans across your cooktop. It will leave marks on the cooktop surface. You can remove these marks by applying ceramic cooktop cleaner with a cleaning pad for ceramic coo...
Page 52 - REMOVING AND REPLACING THE OVEN DOOR; How to remove the door; How to replace the door
51 _ Maintaining your appliance REMOVING AND REPLACING THE OVEN DOOR How to remove the door CAUTION • The door is very heavy. Be careful when removing and lifting the door. Do not lift the door by the handle. • Turn the power OFF before removing the door. 1. Open the door completely. 2. Pull the hin...
Page 53 - REMOVING AND REPLACING THE STORAGE DRAWER; How to remove the storage drawer
Maintaining your appliance _ 52 MAINT AINING Y OUR APPLIANCE 3. Open the door fully. If the door will not open fully, the indentation is not inserted correctly in the bottom edge of the slot. 4. Push the hinge locks up against the front frame of the oven cavity to the locked position. Hinge lock Unl...
Page 54 - CHANGING THE OVEN LIGHT
53 _ Maintaining your appliance CHANGING THE OVEN LIGHT The oven light is a standard 40-watt appliance bulb. It will come on when the oven door is open. When the oven door is closed, press the OVEN LIGHT pad to turn it on or off. It will not work during a self-cleaning cycle. 1. Make sure the oven a...
Page 55 - troubleshooting; TROUBLESHOOTING
TROUBLESHOO TING Troubleshooting _ 54 troubleshooting TROUBLESHOOTING Samsung works hard to ensure that you don’t have problems with your new electric range. If you run into unexpected trouble, look first for a solution in the table below. If, after trying the suggested solution, you’re still having...
Page 59 - warranty
W ARRANT Y Warranty _ 58 warranty PLEASE DO NOT DISCARD THIS REPLACES THE WARRANTY PAGE IN THE USE & CARE GUIDE SAMSUNG ELECTRIC RANGE LIMITED WARRANTY TO ORIGINAL PURCHASER This SAMSUNG brand product, as supplied and distributed by SAMSUNG ELECTRONICS AMERICA, INC. (SAMSUNG) and delivered new, ...