Page 2 - AFTER THE RANGE HAS; WARNING; Do not step, lean, or sit on the doors of the range
2 English WARNING To reduce the risk of tipping the range, the range must be secured by a properly installed Anti-Tip device. AFTER THE RANGE HAS BEEN INSTALLED, CONFIRM THAT THE ANTI-TIP DEVICE HAS BEEN PROPERLY INSTALLED AND VERIFY THAT THE ANTI-TIP DEVICE IS PROPERLY ENGAGED . Refer to the instal...
Page 3 - Reorienting or relocating the receiving antenna.; Regulatory Notice; CAUTION; FCC CAUTION
English 3 FCC STATEMENT: This equipment has been tested and found to comply within the limits for a Class B digital device, pursuant to part 15 of the FCC Rules. These limits are designed to provide reasonable protection against harmful interference in a residential installation. This equipment gene...
Page 4 - FCC RADIATION EXPOSURE STATEMENT:
4 English FCC RADIATION EXPOSURE STATEMENT: This equipment complies with FCC radiation exposure limits set forth for an uncontrolled environment. This equipment should be installed and operated so there is at least 8 inches (20 cm) between the radiator and your body. This device and its antenna(s) m...
Page 5 - Contents
English 5 C ontents Contents Important safety instructions 6 Introducing your new range 21 Overview 21What’s included 21 Before you begin 22 Energy saving tips 22 Surface cooking 22 About surface cooking 22 How to set the appliance for surface cooking 24 Using the proper cookware 26 Choosing the pro...
Page 6 - SAVE THESE INSTRUCTIONS; CALIFORNIA PROPOSITION 65 WARNING; Important safety instructions; severe personal injury; minor personal injury
6 English Impor tant saf ety ins truc tions Important safety instructions Important safety instructions SAVE THESE INSTRUCTIONS CAUTION To reduce the risk of fire, explosion, electric shock, or personal injury when using your range, follow these basic safety precautions. Do NOT attempt. Do NOT disas...
Page 7 - User servicing
English 7 Impor tant saf ety ins truc tions SAVE THESE INSTRUCTIONS FOR YOUR SAFETY When using electrical appliances, you should follow basic safety precautions, including the following: CAUTION • Use this appliance only for its intended purpose as described in this Owner’s Manual. • Potentially hot...
Page 8 - Storage in or on the appliance.
8 English Impor tant saf ety ins truc tions Important safety instructions Important safety instructions SAVE THESE INSTRUCTIONS • If there is a fire in the oven during self-cleaning, turn the oven off and wait for the fire to go out. Do not force the door open. The introduction of fresh air at self-...
Page 9 - Never leave surface units unattended at high heat settings.
English 9 Impor tant saf ety ins truc tions SAVE THESE INSTRUCTIONS SURFACE COOKING UNITS • Never leave surface units unattended at high heat settings. Boilovers cause smoking and greasy spillovers that may ignite. • Protective Liners – Do not use aluminum foil to line surface unit drip bowls or ove...
Page 10 - Do not use decorative surface element covers; ELECTRICAL SAFETY; Proper Installation
10 English Impor tant saf ety ins truc tions Important safety instructions Important safety instructions SAVE THESE INSTRUCTIONS • Be sure you know which control knob operates each surface unit. Make sure you turned on the correct surface unit. • Always turn the surface units off before removing coo...
Page 11 - OVEN; Heating elements may be hot even
English 11 Impor tant saf ety ins truc tions SAVE THESE INSTRUCTIONS CHILD SAFETY WARNING • This appliance is not intended for use by young children or infirm persons without the adequate supervision of a responsible adult. • Young children should be supervised to ensure that they do not play with t...
Page 12 - Use care when opening the door.; Do not attempt to operate the oven during a power failure.; REMOTE OPERATION
12 English Impor tant saf ety ins truc tions Important safety instructions Important safety instructions SAVE THESE INSTRUCTIONS • Use care when opening the door. Let hot air or steam escape before you remove food from or put food into the oven. • Protective liners. Do not use aluminum foil to line ...
Page 13 - Do not clean the door gasket.; VENTILATING HOOD; Clean ventilating hoods frequently.
English 13 Impor tant saf ety ins truc tions SAVE THESE INSTRUCTIONS SELF-CLEANING OVENS Do not clean the door gasket. The door gasket is essential for a good seal. Care should be taken not to rub, damage, or move the gasket. • Never keep pet birds in the kitchen. Birds are extremely sensitive to th...
Page 14 - DO NOT TOUCH SURFACE UNITS OR AREAS NEAR UNITS.; CRITICAL INSTALLATION WARNINGS; - Failing to have a qualified technician install the range
14 English Impor tant saf ety ins truc tions Important safety instructions Important safety instructions SAVE THESE INSTRUCTIONS GLASS/CERAMIC COOKING SURFACES • DO NOT TOUCH SURFACE UNITS OR AREAS NEAR UNITS. Surface units may be hot even though they are dark in color. Areas near surface units may ...
Page 20 - Do not overheat food.; CRITICAL CLEANING WARNINGS; - You may hurt yourself on the sharp edges of the
20 English Impor tant saf ety ins truc tions Important safety instructions Important safety instructions SAVE THESE INSTRUCTIONS • Do not use sealed containers. Remove seals and lids before cooking. Sealed containers can explode due to the build up of pressure even after the oven has been turned off...
Page 21 - What’s included; Introducing your new range; Overview
English 21 Intr oducing y our ne w rang e What’s included Wire racks (2) * NOTE If you need an accessory marked with a *, you can buy it from the Samsung Contact Center (1-800-726-7864). Introducing your new range Overview 02 03 04 05 07 06 08 0910 01 01 Oven control panel (See page 28 for more info...
Page 22 - Energy saving tips; Surface cooking; About surface cooking
22 English Befor e you begin Before you begin Before you begin Clean the oven thoroughly before using it for the first time. Then, remove the accessories, set the oven to bake, and then run the oven at 400 °F for 1 hour. There will be a distinctive odor. This is normal.Ensure your kitchen is well ve...
Page 24 - How to set the appliance for surface cooking
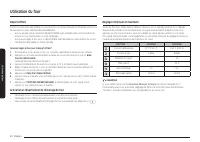
24 English Surfac e cooking Surface cooking Hot surface indicator • Comes on when the unit is turned on or hot to the touch. • Stays on even after the unit is turned off. • Glows until the unit is cooled to approximately 150 °F. Cooktop on/off lamp • The lamp turns on when the surface control knobs ...
Page 26 - Using the proper cookware
26 English Surfac e cooking Surface cooking Using the proper cookware Using the right cookware can prevent many problems, such as uneven cooking or extended cooking times. Using the proper pots and pans will reduce cooking times and cook food more evenly. Check for flatness by rotating a ruler acros...
Page 28 - Operating the oven; The oven control panel
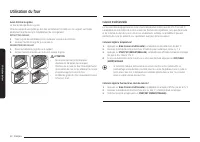
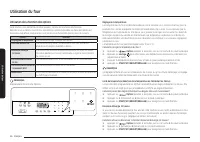
28 English Oper ating the o v en Operating the oven Operating the oven The oven control panel READ THE INSTRUCTIONS CAREFULLY BEFORE USING THE OVEN. For satisfactory use of your oven, become familiar with the various features and functions of the oven as described below. Detailed instructions for ea...
Page 29 - Setting the clock; Setting the kitchen timer
English 29 Oper ating the o v en Setting the clock The clock must be set to the correct time of day for the automatic oven timing functions to work properly. • The time of day cannot be changed during timed cooking, delay-timed cooking, or a self-cleaning cycle. How to set the clock1. Press Clock . ...
Page 30 - Delay start; Turning the oven light on and off
30 English Oper ating the o v en Operating the oven Delay start In a delay timed cooking, the oven’s timer turns the oven on and off at times you select in advance. • You can use the delay start feature only with another cooking operation (bake, or self-clean). • You can set the oven for a delay sta...
Page 31 - Using the oven racks
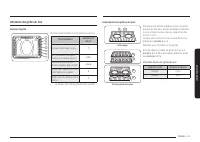
English 31 Oper ating the o v en Using the oven racks Oven rack positions 1 2 3 4 5 6 7 Recommended rack position for cooking TYPE OF FOOD RACK POSITION Broiling hamburgers 7 Broiling meats or small cuts of poultry, fish 4-6 Bundt cakes, pound cakes, frozen pies, casseroles 3 or 4 Angel food cakes, ...
Page 32 - Baking
32 English Oper ating the o v en Operating the oven Before using the racks The oven has two racks.Each rack has stops that need to be placed correctly on the supports. These stops will keep the rack from coming completely out. REMOVING THE RACKS 1. Pull the rack straight out until it stops. 2. Lift ...
Page 33 - Broiling
English 33 Oper ating the o v en Broiling Broiling is a method of cooking tender cuts of meat by direct heat under the broil element of the oven.The high heat cooks quickly and gives a rich, brown outer appearance. Broil mode is best for meats, fish, and poultry up to 1" thick.Always preheat the...
Page 34 - Using the bread proof function
34 English Oper ating the o v en Operating the oven Using the bread proof function Bread Proof The Bread Proof function automatically provides the optimum temperature for the bread proof process and, therefore does not have a temperature adjustment.If you press Bread Proof when the oven temperature ...
Page 35 - Using the smart control feature; Using the voice control
English 35 Oper ating the o v en Using the smart control feature Functions that can be operated from the SmartThings app may not work smoothly if communication condition becomes poor, or the product is installed in a place with a weak Wi-Fi signal.Please refer to the following table for the main fun...
Page 37 - Using the options function
English 37 Oper ating the o v en Using the options function This function enables you to control various electronic control options. Refer to the following table for available options.The option menu is only available when the oven is not being used (not cooking). Options Feature 1. Temp Adjust Lets...
Page 38 - Using the Sabbath feature
38 English Oper ating the o v en Operating the oven 12-hour energy saving If you accidently leave the oven on, this feature will automatically turn off the oven after 12-hours during baking functions or after 3 hours during a broil function. (Default setting : on) How to turn the 12-hour energy savi...
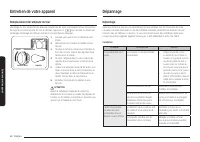
Page 40 - Maintaining your appliance
40 English Maint aining y our applianc e Maintaining your appliance Before a self-cleaning cycle Fig. 1 Fig. 1 Fig. 2 Fig. 2 Don’t hand Don’t hand clean the clean the oven door oven door gasket. gasket. You may You may hand clean hand clean the door. the door. • We recommend venting your kitchen wit...
Page 43 - Care and cleaning of the oven
English 43 Maint aining y our applianc e Care and cleaning of the oven WARNING • Be sure all controls are OFF and all surfaces are COOL before cleaning any part of the range. • If your range is moved for cleaning, servicing, or any reason, be sure the Anti-Tip device is re-engaged properly when the ...
Page 45 - Care and cleaning of the glass cooktop
English 45 Maint aining y our applianc e Removing burned-on residue 1. Allow the cooktop to cool. 2. Spread a few drops of ceramic cooktop cleaner on the entire burned residue area. 3. Using a cleaning pad for ceramic cooktops, rub the residue area, applying pressure as needed. 4. If any residue rem...
Page 47 - Removing and reinstalling the oven door
English 47 Maint aining y our applianc e Fig. 2 Fig. 2 5. Lift door up and out until the hinge arm is clear of the slot (Fig. 2). How to re-install the door Hinge arm Hinge arm Bottom Bottom edge of edge of slot slot Indentation Indentation 1. Firmly grasp both sides of the door at the top. 2. With ...
Page 48 - Removing and reinstalling the storage drawer
48 English Maint aining y our applianc e Maintaining your appliance Removing and reinstalling the storage drawer Hook Hook How to remove the storage drawer1. Pull the drawer out until it stops. 2. Tilt the front of the drawer and pull out it. How to replace the storage drawer1. Put the left side of ...
Page 49 - Troubleshooting; Changing the oven light
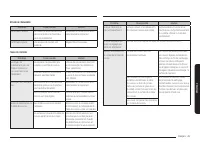
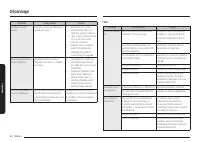
English 49 Tr ouble shoo ting Troubleshooting Troubleshooting Samsung works hard to ensure that you don’t have problems with your new electric range. If you run into unexpected trouble, look first for a solution in the tables below. If you’re still having trouble after trying the suggested solution,...
Page 54 - Information codes
54 English Tr ouble shoo ting Troubleshooting Information codes OVEN Displayed Code Possible cause Solution C-d0 There is a short in the control key. Press OFF/CLEAR , and then restart the oven. If the problem persists, disconnect all power to the range for at least 30 seconds and then reconnect the...
Page 57 - Appendix; Open Source Announcement
English 57 Appendix Appendix Open Source Announcement The software included in this product contains open source software. The following URL http://opensource.samsung.com/opensource/SMART_TP2_0/seq/0 leads to open source license information as related to this product. EXCEPT AS SET FORTH HEREIN THER...
Page 59 - Estufa eléctrica; Manual del usuario
Page 60 - DESPUÉS DE INSTALAR LA ESTUFA, CONFIRME QUE EL; ADVERTENCIA; . Puede causar que la estufa se incline o vuelque, produciendo; Dispositivo antivuelco
2 Español ADVERTENCIA Para reducir el riesgo de inclinación o vuelco de la estufa, ésta debe estar asegurada mediante un dispositivo antivuelco correctamente instalado. DESPUÉS DE INSTALAR LA ESTUFA, CONFIRME QUE EL DISPOSITIVO ANTIVUELCO ESTÉ CORRECTAMENTE INSTALADO Y BIEN ACOPLADO . Consulte el ma...
Page 61 - DECLARACIÓN DE LA FCC:; Aviso sobre regulaciones; PRECAUCIÓN; PRECAUCIÓN DE LA FCC
Español 3 DECLARACIÓN DE LA FCC: Este equipo ha sido sometido a pruebas y se ha determinado que se encuentra dentro de los límites para los dispositivos digitales clase B, de acuerdo con la sección 15 de las Normas de la FCC. Estos límites están destinados a ofrecer una protección razonable contra i...
Page 62 - DECLARACIÓN DE LA FCC SOBRE LA EXPOSICIÓN A LA RADIACIÓN:
4 Español DECLARACIÓN DE LA FCC SOBRE LA EXPOSICIÓN A LA RADIACIÓN: Este equipo cumple con los límites de exposición a la radiación establecidos por la FCC para un entorno no controlado. Este equipo debe ser instalado y operado a una distancia mínima de 8 pulgadas (20 cm) entre su cuerpo y el radiad...
Page 63 - Contenido
Español 5 Contenido Contenido Instrucciones de seguridad importantes 6 Introducción a su nueva estufa 21 Descripción general 21 Elementos incluidos 21 Antes de comenzar 22 Sugerencias para ahorrar energía 22 Superficie de cocción 22 Acerca de la superficie de cocción 22 Como regular el electrodomést...
Page 64 - CONSERVE ESTAS INSTRUCCIONES; Instrucciones de seguridad importantes; Esta guía no cubre todas; Símbolos y precauciones de seguridad importantes; Significado de iconos y símbolos en este manual del usuario:; Prácticas peligrosas o inseguras que pueden provocar
6 Español Ins truccione s de seg uridad impor tantes Instrucciones de seguridad importantes Instrucciones de seguridad importantes CONSERVE ESTAS INSTRUCCIONES PRECAUCIÓN Para reducir el riesgo de incendio, explosión, descarga eléctrica o lesiones personales cuando utilice la estufa, siga estas inst...
Page 65 - PARA SU SEGURIDAD; Mantenimiento del usuario
Español 7 Ins truccione s de seg uridad impor tantes CONSERVE ESTAS INSTRUCCIONES ADVERTENCIA DE LA PROPOSICIÓN 65 DEL ESTADO DE CALIFORNIA ADVERTENCIA Cáncer y Daño Reproductivo - www.P65Warnings.ca.gov PARA SU SEGURIDAD Cuando utilice electrodomésticos, debe seguir precauciones de seguridad básica...
Page 66 - Almacenamiento en o sobre el electrodoméstico.
8 Español Ins truccione s de seg uridad impor tantes Instrucciones de seguridad importantes Instrucciones de seguridad importantes CONSERVE ESTAS INSTRUCCIONES • Si se produce un incendio en el horno durante la autolimpieza, apague el horno y espere a que se extinga el fuego. No fuerce la apertura d...
Page 68 - No almacene objetos pesados sobre la superficie de cocción que; SEGURIDAD ELÉCTRICA; Instalación adecuada
10 Español Ins truccione s de seg uridad impor tantes Instrucciones de seguridad importantes Instrucciones de seguridad importantes CONSERVE ESTAS INSTRUCCIONES • Asegúrese de saber cuál de las perillas controla cada unidad de superficie. Asegúrese de que encendió la unidad de superficie correcta. •...
Page 69 - SEGURIDAD DE LOS NIÑOS; HORNO; NO TOQUE LOS ELEMENTOS CALENTADORES NI LAS
Español 11 Ins truccione s de seg uridad impor tantes CONSERVE ESTAS INSTRUCCIONES ADVERTENCIA • Asegúrese de que el electrodoméstico esté apagado antes de reemplazar la bombilla de luz para evitar la posibilidad de una descarga eléctrica. • La estufa no debe colocarse sobre una base. SEGURIDAD DE L...
Page 70 - OPERACIÓN REMOTA
12 Español Ins truccione s de seg uridad impor tantes Instrucciones de seguridad importantes Instrucciones de seguridad importantes CONSERVE ESTAS INSTRUCCIONES • Cuando abra la puerta, hágalo con precaución. Permita la salida del vapor o aire caliente antes de retirar o volver a colocar los aliment...
Page 72 - No cocine sobre una cubierta quebrada.
14 Español Ins truccione s de seg uridad impor tantes Instrucciones de seguridad importantes Instrucciones de seguridad importantes CONSERVE ESTAS INSTRUCCIONES SUPERFICIES DE COCCIÓN VITRO-CERÁMICAS • NO TOQUE LAS UNIDADES DE SUPERFICIE NI LAS ÁREAS CERCANAS A LAS UNIDADES. Las unidades de superfic...
Page 78 - No caliente en exceso los alimentos.; descarga eléctrica o incendio.
20 Español Ins truccione s de seg uridad impor tantes Instrucciones de seguridad importantes Instrucciones de seguridad importantes CONSERVE ESTAS INSTRUCCIONES • No utilice recipientes sellados. Quíteles los sellos y las tapas antes de cocinar. Los recipientes sellados pueden explotar debido a la a...
Page 79 - Elementos incluidos; Introducción a su nueva estufa; Descripción general
Español 21 Introduc ción a su nue va e stuf a Elementos incluidos Parrillas de alambre (2) * NOTA Si necesita un accesorio marcado con un *, puede adquirirlo en el Centro de contacto de Samsung (1-800-726-7864). Introducción a su nueva estufa Descripción general 02 03 04 05 07 06 08 0910 01 01 Panel...
Page 80 - Antes de comenzar; Sugerencias para ahorrar energía; Superficie de cocción; Acerca de la superficie de cocción
22 Español Antes de c omenz ar Antes de comenzar Antes de comenzar Limpie el horno a fondo antes de utilizarlo por primera vez. Luego, retire los accesorios, programe el horno para hornear y luego haga funcionar el horno a 400 °F durante 1 hora. Se notará un olor característico. Esto es normal.Asegú...
Page 82 - Como regular el electrodoméstico para la cocción en superficie
24 Español Super ficie de c oc ción Superficie de cocción Indicador de superficie caliente • Se ilumina cuando la unidad se encuentra encendida o caliente al tacto. • Permanece encendido aún después de que se haya apagado la unidad. • Emite luz hasta que la unidad se haya enfriado hasta aproximadame...
Page 84 - Utilización de los recipientes de cocción correctos
26 Español Super ficie de c oc ción Superficie de cocción Utilización de los recipientes de cocción correctos Utilizar los recipientes de cocción correctos puede evitar muchos problemas, tales como cocción despareja o tiempos de cocción demasiado largos. Utilizar las cacerolas y sartenes adecuadas r...
Page 85 - Protección de la cubierta
Español 27 Super ficie de c oc ción Protección de la cubierta Limpieza • Limpie la cubierta antes de utilizarla por primera vez. • Limpie su cubierta diariamente o después de cada uso. Esto mantendrá la buena apariencia de la cubierta y puede evitar daños. • Si durante la cocción ocurre un derrame, ...
Page 86 - Funcionamiento del horno; Panel de control del horno; Bloqueo del horno
28 Español Funcionamient o del horno Funcionamiento del horno Funcionamiento del horno Panel de control del horno LEA LAS INSTRUCCIONES CON ATENCIÓN ANTES DE UTILIZAR EL HORNO. Para obtener un funcionamiento satisfactorio del horno, familiarícese con las diversas características y funciones que se d...
Page 87 - Ajuste del reloj; Cómo programar el temporizador de cocina
Español 29 Funcionamient o del horno Ajuste del reloj El reloj debe ajustarse para mostrar la hora correcta y permitir el buen funcionamiento de las opciones de temporizador del horno. • La hora del día no se puede cambiar mientras estén en proceso una cocción con temporizador, una cocción diferida ...
Page 88 - Retrasar el inicio
30 Español Funcionamient o del horno Funcionamiento del horno Retrasar el inicio En una cocción con inicio retardado, el temporizador del horno enciende y apaga el horno a las horas que usted seleccione con anticipación. • La función de retrasar el inicio se puede utilizar únicamente en combinación ...
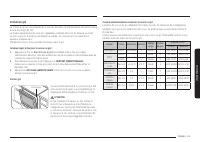
Page 89 - Uso de las parrillas del horno
Español 31 Funcionamient o del horno Uso de las parrillas del horno Posiciones de las parrillas en el horno 1 2 3 4 5 6 7 Posición recomendada de las parrillas para cocción TIPO DE ALIMENTO POSICIÓN DE LA PARRILLA Hamburguesas a la parrilla 7 Carnes o cortes pequeños de ave, pescado, a la parrilla 4...
Page 90 - Hornear
32 Español Funcionamient o del horno Funcionamiento del horno Antes de usar las parrillas El horno tiene dos parrillas.Cada parrilla tiene topes que requieren una colocación correcta sobre las guías. Estos topes impedirán que la parrilla se salga completamente RETIRAR LAS PARRILLAS 1. Jale la parril...
Page 91 - Asar a la parrilla
Español 33 Funcionamient o del horno Asar a la parrilla Asar a la parrilla es un método de cocinar cortes tiernos de carne mediante el calor directo bajo el elemento de asado a la parrilla del horno.La elevada temperatura realiza una cocción rápida y deja el exterior con un aspecto sabroso y dorado....
Page 92 - Uso de la función de levantamiento del pan; Cómo usar la función de mantener caliente
34 Español Funcionamient o del horno Funcionamiento del horno Uso de la función de levantamiento del pan Levantamiento del pan Esta función automáticamente genera la temperatura óptima para el proceso de levantamiento del pan y, por ende, no requiere ningún ajuste de temperatura.Si presiona Levantam...
Page 93 - Uso de la función de control inteligente; Uso de la función de control por voz
Español 35 Funcionamient o del horno Uso de la función de control inteligente Las funciones disponibles desde la aplicación SmartThings pueden no funcionar adecuadamente si el estado de la comunicación es deficiente o si el producto está instalado en un lugar con una señal Wi-Fi débil.Consulte la ta...
Page 94 - Cómo usar la función de opciones
36 Español Funcionamient o del horno Funcionamiento del horno Cómo usar la función de opciones Esta función le permite controlar diversas opciones de control electrónico. Consulte la siguiente tabla para ver las opciones disponibles. El menú de opciones solo está disponible cuando el horno no está e...
Page 95 - Uso de la función Sabbat
Español 37 Funcionamient o del horno Activar/Desactivar sonido Mediante esta función, puede configurar los controles del horno para que funcionen silenciosamente. Cómo activar o desactivar el sonido 1. Presione Opciones durante 3 segundos y luego 4 en el teclado numérico. 2. Presione 1 (Activado) o ...
Page 97 - Mantenimiento de su electrodoméstico; Autolimpieza
Español 39 Mant enimient o de su elec tr odomé stic o Mantenimiento de su electrodoméstico Autolimpieza Este horno autolimpiante utiliza altas temperaturas (mucho más altas que las temperaturas de cocción) para eliminar por incineración los restos de grasa y otros residuos o reducirlas a fino polvo ...
Page 99 - Limpiar al vapor
Español 41 Mant enimient o de su elec tr odomé stic o Limpiar al vapor Cómo programar el horno para limpiar con vapor Para limpieza liviana, la función de limpieza con vapor ahorra tiempo y energía. Si se requiere un trabajo de limpieza más intenso, use la función de autolimpieza. 1. Retire del horn...
Page 100 - Cuidado y limpieza del horno
42 Español Mant enimient o de su elec tr odomé stic o Mantenimiento de su electrodoméstico Limpieza de las partes pintadas y las terminaciones decorativas • Para su limpieza general, utilice un paño con agua jabonosa caliente. • Para residuos más resistentes o grasa acumulada, aplique un detergente ...
Page 102 - Cuidado y limpieza de la cubierta de vidrio
44 Español Mant enimient o de su elec tr odomé stic o Mantenimiento de su electrodoméstico Cómo quitar los residuos quemados 1. Espere que la cubierta se enfríe. 2. Esparza unas pocas gotas de limpiador para cubiertas vitrocerámicas sobre toda la zona de residuos quemados. 3. Utilice un paño de limp...
Page 104 - Cómo retirar y volver a instalar la puerta del horno
46 Español Mant enimient o de su elec tr odomé stic o Mantenimiento de su electrodoméstico Fig. 2 Fig. 2 5. Levante la puerta y jale hacia afuera hasta que el brazo de la bisagra esté fuera de la ranura (Fig. 2). Cómo volver a instalar la puerta Brazo de la bisagra Brazo de la bisagra Borde Borde in...
Page 105 - Cómo retirar y volver a instalar el cajón de almacenamiento
Español 47 Mant enimient o de su elec tr odomé stic o Posición trabada Posición trabada Posición destrabada Posición destrabada Traba de la Traba de la bisagra bisagra 3. Abra la puerta por completo. Si la puerta no se abre completamente, la muesca no se encuentra correctamente insertada en el borde...
Page 106 - Recambio de la luz del horno; Resolución de problemas
48 Español Mant enimient o de su elec tr odomé stic o Mantenimiento de su electrodoméstico Recambio de la luz del horno La luz del horno es una bombilla para electrodomésticos estándar de 40 watts. Se encenderá al abrirse la puerta del horno. Cuando la puerta del horno se encuentre cerrada, presione...
Page 111 - Códigos de información
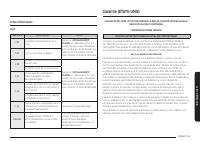
Español 53 Garantía (EE.UU .) Garantía (EE.UU.) NO LA DESECHE. ESTA HOJA REEMPLAZA LA PÁGINA DE GARANTÍA EN LA GUÍA DE USO Y MANTENIMIENTO ESTUFA ELÉCTRICA SAMSUNG GARANTÍA LIMITADA AL COMPRADOR ORIGINAL CON COMPROBANTE DE COMPRA El presente producto de la marca SAMSUNG, tal como lo provee y distrib...
Page 114 - Apéndice; Anuncio de código abierto
56 Español Apéndic e Apéndice Anuncio de código abierto El software incluido en este producto contiene software de código abierto. Consulte la información de licencia de origen relacionada con este producto a través de la siguiente URL http://opensource.samsung.com/opensource/SMART_TP2_0/seq/0. SALV...
Page 115 - Notas
Page 117 - Cuisinière électrique
Cuisinière électrique Manuel d'utilisation NE63*631*S*
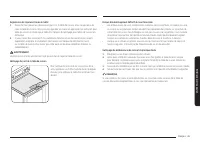
Page 118 - APRÈS; AVERTISSEMENT; . L'appareil risquerait de basculer et provoquer; Dispositif anti-basculement
2 Français AVERTISSEMENT Afin d'éviter tout risque de basculement de la cuisinière, fixez-la correctement à l'aide d'un dispositif anti-basculement. APRÈS AVOIR INSTALLÉ LA CUISINIÈRE, VÉRIFIEZ QUE LE DISPOSITIF ANTI-BASCULEMENT EST BIEN INSTALLÉ ET FIXÉ . Reportez-vous au manuel d'installation pour...
Page 119 - DÉCLARATION DE LA FCC :; Informations relatives à la réglementation; ATTENTION; MISE EN GARDE DE LA FCC
Français 3 DÉCLARATION DE LA FCC : Cet appareil a été testé ; il est conforme aux limitations applicables aux appareils numériques de classe B, selon le paragraphe 15 de la réglementation de la FCC. Ces limitations sont destinées à assurer une protection suffisante contre les interférences néfastes ...
Page 121 - Table des matières
Français 5 Table de s matièr es Table des matières Consignes de sécurité importantes 6 Présentation de votre nouvelle cuisinière 21 Présentation 21Accessoires fournis 21 Avant de commencer 22 Conseils pour économiser de l'énergie 22 Table de cuisson 22 À propos de la table de cuisson 22 Comment régl...
Page 122 - CONSERVEZ PRÉCIEUSEMENT CES INSTRUCTIONS; Suivez scrupuleusement les consignes.; Consignes de sécurité importantes; Le présent guide ne couvre; Symboles de sécurité importants et précautions; Signification des icônes et des symboles utilisés dans ce manuel :; Risques ou manipulations dangereuses susceptibles d'entraîner
6 Français Consigne s de sécurit é impor tantes Consignes de sécurité importantes Consignes de sécurité importantes CONSERVEZ PRÉCIEUSEMENT CES INSTRUCTIONS ATTENTION Afin de réduire les risques d'incendie, d'explosion, d'électrocution ou de blessures lors de l'utilisation de votre cuisinière, vous ...
Page 123 - POUR VOTRE SÉCURITÉ; Entretien par l'utilisateur
Français 7 Consigne s de sécurit é impor tantes CONSERVEZ PRÉCIEUSEMENT CES INSTRUCTIONS AVERTISSEMENT DE LA PROPOSITION 65 ADOPTÉE PAR LA CALIFORNIE AVERTISSEMENT Cancer et Troubles de l'appareil reproducteur - www.P65Warnings.ca.gov POUR VOTRE SÉCURITÉ Lorsque vous utilisez des appareils électriqu...
Page 124 - Portez les vêtements appropriés.
8 Français Consigne s de sécurit é impor tantes Consignes de sécurité importantes Consignes de sécurité importantes CONSERVEZ PRÉCIEUSEMENT CES INSTRUCTIONS • S'il se produit un incendie à l'intérieur du four pendant l'auto-nettoyage, éteignez le four et attendez que le feu s'éteigne. Ne forcez jama...
Page 126 - Ne stockez pas d'objets lourds au-dessus de la table de cuisson; SÉCURITÉ ÉLECTRIQUE; Installation appropriée
10 Français Consigne s de sécurit é impor tantes Consignes de sécurité importantes Consignes de sécurité importantes CONSERVEZ PRÉCIEUSEMENT CES INSTRUCTIONS • Assurez-vous que vous savez quel bouton de commande correspond à chaque foyer. Assurez-vous d'avoir allumé le bon foyer. • Éteignez toujours...
Page 127 - FOUR; NE TOUCHEZ PAS LES ÉLÉMENTS CHAUFFANTS OU LES
Français 11 Consigne s de sécurit é impor tantes CONSERVEZ PRÉCIEUSEMENT CES INSTRUCTIONS SÉCURITÉ ENFANTS AVERTISSEMENT • Cet appareil n'est pas conçu pour être utilisé par des jeunes enfants ou des personnes invalides non assistés par un adulte responsable. • Les jeunes enfants ne doivent pas util...
Page 128 - COMMANDE À DISTANCE
12 Français Consigne s de sécurit é impor tantes Consignes de sécurité importantes Consignes de sécurité importantes CONSERVEZ PRÉCIEUSEMENT CES INSTRUCTIONS • Soyez prudent lorsque vous ouvrez la porte. Laissez l'air chaud ou la vapeur s'échapper avant de retirer les aliments du four ou de les plac...
Page 129 - Ne nettoyez jamais le joint de la porte.
Français 13 Consigne s de sécurit é impor tantes CONSERVEZ PRÉCIEUSEMENT CES INSTRUCTIONS FOURS AUTO-NETTOYANTS Ne nettoyez jamais le joint de la porte. Le joint de la porte est indispensable pour assurer une bonne étanchéité. Veillez à ne pas frotter, endommager ni déplacer le joint. • Ne laissez j...
Page 130 - Ne faites rien cuire sur une table de cuisson brisée.
14 Français Consigne s de sécurit é impor tantes Consignes de sécurité importantes Consignes de sécurité importantes CONSERVEZ PRÉCIEUSEMENT CES INSTRUCTIONS SURFACES DE CUISSON EN VITROCÉRAMIQUE • NE TOUCHEZ PAS LES FOYERS OU LES ZONES SITUÉES À PROXIMITÉ. Les foyers peuvent être chauds même s'ils ...
Page 136 - Évitez de surchauffer les aliments.; - Cela pourrait entraîner une décoloration, une déformation,
20 Français Consigne s de sécurit é impor tantes Consignes de sécurité importantes Consignes de sécurité importantes CONSERVEZ PRÉCIEUSEMENT CES INSTRUCTIONS • N'utilisez pas de récipients fermés hermétiquement. Retirez les opercules et les couvercles avant la cuisson. Les récipients fermés hermétiq...
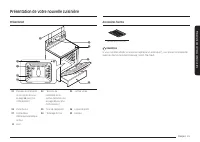
Page 137 - Accessoires fournis; Présentation de votre nouvelle cuisinière; Présentation
Français 21 Pr ésentation de v otr e nouv elle cuisinièr e Accessoires fournis Grilles de cuisson (2) * REMARQUE Si vous souhaitez acheter un accessoire repéré par un astérisque (*), vous pouvez le commander auprès du Centre d'assistance Samsung (1-800-726-7864). Présentation de votre nouvelle cuisi...
Page 138 - Avant de commencer; Conseils pour économiser de l'énergie; Table de cuisson; À propos de la table de cuisson
22 Français Av ant de c ommenc er Avant de commencer Avant de commencer Nettoyez soigneusement le four avant de l'utiliser pour la première fois. Ensuite, retirez les accessoires, lancez un cycle de cuisson traditionnelle et faites fonctionner le four à 400 °F pendant 1 heure. Il est normal qu'une o...
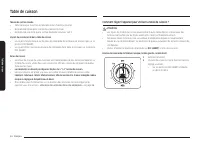
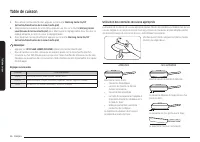
Page 140 - Comment régler l'appareil pour utiliser la table de cuisson ?
24 Français Table de cuis son Table de cuisson Témoin de surface chaude • S'allume lorsque la surface est allumée ou est chaude au toucher. • Reste allumé même après la mise hors tension du foyer. • Reste allumé jusqu'à ce que la surface descende à environ 150 °F. Voyant de marche/arrêt de la table ...
Page 142 - Utilisation des ustensiles de cuisine appropriés
26 Français Table de cuis son Table de cuisson Utilisation des ustensiles de cuisine appropriés L'utilisation de l'ustensile de cuisine approprié permet d'éviter de nombreux problèmes tels qu'une cuisson inégale ou un temps de cuisson trop long. Utiliser les casseroles et plats adaptés permet de réd...
Page 143 - Protection de la table de cuisson
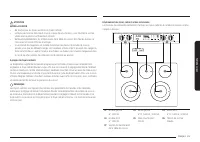
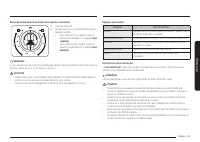
Français 27 Table de cuis son Protection de la table de cuisson Nettoyage • Nettoyez la table de cuisson avant de l'utiliser pour la première fois. • Nettoyez votre table de cuisson quotidiennement ou après chaque utilisation. Ainsi, vous conserverez votre table de cuisson en bon état et éviterez le...
Page 144 - Utilisation du four; Panneau de commande du four; Verrouillage du four
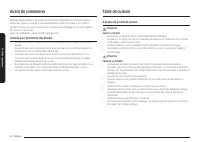
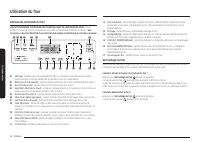
28 Français Utilisation du f our Utilisation du four Utilisation du four Panneau de commande du four LISEZ ATTENTIVEMENT LES CONSIGNES D'UTILISATION AVANT DE VOUS SERVIR DU FOUR. Afin de profiter au mieux de votre four, familiarisez-vous avec les fonctionnalités décrites ci-dessous. Vous trouverez u...
Page 145 - Réglage de la minuterie
Français 29 Utilisation du f our Réglage de l'horloge L' horloge doit être réglée sur l'heure correcte afin que la minuterie automatique du four fonctionne correctement. • L'heure ne peut pas être modifiée durant la cuisson minutée, la cuisson minutée différée ou le cycle d'auto-nettoyage. Comment r...
Page 146 - Départ différé; Activation et désactivation de l'éclairage du four
30 Français Utilisation du f our Utilisation du four Départ différé Durant la cuisson minutée différée, la minuterie du four permet d'allumer et d'éteindre le four aux heures que vous avez sélectionnées préalablement. • Vous ne pouvez utiliser la fonction de Départ différé qu'en parallèle avec une a...
Page 147 - Utilisation des grilles du four
Français 31 Utilisation du f our Utilisation des grilles du four Hauteurs de grille 1 2 3 4 5 6 7 Position recommandée de la grille pour la cuisson TYPE D'ALIMENTS HAUTEUR DE GRILLE Cuisson d'hamburgers au gril 7 Gril de viandes ou de petits morceaux de volaille, poisson 4 à 6 Couronnes, quatre-quar...
Page 148 - Cuisson traditionnelle
32 Français Utilisation du f our Utilisation du four Avant d'utiliser les grilles Le four est équipé de deux grilles.Chacune comporte une butée qui doit être correctement installée sur son support. Les butées empêchent la grille de sortir complètement de son logement. RETRAIT DES GRILLES 1. Tirez la...
Page 149 - Cuisson au gril
Français 33 Utilisation du f our Cuisson au gril La cuisson au gril est une méthode de cuisson des morceaux de viande tendres utilisant la chaleur directe sous le gril du four.La chaleur élevée permet de cuire plus rapidement et permet de brunir les aliments. Le mode Cuisson au gril est le mode le p...
Page 150 - Utilisation de la fonction Pain précuit; Utilisation de la fonction Maintien au chaud
34 Français Utilisation du f our Utilisation du four Utilisation de la fonction Pain précuit Pain précuit La fonction Pain précuit fournit automatiquement la température optimale pour le processus de précuisson du pain. Par conséquent, aucun réglage de température n'est nécessaire.Si vous appuyez su...
Page 151 - Utilisation de la fonction Smart Control; Utilisation de la fonction commande vocale
Français 35 Utilisation du f our Utilisation de la fonction Smart Control Les fonctions pouvant être actionnées depuis l'application SmartThings peuvent ne pas fonctionner avec fluidité si les conditions de communication se détériorent ou si l'appareil est installé dans un endroit avec un faible sig...
Page 152 - Utilisation de la fonction des options
36 Français Utilisation du f our Utilisation du four Utilisation de la fonction des options Cette fonction vous permet de contrôler plusieurs options de commande électronique. Reportez-vous au tableau suivant pour connaître les options disponibles. Le menu des options est disponible uniquement lorsq...
Page 153 - Utilisation de la fonction Sabbat
Français 37 Utilisation du f our Activation/Désactivation du son La fonction Activation/Désactivation du son vous permet de couper le son des commandes du four. Comment activer ou désactiver le son ? 1. Appuyez sur Options pendant 3 secondes, puis sur la touche 4 du pavé numérique. 2. Appuyez sur 1 ...
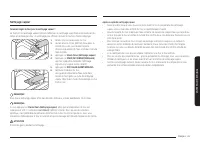
Page 155 - Entretien de votre appareil
Français 39 Entretien de v otr e appar eil Entretien de votre appareil Auto-nettoyage Ce four auto-nettoyant utilise des températures élevées (bien supérieures aux températures de cuisson) pour brûler complètement les résidus de graisse ou les réduire en fine poudre qu'il vous suffit d'essuyer à l'a...
Page 157 - Nettoyage vapeur
Français 41 Entretien de v otr e appar eil Nettoyage vapeur Comment régler le four pour le nettoyage vapeur ? La fonction de nettoyage vapeur permet d'effectuer un nettoyage superficiel en économisant du temps et de l'énergie. Pour un nettoyage plus efficace, utilisez la fonction d'auto-nettoyage. 1...
Page 158 - Entretien et nettoyage du four
42 Français Entretien de v otr e appar eil Entretien de votre appareil Nettoyage des parties peintes et ornements décoratifs • Pour le nettoyage sommaire, utilisez un torchon imbibé d'eau chaude savonneuse. • Pour ôter les résidus incrustés et la graisse accumulée, versez un nettoyant liquide direct...
Page 160 - Entretien et nettoyage de la table de cuisson vitrée
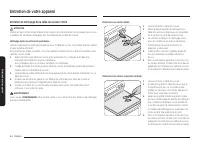
44 Français Entretien de v otr e appar eil Entretien de votre appareil Élimination des résidus brûlés 1. Laissez refroidir la table de cuisson. 2. Étalez quelques gouttes de nettoyant pour table de cuisson en céramique sur l'ensemble de la surface couverte de résidus brûlés. 3. En utilisant un tampo...
Page 162 - Retrait et réinstallation de la porte du four
46 Français Entretien de v otr e appar eil Entretien de votre appareil Fig. 2 Fig. 2 5. Soulevez et retirez la porte jusqu'à ce que le bras de la charnière soit enlevé de son logement (Fig. 2). Comment réinstaller la porte ? Bras de la charnière Bras de la charnière Partie Partie inférieure inférieu...
Page 163 - Retrait et réinstallation du tiroir de rangement
Français 47 Entretien de v otr e appar eil Position de verrouillage Position de verrouillage Position de déverrouillage Position de déverrouillage Verrou de la Verrou de la charnière charnière 3. Ouvrez la porte au maximum. Si la porte ne s'ouvre pas complètement, c'est que la partie creuse n'est pa...
Page 164 - Remplacement de l'ampoule du four; Dépannage
48 Français Entretien de v otr e appar eil Entretien de votre appareil Remplacement de l'ampoule du four L'éclairage du four nécessite une ampoule standard de 40 watts. L'éclairage s'active à l'ouverture de la porte. Lorsque la porte du four est fermée, appuyez sur pour activer ou désactiver l'éclai...
Page 172 - Annexe; Annonce de contenu libre
56 Français Anne xe Annexe Annonce de contenu libre Le présent produit contient un logiciel libre. L’URL http://opensource.samsung.com/opensource/SMART_TP2_0/seq/0 suivante permet d’accéder aux informations sur la licence de source libre relatives à ce produit. SAUF EXCEPTION MENTIONNÉE DANS LE PRÉS...
Page 173 - Notes