Page 2 - AFTER THE RANGE; WARNING
anti-tip device WARNING WARNING - To reduce the risk of tipping the range, the range must be secured by a properly installed Anti-Tip device. AFTER THE RANGE HAS BEEN INSTALLED, CONFIRM THAT THE ANTI-TIP DEVICE HAS BEEN PROPERLY INSTALLED AND VERIFY THAT THE ANTI- TIP DEVICE IS PROPERLY ENGAGED. Ref...
Page 3 - contents
contents IMPORTANT SAFETY INSTRUCTIONS 5 5 Important safety instructions INSTALLING THE OVEN 18 18 About this section18 For your safety PREPARING TO INSTALL THE RANGE 19 19 Remove packaging19 Prepare tools & Parts20 Checking the installation site CONNECTING THE POWER 22 22 Step 1. Meeting electr...
Page 4 - SURFACE COOKING; WARRANTY
contents SURFACE COOKING 33 33 About surface cooking35 How to set the appliance for surface cooking37 Using the proper cookware37 Choosing the proper cookware38 Protecting the cooktop surface OPERATING THE OVEN 39 39 The oven control panel40 Using the oven racks42 Minimum and maximum settings42 Baki...
Page 5 - important safety instructions; WHAT YOU NEED TO KNOW ABOUT; IMPORTANT SAFETY SYMBOLS AND PRECAUTIONS; What the icons and symbols in this user manual mean:; severe; personal injury when using your oven, follow these basic
INTRODUCING Y OUR NEW RANGE important safety instructions Read and follow all instructions before using your oven to prevent the risk of fire, electric shock, personal injury, or damage when using the range. This guide does not cover all possible conditions that may occur. Always contact your servic...
Page 6 - When using electrical appliances, you should follow basic safety; range or on the back guard of a range.
CALIFORNIA PROPOSITION 65 WARNING WARNING Cancer and Reproductive Harm - www.P65Warnings.ca.gov. FOR YOUR SAFETY When using electrical appliances, you should follow basic safety precautions, including the following: CAUTION Use this appliance only for its intended purpose as described in this Owner’...
Page 7 - Storage in or on appliance.
INTRODUCING Y OUR NEW RANGE If there is a fire in the oven during baking, smother the fire by closing the oven door and turning the oven off or by using a multi-purpose dry chemical or foam-type fire extinguisher.If there is a fire in the oven during self-clean, turn the oven off and wait for the fi...
Page 8 - SURFACE COOKING UNITS
SURFACE COOKING UNITS Never leave surface units unattended at high heat settings. Boilovers cause smoking and greasy spillovers that may ignite. To avoid oil spillover and fire, use a minimum amount of oil when shallow pan-frying and avoid cooking frozen foods with excessive amounts of ice. Do not l...
Page 9 - DO NOT store heavy items above the cooktop surface that could; ELECTRICAL SAFETY
INTRODUCING Y OUR NEW RANGE Be sure you know which control knob operates each surface unit. Always make sure you have turned on the correct surface unit. Always turn the surface units off before removing cookware. When preparing flaming foods under the hood, turn the fan on. Keep an eye on foods bei...
Page 10 - CHILD SAFETY; OVEN; DO NOT TOUCH THE HEATING ELEMENTS OR INTERIOR
CHILD SAFETY WARNING WARNING- This appliance is not intended for use by young children or infirm persons without the adequate supervision of a responsible adult. Young children should be supervised to ensure that they do not play with the appliance. Keep children away from the oven when you open or ...
Page 12 - VENTILATING HOOD; Clean ventilating hoods frequently.; GLASS/CERAMIC COOKING SURFACES; DO NOT TOUCH SURFACE UNITS OR AREAS NEAR THE UNITS.; CRITICAL INSTALLATION WARNINGS
Do not use any commercial oven cleaner or oven liner protective coating of any kind in or on the outside of the oven. Use only a ceramic cooktop cleaner.Remove the nickel oven shelves from the oven before you begin the self- cleaning cycle, or they may discolor.If the self-clean mode malfunctions, t...
Page 13 - CRITICAL USAGE WARNINGS
INTRODUCING Y OUR NEW RANGE Plug the power cord into a properly grounded outlet with the proper configuration. Your oven should be the only item connected to this circuit.Keep all packaging materials out of the reach of children. Children may use them for play and injure themselves.Install your appl...
Page 16 - USAGE CAUTIONS
CAUTION USAGE CAUTIONS If the surface is cracked, turn the appliance off. - Failing to do so may result in electric shock. Dishes and containers can become hot. Handle with care.Hot foods and steam can cause burns. Carefully remove container coverings, directing the steam away from hands and face.Re...
Page 17 - CRITICAL CLEANING WARNINGS
INTRODUCING Y OUR NEW RANGE Do not place food or heavy objects over the edge of the oven door. - If you open the door, the food or object may fall and this may result in burns or injury. Do not abruptly cool the door, the inside of the appliance, or a dish by pouring water over it during or just aft...
Page 18 - installing the oven; ABOUT THIS SECTION; Important note to the installer; Important note to the consumer; FOR YOUR SAFETY
installing the oven ABOUT THIS SECTION READ THESE INSTRUCTIONS COMPLETELY AND CAREFULLY. Important note to the installer • Read all instructions contained in these installation instructions before installing the range. • Remove all packing materials from the oven compartments before connecting the e...
Page 19 - REMOVE PACKAGING; The tools you will need; preparing to install the range
INTRODUCING Y OUR NEW RANGE REMOVE PACKAGING Remove packaging materials. Remove the supporter frame located on the back of the cooktop glass. Failure to remove packaging materials could result in damage to the appliance. PREPARE TOOLS & PARTS The tools you will need Drill Adjustable Wrench Plier...
Page 20 - CHECKING THE INSTALLATION SITE; Clearances and dimensions; Optional rear filler kit
CHECKING THE INSTALLATION SITE Clearances and dimensions To install the range, refer to the following figure. CAUTION CAUTION This range has been designed to comply with the maximum allowable wood cabinet temperatures of 194 °F. Make sure the wall covering, countertops and cabinets around the range ...
Page 21 - Minimum dimensions; IMPORTANT
INTRODUCING Y OUR NEW RANGE Minimum dimensions IMPORTANT To eliminate the risk of burns or fire caused by reaching over heated surface units, avoid having cabinet storage space located above the surface units. If you have cabinet storage space over the heating elements, you can reduce the risk by in...
Page 22 - connecting the power; STEP 1. MEETING ELECTRICAL CONNECTION REQUIREMENTS; NOTE
connecting the power STEP 1. MEETING ELECTRICAL CONNECTION REQUIREMENTS CAUTION CAUTION For personal safety, do not use an extension cord with this appliance. Remove house fuse or open circuit breaker before beginning installation. This appliance must be supplied with the proper voltage and frequenc...
Page 23 - STEP 2. ACCESSING THE POWER CORD CONNECTION
SURF A CE COOKING STEP 2. ACCESSING THE POWER CORD CONNECTION Loosen and then remove the rear access cover screw with a screwdriver. Remove the rear access cover by pull right and then out. The terminal block will then be accessible. Access cover Terminal block Specified power-supply-cord kit rating...
Page 24 - STEP 3. INSTALLING THE POWER CORD; Installing a 3-wire power cord
STEP 3. INSTALLING THE POWER CORD For power cord installations, hook the strain relief over the power cord hole (1 3 / 8 ") located below the rear of the drawer body. Insert the power cord through the strain relief and tighten the device. Strain relief Power cord Conduit connection plate • You m...
Page 25 - Installing a 4-wire power cord
SURF A CE COOKING Installing a 4-wire power cord WARNING WARNING The neutral wire of the supply circuit must be connected to the neutral terminal located in the lower center of the terminal block. The power leads must be connected to the lower left and the lower right terminals of the terminal block...
Page 26 - STEP 4. INSTALLING THE CONDUIT; Installing a 3-wire conduit
STEP 4. INSTALLING THE CONDUIT Remove the conduit connection plate and rotate it as shown below.The conduit hole (1 1 / 8 ") must be used. 1 1 / 8 " 1 3 / 8 " 1 1 / 8 " 1 3 / 8 " 1 . Prepare the conduit cord as shown in Figure 1. 2 . Install the conduit cord as shown in Figure 2....
Page 27 - Installing a 4-wire conduit; STEP 5. REPLACING THE ACCESS COVER
SURF A CE COOKING Installing a 4-wire conduit • Aluminum building wire may be used but it must be rated for the correct amperage and voltage to make the connection. Connect the wires as described below. • The wire you use, the location and enclosure of splices, etc., must conform to good wiring prac...
Page 28 - installing the range; INSTALLING THE ANTI-TIP DEVICE; Install the bracket using the template
installing the range INSTALLING THE ANTI-TIP DEVICE WARNING WARNING To reduce the risk of tipping, you must secure the appliance by properly installing the Anti-Tip device packed with the appliance.• Refer to the installation instructions supplied with the bracket.• If the anti-tip device is not ins...
Page 29 - Check your adjustments; FINALIZING THE INSTALLATION
USING THE W ARMING DRA WER SURF A CE COOKING 3. Check your adjustments Use a spirit level to check your adjustments. Place the level diagonally on the oven rack or surface cooktop, and confirm the range is level in the two directions shown below. 1. Check direction 1. 2. Check direction 2. If the sp...
Page 30 - introducing your new range; OVERVIEW
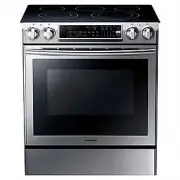
introducing your new range OVERVIEW WHAT’S INCLUDED WITH YOUR RANGE * Wire racks (2) * Recessed rack (1) * Temp probe (1) If you need an accessory marked with a *, you can buy it from the Samsung Contact Center (1-800-726-7864). Oven door Convection fan Shelf position Glass surface Automatic oven li...
Page 31 - SETTING THE CLOCK; How to set the clock; CONTROL PANEL DISPLAY MODES; Sleep Mode
OPERA TING THE O VEN USING THE W ARMING DRA WER SURF A CE COOKING getting started before you begin SETTING THE CLOCK The clock must be set to the correct time of day for the automatic oven timing functions to work properly. • The time of day cannot be changed during a timed cooking, a delay-timed co...
Page 32 - TURNING THE OVEN LIGHT ON AND OFF; CONTROL LOCKOUT; How to activate the control lockout feature; How to unlock the controls; SETTING THE KITCHEN TIMER; How to set the timer
TURNING THE OVEN LIGHT ON AND OFF • The oven light turns on automatically when the door is opened. • The oven light turns off automatically when the door is closed. • You can turn the oven light on and off manually by pressing Oven Light . CONTROL LOCKOUT Control lockout lets you lock the buttons on...
Page 33 - surface cooking; ABOUT SURFACE COOKING; About the radiant surface elements
MAINT AINING Y OUR APPLIANCE OPERA TING THE O VEN USING THE W ARMING DRA WER SURF A CE COOKING surface cooking ABOUT SURFACE COOKING CAUTION BEFORE COOKING • Do not use the glass cooktop surface as a cutting board. • Do not place or store items that can melt or catch fire on the glass cooktop, even ...
Page 34 - Location of the radiant surface elements and controls; Hot surface indicator; Cooking areas
Location of the radiant surface elements and controls The radiant control knobs operate the radiant surface elements on the cooktop as shown below. 1 5 2 3 4 6 1. Left Front: 6"/9", 3000 W 2. Left Rear: 6", 1200 W 3. Right Front: 9"/12", 3000 W 4. Right Rear: 6", 1200 W 5. Wa...
Page 35 - HOW TO SET THE APPLIANCE FOR SURFACE COOKING; Recommended settings
MAINT AINING Y OUR APPLIANCE OPERA TING THE O VEN USING THE W ARMING DRA WER SURF A CE COOKING HOW TO SET THE APPLIANCE FOR SURFACE COOKING CAUTION • The surface elements may be hot even when off and burns can occur. Do not touch the surface elements until they have cooled down sufficiently. • At hi...
Page 36 - Using the warming center
Using the warming center The warming center , located in the back center of the glass surface, will keep hot, cooked food at serving temperature. • The surface warmer will not glow red like the cooking elements. CAUTION • Do not warm food on the warming center for more than two hours.• Use only cook...
Page 38 - PROTECTING THE COOKTOP SURFACE; Cleaning
PROTECTING THE COOKTOP SURFACE Cleaning • Clean the cooktop before using it for the first time. • Clean your cooktop daily or after each use. This will keep your cooktop looking good and can prevent damage. • If a spillover occurs while you are cooking, immediately clean the spill from the cooking a...
Page 39 - operating the oven; THE OVEN CONTROL PANEL
TROUBLESHOO TING MAINT AINING Y OUR APPLIANCE OPERA TING THE O VEN USING THE W ARMING DRA WER SURF A CE COOKING operating the oven THE OVEN CONTROL PANEL READ THE INSTRUCTIONS CAREFULLY BEFORE USING THE OVEN. For the best results, familiarize yourself with the various features and functions of the o...
Page 40 - USING THE OVEN RACKS; Oven rack positions; Recessed rack position
USING THE OVEN RACKS Oven rack positions 1 2 3 4 5 6 7 The single oven has 7 rack positions (1~7). TYPE OF FOOD RACK POSITION Muffins, Browines, Cookies, Cupcakes, Layer cakes, Pies, Biscuits 4 Frozen pies 4 Casserole 4 Bundt or pound cakes 3 Angel food cakes 2 Small roast, hams 2 Turkey, Large roas...
Page 41 - Rack and Pan Placement; Before using the racks
TROUBLESHOO TING MAINT AINING Y OUR APPLIANCE OPERA TING THE O VEN USING THE W ARMING DRA WER SURF A CE COOKING Rack and Pan Placement Centering the baking pans in the oven as much as possible will produce better results. If baking with more than one pan, place the pans so each has at least 1˝ to 1½...
Page 42 - How to set the temperature
MINIMUM AND MAXIMUM SETTINGS All of the features listed in the table below have minimum and maximum time or temperature settings. A beep will sound each time you press a pad on the control panel and the entry is accepted. An error tone will sound in the form of a long beep if the temperature or time...
Page 43 - CONVECTION BAKING; Tip for convection baking; How to set the oven for convection baking
TROUBLESHOO TING MAINT AINING Y OUR APPLIANCE OPERA TING THE O VEN USING THE W ARMING DRA WER SURF A CE COOKING CONVECTION BAKING 1 2 3 4 5 6 7 By using the convection bake feature, you will be able to cook faster. You can program the oven for convection baking at any temperature between 175 °F and ...
Page 44 - CONVECTION ROASTING; How to set the oven for convection roasting; TIMED COOKING; How to set the oven for timed cooking
CONVECTION ROASTING Convection roasting is good for cooking large tender cuts of meat, uncovered. Heat comes from the top heating element. The convection fan circulates the heated air evenly over and around the food. Meat and poultry are browned on all sides as if they were cooked on a rotisserie. T...
Page 45 - DELAY START; How to set the oven for delay start
TROUBLESHOO TING MAINT AINING Y OUR APPLIANCE OPERA TING THE O VEN USING THE W ARMING DRA WER SURF A CE COOKING Place food in the oven after preheating if the recipe calls for it. Preheating is important for good results when baking cakes, cookies, pastry, and breads. After the oven has reached the ...
Page 46 - BROILING; How to set the oven for broiling; Broiling Recommendation Guide
BROILING Broil mode is best for meats, fish, and poultry up to 1" thick. Broiling is a method of cooking tender cuts of meat by direct heat under the broil element of the oven. The high heat cooks quickly and gives a rich, brown outer appearance. Temp probe cannot be used with this mode. How to ...
Page 47 - USING THE FAVORITE COOK FEATURE; How to record a recipe setting; USING THE HEALTHY COOK FEATURE
TROUBLESHOO TING MAINT AINING Y OUR APPLIANCE OPERA TING THE O VEN USING THE W ARMING DRA WER SURF A CE COOKING Food Doneness Size Thickness Rack position Cooking time 1st side 2nd side Beef steaks Rare - 1" 5 5:00 3:30-4:00 Medium - 1-1½" 5 7:00 5:00-6:00 Well done - 1½" 5 8:00 6:00-7:0...
Page 48 - How to set the Rice casserole function; How to set the Baked potato function; How to set the Grilled chicken function; How to set the Salmon steak function
How to set the Rice casserole function 1 . Press Healthy Cook . The default temperature is 375 °F. 2 . Press 1 (Rice casserole) on the number pad. Enter the temperature you want on the number pad. 3 . Press Oven Start/Set to begin rice casserole cooking. For the best results, cook rice casseroles wi...
Page 50 - USING THE KEEP WARM FUNCTION; How to use the Keep Warm function; USING THE BREAD PROOF FUNCTION
Food Quantity Rack Position Default Temp. (°F) Oven Temp. (°F) Cooking Time (min) Recommendations White fish fillet 4 fillets (550 g) 5 375 350 to 425 20-30 Put the fish fillets on a broiler pan or baking dish.Season the fish after cooking if desired.To prevent the fish from over browning or drying ...
Page 51 - USING THE OPTIONS FUNCTION; Temp Adjust; How to correct the oven temperature; Temp Unit (Fahrenheit or Celsius temperature selection)
TROUBLESHOO TING MAINT AINING Y OUR APPLIANCE OPERA TING THE O VEN USING THE W ARMING DRA WER SURF A CE COOKING USING THE OPTIONS FUNCTION This function enables you to control various electronic control options. These options include temp adjust, temp unit, auto conversion, 12 hour time of day or 24...
Page 52 - Auto Conversion; How to enable or disable the auto conversion feature; How to change between the 12 and 24 hour time of day display; 2 hour energy saving; How to turn the 12 hour energy saving feature on or off; Language; How to change the language on the display
Auto Conversion When you use the auto conversion feature, the convection auto conversion feature will automatically convert entered regular baking temperatures to convection baking temperatures. If this feature is activated, the display will show the actual converted (reduced) temperature. For examp...
Page 53 - How to turn the sound on or off; Demo mode; How to enable or disable the demo mode; USING THE TEMP PROBE; How to use the Temp probe
TROUBLESHOO TING MAINT AINING Y OUR APPLIANCE OPERA TING THE O VEN USING THE W ARMING DRA WER SURF A CE COOKING Sound On/Off Using Sound On/OFF, you can set the oven controls to operate silently. How to turn the sound on or off 1 . Press Options and 7 on the number pad. 2 . Press 1 (Off) or 2 (On) o...
Page 54 - Temp probe table; Removing the Temp probe
2 . Insert the temp probe plug into the socket on the top side wall of the oven as far as it will go. 3 . Select the desired cooking function (Conv.Bake, Conv.Roast, Bake) and temperature. 4 . Press Temp Probe to set the desired internal temperature. 5 . Set the desired internal temperature by press...
Page 55 - SETTING THE SABBATH FEATURE; How to use the Sabbath feature
TROUBLESHOO TING MAINT AINING Y OUR APPLIANCE OPERA TING THE O VEN USING THE W ARMING DRA WER SURF A CE COOKING SETTING THE SABBATH FEATURE (For use on the Jewish Sabbath & Holidays) For further assistance, guidelines for proper usage and a complete list of models with the Sabbath feature, pleas...
Page 56 - maintaining your appliance; Before a self-cleaning cycle
maintaining your appliance SELF-CLEANING This self-cleaning oven uses high temperatures (well above cooking temperatures) to burn off leftover grease and residue completely or reduce them to a finely powdered ash that you can wipe away with a damp cloth. CAUTION • During the self-cleaning cycle, the...
Page 57 - How to run a self-cleaning cycle; How to delay the start of self-cleaning; How to turn off the self-cleaning feature; After a self-cleaning cycle
W ARRANT Y TROUBLESHOO TING MAINT AINING Y OUR APPLIANCE OPERA TING THE O VEN USING THE W ARMING DRA WER SURF A CE COOKING How to run a self-cleaning cycle 1 . Select the length of time for the self-cleaning operation, eg. 3 hours. Press Self Clean once for a 3 hour clean time, twice for a 4 hour cl...
Page 58 - How to set the oven for steam-cleaning; After a steam-cleaning cycle
STEAM-CLEANING How to set the oven for steam-cleaning For light cleaning, the Steam-cleaning function saves time and energy. For heavier-duty cleaning of debris and grease, use the self-cleaning function. 1 . Remove all accessories from the oven. 2 . Pour approximately 10 oz. (300 ml) of water onto ...
Page 59 - CARE AND CLEANING OF THE OVEN; Oven vent
W ARRANT Y TROUBLESHOO TING MAINT AINING Y OUR APPLIANCE OPERA TING THE O VEN USING THE W ARMING DRA WER SURF A CE COOKING CARE AND CLEANING OF THE OVEN WARNING • Be sure all controls are OFF and all surfaces are COOL before cleaning any part of the range. • If your range is removed for cleaning, se...
Page 60 - CARE AND CLEANING OF THE GLASS COOKTOP; Normal daily use cleaning
Oven racks • If the racks are left in the oven during a self-cleaning cycle, their color will turn slightly blue and the finish will be dull. After the self-cleaning cycle is complete and the oven has cooled, rub the sides of the racks with wax paper or a cloth containing a small amount of oil. This...
Page 62 - Cleaning the cooktop seal; Potential for permanent damage to the glass surface
Cleaning the cooktop seal To clean the seal around the edges of the glass, lay a wet cloth on it for a few minutes, then wipe clean with a nonabrasive cleaner. Potential for permanent damage to the glass surface • Sugary spillovers (such as jellies, fudge, candy, syrups) or melted plastics can cause...
Page 63 - REMOVING AND REPLACING THE OVEN DOOR; How to remove the door; How to replace the door
W ARRANT Y TROUBLESHOO TING MAINT AINING Y OUR APPLIANCE OPERA TING THE O VEN USING THE W ARMING DRA WER SURF A CE COOKING REMOVING AND REPLACING THE OVEN DOOR How to remove the door CAUTION • The door is very heavy. Be careful when removing and lifting the door. Do not lift the door by the handle. ...
Page 64 - REMOVING AND REPLACING THE STORAGE DRAWER; How to remove the storage drawer; How to replace the storage drawer
3 . Open the door fully. If the door will not open fully, the indentation is not inserted correctly in the bottom edge of the slot. 4 . Push the hinge locks up against the front frame of the oven cavity to the locked position. Hinge lock Unlocked position Locked position 5 . Close the oven door. REM...
Page 65 - CHANGING THE OVEN LIGHT
W ARRANT Y TROUBLESHOO TING MAINT AINING Y OUR APPLIANCE OPERA TING THE O VEN USING THE W ARMING DRA WER SURF A CE COOKING CHANGING THE OVEN LIGHT The oven light is a standard 40-watt appliance bulb. It will come on when the oven door is open. When the oven door is closed, press Oven Light to turn i...
Page 66 - troubleshooting; TROUBLESHOOTING
troubleshooting TROUBLESHOOTING Samsung works hard to ensure that you don’t have problems with your new electric range. If you run into unexpected trouble, look first for a solution in the table below. If, after trying the suggested solution, you’re still having trouble, call Samsung at 1-800-SAMSUN...
Page 72 - QUESTIONS OR COMMENTS?
Please be advised that the Samsung warranty does NOT cover service calls to explain product operation, correct improper installation, or perform normal cleaning or maintenance. QUESTIONS OR COMMENTS? COUNTRY CALL OR VISIT US ONLINE AT U.S.A Consumer Electronics 1-800-SAMSUNG (726-7864) www.samsung.c...
Page 73 - Estufa eléctrica; manual del usuario
imagine las posibilidades Gracias por adquirir este producto Samsung. Estufa eléctrica manual del usuario N E 5 8 F 9 5 0 0 S S N E 5 8 K 9 5 0 0 S G
Page 74 - dispositivo anti inclinación; DESPUÉS DE INSTALAR LA ESTUFA, CONFIRME QUE EL DISPOSITIVO ANTI; ADVERTENCIA
dispositivo anti inclinación ADVERTENCIA ADVERTENCIA- Para reducir el riesgo de inclinación o vuelco de la estufa, ésta debe asegurarse mediante un dispositivo anti inclinación correctamente instalado . DESPUÉS DE INSTALAR LA ESTUFA, CONFIRME QUE EL DISPOSITIVO ANTI INCLINACIÓN ESTÉ CORRECTAMENTE IN...
Page 75 - contenido
contenido INSTRUCCIONES DE SEGURIDAD IMPORTANTES 5 5 Instrucciones de seguridad importantes INSTALACIÓN DEL HORNO 18 18 Acerca de esta sección18 Para su seguridad PREPARACIÓN PARA INSTALAR LA ESTUFA 19 19 Quite el empaque19 Prepare las herramientas y las piezas20 Control del sitio de instalación CÓM...
Page 76 - SUPERFICIE DE COCCIÓN; GARANTÍA
contenido SUPERFICIE DE COCCIÓN 33 33 Acerca de la superficie de cocción 35 Como regular la estufa para la cocción en superficie37 Utilización de los recipientes de cocción correctos37 Selección de los recipientes de cocción correctos38 Protección de la superficie de cocción OPERACIÓN DEL HORNO 39 3...
Page 77 - instrucciones de seguridad importantes; LO QUE NECESITA SABER SOBRE LAS; SÍMBOLOS Y PRECAUCIONES DE SEGURIDAD IMPORTANTES; lesiones; lesiones leves
INTRODUCCIÓN A SU NUEV A ES TUFA instrucciones de seguridad importantes Lea y siga todas las instrucciones antes de utilizar su horno con el fin de evitar riesgos de incendio, descargas eléctricas, lesiones personales o daños al utilizar su estufa. Esta guía no cubre todas las situaciones que podría...
Page 78 - Mantenimiento del usuario-
CALIFORNIA PROPOSICIÓN 65 ADVERTENCIA ADVERTENCIA Cáncer y Daño Reproductive – www.P65Warnings.ca.gov. PARA SU SEGURIDAD Cuando utilice electrodomésticos, debe seguir precauciones de seguridad básicas, a saber: PRECAUCIÓN Utilice este electrodoméstico solo para el uso para el que fue destinado, tal ...
Page 79 - Almacenamiento en o sobre el electrodoméstico.
INTRODUCCIÓN A SU NUEV A ES TUFA Si se produce un incendio en el horno durante el horneado, ahogue el fuego cerrando la puerta del horno y apagando el horno o usando un producto químico seco multipropósito o un extintor de incendio a base de espuma.Si se produce un incendio en el horno durante la au...
Page 80 - UNIDADES DE SUPERFICIE DE COCCIÓN
UNIDADES DE SUPERFICIE DE COCCIÓN Nunca deje sin atención unidades de superficie reguladas a altas temperaturas. Los derrames por exceso de hervor producen humo y los derrames de sustancias grasas pueden arder en llamas.Para evitar derrame de aceite o incendio, use una cantidad mínima de aceite cuan...
Page 81 - No use cubiertas decorativas para elementos de superficie –; SEGURIDAD ELÉCTRICA; Instalación adecuada-
INTRODUCCIÓN A SU NUEV A ES TUFA Asegúrese de saber cuál de las perillas controla cada unidad de superficie. Siempre asegúrese de que encendió la unidad de superficie correcta. Siempre apague las unidades de superficie antes de retirar los recipientes de cocción. Cuando prepare platillos flambeados ...
Page 82 - SEGURIDAD DE LOS NIÑOS; HORNO; NO TOQUE LOS ELEMENTOS CALENTADORES NI LAS SUPERFICIES
SEGURIDAD DE LOS NIÑOS ADVERTENCIA ADVERTENCIA- Este electrodoméstico no está previsto para ser usado por niños o personas discapacitadas sin la adecuada supervisión de un adulto responsable. Los niños deben ser supervisados para garantizar que no jueguen con el electrodoméstico. Mantenga a los niño...
Page 83 - HORNOS AUTO-LIMPIANTES
INTRODUCCIÓN A SU NUEV A ES TUFA Cuando abra la puerta, hágalo con precaución. Permita la salida del vapor o aire caliente antes de retirar o volver a colocar los alimentos en el horno. Revestimientos protectores. No utilice papel de aluminio para revestir el fondo del horno, salvo de la manera suge...
Page 84 - CAMPANAS DE VENTILACIÓN; Limpie con frecuencia las campanas de ventilación.; SUPERFICIES DE COCCIÓN VITRO-CERÁMICAS; No cocine sobre una cubierta quebrada.; ADVERTENCIAS FUNDAMENTALES PARA LA INSTALACIÓN
No use ningún producto limpiador de hornos ni revestimiento protector dentro del horno ni sobre sus superficies exteriores. Use solo un producto de limpieza para superficies de cocción cerámicas.Retire los estantes niquelados del horno antes de comenzar el ciclo de auto-limpieza, de lo contrario pue...
Page 85 - - Se puede producir una descarga eléctrica o un incendio.; ADVERTENCIAS FUNDAMENTALES PARA EL USO; - No hacerlo puede provocar una descarga eléctrica o un incendio.
INTRODUCCIÓN A SU NUEV A ES TUFA Enchufe el cable de alimentación en un tomacorriente conectado a tierra con la configuración adecuada. Su horno debe ser el único elemento conectado en este circuito.Mantenga todos los materiales de embalaje fuera del alcance de los niños. Podrían utilizarlos para ju...
Page 88 - PRECAUCIONES PARA EL USO
PRECAUCIÓN PRECAUCIONES PARA EL USO Si la superficie está rajada, apague el electrodoméstico. - No hacerlo puede provocar una descarga eléctrica. La vajilla y los envases pueden calentarse. Manipúlelos con cuidado.Los alimentos calientes y el vapor pueden provocar quemaduras. Retire cuidadosamente l...
Page 89 - ADVERTENCIAS FUNDAMENTALES PARA LA LIMPIEZA
INTRODUCCIÓN A SU NUEV A ES TUFA No coloque alimentos ni objetos pesados sobre el borde de la puerta del horno. - Si abre la puerta, los alimentos o el objeto podrían caerse y provocar quemaduras o lesiones. No enfríe abruptamente la puerta, el interior del electrodoméstico ni el plato vertiendo agu...
Page 90 - instalación del horno; ACERCA DE ESTA SECCIÓN; Nota importante para el instalador; Nota importante para el usuario final; PARA SU SEGURIDAD
instalación del horno ACERCA DE ESTA SECCIÓN LEA ESTAS INSTRUCCIONES EN SU TOTALIDAD Y CUIDADOSAMENTE. Nota importante para el instalador • Lea todas las instrucciones contenidas en este manual antes de instalar la estufa.• Retire de la estufa todos los materiales de empaque de los compartimientos d...
Page 91 - QUITE EL EMPAQUE; Las herramientas que necesitará; preparación para instalar la estufa
INTRODUCCIÓN A SU NUEV A ES TUFA QUITE EL EMPAQUE Retire el material de empaque. Retire el marco de apoyo de la parte trasera del vidrio de la cubierta. No retirar los materiales de empaque podría causar daños al electrodoméstico. PREPARE LAS HERRAMIENTAS Y LAS PIEZAS Las herramientas que necesitará...
Page 92 - CONTROL DEL SITIO DE INSTALACIÓN; Distancias, espacios libres y dimensiones; Kit de relleno trasero opcional
CONTROL DEL SITIO DE INSTALACIÓN Distancias, espacios libres y dimensiones Para instalar la estufa, observe la figura a continuación. PRECAUCIÓN PRECAUCIÓN Esta estufa ha sido diseñada para cumplir con la temperatura máxima admisible para gabinetes de madera de 194 °F. Asegúrese de que los revestimi...
Page 93 - Dimensiones mínimas; IMPORTANTE
INTRODUCCIÓN A SU NUEV A ES TUFA Dimensiones mínimas IMPORTANTE Para eliminar el riesgo de quemaduras o de incendio causado por alcanzar elementos por encima de las unidades de superficie calientes, evite colocar gabinetes de almacenamiento arriba de las unidades de superficie. Si tiene gabinetes de...
Page 94 - cómo conectar la corriente eléctrica; PASO 1. CUMPLIMIENTO DE LOS REQUISITOS DE CONEXIÓN ELÉCTRICA; NOTA
cómo conectar la corriente eléctrica PASO 1. CUMPLIMIENTO DE LOS REQUISITOS DE CONEXIÓN ELÉCTRICA PRECAUCIÓN PRECAUCIÓN Para seguridad de las personas, no utilice cables prolongadores con este electrodoméstico. Quite el fusible de su casa o corte la electricidad con el disyuntor antes de comenzar la...
Page 95 - PASO 2. ACCESO A LA CONEXIÓN DEL CABLE DE ALIMENTACIÓN; Especificaciones del kit de cable para alimentación eléctrica
SUPERFICIE DE COCCIÓN PASO 2. ACCESO A LA CONEXIÓN DEL CABLE DE ALIMENTACIÓN Afloje y luego retire el tornillo de la cubierta de acceso posterior con un destornillador. Retire la cubierta de acceso posterior jalando hacia la derecha y luego hacia afuera. Habrá quedado abierto el acceso al cuerpo de ...
Page 96 - PASO 3. INSTALACIÓN DEL CABLE DE ALIMENTACIÓN; Instalación de un cable de alimentación de 3 conductores
PASO 3. INSTALACIÓN DEL CABLE DE ALIMENTACIÓN Cuando se realicen instalaciones de cables de alimentación, enganche el sujetador de cables con amortiguador de esfuerzo sobre el orificio del cable de alimentación (1 3 / 8 ”) ubicado debajo de la parte trasera del cuerpo del cajón. Inserte el cable de ...
Page 97 - Instalación de un cable de alimentación de 4 conductores
SUPERFICIE DE COCCIÓN Instalación de un cable de alimentación de 4 conductores ADVERTENCIA ADVERTENCIA El conductor neutro del circuito de alimentación debe conectarse a la terminal neutra ubicada en la parte central inferior del cuerpo de terminales. Los chicotes de cable que portan corriente deben...
Page 98 - PASO 4. INSTALACIÓN DEL CONDUCTO; Instalación de un conducto de tres conductores
PASO 4. INSTALACIÓN DEL CONDUCTO Retire la placa de conexión del conducto y rótela como se muestra a continuación. Se debe utilizar el orificio de conducto (1 1 / 8 ”). 1 1 / 8 ” 1 3 / 8 ” 1 1 / 8 ” 1 3 / 8 ” 1 . Prepare el cable de conducto como se muestra en la Figura 1. 2 . Instale el cable de co...
Page 99 - Instalación de un conducto de cuatro conductores; PASO 5. COLOCACIÓN DE LA CUBIERTA DE ACCESO
SUPERFICIE DE COCCIÓN Instalación de un conducto de cuatro conductores • Se puede utilizar alambre de construcción de aluminio pero debe estar graduado y aprobado para los amperajes y voltajes correctos para hacer la conexión. Conecte los conductores según se describe a continuación. • El conductor ...
Page 100 - instalación de la estufa; INSTALACIÓN DEL DISPOSITIVO ANTI INCLINACIÓN; Instale la ménsula utilizando la plantilla.
instalación de la estufa INSTALACIÓN DEL DISPOSITIVO ANTI INCLINACIÓN ADVERTENCIA ADVERTENCIA Para reducir el riesgo de inclinaciones o vuelcos, debe sujetar el electrodoméstico instalando correctamente el dispositivo anti inclinación que viene empacado con la estufa.• Remítase a las instrucciones d...
Page 101 - Controle sus ajustes; FINALIZACIÓN DE LA INSTALACIÓN
USO DEL C AJÓN DE C ALENT AMIENT O SUPERFICIE DE COCCIÓN 3. Controle sus ajustes Utilice un nivel de burbuja de aire para controlar los ajustes. Coloque el nivel diagonalmente sobre la parrilla del horno o la superficie de cocción y confirme que la estufa está nivelada en las dos direcciones mostrad...
Page 102 - introducción a su nueva estufa; DESCRIPCIÓN GENERAL
introducción a su nueva estufa DESCRIPCIÓN GENERAL ELEMENTOS INCLUIDOS CON SU ESTUFA * Estantes de alambre (2) * Parrilla ahuecada (1) * Sonda de temperatura (1) Si necesita un accesorio marcado con un *, puede adquirirlo en el Centro de contacto de Samsung (1-800-726-7864). Puerta del horno Ventila...
Page 103 - AJUSTE DEL RELOJ; Cómo ajustar el reloj; MODOS DE PANTALLA DEL PANEL DE CONTROL; Modo de reposo; Modo de actividad
OPERA CIÓN DEL HORNO USO DEL C AJÓN DE C ALENT AMIENT O SUPERFICIE DE COCCIÓN primeros pasos antes de comenzar AJUSTE DEL RELOJ El reloj debe ajustarse para mostrar la hora correcta para permitir el buen funcionamiento de las opciones de temporizador del horno.• La hora del día no se puede cambiar m...
Page 104 - CÓMO ENCENDER Y APAGAR LA LUZ DEL HORNO; TRABA DE CONTROLES; Cómo activar la función de traba de controles; CÓMO PROGRAMAR EL TEMPORIZADOR DE COCINA; Cómo programar el temporizador
CÓMO ENCENDER Y APAGAR LA LUZ DEL HORNO • La luz del horno se enciende automáticamente cuando se abre la puerta.• La luz del horno se apaga automáticamente cuando se cierra la puerta.• La luz del horno se puede encender y apagar manualmente presionando Luz del horno . TRABA DE CONTROLES La traba de ...
Page 105 - superficie de cocción; ACERCA DE LA SUPERFICIE DE COCCIÓN; Sobre los elementos radiantes de la superficie
MANTENIMIENT O DE SU ELEC TRODOMÉS TICO OPERA CIÓN DEL HORNO USO DEL C AJÓN DE C ALENT AMIENT O SUPERFICIE DE COCCIÓN superficie de cocción ACERCA DE LA SUPERFICIE DE COCCIÓN PRECAUCIÓN ANTES DE COCINAR • No utilice la superficie de la cubierta de vidrio como tabla para cortar.• No coloque ni almace...
Page 106 - Indicador de superficie caliente
Ubicación de los elementos radiantes de la superficie y los controles Las perillas controlan los elementos radiantes de la superficie de cocción tal como se indica a continuación. 1 5 2 3 4 6 1. Delantero izquierdo: 6”/9”, 3000 W 2. Trasero izquierdo: 6”, 1200 W 3. Delantero derecho: 9”/12”, 3000 W ...
Page 107 - COMO REGULAR LA ESTUFA PARA LA COCCIÓN EN SUPERFICIE; Regulaciones recomendadas
MANTENIMIENT O DE SU ELEC TRODOMÉS TICO OPERA CIÓN DEL HORNO USO DEL C AJÓN DE C ALENT AMIENT O SUPERFICIE DE COCCIÓN COMO REGULAR LA ESTUFA PARA LA COCCIÓN EN SUPERFICIE PRECAUCIÓN • Los elementos de superficie pueden estar calientes incluso cuando están apagados y pueden causar quemaduras. No toqu...
Page 108 - Uso del centro de calentamiento
Uso del centro de calentamiento El centro de calentamiento , ubicado en la parte posterior central de la superficie de vidrio mantendrá calientes los alimentos ya cocidos, a temperatura apta para servir. • El calentador de superficie no se pondrá al rojo como los demás elementos de cocción. PRECAUCI...
Page 110 - PROTECCIÓN DE LA SUPERFICIE DE COCCIÓN; Limpieza; Cómo evitar marcas y rayaduras; Prevención de manchas
PROTECCIÓN DE LA SUPERFICIE DE COCCIÓN Limpieza • Limpie la cubierta antes de utilizarla por primera vez.• Limpie su cubierta diariamente o después de cada uso. Esto mantendrá la buena apariencia de la cubierta y puede evitar daños. • Si durante la cocción ocurre un derrame, límpielo inmediatamente ...
Page 111 - operación del horno; EL PANEL DE CONTROL DEL HORNO
RESOL UCIÓN DE PROBLEMAS MANTENIMIENT O DE SU ELEC TRODOMÉS TICO OPERA CIÓN DEL HORNO USO DEL C AJÓN DE C ALENT AMIENT O SUPERFICIE DE COCCIÓN operación del horno EL PANEL DE CONTROL DEL HORNO LEA LAS INSTRUCCIONES CON ATENCIÓN ANTES DE UTILIZAR EL HORNO. Para obtener los mejores resultados, familia...
Page 112 - USO DE LAS PARRILLAS DEL HORNO; Posiciones de las parrillas en el horno; Posición de la parrilla ahuecada
21. TECLADO NUMÉRICO: Utilícelo para marcar o fijar cualquier función que requiera números tales como la hora en el reloj, el temporizador, la temperatura del horno, la hora de comienzo y la duración de la operación para el caso de horneado temporizado. 22. CLEAR (ELIMINAR): Use para cancelar temper...
Page 113 - Colocación de parrillas y recipientes; Antes de usar las parrillas
RESOL UCIÓN DE PROBLEMAS MANTENIMIENT O DE SU ELEC TRODOMÉS TICO OPERA CIÓN DEL HORNO USO DEL C AJÓN DE C ALENT AMIENT O SUPERFICIE DE COCCIÓN Colocación de parrillas y recipientes Colocar los moldes o las charolas lo más cerca posible del centro del horno producirá los mejores resultados. Si hornea...
Page 114 - AJUSTES MÍNIMOS Y MÁXIMOS; HORNEAR; Cómo ajustar la temperatura
AJUSTES MÍNIMOS Y MÁXIMOS Todas las funciones enumeradas en la siguiente tabla tienen ajustes de tiempo o temperatura mínimos y máximos. Se escuchará un sonido agudo (“bip”) cada vez que presione un tecla del panel de control y el dato ingresado haya sido aceptado. Si la temperatura o el tiempo ingr...
Page 115 - HORNEAR POR CONVECCIÓN; Consejo para el horneado por convección; Cómo ajustar el horno para hornear por convección.
RESOL UCIÓN DE PROBLEMAS MANTENIMIENT O DE SU ELEC TRODOMÉS TICO OPERA CIÓN DEL HORNO USO DEL C AJÓN DE C ALENT AMIENT O SUPERFICIE DE COCCIÓN HORNEAR POR CONVECCIÓN 1 2 3 4 5 6 7 Utilizar la función de hornear por convección, le permitirá una cocción más rápida. Se puede programar el horno para hor...
Page 116 - ASAR POR CONVECCIÓN; Cómo ajustar el horno para asar al horno por convección.; COCCIÓN REGIDA POR TEMPORIZADOR; Cómo programar el horno para cocción regida por el temporizador.
ASAR POR CONVECCIÓN Asar al horno por convección es conveniente para cortes de carne tiernos y de gran tamaño, sin cubrir. El calor procede del elemento radiante ubicado en la parte superior. El ventilador de convección hacer circular el aire caliente en forma pareja sobre y por alrededor de la comi...
Page 117 - INICIO RETARDADO; Cómo programar el horno para inicio diferido
RESOL UCIÓN DE PROBLEMAS MANTENIMIENT O DE SU ELEC TRODOMÉS TICO OPERA CIÓN DEL HORNO USO DEL C AJÓN DE C ALENT AMIENT O SUPERFICIE DE COCCIÓN Coloque los alimentos en el horno después de precalentarlo, si así lo requiere la receta. El precalentamiento es importante para lograr buenos resultados cua...
Page 118 - ASAR A LA PARRILLA; Cómo ajustar el horno para asar a la parrilla; Guía de recomendaciones para asar a la parrilla
ASAR A LA PARRILLA El modo asar a la parrilla es el mejor para carnes, pescados y aves de hasta 1” de grosor. Asar a la parrilla es un método de cocinar cortes tiernos de carne mediante el calor directo bajo el elemento radiante del horno. La elevada temperatura realiza una cocción rápida y deja el ...
Page 119 - CÓMO UTILIZAR LA FUNCIÓN DE COCCIÓN FAVORITA; Cómo registrar los ajustes para una receta; Cómo recuperar un ajuste
RESOL UCIÓN DE PROBLEMAS MANTENIMIENT O DE SU ELEC TRODOMÉS TICO OPERA CIÓN DEL HORNO USO DEL C AJÓN DE C ALENT AMIENT O SUPERFICIE DE COCCIÓN Alimento Grado de cocción Tamaño Espesor Posición de la parrilla Tiempo de cocción 1er lado 2do lado Hamburguesas Al punto 9 hamburguesas 3/4” 6 3:00 2:30 Al...
Page 120 - USO DE LA FUNCIÓN DE COCCIÓN SALUDABLE; Cómo programar la función de guiso de arroz
USO DE LA FUNCIÓN DE COCCIÓN SALUDABLE 1. Guiso de arroz La función de guiso de arroz proporciona un método de cocción más sano para cocinar guisos de arroz con vegetales, hierbas, pechugas de pollo, etc.Cuando use esta función, no necesita precalentar el horno antes de cocinar. La temperatura de co...
Page 122 - CÓMO USAR LA FUNCIÓN MANTENER CALIENTE; Cómo utilizar la función mantener caliente; USO DE LA FUNCIÓN ENTIBIAR PAN PARA LEUDADO
Alimento Cantidad Posición de la parrilla Temperatura predeterminada (°F) Temperatura del horno (°F) Tiempo de cocción (min) Recomendaciones Filete de pescado blanco 4 filetes (550 g) 5 375 350 a 425 20-30 Coloque los filetes en una asadera o fuente para horno.Condimente el pescado después de la coc...
Page 123 - CÓMO USAR LA FUNCIÓN DE OPCIONES; Ajuste de temperatura; Cómo corregir la temperatura del horno
RESOL UCIÓN DE PROBLEMAS MANTENIMIENT O DE SU ELEC TRODOMÉS TICO OPERA CIÓN DEL HORNO USO DEL C AJÓN DE C ALENT AMIENT O SUPERFICIE DE COCCIÓN CÓMO USAR LA FUNCIÓN DE OPCIONES Esta función le permite controlar diversas opciones de control electrónico. Estas opciones incluyen ajuste de temperatura, u...
Page 124 - Autoconversión; Cómo activar o desactivar la función de autoconversión; Ahorro de energía transcurridas 12 horas; Cómo cambiar el idioma en la pantalla
Autoconversión Cuando se utiliza la función de autoconversión, la función de autoconversión por convección convertirá automáticamente las temperaturas normales ingresadas a las temperaturas correspondientes para convección. Si se encuentra activada esta función, en la pantalla se verá la temperatura...
Page 125 - Activar o desactivar las señales sonoras; Cómo encender o apagar el sonido; Modo de demostración; Cómo activar o desactivar el modo demostración; USO DE LA SONDA DE TEMPERATURA; Cómo usar la sonda de temperatura
RESOL UCIÓN DE PROBLEMAS MANTENIMIENT O DE SU ELEC TRODOMÉS TICO OPERA CIÓN DEL HORNO USO DEL C AJÓN DE C ALENT AMIENT O SUPERFICIE DE COCCIÓN Activar o desactivar las señales sonoras Mediante esta función, pueden configurar los controles del horno para que funcionen silenciosamente. Cómo encender o...
Page 126 - Tabla de sonda de temperatura; Cómo quitar la sonda de temperatura
2 . Inserte el enchufe de la sonda de temperatura en la toma de pared lateral superior del horno hasta el fondo. 3 . Seleccione la función de cocción (Hornear por convección, Asar por convección, Horneado) y la temperatura deseadas. 4 . Presione Temp Probe (Sonda de temperatura) para regular la temp...
Page 127 - CÓMO PROGRAMAR LA FUNCIÓN SHABAT; Cómo utilizar la función Shabat
RESOL UCIÓN DE PROBLEMAS MANTENIMIENT O DE SU ELEC TRODOMÉS TICO OPERA CIÓN DEL HORNO USO DEL C AJÓN DE C ALENT AMIENT O SUPERFICIE DE COCCIÓN CÓMO PROGRAMAR LA FUNCIÓN SHABAT (Para uso en el Shabat y otras fechas sagradas judías) Para obtener asistencia adicional, pautas para el uso adecuado y una ...
Page 128 - mantenimiento de su electrodoméstico; Antes de un ciclo de auto-limpieza
mantenimiento de su electrodoméstico AUTO-LIMPIEZA Este horno auto-limpiante utiliza altas temperaturas (mucho más altas que las temperaturas de cocción) para eliminar por incineración los restos de grasa y otros residuos o reducirlas a fino polvo de ceniza que se puede limpiar con un paño húmedo. P...
Page 130 - LIMPIEZA AL VAPOR; Cómo programar el horno para limpieza al vapor
LIMPIEZA AL VAPOR Cómo programar el horno para limpieza al vapor Para limpieza liviana, la función de limpieza al vapor ahorra tiempo y energía. Si se requiere un trabajo de limpieza más pesado para eliminar detritos y grasa, use la función de auto-limpieza. 1 . Retire del horno todos los accesorios...
Page 131 - CUIDADO Y LIMPIEZA DEL HORNO; Abertura de ventilación del horno
GARANTÍARESOL UCIÓN DE PROBLEMAS MANTENIMIENT O DE SU ELEC TRODOMÉS TICO OPERA CIÓN DEL HORNO USO DEL C AJÓN DE C ALENT AMIENT O SUPERFICIE DE COCCIÓN CUIDADO Y LIMPIEZA DEL HORNO ADVERTENCIA • Asegúrese de que todos los controles están APAGADOS y que todas las superficies estén FRÍAS antes de limpi...
Page 132 - CUIDADO Y LIMPIEZA DE LA CUBIERTA DE VIDRIO; Limpieza en el uso normal diario
Parrillas del horno • Si las parrillas se dejan en el horno durante un ciclo de auto-limpieza, su color virará a tonos azulados y se volverán opacas. Una vez finalizado el ciclo de auto-limpieza y que se haya enfriado el horno, frote las barras laterales de las parrillas con un papel encerado o con ...
Page 134 - Limpieza de la junta selladora de la cubierta; Potenciales daños permanentes a la superficie de vidrio; Limpieza de derrames azucarados y plástico fundido
Limpieza de la junta selladora de la cubierta Para limpiar la junta selladora a lo largo de los bordes del vidrio, deje un paño mojado reposando contra ella por unos minutos y luego limpie con un producto no abrasivo. Potenciales daños permanentes a la superficie de vidrio • Los derrames de material...
Page 135 - CÓMO RETIRAR Y VOLVER A COLOCAR LA PUERTA DEL HORNO; Cómo retirar la puerta; Cómo volver a colocar la puerta
GARANTÍARESOL UCIÓN DE PROBLEMAS MANTENIMIENT O DE SU ELEC TRODOMÉS TICO OPERA CIÓN DEL HORNO USO DEL C AJÓN DE C ALENT AMIENT O SUPERFICIE DE COCCIÓN CÓMO RETIRAR Y VOLVER A COLOCAR LA PUERTA DEL HORNO Cómo retirar la puerta PRECAUCIÓN • La puerta es muy pesada. Tenga cuidado al retirarla y levanta...
Page 136 - CÓMO RETIRAR Y VOLVER A COLOCAR EL CAJÓN DE ALMACENAMIENTO; Cómo retirar el cajón de almacenamiento
3 . Abra la puerta por completo. Si la puerta no se abre completamente, la muesca no se encuentra correctamente insertada en el borde inferior de la ranura. 4 . Empuje las trabas de bisagra hacia arriba contra el marco frontal de la cavidad del horno hasta que queden en la posición trabada. Traba de...
Page 137 - RECAMBIO DE LA LUZ DEL HORNO
GARANTÍARESOL UCIÓN DE PROBLEMAS MANTENIMIENT O DE SU ELEC TRODOMÉS TICO OPERA CIÓN DEL HORNO USO DEL C AJÓN DE C ALENT AMIENT O SUPERFICIE DE COCCIÓN RECAMBIO DE LA LUZ DEL HORNO La luz del horno es una bombilla para electrodomésticos estándar de 40 watts. Se encenderá al abrirse la puerta del horn...
Page 138 - resolución de problemas; RESOLUCIÓN DE PROBLEMAS
resolución de problemas RESOLUCIÓN DE PROBLEMAS Samsung hace grandes esfuerzos para asegurar que usted no experimente problemas con su nueva estufa eléctrica. Si se encuentra con problemas inesperados, como primera medida busque la solución en la siguiente tabla. Si, luego de intentar la solución su...
Page 144 - ¿TIENE PREGUNTAS O COMENTARIOS?
Tenga en cuenta que la garantía de Samsung NO cubre las llamadas de servicio para explicar el funcionamiento del producto, corregir una instalación inadecuada o realizar tareas de limpieza o mantenimiento. Escanee el código QR* o visite www.samsung.com/spsn para ver nuestros útiles videos instructiv...
Page 145 - de la cuisinière électrique
un monde de possibilités Nous vous remercions d'avoir choisi ce produit Samsung. Manuel d'utilisation de la cuisinière électrique N E 5 8 F 9 5 0 0 S S N E 5 8 K 9 5 0 0 S G
Page 146 - dispositif anti-basculement; Afin d'éviter tout risque de basculement de la cuisinière, fixez-la; APRÈS AVOIR INSTALLÉ LA; Reportez-vous au manuel; AVERTISSEMENT
dispositif anti-basculement AVERTISSEMENT AVERTISSEMENT - Afin d'éviter tout risque de basculement de la cuisinière, fixez-la correctement à l'aide d'un dispositif anti-basculement. APRÈS AVOIR INSTALLÉ LA CUISINIÈRE, CONFIRMEZ QUE LE DISPOSITIF ANTI-BASCULEMENT EST BIEN INSTALLÉ ET VÉRIFIEZ QUE CE ...
Page 147 - sommaire
sommaire CONSIGNES DE SÉCURITÉ IMPORTANTES 5 5 Consignes de sécurité importantes INSTALLATION DU FOUR 18 18 A propos de cette section18 Pour votre sécurité PRÉPARATION AVANT L'INSTALLATION DE LA CUISINIÈRE 19 19 Retirer l'emballage19 Préparation des outils et des pièces20 Vérification du site d'inst...
Page 148 - TABLE DE CUISSON; UTILISATION DU FOUR; DÉPANNAGE
sommaire TABLE DE CUISSON 33 33 A propos de la table de cuisson35 Comment régler la cuisinière pour utiliser la table de cuisson ? 37 Utilisation des ustensiles de cuisine appropriés 37 Choix des ustensiles de cuisine appropriés38 Protection de la surface lisse UTILISATION DU FOUR 39 39 Tableau de c...
Page 149 - consignes de sécurité importantes; dommage lors de l'utilisation de la cuisinière.; CE QUE VOUS DEVEZ SAVOIR SUR LES; SYMBOLES DE SÉCURITÉ IMPORTANTS ET PRÉCAUTIONS; des blessures légères ou des dégâts matériels
INTRODUCING Y OUR NEW RANGE consignes de sécurité importantes Lisez et suivez toutes les consignes avant d'utiliser votre four afin d'éviter tout risque d'incendie, d'électrocution, de blessure ou de dommage lors de l'utilisation de la cuisinière. Le présent guide ne couvre pas toutes les situations...
Page 150 - de sécurité de base suivantes :; Dépannage utilisateur
CALIFORNIA PROPOSITION 65 AVERTISSEMENT AVERTISSEMENT Cancer et Troubles de l’appareil reproducteur – www.P65Warnings.ca.gov. POUR VOTRE SÉCURITÉ Lorsque vous utilisez des appareils électriques, respectez les consignes de sécurité de base suivantes : ATTENTION Utilisez cet appareil uniquement pour l...
Page 151 - Portez les vêtements appropriés.
INTRODUCING Y OUR NEW RANGE Dans le cas d'un incendie dans le four pendant la cuisson, étouffez le feu en fermant la porte du four et en coupant l'alimentation du four ou en utilisant un produit chimique sec multi-usage ou un extincteur de type à mousse.S'il se produit un incendie pendant l'auto-net...
Page 152 - TABLES DE CUISSON
TABLES DE CUISSON Ne laissez jamais la table de cuisson sans surveillance lorsqu'un foyer fonctionne à puissance élevée. En cas de débordement, les particules graisseuses provenant des aliments risquent de s'enflammer.Pour éviter le débordement d'huile et un incendie, employez une quantité minimale ...
Page 153 - Surveillez les aliments frits à température élevée ou moyenne.; SÉCURITÉ ÉLECTRIQUE; Installation correcte; éteignez toutes les zones de cuisson.
INTRODUCING Y OUR NEW RANGE Surveillez les aliments frits à température élevée ou moyenne. NE stockez PAS d'objets lourds au-dessus de la table de cuisson qui pourraient tomber et l'endommager.N'utilisez PAS de caches décoratifs sur les éléments de la table – Si un élément est allumé accidentellemen...
Page 154 - SÉCURITÉ ENFANTS; FOUR; Les éléments rangés dans le four
SÉCURITÉ ENFANTS AVERTISSEMENT AVERTISSEMENT : cet appareil n'est pas conçu pour être utilisé par des jeunes enfants ou des personnes invalides non assistés par un adulte responsable.Les jeunes enfants ne doivent pas utiliser l'appareil sans la surveillance d'un adulte.Maintenez les enfants éloignés...
Page 155 - Insertion des grilles du four.; N'essayez pas d'utiliser le four pendant une panne de courant.; FOURS AUTO-NETTOYANTS; Ne nettoyez jamais le joint de la porte.
INTRODUCING Y OUR NEW RANGE Insertion des grilles du four. Placez toujours les grilles du four à la hauteur appropriée tant que le four est encore froid. Si vous devez déplacer une grille alors que le four est chaud, utilisez des maniques. Les poignées des récipients ne doivent jamais toucher les él...
Page 156 - Nettoyez fréquemment la hotte d'aspiration.; TABLE DE CUISSON EN VITROCÉRAMIQUE; NE TOUCHEZ PAS LES FOYERS OU LES ZONES SITUÉES À PROXIMITÉ.; AVERTISSEMENTS IMPORTANTS
HOTTE D'ASPIRATION Nettoyez fréquemment la hotte d'aspiration. Ne laissez pas la graisse s'accumuler sur la hotte ou le filtre. Si les aliments situés sur la cuisinière s'enflamment, activez la ventilation. TABLE DE CUISSON EN VITROCÉRAMIQUE NE TOUCHEZ PAS LES FOYERS OU LES ZONES SITUÉES À PROXIMITÉ...
Page 157 - - Une étincelle peut provoquer une explosion ou un incendie.
INTRODUCING Y OUR NEW RANGE Cet appareil doit être correctement relié à la terre.Ne reliez jamais cet appareil à une conduite de gaz, à un tuyau d'eau en plastique ou à une ligne téléphonique. - Cela pourrait entraîner un risque d'électrocution, d'incendie, d'explosion ou de défaillance de l'apparei...
Page 159 - vous risquez de provoquer un incendie.; AVERTISSEMENTS RELATIFS À L'UTILISATION; de brûler la bouche du bébé.
INTRODUCING Y OUR NEW RANGE Cet appareil ne doit jamais être utilisé à d'autres fins que la cuisson. - Si vous vous servez de l'appareil pour un autre usage que celui auquel il est destiné, vous risquez de provoquer un incendie. Ôtez le couvercle ou le bouchon des récipients fermés (bouteilles de th...
Page 161 - Ne faites pas surchauffer les aliments.; - Les arêtes de celui-ci peuvent se révéler très tranchantes.
INTRODUCING Y OUR NEW RANGE N'utilisez pas de récipients fermés hermétiquement. Retirez les opercules et les couvercles avant la cuisson. Les récipients fermés hermétiquement peuvent exploser en raison de l'accumulation de pression, même après l'arrêt du four.Veillez à ce que les aliments ne touchen...
Page 162 - installation du four; A PROPOS DE CETTE SECTION; Note importante destinée à l'installateur; POUR VOTRE SÉCURITÉ
installation du four A PROPOS DE CETTE SECTION LISEZ ENTIÈREMENT ET ATTENTIVEMENT CES INSTRUCTIONS. Note importante destinée à l'installateur • Lisez l'intégralité des consignes d'installation avant d'installer la cuisinière. • Retirez tous les éléments d'emballage des compartiments du four avant de...
Page 163 - PRÉPARATION DES OUTILS ET DES PIÈCES; Outils nécessaires
INTRODUCING Y OUR NEW RANGE RETIRER L'EMBALLAGE Retirez le matériel d'emballage. Retirez l'encadrement de soutien situé à l'arrière de la vitre de la table de cuisson. Tout matériel d'emballage non retiré risque d'endommager l'appareil. PRÉPARATION DES OUTILS ET DES PIÈCES Outils nécessaires Perceus...
Page 164 - VÉRIFICATION DU SITE D'INSTALLATION; Dégagements et dimensions; Kit de calage arrière en option
VÉRIFICATION DU SITE D'INSTALLATION Dégagements et dimensions Pour procéder à l'installation de la cuisinière, reportez-vous au schéma suivant. ATTENTION AVERTISSEMENT Cette cuisinière a été conçue pour supporter une température maximale de 194 °F, température maximale autorisée pour toute structure...
Page 165 - Dimensions minimales
INTRODUCING Y OUR NEW RANGE Dimensions minimales IMPORTANT Pour éliminer tout risque de brûlure ou d'incendie lors de l'accès à l'espace situé au-dessus des éléments de cuisson chauds, évitez d'y aménager tout meuble de rangement. Si un meuble de rangement est situé au-dessus des éléments de cuisson...
Page 166 - mise sous tension; ÉTAPE 1 : RESPECT DES EXIGENCES EN MATIÈRE DE; REMARQUE
mise sous tension ÉTAPE 1 : RESPECT DES EXIGENCES EN MATIÈRE DE RACCORDEMENTS ÉLECTRIQUES ATTENTION ATTENTION Pour votre sécurité, n'utilisez pas de rallonge pour brancher l'appareil. Retirez le fusible de l'installation électrique ou ouvrez le disjoncteur avant de démarrer l'installation. Cet appar...
Page 167 - ÉTAPE 2 : ACCÈS AU BRANCHEMENT DU CORDON D'ALIMENTATION; Classification de l'équipement nécessaire à la mise sous tension
SURF A CE COOKING ÉTAPE 2 : ACCÈS AU BRANCHEMENT DU CORDON D'ALIMENTATION Desserrez puis retirez la vis du panneau d'accès situé à l'arrière à l'aide d'un tournevis. Retirez le panneau d'accès situé à l'arrière en le tirant bien droit pour le faire sortir. Vous pourrez alors accéder au bornier. Capo...
Page 168 - ÉTAPE 3 : INSTALLATION DU CORDON D'ALIMENTATION; Installation d'un cordon d'alimentation à 3 fils
ÉTAPE 3 : INSTALLATION DU CORDON D'ALIMENTATION Pour les installations de cordon d'alimentation, accrochez le dispositif de protection contre la traction sur l'orifice du cordon d'alimentation (1 3 / 8 ") situé sous la partie arrière du tiroir. Insérez le cordon d'alimentation dans le dispositif...
Page 169 - Installation d'un cordon d'alimentation à 4 fils
SURF A CE COOKING Installation d'un cordon d'alimentation à 4 fils AVERTISSEMENT AVERTISSEMENT La prise neutre du circuit d'alimentation doit être connectée à la borne neutre située au centre inférieur du bornier. Les câbles d'alimentation doivent être connectés aux bornes inférieures gauches et inf...
Page 170 - ÉTAPE 4 : INSTALLATION DE LA GAINE; Installation d'un conduit à 3 fils
ÉTAPE 4 : INSTALLATION DE LA GAINE Retirez la plaque de connexion de la gaine et tournez-la comme indiqué ci-dessous.Vous devez utiliser l'orifice de la gaine (1 1 / 8 "). 1 1 / 8 " 1 3 / 8 " 1 1 / 8 " 1 3 / 8 " 1 . Préparez le cordon de la gaine comme le montre la figure 1. 2 . ...
Page 171 - Installation d'un conduit à 4 fils; ÉTAPE 5 : REMISE EN PLACE DU PANNEAU D'ACCÈS
SURF A CE COOKING Installation d'un conduit à 4 fils • Un fil de bâtiment en aluminium peut être utilisé mais il devra être doté de l'intensité et de la tension nominales correctes permettant d'établir la connexion. Raccordez les fils comme décrit ci-dessous. • Le fils utilisé, l'emplacement, les bo...
Page 172 - installation de la cuisinière; INSTALLATION DU DISPOSITIF ANTI-BASCULEMENT; Mise à niveau de la cuisinière
installation de la cuisinière INSTALLATION DU DISPOSITIF ANTI-BASCULEMENT AVERTISSEMENT AVERTISSEMENT Afin de réduire les risques de basculement, vous devez fixer la cuisinière en installant correctement le dispositif anti-basculement fourni avec cette dernière.• Reportez-vous aux consignes d'instal...
Page 173 - Vérification des réglages; FINALISATION DE L'INSTALLATION
USING THE W ARMING DRA WER SURF A CE COOKING 3. Vérification des réglages Utilisez un niveau à bulle pour vérifier vos réglages. Placez le niveau en diagonale sur la grille du four ou la table de cuisson et vérifiez le niveau dans les deux directions indiquées ci-dessous. 1. Vérifiez la direction 1....
Page 175 - MODES D'AFFICHAGE DU PANNEAU DE COMMANDE; Mode veille
OPERA TING THE O VEN USING THE W ARMING DRA WER SURF A CE COOKING démarrage avant de commencer RÉGLAGE DE L'HORLOGE L' horloge doit être réglée sur l'heure correcte afin que la minuterie automatique du four fonctionne correctement. • L'heure ne peut pas être modifiée durant la cuisson minutée, la cu...
Page 176 - ACTIVATION ET DÉSACTIVATION DE L'ÉCLAIRAGE DU FOUR; VERROUILLAGE DES COMMANDES; Comment activer la fonction de verrouillage des commandes ?; RÉGLAGE DE LA MINUTERIE; Comment régler la minuterie ?
ACTIVATION ET DÉSACTIVATION DE L'ÉCLAIRAGE DU FOUR • L'éclairage du four s'allume automatiquement à l'ouverture de la porte.• L'éclairage du four s'éteint automatiquement à la fermeture de la porte.• Vous pouvez activer et désactiver l'éclairage du four manuellement en appuyant sur la touche Éclaira...
Page 177 - table de cuisson; A PROPOS DE LA TABLE DE CUISSON; À propos des foyers radiants
MAINT AINING Y OUR APPLIANCE OPERA TING THE O VEN USING THE W ARMING DRA WER SURF A CE COOKING table de cuisson A PROPOS DE LA TABLE DE CUISSON ATTENTION AVANT LA CUISSON • N'utilisez pas la table de cuisson vitrée comme planche à découper.• Ne placez et ne rangez rien qui soit susceptible de fondre...
Page 178 - Emplacement des foyers radiants et des commandes; Témoin de surface chaude; Zones de cuisson
Emplacement des foyers radiants et des commandes Les boutons de commande permettent d'activer les foyers radiants de la table de cuisson comme indiqué ci-dessous. 1 5 2 3 4 6 1. Avant gauche : 6"/9", 3000 W 2. Arrière gauche : 6", 1200 W 3. Avant droit : 9"/12", 3000 W 4. Arrière...
Page 179 - COMMENT RÉGLER LA CUISINIÈRE POUR UTILISER LA TABLE DE CUISSON ?; Réglages recommandés
MAINT AINING Y OUR APPLIANCE OPERA TING THE O VEN USING THE W ARMING DRA WER SURF A CE COOKING COMMENT RÉGLER LA CUISINIÈRE POUR UTILISER LA TABLE DE CUISSON ? ATTENTION • Les foyers de la table de cuisson peuvent être chauds, même éteints, et provoquer des brûlures. Ne touchez pas les foyers avant ...
Page 180 - Utilisation de la zone chauffe-plat
Utilisation de la zone chauffe-plat La zone chauffe-plat , située dans la partie centrale arrière de la surface vitrée, conserve les aliments cuits à température de consommation. • La zone chauffe-plat ne devient pas rouge comme les autres foyers. ATTENTION • Ne réchauffez pas les aliments pendant p...
Page 182 - PROTECTION DE LA SURFACE LISSE; Nettoyage; Prévention des traces et des rayures; Prévention des taches
PROTECTION DE LA SURFACE LISSE Nettoyage • Nettoyez la table de cuisson avant de l'utiliser pour la première fois. • Nettoyez votre table de cuisson quotidiennement ou après chaque utilisation. Ainsi, vous conserverez votre table de cuisson en bon état et éviterez les dommages. • Si la casserole déb...
Page 183 - utilisation du four; TABLEAU DE COMMANDE DU FOUR
TROUBLESHOO TING MAINT AINING Y OUR APPLIANCE OPERA TING THE O VEN USING THE W ARMING DRA WER SURF A CE COOKING utilisation du four TABLEAU DE COMMANDE DU FOUR LISEZ ATTENTIVEMENT LES CONSIGNES D'UTILISATION AVANT DE VOUS SERVIR DU FOUR. Pour de meilleurs résultats, familiarisez-vous avec les divers...
Page 184 - UTILISATION DES GRILLES DU FOUR; Hauteurs de grille; Position de la grille encastrée
UTILISATION DES GRILLES DU FOUR Hauteurs de grille 1 2 3 4 5 6 7 Le four comporte 7 niveaux (1 à 7). TYPE D'ALIMENTS HAUTEUR DE GRILLE Muffins, brownies, cookies, petits gâteaux, gâteaux étagés, tartes, biscuits 4 Tartes surgelées 4 Casserole (Plat mijoté) 4 Couronne ou quatre-quarts 3 Gâteaux des a...
Page 185 - Emplacement de la grille et de la poêle; Avant d'utiliser les grilles
TROUBLESHOO TING MAINT AINING Y OUR APPLIANCE OPERA TING THE O VEN USING THE W ARMING DRA WER SURF A CE COOKING Emplacement de la grille et de la poêle Positionnez les moules à gâteaux le plus au centre possible du four pour assurer de meilleurs résultats. Si vous utilisez plusieurs moules, espacez-...
Page 186 - Comment régler la température ?
RÉGLAGES MINIMUM ET MAXIMUM Toutes les fonctions listées dans le tableau ci-dessous ont un réglage minimum et un réglage maximum de la durée ou de la température. Un signal sonore retentit chaque fois que vous appuyez sur un bouton et que la saisie est validée. Un signal d'erreur retentit sous la fo...
Page 187 - CUISSON PAR CONVECTION; Conseils pour la cuisson par convection
TROUBLESHOO TING MAINT AINING Y OUR APPLIANCE OPERA TING THE O VEN USING THE W ARMING DRA WER SURF A CE COOKING CUISSON PAR CONVECTION 1 2 3 4 5 6 7 La fonction de cuisson par convection permet d'accélérer la cuisson. Vous pouvez programmer la cuisson par convection pour toute température comprise e...
Page 188 - RÔTISSAGE PAR CONVECTION; Comment régler le four pour le rôtissage par convection ?; CUISSON MINUTÉE; Comment régler le four pour la cuisson minutée ?
RÔTISSAGE PAR CONVECTION Le rôtissage par convection est conseillé pour la cuisson de morceaux de viande très tendres qu'il faut préparer sans couvrir.La chaleur provient de l'élément chauffant supérieur. Le ventilateur de convection distribue l'air chauffé de manière uniforme sur la nourriture et a...
Page 189 - DÉPART DIFFÉRÉ; Comment régler le four pour le départ différé ?
TROUBLESHOO TING MAINT AINING Y OUR APPLIANCE OPERA TING THE O VEN USING THE W ARMING DRA WER SURF A CE COOKING Si la recette l'indique, enfournez la nourriture une fois le four préchauffé. Le préchauffage est essentiel pour la cuisson de gâteaux, biscuits, pâte et petits pains. Une fois la températ...
Page 190 - CUISSON AU GRIL; Comment régler le four pour la cuisson au gril ?; Guide de recommandations concernant la cuisson au gril
CUISSON AU GRIL Le mode de cuisson au gril est le mode le plus adapté aux viandes, aux poissons et à la volaille d'une épaisseur maximale de 1". La cuisson au gril est une méthode de cuisson des morceaux de viande tendres utilisant la chaleur directe sous le gril du four. La chaleur élevée perme...
Page 191 - UTILISATION DE LA FONCTION CUISSON FAVORITE; Comment enregistrer une recette préréglée ?; UTILISATION DE LA FONCTION CUISSON SAINE
TROUBLESHOO TING MAINT AINING Y OUR APPLIANCE OPERA TING THE O VEN USING THE W ARMING DRA WER SURF A CE COOKING Type d'aliment Cuisson Dimensions Epaisseur Hauteur de grille Temps de cuisson 1er côté 2ème côté Biftecks Saignant - 1" 5 5:00 3:30-4:00 Moyen - 1-1½" 5 7:00 5:00-6:00 Bien cuit -...
Page 194 - UTILISATION DE LA FONCTION DE MAINTIEN AU CHAUD; Utilisation de la fonction Maintien au chaud; UTILISATION DE LA FONCTION DE PAIN PRÉCUIT
Type d'aliment Quantité Hauteur de grille Température par défaut (°F) Temp. du four (°F) Temps de cuisson (min) Consignes Filet de poisson blanc (4 escalopes) (550 g) 5 375 350 à 425 20-30 Placez les filets de poisson sur une lèchefrite ou un plat.Assaisonnez le poisson après cuisson si vous le souh...
Page 195 - UTILISATION DE LA FONCTION DES OPTIONS; Réglage de la température; Comment corriger la température du four ?
TROUBLESHOO TING MAINT AINING Y OUR APPLIANCE OPERA TING THE O VEN USING THE W ARMING DRA WER SURF A CE COOKING UTILISATION DE LA FONCTION DES OPTIONS Cette fonction vous permet de contrôler plusieurs options de commande électronique. Ces options comprennent le réglage de la température, l'unité de ...
Page 196 - Comment changer la langue sur l'affichage ?
Conversion automatique Lorsque vous utilisez la fonction de conversion automatique, la fonction de convection par conversion automatique permet de convertir automatiquement les températures de la cuisson classique en températures de cuisson par convection. Si cette fonction est activée, l'affichage ...
Page 197 - Activation/désactivation du son; Comment activer ou désactiver le son ?; Mode démo; Comment activer ou désactiver le mode démo ?; UTILISATION DE LA SONDE THERMIQUE; Comment utiliser la sonde thermique ?
TROUBLESHOO TING MAINT AINING Y OUR APPLIANCE OPERA TING THE O VEN USING THE W ARMING DRA WER SURF A CE COOKING Activation/désactivation du son Cette fonction vous permet de désactiver la sonorité des boutons de commande. Comment activer ou désactiver le son ? 1 . Appuyez sur Options et sur 7 sur le...
Page 198 - Tableau de la sonde thermique; Extraction de la sonde thermique
2 . Insérez la fiche de la sonde thermique dans la prise sur la paroi supérieure du four aussi loin qu'elle peut aller. 3 . Choisissez la fonction de cuisson souhaitée (Cuisson, Cuisson par convection, Rôtissage par Convection) ainsi que la température.. 4 . Appuyez sur Sonde de temp. pour régler la...
Page 199 - RÉGLAGE DE LA FONCTION SHABBAT; Comment utiliser la fonction Shabbat ?
TROUBLESHOO TING MAINT AINING Y OUR APPLIANCE OPERA TING THE O VEN USING THE W ARMING DRA WER SURF A CE COOKING RÉGLAGE DE LA FONCTION SHABBAT (Utilisée pour les fêtes et le Shabbat juifs) Pour en savoir plus et obtenir des instructions d'utilisation et une liste complète des modèles avec la fonctio...
Page 200 - entretien de votre appareil
entretien de votre appareil AUTO-NETTOYAGE Le cycle d'auto-nettoyage produit une température très élevée (bien supérieure aux températures de cuisson) afin de brûler complètement les résidus de graisse ou les réduire en poudre ; il vous suffit ensuite de les retirer à l'aide d'un torchon humide. ATT...
Page 201 - Comment différer le cycle d’auto-nettoyage ?
W ARRANT Y TROUBLESHOO TING MAINT AINING Y OUR APPLIANCE OPERA TING THE O VEN USING THE W ARMING DRA WER SURF A CE COOKING Comment lancer un cycle d'auto-nettoyage 1 . Sélectionnez la durée d'auto-nettoyage (ex. : 3 heures). Appuyez sur la touche Auto-nettoyage une fois pour un cycle de 3 heures, de...
Page 202 - NETTOYAGE VAPEUR; Comment régler le four pour le nettoyage vapeur ?; Après un cycle de nettoyage vapeur
NETTOYAGE VAPEUR Comment régler le four pour le nettoyage vapeur ? La fonction de nettoyage vapeur permet d'effectuer un nettoyage superficiel en économisant du temps et de l'énergie. Pour nettoyer plus efficacement des résidus et particules graisseuses, utilisez la fonction d'auto-nettoyage. 1 . Re...
Page 203 - ENTRETIEN ET NETTOYAGE DU FOUR; Ventilation du four
W ARRANT Y TROUBLESHOO TING MAINT AINING Y OUR APPLIANCE OPERA TING THE O VEN USING THE W ARMING DRA WER SURF A CE COOKING ENTRETIEN ET NETTOYAGE DU FOUR AVERTISSEMENT • Avant de nettoyer une quelconque partie de la cuisinière, assurez-vous que toutes les commandes sont DÉSACTIVÉES et que toutes les...
Page 204 - ENTRETIEN ET NETTOYAGE DE LA TABLE DE CUISSON VITRÉE; Nettoyage après une utilisation quotidienne
Grilles de cuisson • Si vous laissez les grilles dans le four durant un cycle d'auto-nettoyage, leur couleur deviendra légèrement bleutée et l'aspect de leur surface se ternira. Une fois le cycle d'auto-nettoyage terminé et le four refroidi, essuyez les parties latérales des grilles à l'aide d'un pa...
Page 206 - Nettoyage du joint de la table de cuisson; Risques d'endommagement définitif de la surface vitrée; Nettoyage des éclaboussures de sucre et du plastique fondu
Nettoyage du joint de la table de cuisson Pour nettoyer le joint situé sur le pourtour de la vitre, appliquez un chiffon humide durant quelques minutes, puis nettoyez à l'aide d'un nettoyant non abrasif. Risques d'endommagement définitif de la surface vitrée • Les éclaboussures de sucre (comme celle...
Page 207 - RETRAIT ET REMISE EN PLACE DE LA PORTE DU FOUR; Comment retirer la porte ?; Comment remettre la porte en place ?
W ARRANT Y TROUBLESHOO TING MAINT AINING Y OUR APPLIANCE OPERA TING THE O VEN USING THE W ARMING DRA WER SURF A CE COOKING RETRAIT ET REMISE EN PLACE DE LA PORTE DU FOUR Comment retirer la porte ? ATTENTION • La porte est très lourde. Soyez prudent lorsque vous retirez et soulevez la porte. Ne soule...
Page 208 - RETRAIT ET REMISE EN PLACE DU TIROIR DE RANGEMENT; Comment retirer le tiroir de rangement ?
3 . Ouvrez la porte au maximum. Si la porte ne s'ouvre pas complètement, c'est que la partie creuse n'est pas correctement insérée dans la partie inférieure du logement. 4 . Poussez les verrous de la charnière vers le haut contre le cadre de la cavité du four pour les mettre en position de verrouill...
Page 209 - REMPLACEMENT DE L'AMPOULE DU FOUR
W ARRANT Y TROUBLESHOO TING MAINT AINING Y OUR APPLIANCE OPERA TING THE O VEN USING THE W ARMING DRA WER SURF A CE COOKING REMPLACEMENT DE L'AMPOULE DU FOUR L'éclairage du four nécessite une ampoule standard de 40 watts. L'éclairage s'active à l'ouverture de la porte. Lorsque la porte du four est fe...
Page 210 - dépannage
dépannage DÉPANNAGE Samsung veille à ce que vous ne rencontriez pas de problèmes lors de l'utilisation de votre nouvelle cuisinière électrique. En cas de problème inattendu, recherchez en premier lieu une solution dans le tableau ci-dessous. Si, après avoir essayé la solution proposée, vous ne parve...
Page 216 - ou exécuter des travaux de nettoyage ou d’entretien réguliers.
Veuillez noter que la garantie Samsung n'inclut pas les déplacements du service après- vente pour expliquer le fonctionnement de l'appareil, corriger une installation non correcte ou exécuter des travaux de nettoyage ou d’entretien réguliers. UNE QUESTION ? UN COMMENTAIRE ? PAYS N° DE TÉLÉPHONE SITE...


 Samsung NE63A6111SS/AA
User Manual
Samsung NE63A6111SS/AA
User Manual
 Samsung NE63A6311SS/AA
User Manual
Samsung NE63A6311SS/AA
User Manual
 Samsung NE63A6511SS/AA
User Manual
Samsung NE63A6511SS/AA
User Manual
 Samsung NE63A6711SS/AA
User Manual
Samsung NE63A6711SS/AA
User Manual
 Samsung NE63A6751SS/AA
User Manual
Samsung NE63A6751SS/AA
User Manual
 Samsung NE63B8211SS
User Manual
Samsung NE63B8211SS
User Manual
 Samsung NE63B8211SS/AA
User Manual
Samsung NE63B8211SS/AA
User Manual
 Samsung NE63B8611SS
User Manual
Samsung NE63B8611SS
User Manual
 Samsung NE63BG8315SS
User Manual
Samsung NE63BG8315SS
User Manual
 Samsung NE63T8111SS/AA
User Manual
Samsung NE63T8111SS/AA
User Manual
 Samsung NE63T8511SS/AA
User Manual
Samsung NE63T8511SS/AA
User Manual
 Samsung NE63T8911SG
User Manual
Samsung NE63T8911SG
User Manual
 Samsung NE63T8911SS
User Manual
Samsung NE63T8911SS
User Manual
 Samsung NSG6DG8300SRAA
User Manual
Samsung NSG6DG8300SRAA
User Manual
 Samsung NX58R5601SS
User Manual
Samsung NX58R5601SS
User Manual
 Samsung NX60A6111SS
User Manual
Samsung NX60A6111SS
User Manual
 Samsung NX60A6111SS/AA
User Manual
Samsung NX60A6111SS/AA
User Manual
 Samsung NX60A6311SS
User Manual
Samsung NX60A6311SS
User Manual
 Samsung NX60A6311SS/AA
User Manual
Samsung NX60A6311SS/AA
User Manual