Pioneer VSX-LX51 - Manuals
Pioneer VSX-LX51 Amplifier – User Manual, Manual in PDF format online.
Manuals:
User Manual Pioneer VSX-LX51
Summary
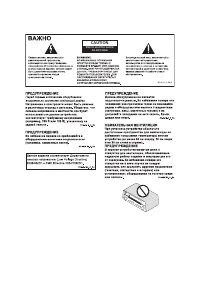
D3-4-2-1-1_Ru-A CAUTION RISK OF ELECTRIC SHOCK DO NOT OPEN ST ANDBY /O N
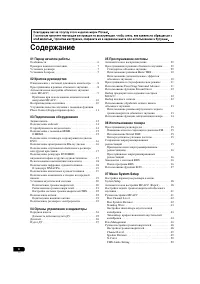
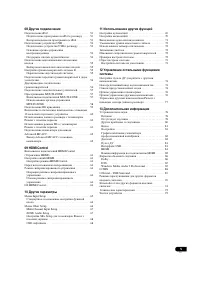
4 Ru 01 . . . . . . . . . . . . . . . . . . . . . . . . . . . . . . . . . . . 6 . . . . . . . . . . . . . . . . . . . . . 7 . . . . . . . . . . . . . . . . . . . . . . . . . . . . . 7 . . . . . . . . . . . . . . . . . . . . . . . . . . . . . . 7 02 . . . . 8 . . . . . . 8 (Auto MCACC) . . . . . . . ...
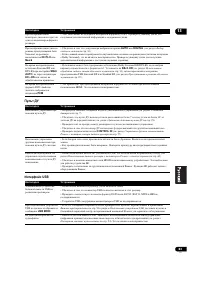
5 Ru 08 iPod . . . . . . . . . . . . . . . . . . . . . . . . . . . . . 51 iPod . . . . . 51 iPod . . . . . . . . . 51 USB . . . . . . . . . . . . . . . . . . . 53 USB . . . . . . . . 53 . . . . . . . . . . . . . . . . . . . . . . . . . . . . 53 . . . . . . . . . . . . . . . 54 . . . . . . . . . . . ...
01 7 Ru • iPod USB iPod USB. iPod , , iPod . USB USB, . : • ( : 5 ) • • AA/IEC R6P x2 • • FM • • • , , . : – ( ) – ( , ). Э . – – – – – – , ( , ) , , . : • . • , . • . . • . • , , , , . Э , , . Э .
02 8 Ru 2: , , . , , , . Dolby Digital, DTS Dolby Surround. - . ( CD ) . 29. . . • , , . 1 DVD. . DVD . 16. DVD . 2 , . , У . 20. . , . . . 21. 3 , DVD, . . 1 , . , . • . 4 MCACC. , . (Auto MCACC) . 9. 5 DVD. , DVD , , DVD. , DVD , DVD. , . 10, , . , . . 29. , . System Setup . 38. 1 , 15- HDMI. , . ...
02 10 Ru • ( , Too much ambient noise! Check Microphone. ) RETRY ( . MCACC ). , GO NEXT . , , . 1 ( ERR ) ( ), , . RETRY , . , , / / ( ) . 6 , «OK», ENTER. , Channel Level, Speaker Distance, Standing Wave Acoustic Cal EQ, . . Э 3 7 . 7 (MCACC) ! RETURN System Setup. 2 MCACC. MCACC , System Setup...
02 11 Ru • . . 29. , - . , Dolby Digital Dolby Digital EX , 5.1- DTS DTS+Neo:6 . , Dolby Digital Dolby Digital . 4 . , , . Phase Control ( ) Phase Control ( ) , , / ( . . ). , LFE (Low-Frequency Effects - ), , . , , , , , . Phase Control, ( . ). Phase Control OFF • • • Phase Control ON • • • Phase C...
03 12 Ru 3: Э , , . , . • , . . 1 HDMI (4 .) / , HDMI. . HDMI . 15. 2 (2 .) , / DVD, , CD . . Input Setup . 65. 3 / ( ) (4 .) OUT CD - . . . 18. IN , / DVD, , CD . . . Input Setup . 65. 4 RS-232C Advanced MCACC. . Advanced MCACC . 62. 5 / Pioneer . . У Pioneer . 77. 6 / (MULTI-ZONE) , , ...
03 13 Ru 10 , , . . У . 20. 11 S-Video . . DVD . 16. 12 / ZONE 2 . . MULTI-ZONE . 57. 13 (4 .) , , , DVD. . . . 18. 14 / ( ) (3 .) , , CD, , . . . . 19. 15 , , , . . . 57 ( . У . 20). 16 AM FM . . . 22.
03 14 Ru • . • , . • . . MONITOR VIDEO OUT . HDMI - : , , / HDMI . 1 ( . Input Setup . 65) : HDMI, , S-Video, ( ). • , THX ( OFF ) (Digital Video Conversion) ( . 70). 1 • , . , ( , ) , . , Digital Video Conversion ( . 70) OFF . • ZONE 2 . , . . 70. HDMI IN S-VIDEO IN VIDEO IN COMPONENT VIDEO IN HDMI...
03 15 Ru HDMI HDMI DVI ( HDCP), HDMI. 1 HDMI , , , DVD-Video, DVD-Audio, SACD, Dolby Digital Plus, Dolby TrueHD, DTS-HD Master Audio ( . ), Video CD/ Super VCD, CD MP3. HDMI . . 14. 1 HDMI HDMI IN HDMI HDMI. HDMI, HDMI . 2 HDMI HDMI OUT HDMI HDMI . • , . 3 INPUT SELECT, HDMI, ( , HDMI 2). INPUT SELE...
03 17 Ru / , « ». 1 / TV SAT AUDIO VIDEO. RCA S-Video. 2 1 OPTICAL IN 1 (TV SAT). 2 . DVD/HDD, / , , DVD/HDD- . 1 / / DVR1 AUDIO VIDEO. RCA/ , – S-Video. • DVR2 IN . 2 , DVR1 AUDIO VIDEO / . RCA/ , – S-Video. • DVR2 OUT . 1 , . , ( . Input Setup . 65). 2 / , . DIGITAL ASSIGNABLE ASSIGN- ABLE OPTICAL...
03 18 Ru 3 , 1 OPTICAL IN 2 (DVR1). . 2 • OPTICAL IN 3 ( DVR2 ). S-Video . ( , ), . , , - . 1 ASSIGNABLE COMPONENT VIDEO. . • , , . , — . Input Setup . 65. 2 COMPONENT VIDEO MONITOR OUT . . , , . . , . . 19. 1 • ( ). • , . 2 , . , ( . Input Setup . 65). TI CH IN SPEAKERS B A CD CD-R ANTENNA PRE OUT ...
03 19 Ru 1 1 COAXIAL IN 2 (CD). . 2 DIGITAL . OPTICAL OUT , . 2 WMA9 Pro Windows Media™ Audio 9 Professional 3 (WMA9 Pro), WMA9 Pro , WMA9 Pro. , DVD, . . WMA9 Pro . . ( CD-R ) . • (AUDIO). RCA/ . • , MD- . ., ( OUT ) . : ( VIDEO ), ( AUDIO L/R ) ( DIGITAL IN ). Э / , , , , / . • PUSH OPEN . • , VID...
03 20 Ru : , , , , . 1 , : , . ( ). , , ( ). 6 Ω 16 Ω ( 8 Ω , . . 72). (+) (–) . , . • . , , . • . . 1 , SURROUND BACK L (Single). DIGITAL ASSIGNABLE ASSIGN- ABLE OPTICAL RS-232C MULTI CH IN SPEAKERS B A CD CD-R ANTENNA PRE OUT DVD TV SAT DVR1 CON-TROL IR ZONE2 1 2 12V TRIGGER COAXIAL HDMI OUT OUT B...
03 22 Ru . ( . A ) ( ). ( . ) . • , THX ( . ). THX THX, . , ( ) , . • , THX THX: THX Select2 CINEMA , THX MUSIC MODE THX GAMES MODE . . THX Audio Setting . 50 , Home THX ( . 30). FM, . ( . . 23). 1 AM. 2 , , AM. 3 AM . , ( . ), ( . ). • AM , ( . ), . . 4 AM . 5 FM , AM. , FM . , . LS LS RS RS SB LS ...
03 23 Ru FM FM FM UNBAL 75 Ω . AM AM LOOP 5 o 6 , AM. . , . • . , , , . , . . , . . . , , Pioneer, . • ( , ), . • , , STANDBY/ON . • . ANTENNA FM UNBAL 75 AM LOOP 75 Ω ANTENNA FM UNBAL 75 AM LOOP 5 6 ( )
04 24 Ru 4: 1 Pery INPUT SELECTOR . 2 STANDBY/ON . . 3 ( . У . 25). 4 PHASE CONTROL – Phase Control ( ) ( . 11). ADVANCED MCACC – , MCACC ( . 32). 1 DIGITAL PRECISION PROCESSING – ( , Pure Direct ( . 32), ). DIGITAL VIDEO SCALER – , Resolution , PURE ( , ) ( . 69). HDMI – , HDMI; , ( . 63). 5 Pery...
04 25 Ru 10 PHONES . . 11 AUTO SURR/STREAM DIRECT – ( . 29) Stream Direct. Stream Direct / ( . 32). HOME THX – Home THX ( . 30). STANDARD SURROUND – 2 Pro Logic IIx Neo:6 ( . 29). ADVANCED SURROUND – ( . 30). STEREO/A.L.C. – , Front Stage Surround Advance ( ) ( . 31). 12 MULTI-ZONE MULTI-ZONE ( . MU...
04 26 Ru 1 SIGNAL . AUTO , ( . 32). 2 Э , . L – C – R – SL – S – ( ) SR – SBL – SB – ( ) SBR – LFE – ( ((( ))) , ) 3 , ( DSD PCM DSD (Digital Stream Direct) PCM SACD). 4 S.RTRV , Sound Retriever ( ) ( . 69). 5 MULTI-ZONE MULTI-ZONE ( . 57). 6 PHASE CONTROL Phase Control ( ) ( . 11). 7 ( ) ( ) ( . ...
05 29 Ru 5: • , , , , . , . . 90. , Auto Surround. , , . 1 • , RECEIVER, AUTO/DIRECT (AUTO SURR/STREAM DIRECT) 2 . AUTO SURROUND . . • FM, Neural THX ( , . Neural THX . 35). . , , . , . . 33. . 3 • , RECEIVER, STANDARD (STANDARD SURROUND). , . • Dolby Digital, DTS Dolby Surround, , . 4 : • 2 Pro Log...
05 30 Ru • 2 Pro Logic IIx MOVIE – . ( ) • 2 Pro Logic IIx MUSIC – . . 29 • Dolby Digital EX – 5.1- 6.1- ( Dolby Digital Surround EX) • DTS-ES – 6.1- DTS-ES • DTS Neo:6 – 6.1- DTS Home THX THX Home THX , THX Ltd. . Home THX , . THX ( . . 33). • RECEIVER, THX (HOME THX) . 1 THX THX CINEMA ( . . 29): ...
05 31 Ru • PHONES SURROUND – . • Advanced Surround , EFFECT , . 69. STEREO ( , , ). M Dolby Digital, DTS WMA9 Pro . (A.L.C.), , , . • , RECEIVER, STEREO/A.L.C. . : • STEREO – , Midnight, Loudness / . • A.L.C. – . • F.S.SURR FOCUS – . Front Stage Surround Advance . • F.S.SURR WIDE – . Front Stage Sur...
05 32 Ru Stream Direct Stream Direct, , . , ( . Stream direct . 94). 1 , RECEIVER, AUTO/DIRECT (AUTO SURR/STREAM DIRECT) . . • AUTO SURROUND – . . 29. • DIRECT – ( , , , X-curve), , , hi-bit. . • PURE DIRECT – PCM . 1 . MCACC • : MEMORY 1 2 , ( , ). • , RECEIVER, MCACC. MCACC 3 . . Data Management ....
05 33 Ru • HDMI – HDMI. 1 • PCM – PCM. 2 DIGITAL AUTO , 2 DIGITAL Dolby Digital Dolby Digital Plus, 2 HD Dolby TrueHD, DTS DTS DTS-HD, WMA9 Pro WMA9 Pro. • : SBch ON 6.1 7.1 6.1 ( , Dolby Digital EX DTS-ES), 6.1 7.1 ( , 5.1). 5.1 , , , 5.1, ( ). , , ( = ( ) ( ) ). • RECEIVER, SBch . : • SBch ON – ...
05 34 Ru Advanced Surround , DVD Pioneer, HDMI Control, HDMI. 1 HDMI Control, . HDMI Control . 63. 1 RECEIVER, GENRE, , . Advanced Surround. Dolby Digital/DTS/PCM/SACD/WMA9 Pro DVD-Audio ON a AUTO b 2- ( ) ON a AUTO b DTS-HD Master Audio/DTS-HD/Dolby Digital Plus/Dolby Tr...
06 35 Ru 6: FM AM ( ) ( ) . , , . , . . . 1 FM/AM . 2 FM/AM (FM AM). . 3 . Э , : TUNE / . , . . TUNE / . TUNE / . . FM TUNED STEREO FM , MPX , . , . Neural THX Neural Surround™, THX ® FM. • FM, AUTO/DIRECT Neural THX. , . Neural – THX Surround . 89. Neural THX STANDARD . . , . 1 FM/AM . 2 FM/A...
06 36 Ru 4 ENTER. ENTER , . , . 1 , . . , , . 2 T.EDIT ( ). STATION NAME , . 3 . . ABCDEFGHIJKLMNOPQRSTUVWXYZ abcdefghijklmnopqrstuvwxyz 0123456789 !”#$%&’() ∗ +,–./:;<=>?@[ \ ]^_{|} ˜ [ ] / , / , ENTER . • , 1 3 . • , DISPLAY , . . , . 35. 1 FM/AM . 2 CLASS, , . A, B C. 3 ST / . • ....
06 37 Ru 3 ST / . 4 ENTER . . , , . 5 , ENTER . ENTER , . NO PTY , , . 1 RDS DISPLAY RDS. 2 • DISPLAY RDS. : • ( RT ) – , . , , - . • ( PS ) – . • ( PTY ) – , . • . EON EON (Enhanced Other Network information ( )), , EON, , . Э , EON , , FM PTY. . 1 FM/AM FM. 3 2 EON . : • EON TA ( ) – . • EON NEW...
07 38 Ru 7: System Setup System Setup ( , ), . 1 . RECEIVER . 1 • , . 2 RECEIVER , SETUP. 2 . /// ENTER . RETURN . • SETUP System Setup. 3 , . • Auto MCACC – . (Auto MCACC) . 9. . MCACC (Expert) . • Surround Back System – , ( . . 41). • Manual MCACC – ( . MCACC . 41). • Data Management – MCACC...
07 40 Ru • . MCACC . 10 . 5 , MCACC . , , . . • . Э . • ( , Too much ambient noise! Check Microphone ) RETRY ( . MCACC . 10). , GO NEXT . 6 , . 1 , , . , , 10 , MCACC. , « OK » ENTER 7. ( ERR ) ( ), , . RETRY , . , , / / ( ) . 7 , «OK», ENTER. , , , . . Э 3 7 . • Stand.Wave Multi-Point ( 2), , ,...
07 42 Ru • Standing Wave – ( . Standing Wave . 43). , . 43: • EQ Adjust – ( . . 43). • EQ Professional – , ( . Э . 44). Fine Channel Level • : 0.0dB ( ) . , . 48. 1 «Fine Channel Level» MCACC. 0.0 . 2 . Э , 0.0dB , . • ENTER . 3 (+/–10dB) . / . , . • , . • / . 4 RETURN. MCACC. Fine Speaker Dis...
07 43 Ru . . , , . 1 , . • , . • / . 4 RETURN. MCACC. Standing Wave • : ON 2 / ATT 0.0dB ( ) , , . Э , . , , (« ») . Standing Wave Control . , Standing Wave Control MCACC. 3 1 «Standing Wave» MCACC. 2 . • Filter Ch – , ( ): MAIN ( , ), Center SW ( ). • TRIM ( Filter Ch SW ) – ( ). • f / Q / ATT ...
07 44 Ru / , . / / . / . • OVER! , . , , OVER! . • . , TRIM . / TRIM , / . 3 RETURN. MCACC. Э Э , . . 1 , ( . . « ») , EQ Pro. & S-Wave ( ALL ) Custom Menu , MCACC (Expert) . 38 . Э , . - , ( ) . Э , , ( Pioneer — . Advanced MCACC . 62). , – . , - ( . . ), . ( 100 ). , , . ( ), , , ....
07 45 Ru • – . , . , 30~50ms . . , , . , ( , ) . . 1 «EQ Professional» ENTER. 2 ENTER. • Reverb Measurement – ( , . Advanced MCACC . 62 RS-232C ). • Reverb View – . 1 • Advanced EQ Setup – Э , . , (Auto MCACC) . 9 MCACC (Expert) . 38 , . 3 «Reverb Measurement», EQ ON OFF, START. , Reverb View Output...
07 46 Ru Э , Reverb Measurement ( 3 . 45). / , . / . , 2 . 5 «Advanced EQ Setup», . , START. ( . ) . , . 30~50ms . / , . / . ( ) : 63Hz , 125Hz , 250Hz , 500Hz , 1kHz , 2kHz , 4kHz , 8kHz 16kHz . ( ): 0~20ms , 10~30ms , 20~40ms , 30~50ms , 40~60ms , 50~70ms 60~80ms . Э . , START . 2 o 4 . ...
07 47 Ru 2 , . • , , . 3 MCACC, . / . 4 RETURN Data Check, 2 3 . 5 RETURN. Data Management setup. MCACC MCACC, . 1 «Memory Rename» Data Management setup. 2 MCACC, , . / , / . 3 MCACC, RETURN. Data Management setup. MCACC ( . MCACC . 41), 1 MCACC. Э , . 1 «MCACC Memory Copy» Data Management set...
07 48 Ru . Э ( ). , , ( . (Auto MCACC) . 9), . • , System Setup, . 1 «Manual SP Setup» ENTER. 2 , . , : • Speaker Setting – ( . ). • Channel Level – ( . 49). • Speaker Distance – ( . 49). • X-Curve – ( . 50). • THX Audio Setting – , THX ( . 50). 3 RETURN. Э ( , ). , , (Auto MCACC) . 9. 1 , MCACC . 1...
07 50 Ru 1 «Speaker Distance» Manual SP Setup. 2 / . 0,01 . 3 RETURN. Manual SP Setup. • , . X-Curve , , . X-Curve , . 1 1 «X-Curve» Manual SP Setup. 2 X-Curve. / . X-Curve , 2 . ( –3.0dB/oct ). X-Curve : • OFF , , X-Curve . 3 «Return», ENTER . THX Audio Setting THX Loudness Plus, . THX SELECT2 ...
08 51 Ru 8: • . , . • , . iPod Э iPod, iPod . 1 • PUSH OPEN iPod DIRECT USB . iPod 1 , USB ( iPod) 2 , iPod iPod DIRECT USB . . iPod. 2 iPod USB iPod. iPod Loading . 3 TOP MENU iPod. Top Menu iPod. 3 • iPod No Connection , iPod . iPod iPod, , . 4 . iPod , , iPod , , , , , iPod. 1 • iPod nano, iPod ,...
08 52 Ru 1 / , ENTER . • RETURN . 2 / ( ., albums ( )). • / / . 3 , , , . 1 iPod : Playlists Songs Artists Albums Songs Albums Songs SongsPodcastsGenres Artists Albums Songs Composers Albums Songs AudiobooksShuffle Songs • , All . , . iPod. iPod USB iPod USB. , , : iPod 2 i...
08 53 Ru USB USB 1 . USB 2 . • PUSH OPEN iPod DIRECT USB . USB 1 . 2 iPod USB USB. No Device . 3 USB. 3 USB . Loading , USB. , , . 4 USB . iPod USB iPod USB. USB ERR , , : • , . • USB . • ( , DVD ), USB . • USB ( ). , USB . 1 Э WMA/MP3/MPEG-4 AAC ( ). 2 • USB , - ( ) ( MP3) FAT16/32. USB. • Pioneer ...
08 54 Ru , , . , , : • MP3 (MPEG-1/2/2.5 Audio Layer 3) – : 8 48 ; : 8 / 320 / ( 128 / ); : .mp3 • WMA (Windows Media Audio) – : 32 / 44,1 ; : 32 / 192 / ( 128 / ); : .wma ; WMA9 Pro WMA : • AAC (MPEG-4 Advanced Audio Coding) – : 11,025 48 ; : 16 / 320 / ( 128 / ); : .m4a ; Apple : • VBR ( ) MP3/WMA...
08 55 Ru DVD Audio SACD DVD 5.1, 6.1 7.1- ( , ). 1 , . 1 , , DVD MULTI CH IN . • RCA/ . 2 DVD , MULTI CH IN . • RCA/ . • , SURROUND BACK L (Single) . , , DVD, . 2 1 , . , DVD, , . 2 MULTI CH IN . • DVD . , 10 Multi Ch In Setup Other Setup. , . Multi Channel Input Setup . 67. • . , . • , , . • 6 16 (...
08 57 Ru , , . , , . • . • , . ( L (Single) ) . • , , . 41. • , OFF , . • , ( . . 48) LARGE . MULTI-ZONE , MULTI- ZONE. MULTI-ZONE. , , . - ( , - ), - . , ZONE Audio Setup . 67. MULTI-ZONE - ( ZONE 2 ). 1 , ( . 58) - . B D-R ANTENNA PRE OUT IN Y P B P R MONITOR OUT FM UNBAL 75 FRONT CENTER SURROUND ...
08 58 Ru MULTI-ZONE , : MULTI-ZONE (ZONE 2) • ZONE 2 AUDIO OUT ZONE 2 VIDEO OUT . , - , . MULTI-ZONE (ZONE 2) , ZONE 2 . 41. , - ( , , ). • ZONE 2 VIDEO OUT . , , . MULTI- ZONE , - , . . MULTI-ZONE . 59. 1 MULTI-ZONE ON/OFF . , MULTI-ZONE: • ZONE 2 ON – MULTI-ZONE • ZONE 2 OFF – MULTI-ZONE MULTI-ZON...
08 59 Ru 2 CONTROL. • , 1 , - , ZONE 2 . , , . 3 INPUT SELECTOR . , ZONE 2 CD-R , CD-R , ( ZONE 2 ). • FM/AM , ( . . 35, , ). 2 • iPod USB MULTI-ZONE. 4 , MASTER VOLUME. Э VARIABLE ZONE Audio Setup . 67. 3 5 , CONTROL . MULTI-ZONE ON/OFF - . 4 MULTI-ZONE MULTI-ZONE ZONE 2 . MULTI-ZONE: , , ( , Niles...
08 60 Ru 12- ( , ) , 12- . , , Input Setup . 65. , . • 12 V TRIGGER 12 . - . • 12 /50 ( 50 1 2). , , , ( ) ( ) Input Setup . 65. Pioneer Pioneer , SR+ 1 , , . 2 • SR+ HDMI Control ( HDMI) ON. , HDMI Control OFF, SR+ ( . 63). • Pioneer SR+, . , , . • , SR+, . . Input Setup . 65 SR+ Setup Pioneer . 68...
08 61 Ru • SR+ 3 , CONTROL IN CONTROL OUT . SR+ - ( DVD . .) , . , ( / ) – . SR+ Pioneer SR+ , Pioneer . : • , , , MCACC . . • . • . • . • . . SR+ Setup Pioneer . 68. • SR+ , iPod USB . 1 , , SR+. . Pioneer . 60. • , , , Input Setup . 65. 2 SR+, RECEIVER, SR+. SR+ ON SR+ OFF . • , . SR+ Setup Pionee...
08 62 Ru Advanced MCACC ( . 43) , . RS-232C, RS-232C 9- RS-232C ( , - ). - Pioneer (http://www.pioneer.eu). . , , - Pioneer, . , , : • Microsoft Windows ® XP (Service Pack 2) Windows ® 2000. • : Pentium 3 / 300 AMD K6 / 300 ( ), 128 , 800x600. • RS-232C . / . • . • RS-232C . , , . 1 RS-232C 9- RS-23...
09 63 Ru 9: HDMI Control • KURO LINK, , HDMI Control . HDMI Control Pioneer HDD/DVD HDMI, , . , HDMI, . . • , HDMI Control. • , , HDMI Control, Pioneer. HDMI Control ( HDMI) . , . • , , . , . • , 15- . , . , HDMI, . • , HDMI , HDMI . HDMI , , HDMI Control, HDMI Control. , . . HDMI Control HDMI Contr...
09 64 Ru 1 RECEIVER, SETUP. 2 «Other Setup» ENTER. 3 «HDMI Control Setup» Other Setup. 4 «HDMI Control». • ON – HDMI Control. HDMI Control, HDMI . 1 • OFF – HDMI Control . . , , HDMI, . 5 SETUP. System Setup. , : 1 . 2 , . 3 HDMI, , , . 4 , , HDMI. . , . . HDMI, , 2 : • . • . • , HDMI, . • , HDMI. •...
10 65 Ru 10: Input Setup , ( . . 66). , , . 1 . RECEIVER . 2 RECEIVER , SETUP. . /// ENTER . RETURN . 3 System Setup «Input Setup». 4 , . ( , DVD VIDEO ), , . 5 ( ) ( ) . , DVD , DVD Digital In COAX-1 ( ) , . ( OPT-1 3 ) , . • , ( , TV SAT ), . • , , , , S-Video . 1 6 «Next» . : • Input Name –...
10 66 Ru . , , ( ), , , . Input Setup . 65. ( ) . Other Setup Other Setup , . 1 . RECEIVER . 2 RECEIVER , SETUP. . /// ENTER . RETURN . 3 «Other Setup» ENTER. 4 , . , : • Multi Ch In Setup – . • ZONE Audio Setup – MULTI-ZONE ( . ZONE Audio Setup . 67). • SR+ Setup – Pioneer ( . SR+ Setup Pio...
10 68 Ru SR+ Setup Pioneer SR+ Pioneer , . . . Pioneer . 60 SR+ Pioneer . 61. 1 «SR+ Setup» Other Setup. 2 «PDP Volume Control». • OFF – . • ON – , ( , DVD ), , . 3 , , . . , DVD 2 , DVD 2 . • Monitor Out Connect , . 4 RETURN. Other Setup. OSD Adjustment - , . 1 «OSD Adjustment» Other Setup. 2 //...
11 70 Ru , Video Parameter. , , . • , Video Parameter ( ), - , . 1 RECEIVER, VIDEO PARAMETER. 2 / , . / . . . DRC ( ) , Dolby Digital, DTS, Dolby Digital Plus, Dolby TrueHD, DTS-HD DTS-HD Master Audio ( ). AUTO c OFF MAX MID LFE ATT ( ) Dolby Digital DTS . . 0 , . –5 , –10 , –15 –20 , . OFF, . 0dB...
11 72 Ru , . Э , OVER . 1 • RECEIVER, A.ATT . , , , . . • RECEIVER, – SLEEP . • SLEEP . . 2 . , . • RECEIVER, – DIMMER . 8 , 6 , . . • , STANDBY/ON, SPEAKERS. : • Speaker 6 Ω – 6 . • Speaker 8 Ω – 8 . MCACC. 1 RECEIVER, STATUS . . 3 : 2 STATUS . 1 Stream Direct. 2 , . INPUT 1 2 3 SLEEP MCACC GENRE...
11 73 Ru , . . 1 . 2 STEREO/A.L.C , STANDBY/ON. RESET? . 3 AUTO SURR/STREAM DIRECT. OK . 4 HOME THX . OK , , . • , , . HDMI Audio Amp HDMI Control ( HDMI) ON ON A Normal . SMALL . SMALL . . SMALL . . . SMALLx2 . . YES 80 Hz X OFF THX Audio 0.0–0.3m . . 66. MULTI-ZONE 2 Variable 2 –60 dB SR+ SR+ ./...
12 74 Ru 12: ( , DVD CD ) , . . , , , . • , RECEIVER . RETURN . • , . 1 RECEIVER, SETUP. . 2 , . . 1 3 3- ( . ). , . , , , . 4 1 3 , . 5 , RECEIVER. , ( ) SOURCE . , ( ). , , , , , . , , . 1 RECEIVER , FM/AM iPod USB . DVD BD TV HDMI DVR 1 DVR 2 CD CD-R DIMMER FM/AM 1 2 3 SLEEP MCACC INPUT SELECT ...
12 76 Ru ( . У ). . • TV CONTROL , TV CTRL . TV CTRL . ( . У . 74). . TV , TV CTRL . / / INPUT . ( ). CH +/– . / / VOL +/– . / / SOURCE . / / «A» . Ы /B / . C / PROTECH 607, 642, 644, 646, 649 QUELLE 631, 632, 607, 642, 645, 653 R-LINE 607 RADIOLA 607 RBM 653 RCA 618, 609 REDIFFUSION 632, 64...
12 77 Ru Pioneer Pioneer CONTROL , , . , , . 1 • , , , HDMI . 1 , . . 2 CONTROL OUT CONTROL IN Pioneer. - . 3 . . CD/MD/CD-R/VCR/DVD/LD/BD/DVR/ . CD/MD/CD-R/VCR/DVD/LD/BD/DVR/ . CD/MD/CD-R/VCR/DVD/LD/BD/DVR/ . CD/MD/CD-R/VCR/DVD/LD/BD/DVR/ . CD/MD/CD-R/VCR/DVD/LD/BD/DVR/ . CD/MD/CD-R/VCR/L...
13 81 Ru . • - ( . . 17). • ( ) ( . . 70), , . • , HDMI ( . Input Setup . 65). • - . • . • ( , ) , . Resolution ( . 70) / , Digital Video Conversion ( . 70) OFF . . • , . • . , ( ). , . • ( , ) ( , ). . . . ( , S-Video ), . MCACC . • . ( . MCACC . 10). , ( . 41). MCACC . • , . . MCACC . • Э ( , . .)...
13 84 Ru HDMI • , , , , . HDMI . • , . . • Э HDCP. HDCP . , , S-Video. • - , ( HDCP). , S-Video. • HDMI , , . • , , DeepColor . • « NOT SUPPORT », , DeepColor . • HDMI, . • MULTI CH IN HDMI, THROUGH, . , . • DeepColor, HDMI ( HDMI) DeepColor. . • Resolution ( . 70). . • , - HDMI AMP/THROUGH . • DVI,...
13 86 Ru , DVD, , , . Dolby Dolby. www.dolby.com. Dolby Digital Dolby Digital – , DVD . , LFE ( ), ; «5.1- » Dolby Digital. , , Dolby Digital , Dolby Pro Logic . , Dialog Normalization, ( ) , , ( Dialnorm) . Dolby Digital Surround EX Dolby Digital Surround EX (EX EXtended – ) – Dolby Digital, ( ) , ...
13 87 Ru Dolby Laboratories. « », «Pro Logic», «Surround EX», D Dolby Laboratories. DTS DTS. www.dtstech.com. DTS Digital Surround DTS Digital Surround 5.1- DTS Inc., DVD- Video, DVD-Audio, 5.1- , . , , LFE ( ). , . DTS-ES DTS-ES (ES Extended Sound – ) – , DTS-ES Discrete 6.1 DTS-ES Matrix 6.1. DTS-...
13 88 Ru THX THX. www.thx.com. • THX Cinema THX , THX Ltd. THX , , . , « » . , VHS, DVD . . . THX , . , , Cinema ( , THX Cinema, THX Surround EX). • , . . • . , . , . Timbre Matching , , , , . Э . • , . , , . , . . Э – – , . • THX Select2 Plus THX Select2 Plus . THX Select2 Plus, , . THX Select2 Plu...
13 89 Ru • THX Loudness Plus THX Loudness Plus - , , THX Ultra2 Plus™ THX Select2 Plus™. THX Loudness Plus, . Reference Level , - . THX Loudness Plus , . Э , . THX Loudness Plus THX. THX Cinema, THX Music THX Games THX Loudness Plus . • ASA ASA THX , 2 2 . ( , , , , ), THX Audio , , . ASA ; THX Ultr...
13 91 Ru OFF d Dolby Digital Plus Dolby TrueHD ( 176,4 / 192 ) 2 Pro Logic ll MOVIE 2 Pro Logic ll MUSIC 2 Pro Logic ll GAME 2 PRO LOGIC 2 PRO LOGIC + THX 2 Pro Logic ll MOVIE + THX CINEMA 2 Pro Logic ll MUSIC + THX MUSIC 2 Pro Logic ll GAME + THX GAMES Neo:6 MUSIC + THX MUSIC Neo:6 CINEMA + THX Dol...
Printed in <ARC7819-A> http://www.pioneer-rus.ru http://www.pioneer.eu PIONEER CORPORATION 4-1, Meguro 1-Chome, Meguro-ku, Tokyo 153-8654, Japan PIONEER ELECTRONICS (USA) INC. P.O. BOX 1540, Long Beach, California 90801-1540, U.S.A. TEL: (800) 421-1404 PIONEER ELECTRONICS OF CANADA, INC. 300 A...
Manual Pioneer VSX-LX51
Summary
D3-4-2-1-1_En-A The exclamation point within an equilateral triangle is intended to alert the user to the presence of important operating and maintenance (servicing) instructions in the literature accompanying the appliance. The lightning flash with arrowhead symbol, within an equilateral triangle, ...
CAUTION The STANDBY/ON switch on this unit will not completely shut off all power from the AC outlet. Since the power cord serves as the main disconnect device for the unit, you will need to unplug it from the AC outlet to shut down all power. Therefore, make sure the unit has been installed so that...
4 En Contents 01 Before you start Features . . . . . . . . . . . . . . . . . . . . . . . . . . . . . . . . . . . . . . 6Checking what’s in the box . . . . . . . . . . . . . . . . . . . . . . . 7Installing the receiver . . . . . . . . . . . . . . . . . . . . . . . . . . . 7Loading the batteries . . ....
Before you start 01 6 En Chapter 1: Before you start Features • Advanced Direct Energy design This receiver offers a new advancement in discrete design unique to Pioneer for high-power drivability, low distortion and stable imaging. Through a circuit design that minimizes the energy loss of the ampl...
Before you start 01 7 En • iPod and USB Ready This receiver has the terminals for connecting an iPod unit and a USB mass storage device. The iPod terminal is ready for handling digital audio, and this receiver’s enhanced compatibility makes on-screen control of your iPod an added possibility. The US...
5 minute guide 02 8 En Chapter 2: 5 minute guide Introduction to home theater Home theater refers to the use of multiple audio tracks to create a surround sound effect, making you feel like you’re in the middle of the action or concert. The surround sound you get from a home theater system depends n...
5 minute guide 02 9 En Automatically setting up for surround sound (Auto MCACC) The Auto MCACC Setup measures the acoustic characteristics of your listening area, taking into account ambient noise, speaker size and distance, and tests for both channel delay and channel level. After you have set up t...
5 minute guide 02 10 En • With error messages (such as Too much ambient noise! or Check Microphone. ) select RETRY after checking for ambient noise (see Problems when using the Auto MCACC Setup below) and verifying the mic connection. If there doesn’t seem to be a problem, you can simply select GO N...
5 minute guide 02 11 En • See also Listening to your system on page 29 for information on different ways of listening to sources. It is possible to check on the display whether or not multi-channel playback is being performed properly. When using a surround back speaker, 2 D+PL IIx MOVIE is displaye...
Connecting your equipment 03 12 En Chapter 3: Connecting your equipment This receiver provides you with many connection possibilities, but it doesn’t have to be difficult. This page explains the kinds of components you can connect to make up your home theater system. Rear panel Caution • Before maki...
Connecting your equipment 03 13 En 10 Speaker terminals Use for connection to the main front, center, surround and surround back speakers. See Installing your speaker system on page 20. 11 Composite and S-Video monitor outputs Use to connect monitors and TVs. See Connecting your TV and DVD playe...
Connecting your equipment 03 14 En When making cable connections • To avoid hum, do not lay connected cables over the top of the receiver. • When connecting optical cables, be careful when inserting the plug not to damage the shutter protecting the optical socket. • When storing optical cable, coil ...
Connecting your equipment 03 15 En Connecting using HDMI If you have an HDMI or DVI (with HDCP) equipped component, you can connect it to this receiver using a commercially available HDMI cable. 1 The HDMI connection transfers uncompressed digital video, as well as almost every kind of digital audio...
Connecting your equipment 03 17 En Connecting a satellite/cable receiver or other set-top box Satellite and cable receivers, and terrestrial digital TV tuners are all examples of so-called ‘set-top boxes’. 1 Connect the audio/video outputs on the set-top box to the TV SAT AUDIO and VIDEO inputs. Con...
Connecting your equipment 03 18 En 3 If the device can output digital audio, connect an optical-type 1 digital audio output from the recorder to the OPTICAL IN 2 (DVR1) input. Use an optical cable for the connection. 2 • For a second recorder, use the OPTICAL IN 3 ( DVR2 ) inputs. Using the componen...
Connecting your equipment 03 19 En 1 Connect a coaxial-type 1 digital audio output on your digital component to the COAXIAL IN 2 (CD) input. Use a coaxial cable for the connection. 2 For recording equipment, connect the optical-type DIGITAL output to a digital input on the recorder. Use an optical c...
Connecting your equipment 03 20 En Installing your speaker system To take full advantage of the receiver’s surround sound capabilities connect front, center, surround and surround back speakers, as well as a subwoofer. 1 Although this is ideal, other configurations with fewer speakers—no subwoofer o...
Connecting your equipment 03 21 En Bare wire connections Make sure that the speaker cable you’re going to use is properly prepared with about 10 mm of insulator stripped from each wire, and the exposed wire strands twisted together ( fig. A ). To connect a terminal, unscrew the terminal a few turns ...
Connecting your equipment 03 22 En The diagrams below show suggested surround and surround back speaker orientation. The first diagram ( fig. A ) shows orientation with one surround back speaker (or none) connected. The second ( fig. B ) shows orientation with two surround back speakers connected. •...
Connecting your equipment 03 23 En Connecting external antennas To improve FM reception connect an external FM antenna to the FM UNBAL 75 Ω terminal. To improve AM reception, connect a 5 m to 6 m length of vinyl-coated wire to the AM LOOP terminals without disconnecting the supplied AM loop antenna....
Controls and displays 04 24 En Chapter 4: Controls and displays Front panel 1 INPUT SELECTOR dial Use to select an input source. 2 STANDBY/ON Switches the receiver between on and standby. Power indicator lights when the receiver is on. 3 Remote sensor Receives the signals from the remote control (...
Controls and displays 04 25 En 10 MCACC SETUP MIC jack Use to connect the supplied microphone. 11 PHONES jack Use to connect headphones. When the headphones are connected, there is no sound output from the speakers. 12 Listening mode buttons AUTO SURR/STREAM DIRECT – Switches between Auto surround m...
Controls and displays 04 26 En Display 1 SIGNAL indicators Light to indicate the currently selected input signal. AUTO lights when the receiver is set to select the input signal automatically (page 32). 2 Program format indicators These change according to which channels are active in digital source...
Controls and displays 04 27 En Remote control The remote has been conveniently color-coded according to component control using the following system (press the corresponding input source button to access): • White – Receiver controls (see below) • Blue – Other controls (page 76) 1 RECEIVER This sw...
Controls and displays 04 28 En RETURN – Press to confirm and exit the current menu screen (also use to return to the previous menu with DVDs or to select closed captioning with DTV). 6 /// (TUNE/ST) /ENTER Use the arrow buttons when setting up your surround sound system (page 38) and the Audio o...
Listening to your system 05 29 En Chapter 5: Listening to your system Important • The listening modes and many features described in this section may not be available depending on the current source, settings and status of the receiver. See Listening modes with different input signal formats on page...
Listening to your system 05 30 En • 2 Pro Logic IIx MOVIE – See above (only available when you’re using two surround back speakers) • 2 Pro Logic IIx MUSIC – See page 29 • Dolby Digital EX – Creates surround back channel sound for 5.1 channel sources and provides pure decoding for 6.1 channel source...
Listening to your system 05 31 En • PHONES SURROUND – When listening through headphones, you can still get the effect of overall surround. Tip • When an Advanced Surround listening mode is selected, the effect level can be adjusted using the EFFECT parameter in Setting the Audio options on page 69. ...
Listening to your system 05 32 En Using Stream Direct Use the Stream Direct modes when you want to hear the truest possible reproduction of a source. All unnecessary signal processing is bypassed, and you’re left with the pure analog or digital sound source (see Stream direct with different input si...
Listening to your system 05 33 En • HDMI – Selects an HDMI signal. 1 • PCM – Only PCM signals are output. 2 When set to DIGITAL or AUTO , 2 DIGITAL lights with Dolby Digital or Dolby Digital Plus decoding, 2 HD lights with Dolby TrueHD decoding, DTS lights with DTS or DTS-HD decoding, and WMA9 Pro l...
Listening to your system 05 34 En Using the genre synchronizing function This feature automatically selects the most appropriate Advanced Surround mode for the source currently being played back on a Pioneer DVD recorder supporting HDMI Control connected to this receiver via HDMI. 1 For details on H...
Using the tuner 06 35 En Chapter 6: Using the tuner Listening to the radio The following steps show you how to tune in to FM and AM radio broadcasts using the automatic (search) and manual (step) tuning functions. If you already know the frequency of the station you want, see Tuning directly to a st...
Using the tuner 06 36 En 4 Press ENTER. After pressing ENTER , the preset class and number stop blinking and the receiver stores the station. Naming station presets For easier identification, you can name your station presets. 1 Choose the station preset you want to name. See Listening to station pr...
Using the tuner 06 37 En 3 Press ST / to select the program type you want to hear. 4 Press ENTER to search for the program type. The system starts searching through the station presets for a match. When it finds one, the search stops and the station plays for five seconds. 5 If you want to keep li...
The System Setup menu 07 38 En Chapter 7: The System Setup menu Making receiver settings from the System Setup menu The following section shows you how to make detailed settings to specify how you’re using the receiver (for example, if you want to set up two speaker systems in separate rooms), and a...
The System Setup menu 07 42 En • Standing Wave – Control overly resonant low frequencies in your listening room (see Standing Wave on page 43). The last two settings are specifically for customizing the parameters explained in Acoustic Calibration EQ Adjust on page 43: • EQ Adjust – Manually adjust ...
The System Setup menu 07 43 En Listen to the reference speaker and use it to measure the target channel. From the listening position, face the two speakers with your arms outstretched pointing at each speaker. Try to make the two tones sound as if they are arriving simultaneously at a position sligh...
The System Setup menu 07 44 En 3 Select the channel(s) you want and adjust to your liking. Use / to select the channel. Use / to select the frequency and / to boost or cut the EQ. When you’re finished, go back to the top of the screen and use / to select the next channel. • The OVER! indicat...
The System Setup menu 07 45 En • Reverb characteristics for different channels – Reverb characteristics can be somewhat different for each channel. Since this difference increases as the sound is influenced by the various room characteristics, it is often better to capture a frequency analysis early...
The System Setup menu 07 46 En This appears according to the setting you chose in Reverb Measurement (step 3 on page 45). Use / to select the channel and the frequency you want to check. Use / to go back and forth between the two. Note that the markers on the vertical axis indicate decibels in 2...
The System Setup menu 07 47 En 4 Press RETURN to go back to the Data Check menu, repeating steps 2 and 3 to check other settings. 5 When you’re finished, press RETURN. You will return to the Data Management setup menu. Renaming MCACC presets If you have several different MCACC presets that you’re us...
The System Setup menu 07 48 En 2 Select the setting you want to adjust. If you are doing this for the first time, you may want to adjust these settings in order: • Speaker Setting – Specifies the size and number of speakers you’ve connected (see below). • Channel Level – Adjusts the overall balance ...
The System Setup menu 07 49 En Important • When Channel Level is selected while MCACC is set to OFF , the selection screen for the MCACC memory appears. Select a memory to adjust manually. 1 Select ‘Channel Level’ from the Manual SP Setup menu. 2 Select a setup option. • MANUAL – Move the test tone ...
The System Setup menu 07 50 En X-Curve Most soundtracks mixed for cinema sound too bright when played back in large rooms. The X-Curve setting acts as a kind of re-equalization for home theater listening, and restores proper tonal balance of movie soundtracks. 1 1 Select ‘X-Curve’ from the Manual SP...
Other connections 08 51 En Chapter 8: Other connections Caution • Before making or changing the connections , switch off the power and disconnect the power cord from the power outlet. Plugging in components should be the last connection you make with your system. • Do not allow any contact between s...
Other connections 08 52 En 1 Use / to select a category, then press ENTER to browse that category. • To return to the previous level any time, press RETURN . 2 Use / to browse the selected category (e.g., albums). • Use / to move to previous/next levels. 3 Continue browsing until you arrive at...
Other connections 08 53 En Connecting a USB device It is possible to listen to two-channel audio 1 using the USB interface on the front of this receiver. Connect a USB mass storage device 2 as shown below. • Push down on the PUSH OPEN tab to access the iPod DIRECT USB terminal. Connecting your USB d...
Other connections 08 54 En Compressed audio compatibility Note that although most standard bit/sampling rate combinations for compressed audio are compatible, some irregularly encoded files may not play back. The list below shows compatible formats for compressed audio files: • MP3 (MPEG-1/2/2.5 Aud...
Other connections 08 55 En Connecting the multichannel analog inputs For DVD Audio and SACD playback, your DVD player may have 5.1, 6.1 or 7.1 channel analog outputs (depending on whether your player supports surround back channels). 1 Make sure that the player is set to output multichannel analog a...
Other connections 08 56 En • Use the SPEAKERS button on the front panel to select a speaker system setting. As mentioned above, if you have selected Normal , the button will simply switch your main speaker system (A) on or off. Press repeatedly to choose a speaker system option: • SP A – Sound is ...
Other connections 08 57 En Connecting additional amplifiers This receiver has more than enough power for any home use, but it’s possible to add additional amplifiers to every channel of your system using the pre-outs. Make the connections shown below to add amplifiers to power your speakers. • Befor...
Other connections 08 58 En MULTI-ZONE listening options The following table shows what you can listen to in the sub zone: Basic MULTI-ZONE setup ( ZONE 2 ) • Connect a separate amplifier to the ZONE 2 AUDIO OUT jacks and a TV monitor to the ZONE 2 VIDEO OUT jacks, both on the rear of this receiver. ...
Other connections 08 59 En 2 Press CONTROL. • When the receiver is on, 1 make sure that any operations for the sub zone are done while ZONE 2 shows in the display. If this is not showing, the front panel controls affect the main zone only. 3 Use the INPUT SELECTOR dial to select the source for the z...
Other connections 08 60 En Switching components on and off using the 12 volt trigger You can connect components in your system (such as a screen or projector) to this receiver so that they switch on or off using 12 volt triggers when you select an input function. However, you must specify which inpu...
Other connections 08 61 En • Use a 3-ringed miniplug SR+ cable to connect the CONTROL IN jack of this receiver with the CONTROL OUT jack of your flat screen TV. To make the most of the SR+ features, you should connect your source components (DVD player, etc.) in a slightly different way to that desc...
Other connections 08 62 En Connecting a PC for Advanced MCACC output When using the Acoustic Calibration EQ Professional (see page 43) to calibrate the reverb characteristics of your listening room, you can graphically check the results on your computer connected to this receiver. Use a commercially...
HDMI Control 09 63 En Chapter 9: HDMI Control Important • The KURO LINK function name used on the web and in catalogues is referred to as HDMI Control in the operating instructions and on the product. By connecting this receiver to an HDMI Control-compatible Pioneer flat screen TV or the HDD/DVD rec...
HDMI Control 09 64 En 1 Press RECEIVER, then press the SETUP button. 2 Select ‘Other Setup’, then press ENTER. 3 Select ‘HDMI Control Setup’ from the Other Setup menu. 4 Select the ‘HDMI Control’ setting you want. • ON – Enables the HDMI Control function. When this receiver’s power is turned off and...
Other Settings 10 65 En Chapter 10: Other Settings The Input Setup menu You only need to make settings in the Input Setup menu if you didn’t hook up your digital equipment according to the default settings (see Input function default and possible settings on page 66). In this case, you need to tell ...
Other Settings 10 66 En Input function default and possible settings The terminals on the rear of the receiver generally correspond to the name of one of the input source functions. If you have connected components to this receiver differently from (or in addition to) the defaults below, see The Inp...
Other Settings 10 67 En Multi Channel Input Setup You can adjust the level of the subwoofer for a multi-channel input. 1 Select ‘Multi Ch In Setup’ from the Other Setup menu. 2 Select the ‘SW Input Gain’ setting you want. • 0dB – Outputs sound of the subwoofer at the level originally recorded on the...
Other Settings 10 68 En SR+ Setup for Pioneer flat screen TVs Make the following settings if you have connected a Pioneer flat screen TV to this receiver using an SR+ cable. Note that the number of function settings available will depend on the flat screen TV you’ve connected. See also Using this re...
Using other functions 11 69 En Chapter 11: Using other functions Setting the Audio options There are a number of additional sound settings you can make using the Audio Parameter menu. The defaults, if not stated, are listed in bold. Important • Note that if a setting doesn’t appear in the Audio Para...
Using other functions 11 70 En Setting the Video options There are a number of additional picture settings you can make using the Video Parameter menu. The defaults, if not stated, are listed in bold. Important • Note that if a setting doesn’t appear in the Video Parameter menu, it is unavailable du...
Using other functions 11 71 En Making an audio or a video recording You can make an audio or a video recording from the built-in tuner, or from an audio or video source connected to the receiver (such as a CD player or TV). 1 Keep in mind you can’t make a digital recording from an analog source or v...
Using other functions 11 73 En Resetting the system Use this procedure to reset all the receiver’s settings to the factory default. Use the front panel controls to do this. 1 Switch the receiver into standby. 2 While holding down the front panel STEREO/A.L.C button, press and hold STANDBY/ON for a...
Controlling the rest of your system 12 74 En Chapter 12: Controlling the rest of your system Setting the remote to control other components Most components can be assigned to one of the input source buttons (such as DVD or CD ) using the component’s manufacturer preset code stored in the remote. How...
Controlling the rest of your system 12 75 En VCR Manufacturer Code PHILIPS 414, 428 PANASONIC 432, 408 THOMSON 417, 449, 428 SONY 416, 417, 457, 458, 459 JVC 407, 417, 428 GRUNDIG 408, 414, 441, 453, 454, 455 AKAI 442, 417 HITACHI 406, 417, 441 TOSHIBA 405, 409, 414, 417, 428 MITSUBISHI 407, 409, 41...
Controlling the rest of your system 12 76 En Controls for TVs This remote control can control components after entering the proper codes or teaching the receiver the commands (see Setting the remote to control other components above for more on this). Use the input source buttons to select the compo...
Controlling the rest of your system 12 77 En Operating other Pioneer components with this receiver’s sensor Many Pioneer components have CONTROL jacks which can be used to link components together so that you can use just the remote sensor of one component. When you use a remote control, the control...
Additional information 13 78 En Chapter 13: Additional information Troubleshooting Incorrect operations are often mistaken for trouble and malfunctions. If you think that there is something wrong with this component, check the points below. Sometimes the trouble may lie in another component. Investi...
Additional information 13 80 En Other audio problems Symptom Remedy Broadcast stations cannot be selected automatically, or there is considerable noise in radio broadcasts. For FM broadcasts • Fully extend the FM wire antenna, adjust the position for best reception and secure to a wall, etc. • Use a...
Additional information 13 81 En Video Settings Symptom Remedy No image is output when an input is selected. • Check the video connections of the source component (see page 17). • For high-definition video (using component video connections), or when digital video conversion is switched off (in Setti...
Additional information 13 82 En Professional Calibration EQ graphical output Display Symptom Remedy The EQ response displayed in the graphical output following calibration does not appear entirely flat. • There are cases where the graph does not appear flat (even when selecting ALL CH ADJUST in the ...
Additional information 13 83 En Remote control USB interface When playing certain discs, none of the receiver’s format indicators light. • The disc may not contain 5.1/6.1 channel material. Check the disc packaging for more on what audio tracks are recorded on the disc. When playing a disc with the ...
Additional information 13 85 En Important information regarding the HDMI connection There are cases where you may not be able to route HDMI signals through this receiver (this depends on the HDMI-equipped component you are connecting–check with the manufacturer for HDMI compatibility information). I...
Additional information 13 86 En Surround sound formats Below is a brief description of the main surround sound formats you’ll find on DVDs, satellite, cable and terrestrial broadcasts, and video cassettes. Dolby The Dolby technologies are explained below. See www.dolby.com for more detailed informat...
Additional information 13 87 En Manufactured under license from Dolby Laboratories. “ Dolby ”, “ Pro Logic ”, “ Surround EX ” and the double-D symbol are trademarks of Dolby Laboratories. DTS The DTS technologies are explained below. See www.dtstech.com for more detailed information. DTS Digital Sur...
Additional information 13 89 En • THX Loudness Plus Description THX Loudness Plus is a new volume control technology featured in THX Ultra2 Plus™ and THX Select2 Plus™ Certified amplifiers. With THX Loudness Plus, home theater audiences can now experience the rich details in a surround mix at any vo...
Additional information 13 90 En Listening modes with different input signal formats The following charts outline the listening modes available with different input signal formats, depending on the surround back channel processing and decoding method you have selected. Stereo (2 channel) signal forma...
Additional information 13 92 En Multichannel signal formats SBch Processing Input signal format Standard THX Auto Surround SBch Processing ON (7.1 channel decoding used for all sources) Dolby Digital Plus Dolby TrueHD DTS-HD DTS-HD Master Audio WMA9 Pro PCM (6.1/7.1 channel) Straight decoding THX CI...
Additional information 13 94 En Stream direct with different input signal formats The following charts show what you will hear with different input signal formats, depending on the Stream Direct mode (see Using Stream Direct on page 32) you have selected. Stereo (2 channel) signal formats Multichann...
Additional information 13 95 En Specifications Amplifier section Continuous Power Output (Stereo) Front . . . . . . . . .150 W + 150 W (DIN 1 kHz, THD 1 %, 6 Ω ) 120 W + 120 W (DIN 1 kHz, THD 1 %, 8 Ω ) Continuous Power Output (Multichannel) Front . . . . . . . . .150 W + 150 W (DIN 1 kHz, THD 1 %, ...
Printed in <ARB7408-A> Published by Pioneer Corporation.Copyright © 2008 Pioneer Corporation.All rights reserved. PIONEER CORPORATION 4-1, Meguro 1-Chome, Meguro-ku, Tokyo 153-8654, Japan PIONEER ELECTRONICS (USA) INC. P.O. BOX 1540, Long Beach, California 90801-1540, U.S.A. TEL: (800) 421-140...
Pioneer Amplifiers Manuals
-
Pioneer A-10 / A-20 / A-30
User Manual
-
Pioneer A-50 / A-70
User Manual
-
Pioneer A-A6MK2-K
User Manual
-
Pioneer PIOGMDX871
User Manual
-
Pioneer PIOGMDX874
User Manual
-
Pioneer PIOGMDX971
User Manual
-
Pioneer PIOGMDX975
User Manual
-
Pioneer SC-LX71 / SC-LX81
User Manual
-
Pioneer SC-LX73 / SC-LX83
User Manual
-
Pioneer SC-LX90
User Manual
-
Pioneer VSX-1016V
User Manual
-
Pioneer VSX-1017AV
User Manual
-
Pioneer VSX-1018AH
User Manual
-
Pioneer VSX-2014i
Manual
-
Pioneer VSX-2016AV
User Manual
-
Pioneer VSX-2016AV
Manual
-
Pioneer VSX-2020
User Manual
-
Pioneer VSX-322-K
User Manual
-
Pioneer VSX-322-K
Manual
-
Pioneer VSX-323 / VSX-423
User Manual