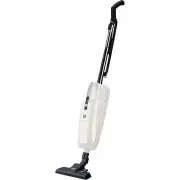
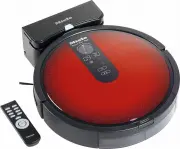
Page 2 - Contents
Contents 2 Warning and Safety instructions ..................................................................... 4 Safety instructions and warnings for AP01 battery, LG01/LG02 charger,LS03 charger cradle (depending on the model) .................................................. 9 Guide to the appli...
Page 4 - Warning and Safety instructions; It is essential to read these instructions.
Warning and Safety instructions 4 It is essential to read these instructions. WARNING AU/NZ! Keep batteries out of reach of children. Coin or button batteries containing lithium can cause severe orfatal injuries within 2 hours of being swallowed or placed insideany part of the body. Non-lithiu...
Page 5 - Correct application; This vacuum cleaner is not intended for outdoor use.
Warning and Safety instructions 5 This vacuum cleaner conforms to current safety requirements. In-appropriate use can lead to personal injury and damage to prop-erty. Please read the operating instructions before using the vacuumcleaner and charging the battery for the first time. They contain im-po...
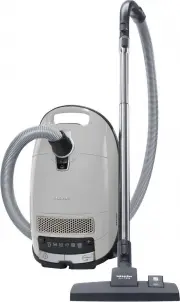
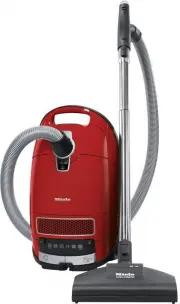
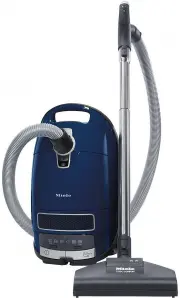
Page 6 - Safety with children
Warning and Safety instructions 6 The vacuum cleaner must only be used to vacuum dry floor sur- faces. Do not vacuum people or animals. Any other types of use,modifications or alterations are not permitted. The vacuum cleaner can only be used by people (including chil- dren) with reduced physica...
Page 7 - Technical safety
Warning and Safety instructions 7 Technical safety The vacuum cleaner operates at 25.2 V. It is classified as a class III appliance.This appliance is supplied by a safety extra-low voltage (SELV)power source where the voltage is low enough to protect users fromthe risk of electrical shock. A Class...
Page 8 - Correct use
Warning and Safety instructions 8 Repairs and other work by unqualified persons can cause consid- erable danger to users. If the vacuum cleaner is to be stored unused for a long period, the battery should be removed. The supply terminals must not be short-circuited. Correct use Do not use th...
Page 10 - If you are using a mains plug adapter, make sure that it is ap-
Warning and Safety instructions 10 XX LG01/LS03 LG02 01 AT, BE, BG, CH, CL, CZ, DE, DK,EE, ES, FI, FR, GR, HR, HU, IT, KZ,LT, LU, LV, NL, NO, PL, PT, RO, RS,RU, SE, SI, SK, TR, UA, ZA AT, BE, BG, CH, CL, CZ, DE, DK,EE, ES, FI, FR, GR, HR, HU, IT, KZ,LT, LU, LV, NL, NO, PL, PT, RO, RS,RU, SE, SI, SK,...
Page 12 - Cleaning
Warning and Safety instructions 12 Disposing of the AP01 battery: remove the AP01 battery from the vacuum cleaner. Insulate the metal contacts with adhesive tape toprevent short circuits. Dispose of the AP01 battery in a municipal re-cycling facility. Do not dispose of the AP01 battery with your h...
Page 13 - Transport; The packaging material protects the vacuum cleaner from trans-
Warning and Safety instructions 13 Transport The packaging material protects the vacuum cleaner from trans- port damage. We recommend you keep the packaging for transportpurposes.
Page 14 - Guide to the appliance
Page 16 - Caring for the environment
Caring for the environment 16 Disposing of the packagingmaterial The packaging material is used forhandling and protects the appliancefrom transport damage. The packagingmaterial used is selected from materialswhich are environmentally friendly fordisposal and can generally be recycled. Recycling th...
Page 17 - Disposing of old batteries
Caring for the environment 17 Disposing of old batteries In many cases, electrical and electronicappliances contain batteries whichmust not be disposed of with house-hold waste after use. You are legally ob-liged to remove any old batteries whichare not securely enclosed by the appli-ance and take t...
Page 18 - Installation and connection; Using the PowerUnit solo
Installation and connection 18 Assembling the vacuumcleaner You can assemble the vacuum cleanerin 2 different ways. You can place the suction tube eitherabove or below the PowerUnit. Take care to assemble the vacuumcleaner exactly as shown in the dia-gram. The advantages of placing the PowerUnit a...
Page 21 - Inserting the battery
Installation and connection 21 Inserting the battery Push the battery along the guide linesuntil it audibly clicks into place in thePowerUnit. If you want to separate the sectionsagain, press both release catches atthe side of the battery to remove thebattery. Connecting the Electrobrush Dependi...
Page 22 - General battery information
Installation and connection 22 General battery information The rechargeable battery is suppliednot fully charged.Charge the battery completely beforeusing it for the first time. Allow approx-imately 4 hours for this.To activate the battery, it is essential toplace it in the PowerUnit when chargingit...
Page 24 - Wall mounting; Attaching the mounting plate
Installation and connection 24 Wall mounting The supplied wall bracket has a mount-ing plate with a bag of screws attachedto the back.Attach the mounting plate to the pointon the wall where you want the wallmounting to be. Remove the bag of screws. Press the release catch at the bottomof the wal...
Page 26 - Connecting the wall bracket
Installation and connection 26 Connecting the accessoriesholder (if required) An accessories holder is supplied forstoring the 3-piece accessory set onthe wall bracket (see “Using the ac-cessories supplied”). Push the accessories holder onto thewall bracket as far as it will go. Connecting the wal...
Page 28 - Using the supplied accessories
Using the supplied accessories 28 Miele offers a range of suitable ac-cessories for many special applica-tions (see “Optional accessories”). Upholstery nozzle XL Accessory for cleaning upholstery,mattresses and cushions Crevice nozzle Accessory for cleaning in folds,crevices or corners Dusting...
Page 29 - Multi Floor XXL Electrobrush; Carpet Care roller brush
Using the supplied accessories 29 Multi Floor XXL Electrobrush Follow the flooring manufacturer’scleaning and care instructions. Damage caused by trapped ma- terial.Risk of the flooring gettingscratched.Make sure that there is no coarse dirtor debris trapped in the bottom ofthe Electrobrush, e.g. ...
Page 33 - Use; Switching on and off; Carpet protective function
Use 33 Switching on and off If you have charged the battery in thewall bracket, take the vacuum cleanerout of the wall bracket. If you have charged the battery dir-ectly, unplug the charger from thecharging socket on the bottom of thebattery. For the best possible cleaning results,always activat...
Page 34 - Illuminating the work area
Use 34 Illuminating the work area (depending on model)The Electrobrush on your vacuumcleaner is equipped with BrilliantLight toilluminate the work area. Self-standing function for shortpauses in vacuuming (For safety reasons, this function canonly be used when the PowerUnit is fit-ted at the bottom ...
Page 35 - Maintenance; Purchasing accessories
Maintenance 35 Risk of injury caused by rotating roller brush.You can injure yourself on the rotat-ing roller brush.Switch the vacuum cleaner off beforedoing any maintenance work. Usethe On/Off switch on the Comforthandle to do this. We recommend using only genuineMiele accessories bearing the “OR...
Page 36 - Filter system
Maintenance 36 Filter system Fine dust filter (HX FSF-2) Pre-filter Dust container d Dust container flap Activating the ComfortCleanfunction Always run the interim cleaning functionfor the fine dust filter before emptyingthe dust container. You should also runit whenever the suction power begi...
Page 37 - Emptying the dust container
Maintenance 37 Emptying the dust container Empty the dust container at the latestwhen the dust has reached the MAX marking on the dust container. Turn the lid of the dust container inthe direction of the arrow as far asthe first stop. Use the grey grippingsurfaces to help you do this. Lift the d...
Page 40 - Cleaning the dust container
Maintenance 40 Reinsert the pre-filter in the dust con-tainer. To do this, line up the guides (arrows)and turn the pre-filter back to its ori-ginal position. Close the dust container flap, makingsure it clicks into place. Reattach the dust container to thePowerUnit connector. Cleaning the du...
Page 42 - Error messages
Error messages 42 Risk of injury caused by rotating roller brush. You can injure yourself on the rotating roller brush.Switch the vacuum cleaner off before dealing with any problems. Use the On/Off switch on the Comfort handle to do this. Error messages are displayed with a quick flashing light on...
Page 43 - Problem solving guide
Problem solving guide 43 With the help of the following guide, minor faults in the performance of the appli-ance, some of which may result from incorrect operation, can be remedied withoutcontacting Miele. This will save you time and money because you won't need aservice call. Please note that a cal...
Page 46 - Service; Contact in case of malfunction
Service 46 Contact in case of malfunction In the event of any faults which youcannot remedy yourself, please contactMiele. Contact information for Miele can befound at the end of this document. Please note that telephone calls may bemonitored and recorded for trainingpurposes and that a call-out cha...
Page 47 - Cleaning and care
Cleaning and care 47 Risk of injury caused by rotating roller brush.You can injure yourself on the rotat-ing roller brush.Always switch the vacuum cleaneroff before cleaning it. Use the On/Offswitch on the Comfort handle to dothis. Vacuum cleaner and accessories Risk of electric shock from mains...
Page 48 - Optional accessories
Optional accessories 48 Follow the flooring manufacturer’scleaning and care instructions. We recommend using only genuineMiele accessories bearing the “ORI-GINAL Miele” logo on the packaging.Only these will guarantee the optimumperformance of your vacuum cleanerand the best possible cleaning results...
Page 50 - Electrical connection
Electrical connection 50 All work should be carried out by a suit-ably qualified and competent person instrict accordance with national andlocal safety regulations. The voltageand rated load are given on the dataplate located underneath the vacuumcleaner. Please ensure that these matchthe household ...
Page 52 - Miele New Zealand Limited
Miele Head Office Melbourne: Level 4, 141 Camberwell RoadHawthorn East, VIC 3123 Miele Experience Centre South Melbourne: 206-210 Coventry StreetSouth Melbourne, VIC 3205 Miele Experience Centre and Office Sydney: 3 Skyline PlaceFrenchs Forest, NSW 2086 Miele Experience Centre and Office Brisbane: T...