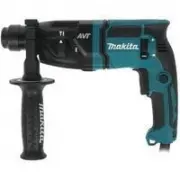
Page 2 - SPECIFICATIONS; Applicable battery cartridge and charger; SAFETY WARNINGS; General power tool safety warnings; Save all warnings and instruc-
2 ENGLISH ENGLISH (Original instructions) SPECIFICATIONS Model: GPH02 Drilling capacities Masonry 13 mm (1/2") Steel 13 mm (1/2") Wood Auger bit: 38 mm (1-1/2") Self-feed bit: 38 mm (1-1/2”) Hole saw: 51 mm (2”) Fastening capacities Wood screw 10 mm x 90 mm (3/8" x 3-1/2") Machin...
Page 4 - Cordless hammer driver drill safety; SAVE THESE INSTRUCTIONS.; Symbols
4 ENGLISH 5. Do not use a battery pack or tool that is dam- aged or modified. Damaged or modified batteries may exhibit unpredictable behaviour resulting in fire, explosion or risk of injury. 6. Do not expose a battery pack or tool to fire or excessive temperature. Exposure to fire or tem - perature...
Page 5 - Tips for maintaining maximum; FUNCTIONAL; Installing or removing battery
5 ENGLISH A battery short can cause a large current flow, overheating, possible burns and even a breakdown. 6. Do not store and use the tool and battery car- tridge in locations where the temperature may reach or exceed 50 °C (122 °F). 7. Do not incinerate the battery cartridge even if it is severel...
Page 6 - Indicating the remaining battery capacity; Tool / battery protection system; Overload protection; Overheat protection
6 ENGLISH CAUTION: Always install the battery cartridge fully until the red indicator cannot be seen. If not, it may accidentally fall out of the tool, causing injury to you or someone around you. CAUTION: Do not install the battery cartridge forcibly. If the cartridge does not slide in easily, it i...
Page 7 - Reversing switch action; Selecting the action mode
7 ENGLISH 1 ► 1. Lamp NOTE: When the tool is overheated, the tool stops automatically and the lamp starts flashing. In this case, release the switch trigger. The lamp turns off in one minute. NOTE: Use a dry cloth to wipe the dirt off the lens of the lamp. Be careful not to scratch the lens of lamp,...
Page 8 - Adjusting the fastening torque
8 ENGLISH 4 3 2 1 ► 1. Action mode changing ring 2. Adjusting ring 3. Mark 4. Arrow Adjusting the fastening torque 4 3 2 1 ► 1. Action mode changing ring 2. Adjusting ring 3. Graduation 4. Arrow The fastening torque can be adjusted in 21 levels by turning the adjusting ring. Align the graduations wi...
Page 9 - ASSEMBLY; Installing or removing driver bit/; Installing hook; Installing driver bit holder
9 ENGLISH ASSEMBLY CAUTION: Always be sure that the tool is switched off and the battery cartridge is removed before carrying out any work on the tool. Installing or removing driver bit/ drill bit Optional accessory 1 2 3 ► 1. Sleeve 2. Close 3. Open Turn the sleeve counterclockwise to open the chuc...
Page 10 - OPERATION; Screwdriving operation; Drilling operation
10 ENGLISH OPERATION CAUTION: Always insert the battery cartridge all the way until it locks in place. If you can see the red indicator on the upper side of the button, it is not locked completely. Insert it fully until the red indicator cannot be seen. If not, it may accidentally fall out of the to...
Page 11 - MAINTENANCE; OPTIONAL; MAKITA LIMITED WARRANTY
11 ENGLISH CAUTION: Pressing excessively on the tool will not speed up the drilling. In fact, this excessive pressure will only serve to damage the tip of your drill bit, decrease the tool performance and shorten the service life of the tool. CAUTION: Hold the tool firmly and exert care when the dri...
Page 12 - ESPECIFICACIONES; Cartucho de batería y cargador aplicables; ADVERTENCIAS DE; Advertencias generales de; Conserve todas las advertencias
12 ESPAÑOL ESPAÑOL (Instrucciones originales) ESPECIFICACIONES Modelo: GPH02 Capacidades de taladrado Mampostería 13 mm (1/2") Acero 13 mm (1/2") Madera Broca de barrena: 38 mm (1-1/2″) Broca de autoalimentación: 38 mm (1-1/2″) Sierra perforadora: 51 mm (2″) Capacidades de fijación Tornillo ...
Page 15 - GUARDE ESTAS; Símbolos
15 ESPAÑOL Instrucciones de seguridad cuando se utilicen brocas largas 1. Nunca opere a una velocidad mayor que la velocidad máxima nominal de la broca. A velo- cidades más altas, es probable que la broca se doble si se permite que gire libremente sin tocar la pieza de trabajo, lo que ocasionaría le...
Page 16 - DESCRIPCIÓN DEL; Instalación o extracción del
16 ESPAÑOL 15. No toque el terminal de la herramienta inme- diatamente después de su uso, ya que el mismo podría estar lo suficientemente caliente como para provocarle quemaduras. 16. No permita que las rebabas, el polvo o la tierra queden atrapados en los terminales, orificios y ranuras del cartuch...
Page 17 - Sistema de protección para la; Freno eléctrico
17 ESPAÑOL Indicación de la capacidad restante de la batería Oprima el botón de verificación en el cartucho de la batería para que indique la capacidad restante de la batería. Las luces indicadoras se iluminarán por algu- nos segundos. 1 2 ► 1. Luces indicadoras 2. Botón de verificación Luces indica...
Page 18 - Iluminación de la luz delantera; Accionamiento del conmutador de; Cambio de velocidad
18 ESPAÑOL Iluminación de la luz delantera PRECAUCIÓN: No mire a la luz ni vea a la fuente de luz directamente. Jale el gatillo interruptor para encender la luz. La luz continúa iluminándose mientras se está jalando el gatillo interruptor. La luz se apaga aproximadamente 10 segundos tras haber liber...
Page 20 - MONTAJE; Instalación o extracción de la punta; Instalación del gancho; Instalación del portabrocas; Instalación de la empuñadura lateral
20 ESPAÑOL MONTAJE PRECAUCIÓN: Asegúrese siempre de que la herramienta esté apagada y el cartucho de batería haya sido extraído antes de realizar cualquier trabajo en la misma. Instalación o extracción de la punta de destornillador/broca de taladro Accesorio opcional 1 2 3 ► 1. Mandril 2. Cerrar 3. ...
Page 21 - OPERACIÓN; Operación de atornillado; Operación de taladrado
21 ESPAÑOL OPERACIÓN PRECAUCIÓN: Siempre inserte completa- mente el cartucho de batería hasta que quede asegurado en su lugar. Si puede ver el indicador rojo del lado superior del botón, esto indica que no ha quedado completamente asegurado. Insértelo por completo hasta que el indicador rojo no pued...
Page 22 - Taladrado en metal; MANTENIMIENTO; ACCESORIOS; GARANTÍA LIMITADA DE MAKITA; Ésta Garantía no aplica para México
22 ESPAÑOL Taladrado en metal Para evitar que la broca de taladro resbale una vez que comience a hacer el orificio, haga un surco con punzón y un martillo en el punto a taladrar. Coloque la punta de la broca de taladro en el surco y comience a taladrar. Utilice un lubricante para corte cuando taladr...
Page 24 - Makita Corporation
Some dust created by power sanding, sawing, grinding, drilling, and other construction activities contains chemicals known to the State of California to cause cancer, birth defects or other reproductive harm. Some examples of these chemicals are: • lead from lead-based paints, • crystalline silica f...