LG LRV5900 - Manuals
User Manual LG LRV5900


Summary
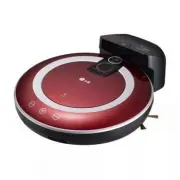
FEATURES Images of the ceiling and floor are obtained from the upper and lower cam- eras. This establishes the location of the HOM-BOT. to accomplish elaborate cleaning of the room. The low height of the HOM-BOT (3.54in) allows it to move freely under beds and furniture. Microfiber mop attachment pi...
CONTENTS Safety PrecautionsIncluded with ProductParts DescriptionsButton FunctionsDisplay Status InformationBefore You StartOverview 2 BEFORE USE 3 HOW TO USE 4 CARE AND MAINTENANCE 2831 1 How to Install the Home StationHow to Turn the Power Supply On and Off.How to Start and Stop CleaningHow to Cha...
2 SAFETY PRECAUTIONS The purpose of the safety precautions described below is for the user to use the product safely and correctly to prevent any unexpected risk of injury or damage. * 1) Place the cords from other appliances out of the area to be cleaned. 2) Do not operate the vacuum in a room wher...
LG Vacuums Manuals
-
 LG A931KWM
User Manual
LG A931KWM
User Manual
-
 LG A9ESSENTIAL
User Manual
LG A9ESSENTIAL
User Manual
-
 LG A9K-AQUA
User Manual
LG A9K-AQUA
User Manual
-
 LG A9K-EVOLVE
User Manual
LG A9K-EVOLVE
User Manual
-
 LG A9MASTER2X
User Manual
LG A9MASTER2X
User Manual
-
 LG A9MULTI2X CordZero
User Manual
LG A9MULTI2X CordZero
User Manual
-
 LG A9N-CORE
User Manual
LG A9N-CORE
User Manual
-
 LG A9NEOMAX
User Manual
LG A9NEOMAX
User Manual
-
 LG A9N-MULTI
User Manual
LG A9N-MULTI
User Manual
-
 LG A9PETNBED2X
User Manual
LG A9PETNBED2X
User Manual
-
 LG CordZero A9ESSENTIAL
User Manual
LG CordZero A9ESSENTIAL
User Manual
-
 LG CordZero A9-LITE
User Manual
LG CordZero A9-LITE
User Manual
-
 LG CordZero A9MASTER2X
User Manual
LG CordZero A9MASTER2X
User Manual
-
 LG CordZero A9MULTICARE
User Manual
LG CordZero A9MULTICARE
User Manual
-
 LG CordZero A9N-Core
User Manual
LG CordZero A9N-Core
User Manual
-
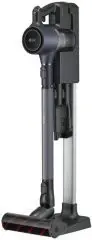
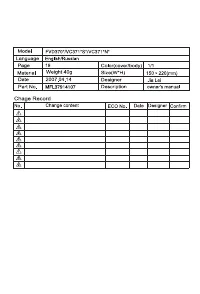 LG FVD3700
User Manual
LG FVD3700
User Manual
-
 LG Kompressor Plus VK8828HQ
User Manual
LG Kompressor Plus VK8828HQ
User Manual
-
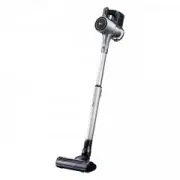
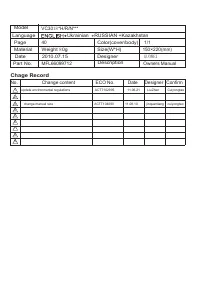
 LG Kompressor VC83209UHAV
User Manual
LG Kompressor VC83209UHAV
User Manual
-
 LG KV-PRO
User Manual
LG KV-PRO
User Manual
-
 LG MVK71187HU
User Manual
LG MVK71187HU
User Manual