Page 3 - Important Customer Information; Before you read
1 Important Customer Information Before you read Before getting started, please review the separate Product Safety and Warranty Information guide for important product safety and warranty information about your device.
Page 4 - Table of Contents
2 Table of Contents Important Customer Information...............................................1 Table of Contents .......................................................................2 Technical Details .........................................................................5 The Basics .........
Page 7 - Bodily Contact During Operation
5 Technical Details FCC RF Exposure Information WARNING! Read this information before operating the phone. In August 1996, the Federal Communications Commission (FCC) of the United States, with its action in Report and Order FCC 96-326, adopted an updated safety standard for human exposure to Radio ...
Page 8 - that may cause undesired operation.
6 Technical Details FCC Notice and Cautions This device and its accessories comply with part 15 of FCC rules. Operation is subject to the following two conditions: (1) This device and its accessories may not cause harmful interference, and (2) this device and its accessories must accept any interfer...
Page 9 - Technical Details; Cautions
7 Technical Details (e.g., television), determine if this equipment is causing the harmful interference by turning the equipment off and then back on to see if the interference is affected. If necessary, try correcting the interference by one or more of the following measures: - Reorient or relocate...
Page 10 - The Basics; Phone Overview; Front View; Proximity Sensor; Front Camera Lens
8 The Basics Phone Overview Front View ❷ Front Camera Lens ❸ Back Key ❹ Home Key ❻ Recent Apps Key ❾ Earpiece ❽ Home Screen ❼ Menu Key ❶ Proximity Sensor ❺ Microphone ❿ Rubberdium™ Pen NOTES • All screen shots in this guide are simulated. Actual displays may vary. • Instructions to perform tasks in ...
Page 12 - Speaker; Top View and Side Views; SIM Card Slot
10 The Basics 14. Speaker Sound comes from the rear speaker instead of the earpiece (e.g., the speakerphone function, music player function, etc.). 15. Back Cover The non-removable back cover encloses the battery compartment. Top View and Side Views USB/Charger Port Volume Keys 3.5mm Headset Jack SI...
Page 13 - Help; The; Insert the SIM card; place until it clicks.; Remove the SIM card; Locate the SIM Card Slot and open the cover.
11 The Basics Help The Help application allows you to quickly and conveniently view information about your phone, including the user guide and video tutorials. To access Help, from the Home screen, tap Apps > Help . Insert the SIM card 1. With the phone face down, locate the SIM Card Slot and ope...
Page 14 - Charging the Phone; Charging with the USB Cable and your computer
12 The Basics Charging the Phone Your phone comes with an adapter and a USB Cable which connect together to charge your phone. To charge your phone: NOTICE Please use only an approved charging accessory to charge your phone. Improper handling of the USB/Charger Port, as well as the use of an incompa...
Page 15 - Optimizing Battery Life; Tips to extend the life of your battery; Apps
13 The Basics Non-Removable Battery Your device is equipped with an internal rechargeable battery which should be replaced only by LG or an authorized LG repair center. You should never attempt to open or disassemble this device yourself and doing so may cause damage that voids your warranty. NOTE I...
Page 16 - From the Home screen, tap; Power saver mode; switch
14 The Basics To monitor and control what uses the battery The Battery use screen allows you to see which applications are consuming the most battery power. Information on this screen allows you to identify downloaded applications you may want to turn off when not being used, so you can get the most...
Page 17 - Turning the Phone On and Off; Turning the phone on; Power off; Restarting the phone; Power off and restart; To unlock the phone
15 The Basics Turning the Phone On and Off Turning the phone on 㻌 Press and hold the Power/Lock Key for a couple of seconds until the screen turns on. Turning the phone off 1. Press and hold the Power/Lock Key until the Phone options menu appears. 2. Tap Power off in the dialog box that appears. 3. ...
Page 18 - Press and hold the; OR
16 The Basics About Lock Screen Improvement Notification Viewing from Lock Screen From the lock screen simply slide the Status Bar down to see the latest notifications, all in one step. See "To open the Notifications panel" on page 35 for the reference. Customizable Lock Screen Customize by sel...
Page 19 - Setting Up Your Device; To set up your device, follow the steps below:
17 The Basics Press the down Volume Key on the side of the phone until all sounds are turned off. NOTE You can also use these keys to quickly turn the phone sounds back on. Press and hold the Power/Lock Key , then tap either the Vibrate mode icon or the Sounds mode icon . While in Silent mode, press...
Page 20 - Done with setup; Setting up your Google Account; Existing; Set up a payment method if necessary.
18 The Basics 9. Read the Google & location information and tap the checkboxes if you agree. Then tap . 10. Setup is complete. Tap Done with setup to use your phone. Setting up your Google Account 1. At the Setup screen, tap Existing or New . 2. Enter your username and password or any other nece...
Page 22 - Phone’s Status Icons; Call icons
20 The Basics Phone’s Status Icons The Status Bar appears at the top of every screen. It displays icons indicating that you’ve received notifications (on the left) and icons indicating the phone’s status (on the right), along with the current time. Notification icons Status icons If you have more noti...
Page 24 - Getting to Know the Home Screen; Quick Keys
22 The Basics Getting to Know the Home Screen The Home screen is your starting point to access all of the features on your phone. It displays application shortcuts, icons, widgets, and other features. Status Bar Shows device status information, including the time, signal strength, battery status, an...
Page 25 - To return to the Home screen; Tap the; To view other Home screen canvases; Swipe (or flick) your finger left or right across the Home screen. The; Mini Canvas View
23 The Basics a list of available widgets by tapping the tabs across the top of the screen. NOTE To add an icon, touch and hold the desired icon and drag it to the Quick Keys bar. Release it at the desired location. To remove an icon, touch and hold it, then drag it out of the Quick Keys bar. To ret...
Page 26 - Set default; Clean View; Back
24 The Basics Pinch in on any of the Home screen canvases to change from full screen view to mini canvas view. From mini canvas view you have the following options: 㻌 To go directly to any Home screen canvas, simply tap the one you want. 㻌 To add a new Home screen canvas, tap . 㻌 To delete a Home sc...
Page 27 - Your Home screen; Customizing an application icon from the Home screen
25 The Basics Your Home screen Customizing an application icon from the Home screen NOTE This feature allows you to make and use an icon with the pictures in your Gallery. You can edit the icons on Quick Launch Bar, Home screen or Applications screen by creating your own icons with the camera or Gal...
Page 28 - Touchscreen; Touch or tap; A single finger tap selects an item. For example, tap an icon; Tap and hold; Tap and hold an item on the screen by tapping it and not; Drag; Tap and hold an item for a moment and then, without lifting your
26 The Basics Touchscreen Your touchscreen provides an excellent way to interact with and use your Android phone. With the tap of your finger, you can download and use available applications, make menu selections, and access data saved to your phone. The following terms are used for describing the di...
Page 29 - Rotate the screen; From many applications, the orientation of the screen; Text Input Methods
27 The Basics Rotate the screen From many applications, the orientation of the screen rotates with the phone as you turn it from upright to sideways and back again. Rotate the phone sideways for landscape orientation. Rotate the phone upright for portrait orientation. Text Input Methods On-screen Ke...
Page 30 - Text input settings
28 The Basics Typing tips Enter other characters Tap to view the Numbers/Symbols Keyboard. Then tap to view additional symbols. Enter one capital letter Tap to capitalize the next letter. The Shift Key will change to . Enter all capital letters Tap the Shift Key until is displayed. Tap again to reve...
Page 31 - Block offensive words:
29 The Basics • Block offensive words: Checkmark to hide recognized offensive text. • Download offline speech recognition: Checkmark to enable voice input while offline. LG Keyboard - Checkmark to select the LG Keyboard to enter text. Tap to change the following settings. • Input language & type: ...
Page 32 - Checkmark to automatically correct common pinyin; Applications: How to View, Open and Switch; Opening and Closing the Applications screen; Home Key; Closing the Applications screen; To manually close the Applications screen, tap the
30 The Basics • Fuzzy pinyin: Checkmark to automatically correct common pinyin mistakes. • Software version: Displays the LG Keyboard software version. Applications: How to View, Open and Switch Home screen Applications screen Tap to open the Applications screen. Tap an application icon to open the ...
Page 33 - Sorting applications
31 The Basics Customizing the Applications screen The phone includes a wide variety of applications and you can download even more applications to your device. You can customize these items on the Applications screen for faster access (less scrolling) to the applications you use most often. To downl...
Page 34 - at the top right of the tab bar.; Opening and Switching Applications; Open an application simply by tapping its icon on the screen.; Opening multiple applications; Tap the icon for the other application you want to open.
32 The Basics Checking application information To check on an application’s detail information from the Applications screen: 1. From the Home screen, tap Apps . 2. Tap the Apps tab, then tap Settings at the top right of the tab bar. The Settings icon changes to a checkmark . 3. Tap any of the applic...
Page 35 - Recent Apps Key; Adding application icons to the Home screen; Moving applications to other Home screens
33 The Basics Switching between multiple applications 1. Tap the Recent Apps Key . A screen with the icons of the applications that you’ve used recently will appear. 2. Tap the application preview of the application you want to use or tap the Back Key to return to the current screen. Tap an app prev...
Page 36 - Working With Menus; Options menus; Context menus
34 The Basics Setting the Theme Four different themes are provided, each with a stylized Home screen wallpaper and unique application icons per theme. To change your theme, from the Home screen, tap the Menu Key > Theme . The current theme is indicated by a checkmark in the top corner. Tap the th...
Page 37 - Managing Notifications; To open the Notifications panel; Tap and drag the Status Bar to the bottom of the screen.; To respond to a notification; Gmail
35 The Basics Managing Notifications Notification icons report the arrival of new messages, calendar events, alarms, as well as ongoing events, such as when you are on a call. When you receive a notification, the notification icon will be displayed in the Status Bar. You can open the Notifications panel ...
Page 38 - Clear; To close the Notifications panel; Back Key; Quick settings on the Notifications panel; Edit
36 The Basics To clear all notifications 1. Open the Notifications panel. 2. Tap the Clear icon . All event-based notifications will be cleared; ongoing notifications will remain in the list. NOTE You can also swipe a notification to the left or right to delete that specific notification. To close the Noti...
Page 39 - Searching Your Phone and the Web; Search; Phone and Web search using text entry; Tap the Search Widget; Enter the text you’re searching for in the Quick Search Box.
37 The Basics Searching Your Phone and the Web You can search for information on your phone and on the web using the Search application. Some applications, such as Gmail , Contacts , and Browser have the ability to search contents within those specific applications. You can conduct the search by typi...
Page 40 - You can use the Search preferences to configure some aspects of web; Using the Voice Search; Search Widget
38 The Basics You can use the Search preferences to configure some aspects of web search (for example, whether it makes suggestions below the Quick Search Box as you type), and what phone features you want to include in searches. To access these settings tap the Menu Key > Settings . 3. Tap the Se...
Page 41 - Locking the Screen; Setting a screen lock
39 The Basics Locking the Screen Your phone automatically uses a default Lock Screen to prevent unintentional function activation. You can choose to secure your phone so that only you can unlock it to make calls, access your data, buy applications, and so on. For added security to guard against unau...
Page 43 - Customizing the lock screen wallpaper
41 The Basics 5. You’re prompted to enter and reenter your new lock sequence. From then on, you will need to enter the sequence and tap OK to unlock the screen. NOTES • You have 5 opportunities to enter your unlock pattern, PIN or password. If you used all of opportunities, you can try again after 3...
Page 45 - Customizing the Home Screen; To add an item to the Home screen; Go to the Home screen canvas where you want to add the item.; You can add the following types of items to the Home screen:
43 The Basics Customizing the Home Screen You can personalize your Home screen by adding application icons, shortcuts, widgets, and other items to any Home screen canvas. You can also change the wallpaper. To add an item to the Home screen 1. Go to the Home screen canvas where you want to add the it...
Page 46 - To remove an item from the Home screen
44 The Basics To move an item on the Home screen 1. Tap and hold the item. 2. Drag the item to a new location on the screen. Pause at the left or right edge of the screen to drag the item onto the next available Home screen canvas. 3. When the item is where you want it, lift your finger. NOTE If Move...
Page 47 - Connecting Quickly With Your Contacts; on the icon you’ve tapped, a different application will open.
45 The Basics Connecting Quickly With Your Contacts As you build up your list of contacts on your phone, you can use the Quick Contact for Android feature to quickly chat, email, text message, place a call, or locate your contacts. Quick Contact for Android is a special set of icons that you can use...
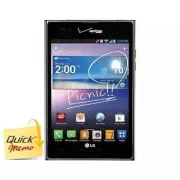
Page 48 - QuickMemo; Using the QuickMemo options
46 The Basics QuickMemo ™ Front view Top view QuickMemo Key 1. Quickly press and release the QuickMemo Key at the top of the phone to access the QuickMemo application. 2. Select the desired menu options including pen type and color, then create a memo. 3. Tap in the upper right-hand corner to save t...
Page 49 - Viewing saved QuickMemos
47 The Basics Tap the Eraser icon to selectively erase drawn lines or erase the entire memo. Tap the Share icon share your memo with others. Tap in the upper right-hand corner to save your memo to one of your notebooks or to your Gallery. NOTE Tap the Lock front keys icon in the bottom left-hand cor...
Page 50 - Calls; Placing and Ending Calls; To open the Phone application
48 Calls Placing and Ending Calls You place calls using the Phone application. Calls can be manually dialed using the Dial tab. You can also dial from your phone’s memory using the Recent tab, Contacts tab, Favorites tab, or the Groups tab. To open the Phone application From the Home screen, tap Pho...
Page 51 - Use the on-screen dialpad to enter additional numbers, place the; Instant List; to view more matching entries.; Selecting an Instant list entry; Tap an entry in the Instant list to insert it on the dialpad and tap
49 Calls Use the on-screen dialpad to enter additional numbers, place the call on hold and take an incoming call, add another call, use the speakerphone, end the call, and other options. NOTE If you opened other applications while on a call, you'll need to return to the Call screen and tap End call ...
Page 52 - Answering or Rejecting Calls; To answer a call; Answer; Unlocked Screen
50 Calls Answering or Rejecting Calls When you receive a phone call, the Incoming call screen opens with the caller ID and any additional information about the caller that you have saved in the Contacts list. All incoming calls are recorded in the Call log. To answer a call If the screen is unlocked...
Page 53 - To Ignore a call and send a text message
51 Calls To ignore a call and divert it to voicemail If the screen is unlocked, tap Ignore . If the screen is locked, swipe the Ignore icon in any direction. The caller is sent directly to your voicemail box to leave a message. Tap to send a quick message to the caller and forward them to your voice...
Page 54 - Working with the Call Log; To open the Call log; To dial a number in the Call log
52 Calls Working with the Call Log The Call log is a list of all of the calls you’ve dialed, received, or missed. It offers a convenient way to redial a number, return a call, or add a number to your Contacts list. To open the Call log From the Home screen, tap Phone and then the Recent tab at the t...
Page 55 - Calling Your Contacts; To call a contact
53 Calls 4. Tap an existing contact entry to add the new number to it or tap the Create new contact icon to save it as a new entry. Clearing the Call logs You can empty the entire Call logs at once or selectively delete entries. 1. Access the Call logs. 2. Tap the Menu Key . Tap Clear to select entr...
Page 56 - Voice Dialer; To place a call by speaking; Options During a Call; To mute the microphone during a call
54 Calls Voice Dialer You can use the Voice Dialer application to place a phone call by speaking the name of a contact or a phone number. To place a call by speaking 1. From the Home screen, tap Apps > Voice Dialer . You can also use the Voice Dialer from the dial pad. From the Home screen, tap P...
Page 57 - To switch between a Bluetooth device and the phone; Bluetooth
55 Calls To turn the speakerphone on or off Tap Speaker . The light bar on the Speaker button illuminates blue to indicate that the speakerphone is on and the sound from your call is played through the phone’s speaker on the back of the device. While viewing the in-call screen, you can turn the spea...
Page 58 - Managing Multiple Calls; To set up a conference call; Listening to Your Voicemail; To listen to your Voicemail
56 Calls Managing Multiple Calls Contact your wireless service provider to learn whether they support conference calls and how many participants you can include. To set up a conference call 1. Place a call to the first participant. 2. When you're connected, tap Add call and select the contact you wis...
Page 60 - Connecting to Networks and Devices; Connecting to Wi-Fi Networks; To configure the phone with a static IP address.
58 Connecting to Networks and Devices Connecting to Wi-Fi Networks Wi-Fi is a wireless networking technology that can provide Internet access at distances of up to 100 meters, depending on the Wi-Fi router and your surroundings. To use Wi-Fi on your phone, you must connect to a wireless access point...
Page 61 - New network detection and notification
59 Connecting to Networks and Devices To turn Wi-Fi on and connect to a Wi-Fi network 1. From the Home screen, tap Apps > Settings . OR Open the Notifications panel and tap Wi-Fi to turn the feature on. 2. Tap Wi-Fi . If Wi-Fi is off, tap to turn it on. Your device scans for available Wi-Fi networ...
Page 63 - USB Autorun; To select USB mode for Autorun
61 Connecting to Networks and Devices To connect your device to a computer via USB: 1. Use the USB Cable that came with your phone to connect the phone to a USB port on your computer. 2. Open the Notifications panel and tap USB connected . 3. Tap the connection mode you want to use to connect to the ...
Page 64 - Ask on connection
62 Connecting to Networks and Devices Internet connection mode You can share your phone’s internet connection with your PC using a USB Cable. After connecting with a USB Cable, set the USB connection mode to Internet connection. Then select either Ethernet or Modem . Ethernet This mode changes the p...
Page 65 - Connecting the phone to a PC; Connect your phone to your PC with a compatible USB Cable; Downloading the LG USB Modem Driver.
63 Connecting to Networks and Devices Using the Status Bar to change the settings The Status Bar displays the current USB connection mode so you can easily open the Status Bar and change the settings as needed. When connected via USB, the current USB connection mode also appears on the Notifications ...
Page 66 - Installing the LG USB Modem Driver.; Make Your Device a Mobile Hotspot; The following Status Bar icon indicates your Wi-Fi Hotspot status.
64 Connecting to Networks and Devices • If a recent version of the LG USB Modem driver is installed in the computer, LG Autorun skips ‘Step 2.’ Step 3. Installing the LG USB Modem Driver. Step 4. Installing the Utility Application. Make Your Device a Mobile Hotspot The Mobile Hotspot application can...
Page 67 - NFC; To turn the NFC feature on, from the Home screen tap; and tap the back of your device to a tag or a
65 Connecting to Networks and Devices NFC Near field communication (NFC) lets you get things done just by tapping your phone on NFC touchpoints – quickly change your phone settings, for example, or open a website featured on an advertising poster without typing the Web address, and lots more. Android...
Page 68 - Transfer Content; Via PC or Laptop; Connect the Android device to a computer using a USB cable. Then
66 Connecting to Networks and Devices Using Tag+ reading Make sure the display screen is on and unlocked, then tap the NFC tag or NFC-enabled device with the back of your phone. When tapping the set tag or a device, the preconfigured mode will be activated right away. NOTE For best results tap betwee...
Page 69 - USB storage; Via cloud storage
67 Connecting to Networks and Devices USB storage ) then disconnect the previous Android device from the computer. 6. Connect the LG Intuition to the computer using the supplied USB cable. 7. In the USB connection type menu on the LG Intuition, tap Media sync (MTP) . 8. On the computer, organize the...
Page 70 - Web; Backup Assistant Plus; application or from the
68 Web Backup Assistant Plus How to access and register Contacts backup settings from Backup Assistant Plus If you didn’t set up Backup Assistant Plus when you turned on your phone for the first time, you can enable it in the Settings application or from the Contacts application. 1. From the Home scr...
Page 71 - Using Backup Assistant Plus
69 Web Backup Assistant Plus can be accessed directly from the various multimedia applications From the Music application , select Backup Assistant Plus icon to upload files from your device, to download files from the server, and for file streaming from the server. From the Gallery application , tap B...
Page 72 - Browser; Browse web pages
70 Web Browser The Browser application allows you to access the internet from your Verizon Wireless device. Access and selections within this feature are dependent upon your service provider. For specific information on Browser access through your phone, contact your service provider. NOTES • You may...
Page 76 - Changing the Browser settings; General
74 Web To delete a group of bookmarks from the list all at once, tap the Menu Key > Delete . Tap each bookmark to be deleted to checkmark it, tap Delete , then Yes . To move a group of bookmarks in the list all together at once, tap the Menu Key > Move. Tap each bookmark to be moved to checkma...
Page 78 - TEXT SIZE; Advanced; Allow multiple tabs per app:
76 Web Accessibility Force enable zoom: Checkmark to override a website’s request to control the zoom behavior. TEXT SIZE Preview: Allows you to see how the text size choices are affected as you move the slider on the Text scaling bar and the Minimum font size bar. Text scaling: Sets the text magnifi...
Page 79 - PAGE CONTENT; Bandwidth management
77 Web PAGE CONTENT Default zoom: Allows you to set the default zoom to far, medium, or close. Open pages in overview: Checkmark to show newly-opened pages in an overview format. Auto-fit pages: Checkmark to format web pages to fit the screen. Block pop-ups: Checkmark to block websites from displaying...
Page 80 - Maps; To search for a location; icon; To get directions
78 Web Maps Layers Icon Tap here to select the type of map you want to view. Local Icon Tap here to find types of places near your location. Maps Menu Tap here to access Map , Local , Offers , Navigation , Join Latitude , Location history , and My Places . Directions Icon Tap here to get directions t...
Page 81 - To get directions using the Navigation application
79 Web The starting point drop-down menu includes My current location , Contacts , Point on map , and My Places . The destination drop-down menu includes Contacts , Point on map , and My Places . NOTE When you search for a location in the Maps application, your current location is automatically desi...
Page 83 - Checking the Weather; To get details about the weather; Weather; Refresh
81 Web Checking the Weather The Weather application provides weather forecasts and other weather information. You can place a Weather widget on your Home screen for a summary of your local weather. Access the Weather application for more detailed weather information. To get details about the weather...
Page 85 - Changing Weather Settings; LIST SETTINGS
83 Web Changing Weather Settings You can configure a number of settings for the Weather application. The location and related settings also affect the display of the Weather widget application. To open the Weather settings screen, from the Weather application, tap the Menu Key > Settings . You can...
Page 86 - Contacts; Using Your Contacts; To open your Contacts application; To open a list of your favorite contacts
84 Contacts The Contacts application allows you to store names, phone numbers, and other information in your phone’s memory. Using Your Contacts Use the Contacts application to add, view, and communicate with your friends and acquaintances. To open your Contacts application From the Home screen, tap...
Page 87 - Adding Contacts
85 Communication To view details about a contact and communicate 1. Open your Contacts application. 2. Tap the contact whose details you want to view. 3. The Contact Info tab displays by default. In the contact’s details screen, tap the way you want to communicate with the contact. The Dial icon pla...
Page 88 - Editing Contacts
86 Communication To add a new contact 1. From the Home screen, tap Apps > Contacts . You can also open the Contacts application by tapping Contacts from the Home screen. 2. Tap the New contact icon to the right of the Search box to start a new contact entry. 3. If you have more than one account w...
Page 89 - Communication; Importing, Exporting, and Sharing Contacts; To import contacts from the phone’s internal storage; which you want to import the contacts.; To export contacts to internal storage; the contacts, tap the
87 Communication Importing, Exporting, and Sharing Contacts If you have contacts stored in vCard format in your phone’s internal storage, you can import them into your Contacts application on your phone. You can also export contacts in vCard format from your phone’s internal storage. Exporting your ...
Page 90 - Adding a Contact to Your Favorites; To add a contact to your Favorites list
88 Communication To share a contact You can share a contact with someone by sending it to them as a vCard file. 1. Open the Contacts application. 2. Tap the contact you want to share to view its details. 3. Tap the Menu Key > Share . 4. Choose the method for sending. 5. Enter the necessary informa...
Page 91 - Communicating with Your Contacts; To connect using Quick Contact for AndroidTM
89 Communication Communicating with Your Contacts From the Contacts tab, Favorites tab, or Groups tab, you can quickly call or send a text (SMS) or multimedia (MMS) message to a contact’s default phone number. You can also open a list of all of the ways you can communicate with that contact. This se...
Page 92 - Selecting Which Contacts are Displayed; To change which groups are displayed; Joining Contacts
90 Communication Selecting Which Contacts are Displayed You can configure which groups of contacts you want to display in the Contacts list. To change which groups are displayed 1. Open the Contacts application. 2. Tap the Menu Key > Settings > Display options . 3. Select which account entries ...
Page 93 - Separating Contact Information; To separate contact information; Tap the contact entry whose information you want to separate.
91 Communication To join contacts 1. Open the Contacts application. 2. Tap the contact entry to which you want to add information. The contact name for this entry will remain unchanged after you join it with another contact. 3. Tap the Menu Key > Join . 4. Tap the contact whose information you wa...
Page 94 - Email; Email icons; To open the Email application
92 Communication Email NOTE AOL, Yahoo! and Hotmail icons only appear when the SIM card is inserted. Email icons New Exchange mail message received or sending succeeded Exchange mail message sending or receiving failed AOL mail message received or sending succeeded AOL mail message sending or receiv...
Page 95 - Reading Your Email; To read an email; Email settings
93 Communication The Accounts screen The Accounts screen lists all of your accounts. Open the Email application. If you’re not on the Accounts screen, tap the Menu Key > Accounts . You can also view accounts by tapping at the top of the screen to switch between your accounts. Each account on the ...
Page 97 - Visual Voicemail; To be able to use Visual Voicemail
95 Communication MICROSOFT EXCHANGE SETTINGS Tap Corporate directory to checkmark this setting to search the online directory for the entered recipient. Visual Voicemail The Voicemail application allows the management of voicemail directly from the device rather than accessing voicemail via traditio...
Page 98 - Opening Gmail and Your Inbox; To open the Gmail application; To view your Inbox when Gmail is running
96 Communication Gmail Opening Gmail and Your Inbox When you open the Gmail application, the most recent conversations are displayed in your Inbox. To open the Gmail application From the Home screen, tap Apps > Gmail . All of your conversations are displayed in your Inbox unless you delete, archi...
Page 99 - To switch accounts; From your Gmail Inbox, tap the Accounts icon on the Inbox header,
97 Communication Adding another Google Account 1. From your Gmail Inbox, tap the Menu Key > Settings . 2. Tap ADD ACCOUNT in the upper right corner of the screen. 3. Tap Existing or New , then enter the necessary information. To switch accounts Gmail displays conversations and messages from one G...
Page 100 - Navigating in the Gmail application
98 Communication Navigating in the Gmail application If you are viewing a message or another label, tap the Back Key until you return to your Inbox. While viewing your Inbox, swipe the screen up and down to scroll through the list. The icons at the bottom of the screen allow you to navigate within t...
Page 101 - Reading Your Messages; To read a message
99 Communication Reading Your Messages While viewing a list of conversations in your Inbox, or in any list of labeled conversations, you can open a conversation to read its messages. To read a message Tap a conversation that contains the message you want to read. The conversation opens to the first n...
Page 102 - Composing and Sending a Message; To compose and send a message
100 Communication To reread a message When you open a conversation, messages that you’ve already read are minimized into a tab that indicates the number of hidden messages. 1. From the Home screen, tap Apps > Gmail . Then tap the conversation you want to view. 2. Tap the contact name to open that...
Page 103 - Replying to or Forwarding a Message; To reply to or forward a message; Google Account settings
101 Communication Replying to or Forwarding a Message You can continue an email conversation by replying to a message or by forwarding it. To reply to or forward a message 1. Open the message you want to reply to or forward. 2. On the message header, tap or tap , then Reply all or Forward . Replying...
Page 105 - Responding with quoted text
103 Communication DATA USAGE Sync Gmail Opens the Accounts & Sync screen to modify your sync settings for this account, or remove this account. Days of mail to sync Allows you to set the number of days of mail to sync. Modifying this setting affects the sync download in the Ringtone & vibrat...
Page 106 - To open Messaging; Messaging; To delete a message thread from the Messaging window; Messaging; Exchanging Messages
104 Communication Messaging To open Messaging From the Home screen, tap Messaging . The Messaging screen will open, where you can create a new message or open an ongoing message thread. New Message Tap here to create a new message. Tap the New message icon to start a new text or multimedia message. ...
Page 107 - To send a text message; New message
105 Communication Multimedia messages (MMS) can contain text and a picture, location, a recorded voice, an audio file, a video, or a picture slideshow. The Messaging application automatically converts a message into a multimedia message if you add a subject or attach a media file. To send a text messa...
Page 110 - Changing Messaging Settings; Storage
108 Communication To respond to messages you receive If you receive a new message while you’re working in a message window, the new message is displayed. If not, you’ll receive a new message notification and the new message icon appears in the Status Bar. When a New Message notification is displayed, ...
Page 111 - Manage SIM card messages:; Multimedia message; Allows delivery reports:
109 Communication Signature: Allows you to enter the signature you want to send with your messages. A checkmark appears in the box after you save your signature. Callback number: Allows you to enter the callback number you want to send with your messages. A checkmark appears in the box after you sav...
Page 113 - Using the QWERTY keyboard
111 Communication Severe alert: Checkmark this setting so that Severe alerts are always presented. AMBER alert: Checkmark this setting so that AMBER alerts are always presented. Alert reminder: Allows you to select how often you want to be reminded when notified of an alert. To change input language ...
Page 114 - Allow you to write letter in a style of writing with a pen or pencil.
112 Communication Using the Phone keypad Allow you to write letter with a phone keyboard layout. Tap each key with the respective letter you want until it is displayed. Using the Handwriting Allow you to write letter in a style of writing with a pen or pencil.
Page 115 - Delete Key
113 Communication Text Entry Tips using Path keyboard Put your finger on the first letter of the word and draw a path from letter to letter, lifting your finger up after the final letter. Create a squiggle (like an S shape) to create a double letter (such as pp in apple). Tap and hold a key to enter the...
Page 116 - Talk; To open Google Talk and sign in; To sign out of Google Talk
114 Communication Talk To open Google Talk and sign in From the Home screen, tap Apps > Talk . When you first open Google Talk, the Google Talk accounts screen is displayed. Tap your Google Account to sign in to it and display your Friends list. Your Friends list includes all of the friends you’ve...
Page 117 - Chatting with Friends; To chat with a friend; Options from your Friends list
115 Communication Chatting with Friends To chat with a friend 1. From the Home screen, tap Apps > Talk . 2. Tap the Google Talk account you want to sign in to. 3. Tap the friend you want to chat with. 4. Enter your message, then tap the Send icon to the right of your Talk text. To accept an invit...
Page 118 - Changing and Monitoring Online Status; To change your online status; Status Icons; Voice Chat Available:
116 Communication Changing and Monitoring Online Status Tap your account at the top of your Friends list to change and monitor your online status. Tap here to change your online status. Displays your current account. Tap here to change the status message. Your current online status . Tap here to acc...
Page 119 - To change your picture
117 Communication To change your status message In addition to the standard status icons described in the table above, you can also enter a status description to go with your status. 1. From the Home screen, tap Apps > Talk (Sign in to your Google Talk account, if necessary.). 2. Tap your account...
Page 121 - Changing Google Talk Settings; To show or hide the mobile indicator to friends; To set Google Talk to change your status
119 Communication and tapping the Menu Key > Settings . Tap the Google Account the friend is in, then tap Blocked friends . You can unblock a friend by tapping the friend’s name in the blocked list then tapping OK in the dialog box that opens. Changing Google Talk Settings You can configure Google...
Page 123 - Entertainment; Camera; To open the; Getting to know the viewfinder; on the viewfinder screen:
121 Entertainment Camera To open the Camera application, from the Home screen, tap Camera . TIP If you've set your phone to use the Swipe unlock method, from the locked screen, simply press the Power/Lock Key , then drag Camera upward to open the Camera application. Getting to know the viewfinder Sho...
Page 128 - Video Camera
126 Entertainment Edit Tap to edit the photo with a variety of adjustment tools including contrast , effects , color , and other options to fine tune your photo. Slideshow Tap to see your photos played in a slideshow. Details Tap to display information about the photo (e.g., file type, file size, etc.)...
Page 130 - After recording a video; Watching your saved videos
128 Entertainment 6. The record dot at the upper left corner of the viewfinder turns red and the video length timer begins counting. 7. Tap the Stop icon on the screen to stop recording. TIP To capture pictures while recording video, tap . After recording a video If Auto review is set to On, a still ...
Page 131 - Your Photos and Videos; Adjusting the volume when viewing a video; Gallery; Opening Gallery and Viewing Your Albums; To open Gallery and view your albums
129 Entertainment Your Photos and Videos Adjusting the volume when viewing a video To adjust the volume of a video while it is playing, use the Volume Keys on the right side of the phone. Setting a photo as wallpaper 1. From the Home Screen, tap Apps > Gallery and tap the photo you want to set as...
Page 132 - Working with photos; To view and browse photos
130 Entertainment To share an album You can share the entire contents of one or more albums or individual images or videos from an album. 1. From the Home screen, tap the Apps Key > Gallery . 2. Touch and hold the desired album, tap Share , then select the application to use to share your images....
Page 133 - Working with Videos; To play videos
131 Entertainment To edit pictures Tap here to redo the step. Tap here to go to previous step. Tap here to save. Tap here to access the editing tools. Working with Videos Use the Gallery application to play videos that you’ve taken with the Camera application and to share them with friends. To play ...
Page 134 - Video Wiz
132 Entertainment To share a video You can share your videos in a variety of ways, including sending it by email or multimedia message (MMS), or via SmartShare or a Bluetooth device. You even have the option to share your videos publicly by uploading it to the YouTube™ website. 1. From the Home scre...
Page 135 - Video Wiz Options
133 Entertainment 4. Tap the Select music icon to select the background music. 5. Tap the Play icon to preview your music video. NOTE The length of the final version will vary depending on the size and number of the images, the size and length of the video footage, as well as the music added and the ...
Page 137 - Play Store; Opening Google Play StoreTM and Finding Applications; To open the Google Play Store
135 Entertainment Play Store Opening Google Play Store™ and Finding Applications Open the Google Play Store ™ application to browse and search for free and paid applications. NOTE You must subscribe to Google and have an account to access the Play Store. To open the Google Play Store ™ application F...
Page 138 - Downloading and Installing Applications; To download and install an application
136 Entertainment To open a screen with details about an application At any time while browsing through the Google Play Store™, tap an application to open its details screen. The Application details screen include a description, ratings, comments, and related information about the application. From ...
Page 139 - Price; If you agree to the application’s access requirements, tap; To create a Google Checkout account; Google Checkout account.
137 Entertainment 2. Tap Price (for paid applications) or Install (for free applications). The screen will display what the application can access, such as your data and device functions, if you continue with the download. WARNING! Read this screen carefully. Be especially cautious with applications...
Page 140 - Music; Transferring Music Files to Your Phone; To copy music files onto the phone
138 Entertainment Music Transferring Music Files to Your Phone The Music application plays audio files that are stored in your phone’s internal memory. Copy audio files from your computer into your phone’s internal memory before you open the Music application. NOTE The LG USB driver needs to be instal...
Page 141 - Opening the Music and Working with Your Library; To open the Music and view your music library; To search for music in your library
139 Entertainment Opening the Music and Working with Your Library After you’ve copied some music into your phone’s internal memory, you can open the Music application and view your library of music files. Your music files are sorted and displayed based on the Music tab you select. To open the Music an...
Page 142 - Playing Music; To play music
140 Entertainment To delete a song from your phone’s internal memory You can delete music from your phone’s internal memory. Tap and hold a song in a Library list. In the Context menu that opens, tap Delete . OR On the Playback screen, tap the Menu Key > Delete . You can also delete music files fr...
Page 143 - To control playback
141 Entertainment You can return to the Playback screen from most other screens in the Music application by tapping the currently playing song at the bottom of the screen. You can return to the Playback screen from any other application by opening the Notifications panel and tapping the ongoing music...
Page 144 - To use a song as a ringtone
142 Entertainment To control playback volume In addition to the techniques for setting media volume, you can control the volume of music in the Music application. Press the phone’s up/down Volume Keys . A panel opens to show the current media volume. Some headsets include their own volume controls o...
Page 145 - Working with Playlists; To create a playlist
143 Entertainment Working with Playlists You can create playlists to organize your music files into sets of songs, which you can play in the order you set or in a shuffle. To create a playlist 1. From the Music Library, tap the Playlists tab. 2. Tap the Menu Key > New playlist . 3. Enter a name for...
Page 146 - Videos; To open the Videos application
144 Entertainment applications. To control the music, slide the Status Bar down to display the Notifications panel. Here you will see the music controller menu where you can control music playback. To delete playlist 1. Open the Playlist library. 2. Tap and hold the playlist you want, then tap Delete...
Page 147 - Videos list options; Details
145 Entertainment Playback controls Tap the screen to display the playback controls. The following options allow you to control the video playback: Pause playback. Play a video file. Tap to fast-forward the playback about 10 seconds. Tap and hold to fast-forward the playback in 3 second increments. T...
Page 148 - YouTubeTM; Opening YouTube and Watching Videos; YouTube; To open the YouTube application; To watch and interact with YouTube videos
146 Entertainment YouTube™ Opening YouTube and Watching Videos You can browse, search for, view, upload, and rank YouTube videos on your phone with the YouTube application. To open the YouTube application From the Home screen, tap Apps > YouTube . Tap a video to watch it or tap the Menu Key for o...
Page 150 - Voice Recorder; Record a Voice Memo; Play a Voice Memo
148 Entertainment Voice Recorder The Voice Recorder application records audible files for you to use in a variety of ways. Use your recordings to simply remind you about something you don’t want to forget (like a grocery list) or record sound effects that you can attach to a message or set as a ringt...
Page 152 - Tools; To open the Notebook application; To make and decorate a notebook; Notebook
150 Tools Notebook Notebook allows you to make your own notes using handwriting tools or attaching preferred multimedia files. With the Notebook application, you can manage and personalize a wide variety of information. To open the Notebook application From the Home screen, tap Apps > Notebook . O...
Page 154 - Calendar; Viewing Your Calendar and Events; To open the Calendar application
152 Tools Calendar Viewing Your Calendar and Events Open the Calendar application to view events you’ve created or that others have invited you to. When you first set up your phone, you configured it to use an existing Google Account or you created a new account. The first time you open the Calendar ap...
Page 155 - There is a; Working in Day View; To switch to Day view; Tap the date in the upper left corner above the calendar, then tap
153 Tools Dual Calendar Views There is a at the top center of the screen in Day, Week, and Agenda view. It allows you to open the Month view calendar at the top of the screen and another calendar view at the bottom. Simply drag the calendar handle all the way down the screen to open the month calend...
Page 156 - New event; Working in Week View; To switch to Week view; Week; To learn more about events in Week view
154 Tools To learn more about events in Day view Tap an event to view its details. To add an event in Day view Tap and hold an empty spot or an event in the day to open a Context menu, then tap New event to create a new event at that time. OR Tap and select the calendar you want to use (if applicabl...
Page 157 - Working in Month View; To switch to Month view; Month; To view more information about events in Month view
155 Tools To add an event in Week view Tap and hold an empty spot or an event in the week to open a Context menu, then tap New event to create a new event at that time. OR Tap and select the calendar you want to use (if applicable). NOTE You can create a new event in the same time slot allowing you ...
Page 158 - Working in Agenda View; Touch to; To switch to Agenda view; Agenda; To learn more about events in Agenda view
156 Tools Working in Agenda View Agenda view is a list of your events in chronological order by day. A month’s worth of events is displayed. To show earlier Agenda events, tap Touch to view events before at the top of your Agenda list. To show later Agenda events tap Touch to view events after at th...
Page 159 - Viewing Event Details; To view information about an event
157 Tools Viewing Event Details You can view more information about an event in a number of ways, depending on the current view. To view information about an event In Agenda, Day, or Week view, tap an event to view its details. In Month view, tap a day to display the events below the calendar. Then ...
Page 160 - Setting an Event Reminder; To set an event reminder; Add reminder; To delete an event reminder; Remove reminder
158 Tools Setting an Event Reminder You can set one or more reminders for an event, whether or not you created the event or have permission to edit its other details. To set an event reminder 1. Tap an event to view its details. 2. If no reminder is set, tap the Add reminder icon to automatically ad...
Page 161 - Tasks; To open and use your Tasks list; To Synchronize with your MS Exchange account
159 Tools Tasks The Tasks application allows you to create a list of tasks to keep track of outstanding items and remind you when due dates approach. Your list of tasks can be synchronized with your MS Exchange account. You can create a task, revise it, and delete it using the Tasks application on y...
Page 162 - To delete a task
160 Tools Due date Tap to set the due date, then tap OK . Tap Remove to remove the due date. Description Tap to enter a description for the task, then tap the Back Key to return to the task details screen. Priority Tap to set the priority level for the task. Repeat Tap to set if, and how, the task n...
Page 163 - Calculator; To open and use the Calculator
161 Tools Calculator The Calculator application allows you to perform simple mathematical calculations. To open and use the Calculator From the Home screen, tap Apps > Calculator . Basic Panel Advanced Panel Enter numbers and arithmetic operators on the Basic panel. Swipe the Basic panel to the l...
Page 164 - Setting Alarms; To set an alarm; Alarms
162 Tools Alarm/Clock You use the Alarm/Clock application to access the Alarms, Timer, World clock, and Stopwatch functions. These functions are accessed by tapping the tabs across the top of the screen. To open the Alarm/Clock application From the Home screen, tap Apps > Alarm/Clock . Setting Al...
Page 166 - Setting the Timer
164 Tools When the alarm sounds Tap Stop or, if set, or use the Gesture feature of simply flipping the device over to stop the alarm. Tap Snooze to stop the alarm for the snooze duration you set. NOTE If Puzzle lock is set to On, using the Gesture feature of flipping the device over will snooze the al...
Page 167 - Managing the World Clock Cities
165 Tools Managing the World Clock Cities Tap New city in the lower of the screen to select another city for your list. Tap Delete in the lower right corner of the screen, then checkmark one or more cities to delete from your list. Tap the Menu Key > Delete all > Yes to remove all cities from ...
Page 168 - Polaris Office 4; Create a New Document
166 Tools Polaris Office 4 With Polaris Office 4, you can view, create and edit document files on your device. Files can be downloaded from email attachments, uploaded from a memory card or internal memory. The Polaris Office 4 application supports the following file formats: txt, doc, docx, xls, xlsx, p...
Page 170 - FileShare; To turn SmartShare on and allow sharing contents
168 Tools FileShare FileShare application allows you to share multimedia files and documents to other devices via Wi-Fi Direct. To access this application, from the Home screen, tap Apps > FileShare . 1. Choose the types of content you would like to share. Tap Images , Videos , Music , or Document...
Page 172 - To upload contents to the remote content library
170 Tools To download contents from the remote content library 1. From the Home screen, tap Apps > SmartShare . 2. Tap the From icon and select the device of the remote content library. 3. You can browse the content library. 4. Touch and hold a content thumbnail and then touch Download . NOTICE S...
Page 173 - Settings; To open the Settings application; Airplane mode
171 Settings Settings The Settings application contains most of the tools for customizing and configuring your phone. All of the settings in the Settings application are described in this section. For settings specific to the Browser application, see the Browser section, and for settings specific to yo...
Page 175 - Mobile data
173 Settings AVAILABLE DEVICES The list of all of the available in-range Bluetooth devices. Tap the Menu Key to access the following options: Rename phone: Allows you to rename your phone as it is seen by other Bluetooth compatible devices. Visibility timeout : Tap to set the visibility timeout when...
Page 177 - Android
175 Settings Hearing aids: Checkmark to turn on hearing aid compatibility. TTY mode: Sets the TTY mode to communicate with other TTY devices. DTMF tones: Sets the length of the DTMF tones. Assisted dialing: Configures the Assisted dialing options when you are traveling outside of your home country. C...
Page 178 - DEVICE; Sound
176 Settings Beam switch (in the upper right corner of the screen) to the right to turn it on. VPN: Allows you to set up and manage Virtual Private Networks (VPNs). Mobile networks: Allows you to set up options for data access, roaming, networks, and APNs (Access Point Names). DEVICE The Device sect...
Page 179 - TOUCH FEEDBACK & SYSTEM; Display; SCREEN
177 Settings TOUCH FEEDBACK & SYSTEM Dial pad touch tones: Checkmark to set the phone to make a sound when you tap the dialpad. Touch sounds: Checkmark to set the phone to make a sound when you tap an item to activate it (e.g., tapping a checkbox). Screen lock sound: Checkmark to set the phone t...
Page 183 - PERSONAL; Location access
181 Settings the Status Bar next to the battery icon. Battery use: Displays which components and applications are using the most battery power. Tap one of the entries to see more detailed information. Application manager Use the Application manager to view details about the applications installed on...
Page 187 - Listen to an example:; ACCOUNTS; Backup Assistant Plus:
185 Settings Speech rate: Allows you to set the speed at which the text is spoken. Listen to an example: Plays a short demonstration of speech synthesis. MOUSE/TRACKPAD Pointer speed: Allows you to set the pointer speed. Backup & reset This menu allows you to back up and erase your data. BACKUP ...
Page 188 - SYSTEM; Accessibility
186 Settings SYSTEM The System section allows you to manage various system settings. Date & time This menu allows you to manage your date and time formats. Automatic date & time: Checkmark to use the network provided values. Automatic time zone: Checkmark to use the network provided time zon...
Page 189 - Power button ends call:; PC connection; USB CONNECTION; Developer options
187 Settings Auto-rotate screen: Checkmark to allow the device to rotate the screen depending on the device orientation (portrait or landscape). Power button ends call: Checkmark so that you can end voice calls by pressing the Power/Lock Key. When this option is enabled, pressing the Power/Lock Key ...
Page 192 - Allows you to view battery status, battery level, and battery use; Global ReadyTM
190 Settings PRL version, ERI version, IMEI, IMEI SVN, ICCID, up time, lifetime calls, and warranty date code. Battery: Allows you to view battery status, battery level, and battery use information. Hardware information: Allows you to view Wi-Fi MAC address, Bluetooth address, and Hardware version. ...
Page 193 - LG Smart Mobile Office; Introduction; Exchange ActiveSync Settings
191 LG Smart Mobile Office LG Smart Mobile Office Introduction The LG Smart Mobile Office program provides a productive and secure mobile working environment, helping you to stay on top of your business whether you are at the office, at home, or on the move. An array of business applications, built-in o...
Page 194 - Enter your account information, including an email address.; Push Email; The Microsoft Exchange Push Email feature allows you to exchange
192 LG Smart Mobile Office 4. Enter your account information, including an email address. You may need additional information such as domain name, server address, etc. Please refer to your IT administrator for the necessary corporate network information. Then tap Next . 5. Checkmark the information y...
Page 195 - contact information in the company directory.; Event name
193 LG Smart Mobile Office Contacts Use the Global Address List (GAL) to look up your colleagues and their contact information in the company directory. Calendar Easily manage your calendar seamlessly across devices, allowing you to organize meetings promptly, and stay on top of your schedule whereve...
Page 196 - Accept meeting; to reply regarding your attendance.
194 LG Smart Mobile Office 3. Tap Save . Accept meeting 1. Open the invitation email. 2. Tap Calendar to reply regarding your attendance. 3. Tap Accept , Tentative , or Decline , then tap OK . Tasks The Tasks function provides a complete overview of your task schedule and associated progress to help ...
Page 198 - Share; Password
196 LG Smart Mobile Office Task share Share your task(s) with your colleagues, partners, or customers to collaborate on your projects. 1. Tap and hold a task in your Tasks list. 2. Tap Share in the Context menu that opens. 3. Tap the email service to use, then type the email address(es) of the task m...
Page 199 - Encryption; Virtual Private Networks; IPSec
197 LG Smart Mobile Office Minimum device password length Alphanumeric password Minimum device password complex characters Device password history Device password recovery Device password expiration Encryption LG Smart Mobile Office supports encryption by the Exchange Server. Please refer to your IT a...
Page 202 - : The group element specifies the Diffie-Hellman group
200 LG Smart Mobile Office IKE encryption : IKE encryption algorithm (3DES-CBC, AES- CBC-128/192/256, etc.) IKE integrity : Algorithm for IKE integrity (HMAC-MD5-96, HMAC- SHA1-96, etc.) IKE group : The group element specifies the Diffie-Hellman group used in the IKE SA negotiation. Type: IPSec CRT 1. ...
Page 203 - Device Security; Data Security
201 LG Smart Mobile Office Device Security Device security establishes security policies to prevent unauthorized use. The device can also be deactivated or erased when lost or stolen. Passcode policies: minimum length, case-sensitive, special characters Local/ Remote lock, wipe data Policy enforcemen...
Page 204 - Access the Encryption settings, then tap
202 LG Smart Mobile Office Encrypt phone In order to encrypt the device, the battery status needs to be over 80% and the charger plugged in and supplying power. 1. Access the Encryption settings, then tap Encrypt phone . 2. Tap Encrypt phone at the bottom of the screen. 3. Enter your current encrypti...
Page 205 - Network Security; VPN; Platform Security; Secure booting
203 LG Smart Mobile Office Network Security Network security ensures that only authorized users access and watch user data during data transmission. Data transmission is securely protected. VPN : SSP VPN, Authentec IPSec, L2TP over IPSec, PPTP SSL/ TLS : SSLv3, TLS1.0 Wi-Fi security protocols : WEP, ...
Page 206 - Specifications; DivX Mobile
204 Specifications DivX Mobile ABOUT DIVX VIDEO: DivX ® is a digital video format created by DivX, LLC, a subsidiary of Rovi Corporation. This is an official DivX Certified ® device that plays DivX video. Visit divx.com for more information and software tools to convert your files into DivX videos. ABOU...
Page 207 - Index
205 Index A Adding a Contact to Your Favorites 88 Adding Contacts 85 Alarm/Clock 162 Android™ 89 Answering or Rejecting Calls 50 Applications: How to View, Open and Switch 30 B Backup Assistant Plus 68 Browser 70 C Calculator 161 Calendar 152 Calendar and Alarm icons 20 Call icons 20 Calling Your Co...


 LG A7110
User Manual
LG A7110
User Manual
 LG AX5000
User Manual
LG AX5000
User Manual
 LG C1300
User Manual
LG C1300
User Manual
 LG C1300A
User Manual
LG C1300A
User Manual
 LG C1300I
User Manual
LG C1300I
User Manual
 LG C1500
User Manual
LG C1500
User Manual
 LG C2000
User Manual
LG C2000
User Manual
 LG CB630
User Manual
LG CB630
User Manual
 LG CE500
User Manual
LG CE500
User Manual
 LG CF360
User Manual
LG CF360
User Manual
 LG CF360A
User Manual
LG CF360A
User Manual
 LG CG180
User Manual
LG CG180
User Manual
 LG CG225
User Manual
LG CG225
User Manual
 LG CG300
User Manual
LG CG300
User Manual
 LG CP150
User Manual
LG CP150
User Manual
 LG CU320
User Manual
LG CU320
User Manual
 LG CU400
User Manual
LG CU400
User Manual
 LG CU405
User Manual
LG CU405
User Manual
 LG CU500
User Manual
LG CU500
User Manual