Page 3 - Important Customer Information; Before you read
1 Important Customer Information Before you read Before getting started, please review the separate Product Safety and Warranty Information guide for important product safety and warranty information about your device.
Page 4 - Table of Contents
2 Important Customer Information........................................................... 1 Table of Contents ................................................................................... 2 Technical Details .......................................................................................
Page 7 - Bodily Contact During Operation
5 Technical Details Technical Details HAC This phone has been tested and rated for use with hearing aids for some of the wireless technologies that it uses. However, there may be some newer wireless technologies used in this phone that have not been tested yet for use with hearing aids. It is import...
Page 8 - that may cause undesired operation.
6 Technical Details Vehicle-Mounted External Antenna (Optional, if available.) To satisfy FCC RF exposure requirements, keep 8 inches (20 cm) between the user / bystander and vehicle-mounted external antenna. For more information about RF exposure, visit the FCC website at www.fcc.gov. FCC Notice an...
Page 9 - Technical Details; - Reorient or relocate the receiving antenna.; Consumer Information on SAR
7 Technical Details designed to provide reasonable protection against harmful interference in a residential installation. This equipment generates, uses, and can radiate radio frequency energy and, if not installed and used in accordance with the instructions, may cause harmful interference to radio...
Page 12 - For information about hearing aids and digital wireless phones; Cautions; The user interface of Google applications (Google Search, Google
10 Technical Details American National Standards Institute (ANSI) C63.19 standard. When you're talking over the cell phone, it's recommended you'd turn the BT (Bluetooth) mode off for HAC. This phone has been tested and rated for use with hearing aids for some of the wireless technologies that it us...
Page 13 - The Basics; Phone Overview; Front View
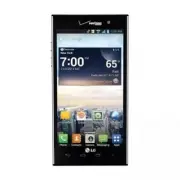
11 The Basics Phone Overview Front View ❾ Proximity Sensor ❷ Back Key ❸ Home Key ❺ Recent Apps Key ❶ Earpiece ❼ Home Screen ❻ Menu Key ❽ Front Camera Lens ❹ Microphone NOTES ţ All screen shots in this guide are simulated. Actual displays may vary. ţ Tap Apps , then tap Help to access the quick start...
Page 14 - Rear View
12 The Basics 8. Front Camera Lens Use for taking pictures and recording videos of yourself. You can also use this for video chatting. Keep it clean for optimal performance. 9. Proximity Sensor Senses proximity toward other objects (such as your head) so that tap commands are not accidentally activa...
Page 15 - Volume Keys; Help
13 The Basics Top View and Side View USB/Charger Port Volume Keys 3.5mm Headset Jack Power/Lock Key 15. 3.5mm Headset Jack Allows you to plug in an optional headset for convenient, hands-free conversations. You can also plug in headphones to listen to music. 16. Volume Keys Allow you to adjust the r...
Page 16 - Removing Back Cover; Installing the Battery, SIM Card and microSD Card; Installing the battery; Insert your fingertip
14 The Basics Removing Back Cover Insert your fingertip under the ledge at the bottom of the phone and gently lift back the cover to remove it. The back cover is compatible with a wireless charging pad (sold separately) which allows you to charge your device wirelessly. * To purchase a wireless charg...
Page 17 - the phone and gently lift back the cover to remove it.; Installing a SIM card; Turn the power off and remove the back cover and the battery (as
15 The Basics Removing the battery 1. Turn the phone off and insert your fingertip under the ledge at the bottom of the phone and gently lift back the cover to remove it. 2. Use the fingertip cutout at the bottom of the battery compartment to lift the battery out. NOTE Be careful not to scratch or dam...
Page 18 - Inserting a microSD card; To unmount the microSD card; Apps; To remove the microSD card
16 The Basics Removing the SIM card 1. Remove the back cover and locate the SIM card slot. 2. Gently slide the SIM card out to remove it. CAUTION If you switch to a new SIM card, the device will display a message advising you that all email accounts will be deleted. You will not have the option to e...
Page 20 - Charging the Phone; Connect the USB Cable into the adapter.; Charging with the USB Cable
18 The Basics Charging the Phone Your phone comes with an adapter and a USB Cable which connect together to charge your phone. To charge your phone: NOTICE Please use only an approved charging accessory to charge your phone. Improper handling of the USB/Charger Port, as well as the use of an incompa...
Page 21 - Optimizing Battery Life; Tips to extend the life of your battery; To monitor and control what uses the battery
19 The Basics Optimizing Battery Life You can extend your battery’s life between charges by turning off features that run in the background. You can also monitor how applications and system resources consume battery power. Tips to extend the life of your battery 㻌 Turn off radio communications that ...
Page 22 - Turning the Phone On and Off; Turning the phone on
20 The Basics of the applications or services using battery power from the greatest amount of energy used to the least amount. 㻌 Tap an application or service in the Battery use screen to see the details about its power consumption, including either how long since last connected to a power source or...
Page 23 - Power off and restart; To unlock the phone; . Your Lock screen will; About Lock Screen Improvement
21 The Basics 2. Tap Power off and restart . 3. Tap OK to confirm that you want to restart the phone. To unlock the phone If you don’t use the phone for a while, the screen and backlight will turn off to conserve battery power. To unlock the phone: 1. Press the Power/Lock Key . Your Lock screen will ...
Page 24 - OR; To set up your device, follow the steps below:
22 The Basics just like a “to do” list. Now, with a swipe left or right, users can clear the notification they want to remove from the list. See page 40 for the reference. To turn the phone sounds off If you’re in a place where your phone sounds may disturb others, you can quickly silence your phone ...
Page 25 - Setting up your Google Account
23 The Basics 6. Read the Privacy caution and data use information. If you want to share your location, tap the I agree to share my location checkbox and tap Next . 7. The Verizon setup is complete. Touch Next to continue. NOTE After successfully setting up your device, you can choose to view option...
Page 27 - Phone’s Status Icons; Call icons
25 The Basics Phone’s Status Icons The Status Bar appears at the top of every screen. It displays icons indicating that you’ve received notifications (on the left) and icons indicating the phone’s status (on the right), along with the current time. Notification icons Status icons If you have more noti...
Page 29 - Phone
27 The Basics (FUUJOHUP,OPXUIF)PNF4DSFFO The Home screen is your starting point to access all of the features on your phone. It displays application shortcuts, icons, widgets, and other features. Status Bar Shows device status information, including the time, signal strength, battery status, and not...
Page 30 - Tap the; To view other Home screen canvases; Swipe (or flick) your finger left or right across the Home screen. The; Mini Canvas View; To go directly to any Home screen canvas, simply tap the one you want.
28 The Basics To return to the Home screen 㻌 Tap the Home Key at any time, from any application. To view other Home screen canvases 㻌 Swipe (or flick) your finger left or right across the Home screen. The Home screen spans up to seven screen widths, allowing more space for icons, widgets, shortcuts, a...
Page 31 - Set default; Clean View
29 The Basics then drag it to at the top of the screen. When the Remove icon changes to , lift your finger. 㻌 To rearrange your canvases, tap and hold the canvas to move, drag it on top of the canvas position where you want it, then lift your finger. The moved canvas takes that position and the remain...
Page 32 - Touchscreen; Touch or tap
30 The Basics customization, it’s easy to access what is most important, like a special contact or a frequently used app. 1. Tap and hold an icon until the canvas grid is displayed, then release the icon. An editing icon appears at the upper right side of the application icon. 2. Tap the icon and se...
Page 33 - Use your index finger and thumb in a pinch or spread; Rotate the screen; From many applications, the orientation of the screen; Text Input Methods
31 The Basics Double-tap Double-tap to zoom in or out on a screen. For example, quickly double-tap a section of a web page to zoom in or out on that section to fit the width of the screen. You can also double-tap to control the zoom in Maps and in other applications. Pinch-to-Zoom Use your index finge...
Page 34 - Text input settings
32 The Basics Typing tips Enter other characters Tap to view the Numbers/Symbols Keyboard. Then tap to view additional symbols. Enter one capital letter Tap to capitalize the next letter. The Shift Key will change to . Enter all capital letters Tap the Shift Key twice until is displayed. Tap again t...
Page 36 - Applications: How to View, Open and Switch; Opening and Closing the Applications screen; Home Key; Closing the Applications screen; To manually close the Applications screen, tap the
34 The Basics Applications: How to View, Open and Switch Home screen Applications screen Tap to open the Applications screen. Tap an application icon to open the application. Slide the screen right or left to bring more icons into view. Tap a tab to select Apps, Downloads or Widgets. NOTE ţ You can ...
Page 37 - at the top right of; Sorting applications; to open the Applications screen.; Changing the icon size; You can change the size of the icons on the Applications screen.
35 The Basics Customizing the Applications screen The phone includes a wide variety of applications and you can download even more applications to your device. You can customize these items on the Applications screen for faster access (less scrolling) to the applications you use most often. Rearrang...
Page 38 - at the top right of the tab bar.; Opening and Switching Applications; Open an application simply by tapping its icon on the screen.; Opening multiple applications; Tap the icon for the other application you want to open.
36 The Basics Checking application information To check on an application’s detail information from the Applications screen: 1. From the Home screen, tap Apps . 2. Tap the Apps tab, then tap Settings at the top right of the tab bar. The Settings icon changes to a checkmark . 3. Tap any of the applic...
Page 39 - Recent Apps Key; Adding application icons to the Home screen; Drag
37 The Basics Switching between multiple applications 1. Tap the Recent Apps Key . A screen with the icons of the applications that you’ve used recently will appear. 2. Tap the application preview of the application you want to use or tap the Back Key to return to the current screen. Tap an app prev...
Page 41 - Working With Menus; Options menus; Context menus
39 The Basics Working With Menus There are two kinds of Android menus: Options menus and Context menus. Options menus Options menus contain tools that apply to the activities of the current screen or application, not to any specific item on the screen. To open the available Options menu, tap the Menu...
Page 42 - Managing Notifications; To open the Notifications panel; Tap and drag the Status Bar to the bottom of the screen.; To respond to a notification
40 The Basics Managing Notifications Notification icons report the arrival of new messages, calendar events, alarms, as well as ongoing events, such as when you are on a call. When you receive a notification, the notification icon will be displayed in the Status Bar. You can open the Notifications panel ...
Page 43 - Clear; To close the Notifications panel; Back Key; Quick settings on the Notifications panel; Edit
41 The Basics 2. Tap the Clear icon . All event-based notifications will be cleared; ongoing notifications will remain in the list. NOTE You can also swipe a notification to the left or right to delete that specific notification. To close the Notifications panel Tap and drag the Notification Bar at the bot...
Page 44 - FBSDIJOH:PVS1IPOFBOEUIF8FC; Phone and Web search using text entry
42 The Basics 4FBSDIJOH:PVS1IPOFBOEUIF8FC You can search for information on your phone and on the web using the Search application. Some applications, such as Gmail , Contacts , and Browser have the ability to search for contents within those specific applications. You can conduct the search by typin...
Page 46 - Locking the Screen
44 The Basics Phone search : Phone search settings let you select which apps on your phone are included in Google searches. Privacy and accounts : These settings control the account for use with Google Search and search-related privacy options for that account. Locking the Screen Your phone automati...
Page 48 - Security lock timer
46 The Basics 4. Tap PIN to change your number lock sequence or tap Password to change your alphanumeric lock sequence. 5. You’re prompted to enter and reenter your new lock sequence. From then on, you will need to enter that sequence and tap OK to unlock the screen. NOTES ţ You have 5 opportunities...
Page 50 - Customizing the Home Screen; To add an item to the Home screen; From the Home screen, tap and hold an empty space on a Home screen; You can add shortcut items to any of the Home screen canvases.
48 The Basics Customizing the Home Screen You can personalize your Home screen by adding application icons, shortcuts, widgets, and other items to any Home screen canvas. You can also change the wallpaper. To add an item to the Home screen 1. From the Home screen, tap and hold an empty space on a Ho...
Page 51 - To remove an item from the Home screen
49 The Basics To move an item on the Home screen 1. Tap and hold the item. 2. Drag the item to a new location on the screen. Pause at the left or right edge of the screen to drag the item onto the next available Home screen canvas. 3. When the item is where you want it, lift your finger. NOTE If Move...
Page 52 - Scroll screens circularly; on the icon you’ve tapped, a different application will open.
50 The Basics Scroll screens circularly : Checkmark this setting so that the Home screen canvases continuously rotate (does not stop at the far left or far right canvas). $POOFDUJOH2VJDLMZ8JUI:PVS$POUBDUT As you build up your list of contacts on your phone, you can use the Quick Contact for Android ...
Page 53 - QuickMemo; Using the QuickMemo options; Gallery
51 The Basics QuickMemo The QuickMemo feature allows you to create memos and capture screen shots. You can use QuickMemo to easily and efficiently create memos during a call, with a saved picture or on the current phone screen. 1. Access the QuickMemo feature by pressing both the Volume Up and Volume...
Page 54 - Connecting to Networks and Devices; Connecting to Wi-Fi Networks
52 Connecting to Networks and Devices Connecting to Wi-Fi Networks Wi-Fi is a wireless networking technology that can provide Internet access at distances of up to 100 meters, depending on the Wi-Fi router and your surroundings. To use Wi-Fi on your phone, you must connect to a wireless access point...
Page 56 - ADD NETWORK; To forget a Wi-Fi network; Forget network
54 Connecting to Networks and Devices To add a Wi-Fi network You can add a Wi-Fi network so the phone will remember it, along with any security credentials, and connect to it automatically when it is in range. You can also add a Wi-Fi network manually if it does not broadcast its name (SSID) or if y...
Page 58 - Charge only mode
56 Connecting to Networks and Devices 64#"VUPSVO USB Autorun is a feature that allows your phone to connect to a PC using a USB Cable and set it up on that PC without using a physical CD-ROM. Automatically installs the LG USB Modem driver. Allows a phone with an installed microSD card to be used...
Page 59 - Return to the Settings screen and tap; This mode changes the phone to Modem mode from the PC.; is checkmarked, the USB selection dialog box is; Autorun is not available when:; Then tap any USB mode.; Using the Status Bar to change the settings
57 Connecting to Networks and Devices PC. From the Home screen, tap Apps > Settings > PC connection > USB connection type > Internet connection > Ethernet. Return to the Settings screen and tap More... (under the WIRELESS & NETWORKS section) > USB tethering > Mobile Broadban...
Page 60 - Connecting the phone to a PC; Connect your phone to your PC with a compatible USB Cable; Downloading the LG USB Modem Driver.; Installing the LG USB Modem Driver.
58 Connecting to Networks and Devices Step 1. Connecting the phone to a PC Connect your phone to your PC with a compatible USB Cable (supplied). LG Autorun starts automatically. Click ‘I accept the terms in the agreement’ then ‘Yes’. NOTES ţ USB Autorun is only supported for Windows ® XP, Windows ® ...
Page 61 - Installing the Utility Application.; The; The following Status Bar icon indicates your Wi-Fi Hotspot status.
59 Connecting to Networks and Devices Step 4. Installing the Utility Application. .BLF:PVS%FWJDFB.PCJMF)PUTQPU The Mobile Hotspot application can share the phone’s 4G data connection with any Wi-Fi capable devices. WARNING! There are security risks associated with creating a Wi-Fi network open to th...
Page 62 - NFC; To turn the NFC feature on, from the Home screen tap; TJOH5BHXSJUJOH; and tap the back of your device to a tag or a; TJOH5BHSFBEJOH
60 Connecting to Networks and Devices NFC Near field communication (NFC) lets you get things done just by tapping your phone on NFC touchpoints – quickly change your phone settings, for example, or open a website featured on an advertising poster without typing the Web address, and lots more. To turn...
Page 63 - microSD Card; . Now you can safely remove the microSD card.; Viewing Memory in the microSD Card; to release the microSD card from device use.
61 microSD Card microSD Card NOTE The microSD card is sold separately. See page 13 for installation instructions. 6ONPVOUJOHBOESFNPWJOHUIFNJDSP4%$BSE To safely remove the microSD card from your device, you must first unmount it before removing it from the phone. 1. From the Home screen, tap Apps >...
Page 65 - Calls; Placing and Ending Calls; To open the Phone application
63 Calls Placing and Ending Calls You place calls using the Phone application. Calls can be manually dialed using the Dial tab. You can also dial from your phone’s memory using the Call logs tab, the Contacts tab, or the Favorites tab. To open the Phone application From the Home screen, tap Phone . ...
Page 66 - Call; Instant List; Dial; Sequence matches
64 Calls open another application, the Call icon appears in the Status Bar for the duration of the call. Press the Volume Keys to adjust the call volume. Use the on-screen icons to enter additional numbers, place the call on hold and take an incoming call, add another call, use the speakerphone, end...
Page 67 - Airplane mode; Press and hold the
65 Calls Selecting an Instant list entry Tap an entry in the Instant list to insert it on the dialpad and tap the Call to dial it. Instant list Icon Tap to view the entire Instant list. Instant List Call Airplane mode Some locations may require you to turn off your phone’s wireless connections by pl...
Page 68 - Answering or Rejecting Calls; To answer a call; To ignore a call and divert it to voicemail
66 Calls Answering or Rejecting Calls When you receive a phone call, the Incoming call screen opens with the caller ID and any additional information about the caller that you have saved in the Contacts list. All incoming calls are recorded in the Call logs. To answer a call If the screen is unlocke...
Page 69 - Unlocked Screen; To ignore a call and send a text message; Ignore with message
67 Calls Tap the Ignore with message icon to send a quick message to the caller and forward them to your voicemail. Unlocked Screen Locked Screen Tap the Ignore icon to decline the call and send the caller directly to your voicemail box to leave a message. Swipe the Ignore icon in any direction to d...
Page 70 - Working With the Call logs; To open the Call logs
68 Calls Working With the Call logs The Call logs is a list of all of the calls you’ve dialed, received, or missed. It offers a convenient way to redial a number, return a call, or add a number to your Contacts list. To open the Call logs From the Home screen, tap Phone then tap the Call logs tab at...
Page 72 - Voice Dialer; To place a call by speaking; Options During a Call; To mute the microphone during a call
70 Calls Voice Dialer You can use the Voice Dialer application to place a phone call by speaking the name of a contact or a phone number. To place a call by speaking 1. From the Home screen, tap Apps > Voice Dialer . If you have a Bluetooth device that supports "voice-recognition" or "...
Page 73 - To switch between a Bluetooth device and the phone
71 Calls While viewing the in-call screen, you can unmute the microphone by tapping the Mute icon again. The microphone is unmuted automatically when the call ends. To turn the speakerphone on or off Tap the Speaker icon . The light bar on the Speaker icon illuminates blue to indicate that the speak...
Page 74 - Managing Multiple Calls; To set up a conference call; Place a call to the first participant.
72 Calls Managing Multiple Calls Contact your wireless service provider to learn whether they support conference calls and how many participants you can include. To set up a conference call 1. Place a call to the first participant. 2. When you’re connected, tap Add call . Manually enter the phone num...
Page 75 - To set up your Voicemail
73 Calls -JTUFOJOHUP:PVS7PJDFNBJM When you have a new voicemail message, the Voicemail notification icon appears in the Status Bar. If you have not set up your voicemail number, or if you need to change it, you can do that in the Call settings. To listen to your Voicemail Open the Notifications panel ...
Page 76 - Browser; Browse web pages; Web
74 Browser The Browser application allows you to access the internet from your Verizon Wireless device. Access and selections within this feature are dependent upon your service provider. For specific information on Browser access through your phone, contact your service provider. NOTE You may incur ...
Page 80 - Changing the Browser settings; General
78 Web To view the list of recently visited web pages, tap the Bookmarks icon in the toolbar, then tap the History tab at the top-center of the screen. You can select to view today’s list, yesterday’s list, the list from the last 7 days, and the most visited list. Tap the Menu Key > Clear all his...
Page 82 - Allow multiple tabs per app
80 Web Inverted rendering: Checkmark for inverted rendering. Black becomes white and vice versa. Contrast: Allows you to adjust the contrast level. This option is only available when the Inverted rending option is selected. Advanced Set search engine: Allows you to select which search engine to use....
Page 83 - Maps; To search for a location
81 Web Bandwidth management Pre-load search results: Allows you to set when the Browser will preload high confidence search results in the background. Pre-load web page: Allows you to set when the Browser will preload linked web pages in the background. Load images: Checkmark to set whether or not to...
Page 85 - Switching between common features
83 Web Tap the Back Key to return to map view. NOTE To reverse the directions, from the Directions list, tap the Menu Key > Reverse . Switching between common features The Maps application has icons for easy access to many common features used when searching for the places you want to go. Tap the...
Page 86 - Checking the Weather; To get details about the weather; To add a city or update current location
84 Web Checking the Weather The Weather application provides weather forecasts and other weather information. You can place a Weather widget on your Home screen for a summary of your local weather. Access the Weather application for more detailed weather information. To get details about the weather...
Page 87 - Changing Weather Settings
85 Web Tap here to add the city to your City list. Tap to search. Type in the city, state or ZIP code to search for that location. Managing your City list The City list screen allows you to manage a list of cities that you want to monitor. From the Weather application, tap the Menu Key > Settings...
Page 88 - Backup Assistant Plus; Manually backing up your contacts
86 Web Backup Assistant Plus How to access and register Contacts backup settings from Backup Assistant Plus If you didn’t set up Backup Assistant Plus when you turned on your phone for the first time, you can enable it in the Settings application, the Contacts application, or from the Applications sc...
Page 90 - Communication; To open your Contacts application; To open a list of your favorite contacts
88 Communication Contacts The Contacts application allows you to store names, phone numbers, and other information in your phone’s memory. 6TJOH:PVS$POUBDUT Use the Contacts application to add, view, and communicate with your friends and acquaintances. To open your Contacts application From the Home...
Page 91 - Adding Contacts
89 Communication To view details about a contact 1. Open your Contacts application. 2. Tap the contact whose details you want to view. 3. The Contact information displays by default. Tap an icon to call, message, or open other applications. The Dial icon places a call to the number. The Message icon...
Page 92 - Importing, Exporting, and Sharing Contacts
90 Communication To add a new contact 1. Open the Contacts application. 2. Tap the New contact icon to the right of the Search box. 3. If you have more than one account with contacts, tap at the top of the screen and choose the account to which you want to add the contact. 4. Enter the contact’s nam...
Page 94 - Communicating with Your Contacts
92 Communication "EEJOHB$POUBDUUP:PVS'BWPSJUFT The Favorites tab contains the list of people you choose as favorites and a short list of the contacts you communicate with most often. To add a contact to your Favorites list 1. Open the Contacts application. 2. Tap a contact to view its details. 3...
Page 95 - Selecting Which Contacts are Displayed; To change which groups are displayed
93 Communication To connect using Quick Contact for Android ™ 1. Tap a contact’s picture to open Quick Contact for Android. Quick Contact Quick Contact panel Contact list screen Tap a contact's picture. 2. Tap the icon corresponding to the type of communication you want to start. The communication i...
Page 96 - Tap each group whose contacts you want to view in your; Joining Contacts; application attempts to avoid duplication by; To join contacts; Separating Contact Information; To separate contact information; Tap the contact entry whose information you want to separate.
94 Communication 4. Tap each group whose contacts you want to view in your Contacts application. Contact types with a checkmark will appear in your Contacts list. This action affects only which contacts are displayed. Your sync settings will not be affected. 5. Tap Apply to save your settings. Joini...
Page 97 - Email; Email icons; To open the Email application
95 Communication Email NOTE AOL, Yahoo! and Hotmail icons only appear when the SIM card is inserted. Email icons New Exchange mail message received or sending succeeded Exchange mail message sending or receiving failed AOL mail message received or sending succeeded AOL mail message sending or receiv...
Page 98 - Email settings
96 Communication The Accounts screen The Accounts screen lists all of your accounts. Open the Email application. If you’re not on the Accounts screen, tap the Menu Key > Accounts . Each account on the Accounts screen displays the number of unread mail. You can tap an account to view its Inbox. Th...
Page 100 - Voicemail; To be able to use Voicemail
98 Communication Tap Email preview to set how many lines of email text to download on your device for preview. Microsoft Exchange Settings Tap Corporate directory to checkmark this setting to search the online directory for the entered recipient. Voicemail The Voicemail application allows the manage...
Page 102 - From your Gmail Inbox, tap the Accounts icon
100 Communication To switch accounts Gmail displays conversations and messages from one Google Account at a time. If you have set up more than one Google Account on your device, you can easily switch between them. From your Gmail Inbox, tap the Accounts icon on the Inbox header, then tap the account...
Page 104 - Undo
102 Communication 3FBEJOH:PVS.FTTBHFT While viewing a list of conversations in your Inbox or in any list of labeled conversations, you can open a conversation to read its messages. To read a message Tap a conversation that contains the message you want to read. The conversation opens to the first new...
Page 105 - Composing and Sending a Message; To compose and send a message
103 Communication While viewing a message, tap the message action icons on the message header to access options which include to mark it as important, to reply to the sender, and to access Reply all to reply to all address and Forward to forward the message to someone else. To reread a message When ...
Page 106 - Replying to or Forwarding a Message; To reply to or forward a message
104 Communication 6. Tap the Menu Key > Attach picture or Attach video if you want to add an attachment to the email. 7. Tap Send at the top right corner of the screen to send your message. NOTE If you aren't ready to send the message, tap the Menu Key , then tap Save draft . Replying to or Forwa...
Page 108 - To open Messaging; Messaging; To delete a message thread from the Messaging window; Delete thread; Exchanging Messages; Messaging
106 Communication Messaging To open Messaging From the Home screen, tap Messaging . The Messaging screen will open, where you can create a new message or open an ongoing message thread. New Message Tap here to create new message. Tap an existing message thread to open it. Tap to make a call in the m...
Page 109 - New message
107 Communication To send a text message 1. On the Messaging screen, tap the New message icon at the top right corner of the screen. 2. Enter a mobile phone number in the To field. As you enter the mobile phone number, matching contacts appear. You can tap a suggested recipient or continue entering t...
Page 112 - Changing Messaging Settings; Storage settings
110 Communication To view details about a message 1. Tap and hold a message in the message window. 2. Tap View message details in the Context menu that opens. Changing Messaging Settings To change your Messaging settings, open the Messaging application, tap the Menu Key > Settings . Storage setti...
Page 113 - Delivery report allow:; Group conversation settings
111 Communication Multimedia message (MMS) settings Delivery reports: Checkmark this setting to allow your phone to receive delivery reports for the multimedia messages you send. Delivery report allow: Checkmark this setting to send a delivery report when it is requested. Auto-retrieve: Remove the c...
Page 114 - Choose input method
112 Communication Emergency alerts settings Presidential alert: This setting allows presidential alerts to be always presented. This setting is greyed-out because it cannot be changed. Extreme alert: Checkmark this setting so that Extreme alerts are always presented. Severe alert: Checkmark this set...
Page 115 - Talk; PPQFO(PPHMF5BMLBOETJHOJO; To sign out of Google Talk
113 Communication Powerful Voice Input Engine Voice to text has always been a cool feature. Now it is even better because users can dictate an entire message instead of just a few words at a time. While they are talking, the words appear a split second later on the screen, so they can actually see i...
Page 116 - Chatting with Friends; To chat with a friend; Options from your Friends list
114 Communication Chatting with Friends To chat with a friend 1. Sign in to your Google Talk account. 2. Tap the friend you want to chat with. 3. Enter your message then tap Send . To accept an invitation to chat When a friend sends you a Google Talk message, you will receive a notification. The frie...
Page 117 - Changing and Monitoring Online Status; To change your online status
115 Communication Changing and Monitoring Online Status Tap your account name from the Friends list to change and monitor online status. Tap here to change your status. Displays your current account. Your current status. Tap here to change the status message. Tap here to access previously used statu...
Page 118 - To change your picture; Select from Gallery; Managing Your Friends List
116 Communication To change your status message In addition to the standard status icons described in the table above, you can also enter a status description to go with your status. 1. Sign in to your Google Talk account. 2. Tap your account name at the top of your Friends list. 3. In the Status sc...
Page 121 - To set Google Talk to change your status; The Phone application; Dial tab
119 Communication To show or hide the mobile indicator to friends 1. From the Friends list, tap the Menu Key > Settings . NOTE Each Google Account uses its own settings. If you use more than one Google Account on your device, tap the account you want to modify. 2. Checkmark Mobile indicator (or r...
Page 122 - Call logs tab; to confirm you want to; Contacts tab; to view additional options.; Favorites tab; view additional options.; To add a Contact to your list of favorites; tab then the Contact entry you want to add to your
120 Communication Call logs tab This tab displays the history of all of your calls. From here you can call or contact any of the entries. To delete all of the Call logs entries at once, tap the Menu Key , select Clear all , then tap Yes to confirm you want to delete them. NOTE You can also selectivel...
Page 123 - Call a Contact by Voice Dialing; Open an Application using Voice Dialer; If a list of results is displayed, tap the one you want to use.
121 Communication Voice Dialer Call a Contact by Voice Dialing You can call numbers directly by saying the contact’s name or number. 1. From the Home screen, tap Apps > Voice Dialer . 2. Say " Call " or " Dial " then a name or a phone number. Or, you can say " Redial " to ...
Page 124 - Entertainment; Camera; To open the; Getting to know the viewfinder; on the viewfinder screen:
122 Entertainment Camera To open the Camera application, from the Home screen, tap Apps > Camera or from the Home screen, tap Camera . TIP From the Lock screen (the Swipe unlock method), you can simply press the Power/Lock Key , then drag the Camera icon upward. Getting to know the viewfinder Time...
Page 126 - Viewing your saved photos
124 Entertainment Taking a quick photo 1. Open the Camera application. 2. Hold the phone horizontally and point the lens toward the subject you want to photograph. 3. Tap the subject on the screen and a focus box will appear in the viewfinder. 4. When the focus box turns green, the camera has focused...
Page 128 - Video Camera
126 Entertainment Video Camera To open the Video Camera application, from the Home screen tap Camera . Tap the Mode Switch icon to toggle from Camera mode to Video mode. Getting to know the viewfinder Brightness – Defines and controls of the amount of light entering the lens. Slide the brightness indi...
Page 129 - After recording a video
127 Entertainment Color effect : Applies artistic effects to videos. Choose from None, Mono, Sepia, and Negative. Geotagging : Sets the camera to add location information to the video. This is ideal for geotagging purposes. Choose Off or On. Audio recording : Sets the camcorder to record audio for t...
Page 130 - Watching your saved videos
128 Entertainment NOTE If Auto review is set to Off, these options can be accessed while viewing the video in the Gallery application. Tap to play the video you just recorded. Tap to share your video using Bluetooth , Email , Gmail , Google+ , Messaging , Picasa , YouTube , or any other application ...
Page 131 - Working with Albums; To open an album and view its contents
129 Entertainment (BMMFSZ 0QFOJOH(BMMFSZBOE7JFXJOH:PVS"MCVNT Open the Gallery application to view albums of your pictures and videos. To open Gallery and view your albums From the Home screen, tap Apps > Gallery or from the Home screen, tap Gallery . OR Open Gallery from the Camera applicatio...
Page 132 - To delete an album; Working with Pictures; Use the; To view and browse pictures
130 Entertainment Tap here to go to Camera mode. Tap here to share picture files. Tap here to delete pictures. To delete an album You can delete an album and its contents from your phone’s internal memory or microSD card. 1. From the Home screen, tap Gallery . 2. Tap the Menu Key > Delete > che...
Page 133 - To watch a slideshow of your pictures; Slideshow; To rotate a picture
131 Entertainment Turn the phone to view the picture in vertical (portrait) or horizontal (landscape) orientation. The picture is displayed (but not saved) in the new orientation. Tap the picture to view navigation and other control icons. To zoom, use the pinch-to-zoom method or just double-tap the...
Page 134 - To get details about a picture
132 Entertainment To crop a picture You can crop and save pictures that are stored in your phone’s internal memory or microSD card. 1. Open the picture you want to crop. 2. Tap the Menu Key . 3. Tap Crop . The cropping box appears on top of the picture. 4. Use the cropping box to select the portion ...
Page 135 - Working with Videos; To play videos
133 Entertainment To delete a picture You can delete a picture from your phone’s internal memory or microSD card. 1. Open the picture you want to delete. 2. Tap Delete at the top right corner of the screen, then tap Yes in the dialog box that opens. Working with Videos Use the Gallery application to...
Page 136 - To delete a video; Video Wiz
134 Entertainment 4. In the dialog box that opens, tap the application you want to use to share the selected video, then enter the necessary information and share it. NOTE Tap and hold a video file to share a single video. Tap Share , then select your method for sharing the file in the Context menu th...
Page 138 - Play Store; Opening Play Store and Finding Applications; To open the Play Store application
136 Entertainment Preview Tap this icon to play your movie. Delete Media Tap this icon to remove the selected image(s) and/or video(s). Tap Delete at the upper right side of the image or video, then tap OK . Play Store Opening Play Store and Finding Applications Open the Play Store application to br...
Page 139 - To open a screen with details about an application; Downloading and Installing Applications; To download and install an application
137 Entertainment To get help with Play Store Play Store Help web pages are available from all of the Play Store screens. Tap the Menu Key > Help . The Browser application opens to the Play Store Help page, with links to many help topics. To open a screen with details about an application At any ...
Page 140 - Install; If you agree to the application’s access requirements, tap
138 Entertainment The price is indicated here. 2. Tap Install (free apps) or the Price button (paid apps). The screen will display if the application requires access to your data or control of any functions on your phone. The Play Store application tells you what it can access if you continue with t...
Page 141 - Music; To copy music files onto the phone’s microSD card
139 Entertainment To create a Google Checkout account You must have a Google Checkout account associated with your Google Account to purchase items from the Play Store. On your computer, go to http://checkout.google.com to establish a Google Checkout account. OR The first time you use your phone to b...
Page 143 - Playing Music; To play music
141 Entertainment To search for music in your library 1. Open the main Library screen, then tap the Menu Key > Search . 2. Start typing the name of the artist, album, or track you’re looking for. Matching songs are displayed in the list below the search box. 3. Tap a matching song to play it or t...
Page 144 - To control playback
142 Entertainment in the current playlist play in order until it reaches the end, then stops. If you choose a repeat option, playback only stops when you stop it. Tap here to restart, play or skip. You can return to the Playback screen from most other screens in the Music application by tapping the ...
Page 145 - To control playback volume
143 Entertainment Tap to share the music using SmartShare (turn on Wi-Fi if it’s not already on). Tap to play the current playlist in shuffle mode (tracks are played in random order). Tap to set repeat mode to repeating all songs, repeating current song, or repeat is off. Tap to manage the music volu...
Page 146 - To use a song as a ringtone; Working with Playlists; To create a playlist
144 Entertainment Sleep timer: Turns off the player automatically. Tap the following options to apply sleep timer: Off , After 10 min , After 20 min , After 30 min , After 1 h , After 2 h. Dolby Mobile: Applies the following sound effect (Dolby) options: Off , Neutral , Expansive , Bass Boost , Treb...
Page 147 - Tap and hold the song you want to remove then tap; To delete a playlist; To rename a playlist; Tap and hold the playlist to display the Context menu, then tap; Video Player; You can play a wide variety of videos using the Video Player.; To open the Video Player application
145 Entertainment To remove a song from a playlist 1. Open a playlist. 2. Tap and hold the song you want to remove then tap Remove from playlist in the Context menu. To delete a playlist 1. Open the Playlist library. 2. Tap and hold the playlist to display the Context menu, then tap Delete . To rena...
Page 148 - To control videos with gestures; Dragging horizontally will seek the video clip (in seconds).
146 Entertainment Tap to rewind the playback about 10 seconds. Tap and hold to rewind the playback slowly. Tap to display a slider bar to increase or decrease the media volume. Tap to choose from full screen, original size, or best fit. Tap to share the video using SmartShare (turn on Wi-Fi if it’s n...
Page 149 - QFOJOH:PV5VCFBOE8BUDIJOH7JEFPT; To open the YouTube application
147 Entertainment Video Player list options The following options are available from the Video Player list screen: Details: Tap and hold a Video Player entry in the list to display a Context menu and tap Details . You can also access the Detail option tapping the Menu Key during playback. Delete: Ta...
Page 151 - Voice Recorder; Record a Voice Memo; Play a Voice Memo
149 Entertainment 5. If you want to share the video with everyone, tap the Privacy field and then tap Public . If not, tap Private or Unlisted . 6. Tap the Upload icon to upload the video. Voice Recorder The Voice Recorder application records audible files for you to use in a variety of ways. Use your...
Page 153 - Calendar; To open the Calendar application; Tools
151 Calendar 7JFXJOH:PVS$BMFOEBSBOE&WFOUT Open the Calendar application to view events you’ve created or that others have invited you to. When you first set up your phone, you configured it to use an existing Google Account or you created a new account. The first time you open the Calendar applicat...
Page 154 - Working in Day View; To switch to Day view; Tap the date in the top left corner above the calendar, then tap; To learn more about events in Day view; Tap an event to view its details.; To add an event in Day view; Tap and hold an empty spot or an event in the day to create a new
152 Tools Working in Day View Day view displays a list of the events of one day, in a table of one-hour rows. The current time will be designated as a thick horizontal black line. If it’s a day of commemoration (e.g., a holiday) it is listed at the top of the screen. All-day and multi-day events are...
Page 155 - Working in Week View; To switch to Week view; Week; To learn more about events in Week view; New event; Working in Month View
153 Tools Working in Week View Week view displays a chart of the events of one week. All-day and multi-day events are displayed at the top. To view other weeks, simply swipe left to see future weeks and right to see past weeks. To switch to Week view Tap the date in the top left corner above the cal...
Page 156 - Month; To view more information about events in Month view; Working in Agenda View; Touch to; To switch to Agenda view; Agenda
154 Tools To switch to Month view Tap the date in the top left corner above the calendar, then tap Month in the drop-down menu. Tap here to create a new event. Drag upward here to hide the month calendar. Tap here to switch to Day, Week, or Agenda view. To view more information about events in Month...
Page 157 - Viewing Event Details; To view information about an event; Reminders
155 Tools To learn more about events in Agenda view Tap an event. A screen with details about the event opens. Viewing Event Details You can view more information about an event in a number of ways, depending on the current view. To view information about an event In Agenda, Day, or Week view, tap a...
Page 158 - Setting an Event Reminder; To set an event reminder; Time; To delete an event reminder
156 Tools Setting an Event Reminder You can set one or more reminders for an event, whether or not you created the event or have permission to edit its other details. To set an event reminder 1. Tap an event to view its details. 2. If no reminder is set, tap to automatically add a reminder for 10 mi...
Page 159 - Calculator; To open and use the Calculator
157 Tools Calculator Opens the Calculator application to perform simple mathematical calculations. To open and use the Calculator From the Home screen, tap Apps > Calculator . Basic Panel Advanced Panel Enter numbers and arithmetic operators on the Basic panel. Drag the Basic panel to the left to...
Page 160 - Setting Alarms; To set an alarm; New alarm
158 Tools Alarm/Clock You use the Alarm/Clock application to access the Alarms, Timer, World clock, and Stopwatch functions. These functions are accessed by tapping the tabs across the top of the screen. To open the Clock application From the Home screen, tap Apps > Alarm/Clock . Setting Alarms Y...
Page 161 - Setting the Timer
159 Tools 4. Tap Snooze duration to set the amount of time to wait before sounding the alarm again if it is not dismissed. You can set the alarm to ring repeatedly from 5 minutes up to 1 hour. 5. Tap Vibration to checkmark the setting and have the phone vibrate, in addition to playing the ringtone. ...
Page 162 - Setting the World Clock
160 Tools 6. Tap Start at the bottom of the screen to begin the time countdown. 7. Once the alarm sounds, tap Stop to stop the timer. Setting the World Clock This feature allows you to set up a list of cities to easily check current times in other time zones with a quick glance. 1. Open the Alarm/Cl...
Page 163 - Polaris Office 4; To access this application, from the Home Screen, tap; Managing Files
161 Tools Polaris Office 4 Polaris Office 4 is a professional Mobile Office Solution which enables users to conveniently view or edit various types of office documents including Word, Excel, and PowerPoint file extensions anywhere, anytime, using their mobile device. To access this application, from the ...
Page 165 - Tap and hold a content thumbnail and tap; While playing your music using the
163 Tools 5. Tap and hold a content thumbnail and tap Play or tap the Menu Key > Play . To share contents from your phone to your renderer device (e.g., TV) NOTE Make sure that your renderer device is properly configured. 1. While playing your music using the Music application, tap / / on the Titl...
Page 166 - To upload contents from the remote content library
164 Tools To download contents from the remote content library 1. From the Home screen, tap Apps > SmartShare . 2. Tap the From icon at the top left of the screen, then tap the device that has your remote content library. 3. You can browse through the content library to find the content(s) you wan...
Page 167 - Settings; To open the Settings application
165 Settings Settings The Settings application contains most of the tools for customizing and configuring your phone. All of the settings in the Settings application are described in this section. For settings specific to the Browser application, see the Browser section and for settings specific to the...
Page 168 - Bluetooth
166 Settings Advanced: Tap the Menu Key > Advanced to set the advanced Wi-Fi settings. Keep Wi-Fi on during sleep: Allows you to keep Wi-Fi on during sleep. Avoid poor connections: Don't use a Wi-Fi network unless it has a good Internet connection. MAC address: Allows you to view the MAC address....
Page 169 - Mobile data
167 Settings Visibility timeout: Tap the Menu Key > Visibility timeout to set the visibility timeout when other Bluetooth devices see your phone for pairing and connection. Show received files: : Tap the Menu Key > Show received files to view your Bluetooth received files. Advanced: : Tap the Men...
Page 171 - NFC switch
169 Settings CDMA call settings: Allows you to set CDMA Call forwarding, Voice privacy, or Auto answer. GSM call settings: Allows you to set GSM Call forwarding, Call barring, Call duration, and Additional settings. More... This menu allows you to manage other network and wireless settings. USB teth...
Page 172 - DEVICE; Sound
170 Settings DEVICE The Device section allow you to configure and manage the general device functions such as sound and display options. Sound This menu allows you to manage your device’s sound settings. SOUND PROFILE Silent mode: Allows you to set the Silent mode. Choose between Off, Vibrate, and On...
Page 173 - Display
171 Settings Screen lock sound: Checkmark to set the phone to make a sound when the screen is locked using the Power/Lock Key and also when it is unlocked. Sound when roaming: Checkmark to enable Enhanced Roaming Indication. Emergency tone: Allows you to set the device's behavior when an emergency c...
Page 177 - PERSONAL
175 Settings Vibrate on touch: Checkmark to turn off touch feedback when Power saver is activated. Brightness: Checkmark to turn off the screen brightness you set in Power saver. Tap Settings to change the setting. Screen timeout: Checkmark to turn off the screen timeout you set in Power saver. Tap ...
Page 182 - Google Account dashboard:
180 Settings Google Account dashboard: Allows you to manage your collected data. Text-to-speech output: Allows you to set the preferred speech engine and other general settings. Google Text-to-speech Engine: Select your preferred text-to-speech engine. Touch to set the language and other settings. S...
Page 186 - About phone
184 Settings Force GPU rendering : Checkmark to use the 2D hardware acceleration in applications. MONITORING Enable strict mode : Checkmark to flash the screen when applications operate for a long period of time on the main thread. Show CPU usage : Checkmark to overlay the current CPU usage on the sc...
Page 187 - Hardware information:
185 Settings Hardware information: Allows you to view Wi-Fi MAC address and Bluetooth address. Software information: Allows you to view Android version, baseband version, kernel version, build number, and software version. Legal information: Allows you to view open source licenses and Google legal i...
Page 188 - Specifications; Dolby Mobile License notice
186 Specifications %JW9.PCJMF ABOUT DIVX VIDEO: DivX ® is a digital video format created by DivX, LLC, a subsidiary of Rovi Corporation. This is an official DivX Certified ® device that plays DivX video. Visit divx.com for more information and software tools to convert your files into DivX videos. ABOUT...
Page 189 - FAQ
187 FAQ Please check to see if any problems you have encountered with your phone are described in this section before taking the phone in for service or calling a service representative. Category Sub-Category Question Answer Bluetooth Bluetooth Devices What are the functions available via Bluetooth?...
Page 196 - Index
194 Index A Adding a Contact to Your Favorites 92 Adding application icons to the Home screen 37 Adding Contacts 89 Advanced settings 80 Airplane mode 65 Alarm/Clock 158 Answering or Rejecting Calls 66 Applications: How to View, Open and Switch 34 B Backup Assistant Plus 86 Bookmark your favorite we...


 LG A7110
User Manual
LG A7110
User Manual
 LG AX5000
User Manual
LG AX5000
User Manual
 LG C1300
User Manual
LG C1300
User Manual
 LG C1300A
User Manual
LG C1300A
User Manual
 LG C1300I
User Manual
LG C1300I
User Manual
 LG C1500
User Manual
LG C1500
User Manual
 LG C2000
User Manual
LG C2000
User Manual
 LG CB630
User Manual
LG CB630
User Manual
 LG CE500
User Manual
LG CE500
User Manual
 LG CF360
User Manual
LG CF360
User Manual
 LG CF360A
User Manual
LG CF360A
User Manual
 LG CG180
User Manual
LG CG180
User Manual
 LG CG225
User Manual
LG CG225
User Manual
 LG CG300
User Manual
LG CG300
User Manual
 LG CP150
User Manual
LG CP150
User Manual
 LG CU320
User Manual
LG CU320
User Manual
 LG CU400
User Manual
LG CU400
User Manual
 LG CU405
User Manual
LG CU405
User Manual
 LG CU500
User Manual
LG CU500
User Manual