Page 3 - ELECTRICAL SAFETY; Use the correct external power source; Important Health Information and Safety Precautions
1 When using this product, the safety precautions below must be taken to avoid possible legal liabilities and damages. Retain and follow all product safety and operating instructions. Observe all warnings in the product operating instructions. To reduce the risk of bodily injury, electric shock, fire...
Page 4 - Keep the battery or device dry and away from water or any
2 not sure of the type of power source required, consult your authorized service provider or local power company. For a product that operates from battery power or other sources, refer to the operating instructions that are included with the product. Handle battery packs carefully This product conta...
Page 7 - EXPLOSIVE ATMOSPHERES; ROAD SAFETY; SAFETY PRECAUTIONS FOR RF EXPOSURE; Avoid using your phone near metal structures (for example,
5 Important Health Information and Safety Precautions powders. Please be aware that sparks in such areas could cause an explosion or fire resulting in bodily injury or even death. EXPLOSIVE ATMOSPHERES When in any area with a potentially explosive atmosphere or where flammable materials exist, the pro...
Page 8 - Use only original manufacturer-approved accessories, or; HEARING AIDS
6 Important Health Information and Safety Precautions s Use only original manufacturer-approved accessories, or accessories that do not contain any metal. s Use of non-original manufacturer-approved accessories may violate your local RF exposure guidelines and should be avoided. INTERFERENCE WITH ME...
Page 10 - Table of Contents
8 Important Health Information and Safety Precautions ................ 1 Table of Contents ............................................................................ 8 Important Customer Information................................................. 13 Technical Details ................................
Page 15 - Important Customer Information
13 Please be advised that many services and applications offered through this unique device are provided by various device, operating system, software and application developers (e.g. Google TM , LG, Microsoft, Palm). If you use, link to or download a service, an application, chat room, marketplace ...
Page 16 - The Optimus V; is an all digital phone that operates on Code; Technical Details
14 Important Information This guide provides important information on the use and operation of your phone. Please read all the information carefully prior to using the phone for the best performance and to prevent any damage to or misuse of the phone. Any unapproved changes or modifications will void...
Page 17 - The following table lists some major CDMA standards.
15 Technical Details * TSB-74: Protocol between an IS- 95A system and ANSI J-STD- 008 Its battery life is twice as long as IS-95. High-speed data transmission is also possible. The following table lists some major CDMA standards. CDMA Standard Designator Description Basic Air Interface TIA/EIA-95A T...
Page 18 - FCC RF Exposure Information; Bodily Contact During Operation
16 FCC RF Exposure Information WARNING! Read this information before operating the phone. In August 1996, the Federal Communications Commission (FCC) of the United States, with its action in Report and Order FCC 96-326, adopted an updated safety standard for human exposure to Radio Frequency (RF) el...
Page 19 - FCC Notice and Cautions; (2) This device & its accessories must accept any interference
17 Technical Details FCC Notice and Cautions This device and its accessories comply with part 15 of FCC rules. Operation is subject to the following two conditions: (1) This device and its accessories may not cause harmful interference, and (2) this device and its accessories must accept any interfe...
Page 20 - - Reorient or relocate the receiving antenna.
18 Technical Details Part 15.21 statement Change or modifications that are not expressly approved by the manufacturer could void the user’s authority to operate the equipment. Part 15.105 statement This equipment has been tested and found to comply with the limits for a class B digital device, pursua...
Page 21 - Setting Up Service; Setting Up Your Device
19 Setting Up Service Setting Up Your Device 1. Install the battery. Remove the battery from its packaging. 㻊 Insert the battery into the opening in the back of the 㻊 device, making sure the connectors align (see step 1, in the following illustration). Gently press down to secure the battery (see st...
Page 22 - Make Your First Call; Setting Up Your Voicemail; Phone
20 Setting Up Service Make Your First Call 1. Press > . (Tap the Phone tab, if the screen is not already on the dial screen.) 2. Use the dialpad to enter a phone number. If you enter a wrong number, tap 㻊 to erase digits one by one. To erase the entire number, touch and hold 㻊 . 3. Tap to place t...
Page 23 - Account Management; Managing You Account; From your phone; Just dial *86 on your phone or just tap; From your computer
21 Account Management Managing You Account From your phone Just dial *86 on your phone or just tap on the home screen to access your Account where you can do any of the following things: Check your minutes 䕪 Add money (Top-Up) 䕪 Change plans ... and a lot more 䕪 From your computer Log in with your p...
Page 24 - From Your Computer:; Just dial *729 on your phone or just tap
22 Account Management Manual Top-Ups From Your Computer: If you don’t want to set Auto Top-Up, you can still log in at virginmobileusa.com whenever you need a quick Top-Up. From Your Phone: Just dial *729 on your phone or just tap on the home screen.
Page 25 - Device Basics; Your Device; Front View; Notification icons
23 Device Basics Your Device TIP Phone Software Upgrades – Updates to your device’s software may become available from time to time. You can use the menu to check for and download updates. Press > > Settings > About Phone > SW Update . Front View Proximity Sensors Status Bar Call Key Men...
Page 27 - Rear View
25 Device Basics Rear View 3.5mm Headset Jack Power/Lock Key Speaker Camera Lens Charger/Accessory Port Microphone 13 Power/Lock Key locks the screen. Press and hold to open the Phone options menu (for the following options): Silent mode , Airplane mode , and Power off . 14 3.5mm Headset Jack allows...
Page 28 - Left Side Right Side
26 Device Basics Left Side Right Side 19 Volume Keys allows you to adjust the ringer and media volumes, or to adjust the in-call volume during a call. 20 Voice Dialer Key lets you activate Voice Dialer. 21 Camera Key lets you activate the camera and camcorder. Once the Camera function is open, you c...
Page 29 - Viewing the Display Screen
27 Device Basics Viewing the Display Screen The Status Bar appears at the top of every screen. It displays icons indicating that you’ve received notifi cations (on the left) and icons indicating the phone’s status (on the right), along with the current time. Notification icons Status icons If you hav...
Page 33 - Turning Your Device On and Off; Turning Your Device On; Press and hold; Turning Your Device Off; for two seconds until you see a pop-; Power off; and then tap; OK; to power off the device.
31 Device Basics Turning Your Device On and Off Turning Your Device On Press and hold 䕪 . Once your phone is on, it may display “Searching for Service.” When your phone finds a signal, it enters standby mode – the phone’s idle state. At this point, you are ready to begin making and receiving calls. I...
Page 34 - Unlock the Screen; To unlock the device’s screen; Unlock; icon; Battery and Charger; Battery Capacity
32 Device Basics Unlock the Screen If you don’t use the device for a while, the screen and backlight will shut off to conserve battery power. To unlock the device’s screen 1. Press or any physical key ( , , , or ). Your lock screen will appear. See “Your Device’s Lock Feature” on page 94. 2. Touch a...
Page 35 - Installing the Battery; See “Setting Up Your Device” on page 19.; Removing the Battery; Make sure the power is turned off so that you don’t lose; Charging the Battery
33 Device Basics Installing the Battery See “Setting Up Your Device” on page 19. 䕪 Removing the Battery 1. Make sure the power is turned off so that you don’t lose any unsaved items. 2. Hold the phone with both hands and use the fingertip cutout located on top of the cover to pull it open and remove ...
Page 36 - Plug one end of the USB cable into the phone’s Charger/; Battery Temperature Protection
34 Device Basics 2. Plug one end of the USB cable into the phone’s Charger/ Accessories Port and the other end into an electrical outlet. The charge time varies depending upon the battery level. Battery Temperature Protection Though extremely rare, if the battery becomes overheated, the phone will a...
Page 37 - Extending Your Battery Life
35 Device Basics Extending Your Battery Life You can extend your battery’s life between charges by turning off features that run in the background. You can also monitor how applications and system resources consume battery power. Reduce the amount of time your backlight is on. (See s “Changing the B...
Page 38 - To check the battery’s charge level:
36 Device Basics To check the battery’s charge level: Press 䕪 > > Settings > About Phone > Status . The battery status (charging or discharging) and level (as a percentage of fully charged) are displayed at the top of the screen. To monitor and control what uses the battery: The Battery ...
Page 39 - Device Function Keys
37 Device Basics Device Function Keys The Optimus V TM comes equipped with four main function keys that can be used on any screen to access additional functions. Menu Key The Menu Key ( ) activates an available menu function for the current screen or application. When on the Home screen, the followi...
Page 40 - Menus Overview
38 Device Basics > Add Shortcuts s - Applications - Bookmark- Contact - Direct dial- Direct message - Directions & Navigation- Email- Gmail label- Latitude- Music playlist - Settings Widgets s - Analog clock - Calendar- Google Search- Home screen tips - Latitude- Market - Music- News and Weat...
Page 41 - Security
39 Device Basics VPN Settings s - Add VPN Mobile Networks s - Data Enabled > Settings > Call settings Other call settings 䕪 Excuse Message s Plus Code Dialing s - North American Dialing (On/ Off) - International Dialing TTY mode s - TTY Off - TTY Full- TTY HCO - TTY VCO DTMF Tones s - Normal -...
Page 44 - Working with Menus; Options menus; applications have Options menus if you press; More; to open the additional items.
42 Device Basics Working with Menus There are two kinds of Android menus: Options menus and Context menus. Options menus Options menus contain tools that apply to the activities of the current screen or application, not to any specific item on the screen. To open the available options menu, press . N...
Page 45 - Using Context menus; Slide the screen up to display more menus.
43 Device Basics Using Context menus Context menus contain options that apply to a specific item on the screen. To open a Context menu, touch and hold an item on the screen. Not all items have Context menus. If you touch and hold an item that has no Context menu, nothing will happen. When you touch a...
Page 46 - Backing Up Within a Menu; To go to the previous menu:; Using the Notifications Panel; To open the Noti; Notifications
44 Device Basics Backing Up Within a Menu To go to the previous menu: Press 䕪 . To return to the Home screen: Press 䕪 . Using the Notifications Panel Notification icons report the arrival of new messages, calendar events, alarms, as well as ongoing events, such as when you are on a call. When you rece...
Page 47 - To respond to a noti; To close the Noti
45 Device Basics The Notifications panel displays your wireless provider and a list of your current notifications, organized into ongoing and event-based notifications. To respond to a noti fi cation: 1. Open the Notifications panel. Your current notifications are listed in the panel, each with a brief d...
Page 48 - Home Key
46 Device Basics Home Key The Home Key takes you back to your Home screen. Back Key The Back Key returns you to the previously active screen. If the onscreen keyboard is currently open, this key closes the keyboard. Search Key The Search Key displays the Quick Search Box that can be used to search f...
Page 49 - Device and Web Search Using Text Entry
47 Device Basics Device and Web Search Using Text Entry 1. Press > . When you press on the Home screen or in the other applications that support this, the Quick Search Box will open automatically. Touch to search by voice. Provides one touch shortcut to previously searched terms. In some applicat...
Page 50 - To search by category:; Google; To search using voice command:
48 Device Basics 3. Tap to search for the entered terms. – or – If what you want to search for what appears in the suggestions list, tap that item to conduct the search. To search by category: Tap 䕪 > Google , Web , Apps , or Contacts . To search using voice command: Press and hold 䕪 . – or – Tap...
Page 51 - Navigation and Customization; is a touch-sensitive device which allows you; Home Screen Overview; Home Screen
49 Device Basics Navigation and Customization The Optimus V TM is a touch-sensitive device which allows you to not only select an onscreen option with a single tap, but also scroll through long menu lists. Simply slide up and down through the display with your fingertip. Home Screen Overview The Home...
Page 52 - To return to the Home screen:; Extended Home Screens:; the device’s screen extends; Touch and hold the Home screen dots on the lower left
50 Device Basics To return to the Home screen: Press 䕪 at any time, from any application. Extended Home Screens: the device’s screen extends beyond the current visible screen width to provide more space for adding icons, widgets, and more. Slide your finger left or right across the Home screen. The 䕪...
Page 53 - Using the Launch screen; Applications: How to View, Open and Switch
51 Device Basics Using the Launch screen All of your device’s applications are located within the Launch screen. This screen houses shortcuts to your currently available applications. NOTE : This screen houses all default and downloaded applications (installed from Android Market or from the Web). 1...
Page 54 - Overview; Opening and Closing the Launch Screen; To open the Launch screen:; Opening and Switching Applications; To open an application:
52 Device Basics Overview Home screen Launch screen Touch an application icon to open the application. Slide the screen up or down to bring more icons into view. Touch to open the Launch screen. Touch to close the Launch screen. Opening and Closing the Launch Screen To open the Launch screen: Tap 䕪 ...
Page 55 - To open multiple applications:; Adding Application Icons to the Home Screen
53 Device Basics TIP : You can customize your Home screen with the application icons you use most often. Applications are located on the Launch screen, but you can copy any application icon to your Home screen for faster access. No matter where the icon is, on the Launch screen or your Home screen, ...
Page 56 - Applications
54 Device Basics Applications The following is a listing of the current applications available on both the Home/Extended screens and via the Launch screen. Application Icons Browser – Launches the Web browser (page 169). Calculator – Launches the Calculator application (page 137). Calendar – Launche...
Page 58 - Customizing Your Home Screen; Creating Shortcuts; To add a shortcut from the Launch screen:
56 Device Basics Virgin Mobile Live – Launches Virgin Mobile Live, a music and entertainment stream. WHERE – Launches the WHERE application, which is a location- based application that helps you connect with the people, places, and things around you. NOTE : The Email application includes access to b...
Page 59 - To add a shortcut via the Add to Home screen:
57 Device Basics NOTE : The same shortcut can be added to any of the available screens (Home or Extended). The application you add to the screen will still appear within the Launch screen. 5. Lift your finger to place it, or drag the icon to where you want it on the screen, then lift your finger. To a...
Page 60 - Adding and Removing Widgets; Add to Home screen; To place a Widget onto a different screen:; Creating and Managing Folders
58 Device Basics Adding and Removing Widgets Widgets are self-contained applications that reside in either your Launch screen or on the Home or Extended screens. Unlike a shortcut, this Widget appears as an onscreen application. To add a Widget: 1. Press to go to the Home screen. 2. Touch and hold o...
Page 61 - To create a folder onscreen:; Changing the Device’s Wallpaper; To change the Home screen wallpaper:
59 Device Basics To create a folder onscreen: 1. Press to go to the Home screen. 2. Touch and hold on an empty area of the screen. 3. From the Add to Home screen window, tap Folders . 4. Tap an available folder type to place it on your current screen. Choices include 㻊 New folder , All contacts , Co...
Page 62 - Accessing Recently-Used Applications; to open the recently-used applications; Changing the Screen Orientation; To manually activate the auto-rotate feature:; to enable or disable the screen; Gestures Guide
60 Device Basics Accessing Recently-Used Applications Your device keeps a running list of your six most recently used applications. 1. Press and hold to open the recently-used applications window. 2. Tap an icon to open the related application. Changing the Screen Orientation This device is capable ...
Page 63 - Tap; : Touch and hold an item on the screen by; Drag; : Touch and hold an item for a moment and then, without; Swipe or slide; : To swipe or slide, quickly move your finger
61 Device Basics Tap s : A single finger tap selects items, links, shortcuts and letters on the on-screen keyboard. Touch and hold s : Touch and hold an item on the screen by touching it and not lifting your finger until an action occurs. For example, to open a contact’s available options, touch and h...
Page 64 - Rotate the screen; Displaying Your Phone Number; Press; Entering Text; Onscreen Keyboard; Tap a text field where you want to enter text.
62 Device Basics Rotate the screen s : From many applications and menus, the orientation of the screen adjusts to the device’s physical orientation. (See “Changing the Screen Orientation” on page 60.) Rotate the device counter-clockwise for landscape orientation. Rotate the device clockwise for port...
Page 65 - Text Entry Keyboard; Numbers and Symbols Entry Keyboard
63 Device Basics Text Entry Keyboard Shift Key Tap once to capitalize the next letter you enter. Double-tap for all caps. Swype Key Tips Tap to see the tips of the Swype keyboard. Number and Symbols Key Tap to change input to number and symbol entry. Voice to Text Key Tap to enter text by voice. Del...
Page 66 - To enter alternate characters, touch and hold the; to close the keyboard.; Entering Text Using Swype; Method; Swype Tips
64 Device Basics To enter alternate characters, touch and hold the 㻊 corresponding key. Rotate the screen to use the larger keyboard. 㻊 Text Entry Keyboard Numbers and Symbols Entry Keyboard NOTE : If you do not want the screen to change orientations automatically, uncheck the Auto-rotate Screen opt...
Page 67 - To con
65 Device Basics Move your finger over the apostrophe to enter contractions. s For common punctuated suffixes, lift your finger off between the suffix and the main part of the word. To con fi gure Swype settings: 1. When the Swype keyboard is displayed, tap . 2. Tap Options . 3. Tap any of the following...
Page 68 - Editing Text; To Cut or Copy and Paste All the Text:
66 Device Basics 㻊 Speed vs. accuracy sets how quickly Swype responds to onscreen input. Move the slider between Fast Response (speed) or Error Tolerance (accuracy) and tap OK . Swype help 㻊 displays the Swype User Manual. Tutorial 㻊 provides an on-screen tutorial. Editing Text You can edit the text...
Page 69 - Creating a Google Account; Your Google Account
67 Device Basics 4. Tap Select Text . 5. Tap and drag over the text you want to select. 6. Touch and hold the highlighted text. 7. When the pop-up menu opens, tap Cut or Copy . 8. Tap the text field where you want to paste the text. 9. Tap to place the cursor on the location where you want to paste t...
Page 70 - Signing into Your Google Account; Username
68 Device Basics 3. Follow the onscreen prompts to create your free account. 4. Log into your provided email address, locate the email from Google, and respond to the new email to both confirm and activate your new account. Signing into Your Google Account 1. Launch the application that requires a Go...
Page 71 - Making and Answering Calls; Making Calls; Options during a call:
69 Making and Answering Calls Making Calls 1. Press > . NOTE : If necessary, tap the Phone tab to access the dialpad. 2. Enter a phone number using the onscreen dialpad and tap . If you enter a wrong number, tap 㻊 to erase digits one by one. To erase the entire number, touch and hold 㻊 . Options ...
Page 72 - Dialing Options; Add to Contacts; Answering Calls
70 Making and Answering Calls Dialing Options After entering numbers with the dialpad, you can use the following dialing options. Press to view the following options: Add to Contacts s : Tap to add the entered number as a new contact, or to an existing contact entry. (See “Saving a Phone Number” on ...
Page 73 - To decline a call and divert it to voicemail:; Missed Call Notifi cation; To display the Missed Call entry from the noti; Call Log
71 Making and Answering Calls The backlight illuminates. s The screen displays an incoming call message. s To decline a call and divert it to voicemail: Touch and drag 䕪 to the left. The caller is sent directly to your voicemail box to leave a message. Missed Call Notifi cation When you do not answer...
Page 74 - Calling Emergency Numbers; Speaker On; To exit Emergency mode:; Exit
72 Making and Answering Calls Calling Emergency Numbers You can place calls to 911 (tap and dial ), even if your phone is locked or your account is restricted. NOTE : When you place an emergency call, your phone automatically enters Emergency mode. During an emergency call, tap an option. s Speaker ...
Page 75 - Saving a Phone Number
73 Making and Answering Calls In-Call Options Once you initiate a call, you will see these onscreen options: Contacts s to open Contacts. End s to end the call. Dialpad s to display the dialpad. Bluetooth s (Only available when a Bluetooth headset is connected to your phone) to conduct the call via ...
Page 76 - To save a number from the Home screen:; Finding a Phone Number; Contacts
74 Making and Answering Calls To save a number from the Home screen: 1. Press > . 2. Enter a phone number, press and tap Add to Contacts . 3. Tap Create New Contact . – or – Tap an existing contact to add the new number to that existing contact. For more information about creating and editing con...
Page 77 - Yes; To dial or save phone numbers with pauses:; Add Wait; Dialing From the Contacts List
75 Making and Answering Calls Dialing and Saving Phone Numbers With Pauses You can dial or save phone numbers with pauses for use with automated systems, such as voicemail or credit card billing numbers. There are two types of pauses available on your device: 2-Second Pause s automatically sends the...
Page 78 - Call Contact; Using Direct Dialing; Add
76 Making and Answering Calls 2. Find a contact to call and tap it to open its entry, then tap . – or – Touch and hold the contact. When a context menu opens, tap Call Contact . Using Direct Dialing With Direct Dialing, you are able to directly save a contact to your Home screen. 1. Press > > ...
Page 79 - Sound Settings; Ringer Types; Selecting Ringtone for Voice Calls
77 Settings The Settings menu contains most of the tools for customizing and configuring your phone. All of the settings in the Settings application are described in this section. To open Settings: Press 䕪 > > Settings . – or – Press > > Settings . Sound Settings In the Sound settings men...
Page 80 - Adjusting the Device’s Volume Settings; : The volume of ringtones that sound when you; Vibrate and Silent Mode; To set your device to vibrate instead of making any sounds:
78 Settings Adjusting the Device’s Volume Settings Adjust your device’s volume settings to suit your needs and your environment. 1. Press > > Settings > Sound > Volume . 2. A dialog opens. Adjust each volume level. Ringtone 㻊 : The volume of ringtones that sound when you receive a phone ...
Page 81 - To switch to silent mode:; Selecting a Notifi cation Ringtone; To hear tones when you use the dialpad to dial a number:
79 Settings To switch to silent mode: 1. Press > Settings > Sound . 2. Tap Silent Mode . (A green checkmark will appear.) – or – Press the down volume key until you see on the screen. – or – On the lock screen, drag to the left. Selecting a Notifi cation Ringtone When you receive a notifi cation...
Page 82 - To hear sound when the screen is locked or unlocked:; Display Settings; Changing the Backlight Time Length
80 Settings onscreen items: 1. Press > > Settings > Sound . 2. Tap Audible Selection . (A green checkmark will appear.) To hear sound when the screen is locked or unlocked: 1. Press > > Settings > Sound . 2. Tap Screen Lock Sounds . (A green checkmark will appear.) To set your devi...
Page 83 - Changing the Contrast; Display Language; 한국어
81 Settings Changing the Contrast Adjust your screen’s contrast (brightness) to suit your surroundings. 1. Press > > Settings > Display > Brightness . 2. Use the slider to set a brightness level. NOTE : For the best battery performance, use the dimmest comfortable brightness. Display Lan...
Page 84 - Date & Time Display Settings; to display the time using 24-hour; Animation Display Options; Location Settings
82 Settings Date & Time Display Settings Set your preferences for how dates and time are displayed. You can also use these settings to set your own time and time zone, rather than obtaining the current time from the mobile network. 1. Press > > Settings > Date & time . 2. Tap Use 24...
Page 85 - Using Wireless Networks; When you check this option, you’re asked whether you; Agree
83 Settings NOTE : Turning Location on will allow the network to detect your position using GPS technology, making some applications and services easier to use. Turning Location off will disable the GPS location function for all purposes except 911, but will not hide your general location based on t...
Page 86 - Using GPS Satellites; Synchronizing Accounts; . A checkmark indicates the feature is
84 Settings Using GPS Satellites You can use your device’s global positioning system (GPS) satellite receiver to pinpoint your location to within an accuracy as close as several meters (“street level”). Actual GPS accuracy depends on a clear view of the sky and other factors. 1. Press > > Sett...
Page 87 - Synchronizing Your Google Account
85 Settings Synchronizing Your Google Account By default, there are no accounts managed by the device. These must be added manually. To add an account (using a Google account type as an example): 1. Press > > Settings > Accounts & Sync . 2. Tap Add Account > Google . 3. Tap Next >...
Page 88 - Synchronizing Your Corporate Account; To add a new Corporate account:
86 Settings Synchronizing Your Corporate Account Your device is capable of synchronizing with your company’s Exchange Servers. To add a new Corporate account: 1. > > Settings > Accounts & Sync . 2. Tap Add Account > Corporate . 3. Follow the onscreen prompts to create your new Corpor...
Page 90 - Search Settings; Configuring the Search Settings
88 Settings Sync Calendar 㻊 synchronizes your exchange calendar entries between your device and the remote exchange erver. A checkmark indicates the feature is enabled. 4. Press to return to the previous screen. For more detailed Work/Corporate email information, see “Corporate Email (Outlook)” on p...
Page 91 - Messaging Settings; Viewing Notifications of Received Messages
89 Settings 㻊 Searchable items opens a screen where you can choose the search categories included in device searches. Categories include: s Web , Apps , Contacts , Messaging , Music , or Voice Search . 㻊 Clear shortcuts erases the history of recently selected search results. Messaging Settings Your ...
Page 92 - To delete a speci; Airplane Mode; to reveal the Phone options.
90 Settings Deleting a thread will delete the sent and received messages in the conversation. To delete a speci fi c message thread: 1. Press > > Messaging . 2. Tap a thread to view the contents of that thread. 3. Press > Delete thread . To delete all stored messages: 1. Press > > Mes...
Page 93 - TTY Use With Virgin Mobile Service; To turn TTY Mode on or off:
91 Settings 1. Press > > Settings > Wireless & Networks . 2. Tap Airplane Mode to remove the checkmark. TTY Use With Virgin Mobile Service A TTY (also known as a TDD or Text Telephone) is a telecommunications device that allows people who are deaf, hard of hearing, or who have speech or...
Page 94 - Security Settings; Accessing the Security Menu; Your Device’s Lock Feature; Locking Your Device
92 Settings WARNING : 911 Emergency Calling Virgin Mobile recommends that TTY users make emergency calls by other means, including Telecommunications Relay Services (TRS), analog cellular, and landline communications. Wireless TTY calls to 911 may be corrupted when received by public safety answerin...
Page 95 - Unlocking Your Device
93 Settings Unlocking Your Device 1. Press or any physical key ( , , , or ) to wake up the phone. 2. On your lock screen, touch and drag the Unlock icon to the right. If you have set up an Unlock Pattern (see “Your Device’s 㻊 Lock Feature” on page 94), use your finger-tip to draw the pattern. If you ...
Page 97 - Changing the Screen Lock
95 Settings Pattern 㻊 : The first time you set unlock pattern, you will see a tutorial with instructions on how to create it. Read the tutorial and tap Next (twice). Draw your own pattern and tap Continue . Then redraw your pattern and tap Confirm . (Connect at least four dots.) PIN: 㻊 Enter a PIN (at...
Page 98 - To disable your device’s lock feature:; Calling in Lock Mode; To call an emergency number, tap the; Silence Your Device from the Lock Screen; Credential Storage Settings; To allow applications to access your device’s encrypted
96 Settings To disable your device’s lock feature: 1. Press > > Settings > Location & Security > Change screen lock . 2. Confirm the saved pattern, or your PIN or Password. 3. Tap None . Calling in Lock Mode Even if the screen is locked, you will still be able to place emergency calls...
Page 99 - To install a secure certi
97 Settings To install a secure certi fi cate from a microSD card: 1. Press > > Settings > Location & Security > Install from SD card . 2. Tap the file name of the certificate to install. Only the names of certificates that you have not already installed on your device are displayed. 3....
Page 100 - Resetting Your Device; Read the message stating the types of data that will be
98 Settings Resetting Your Device Resetting the device restores all the factory defaults, including personal data from internal device storage, information about your Google Account, any other accounts, your system and application settings, and any downloaded applications. Resetting the device does ...
Page 101 - Viewing the Call Log; To open the Call Log:; Call Log Options; Call Again
99 Call Log Viewing the Call Log The Call Log is a list of all the calls you’ve placed, received, or missed. It offers a convenient way to redial a number, return a call, or add a number to your Contacts. To open the Call Log: Press 䕪 > > Call Log . Calls are listed in the Call Log tab, the mo...
Page 102 - Making a Call From the Call Log
100 Call Log Touch to view specific call logs. Touch and hold an entry for more options. Touch to call back. You can also touch and hold the entry to open a menu with more options, to communicate with that contact in other ways. Call s to make a call. View Contact s (for entries saved in Contacts) to...
Page 103 - Prepending a Number From the Call Log; Edit Number Before Call; Clearing the Call Log; Clear Call Log
101 Call Log Search for an existing contact name and tap an existing contact to add the new number to that existing contact. (For more information about creating and editing contacts, see “Contacts” on page 102.) NOTE : You cannot save phone numbers already in your Contacts or from calls identified a...
Page 104 - To open your Contacts application:; Creating a New Contacts Entry
102 Contacts Use the Contacts application to add, view, and communicate with your friends and acquaintances. To open your Contacts application: Press 䕪 > > Contacts . All of your contacts are displayed alphabetically in a list. If you have a new phone and haven’t added any contacts yet, The Co...
Page 105 - Adding a Contact to Your Favorites; To add a contact to your favorites:
103 Contacts Email , Postal Address , Organization , or More to input additional contact information. 8. When you’re finished, tap Done . Adding a Contact to Your Favorites Favorites contains a short list of the contacts you communicate with most often. To add a contact to your favorites: 1. Press &g...
Page 106 - Editing a Contacts Entry; To edit contact details:; Touch and hold the contact whose details you want to edit.; Edit Contact; Edit the desired contact information.; Done
104 Contacts Editing a Contacts Entry You can change or add details saved in your contact entries, such as setting specific ringtones to specific contacts or setting calls from specific contacts to divert to your voicemail. Some contact entries contain information from multiple sources: information tha...
Page 107 - To change a contact’s default phone number:
105 Contacts To change a contact’s default phone number: The default phone number is used when you initiate a call or send a text message using the context menu (by touching and holding a contact). 1. Press > > Contacts . 2. Tap the name of a contact in the list to view its details. 3. Touch a...
Page 108 - Adding a Number to a Contacts Entry
106 Contacts To delete a contact: 1. Press > > Contacts . 2. Tap the name of a contact. 3. Press > Delete Contact . If the contact contains information from a read-only 㻊 account, you will not be able to delete it; you will only be able to change the sync settings for that account or delete...
Page 109 - Assigning Direct Dialing Numbers; To set a contact as Direct dial:; Direct Dial; Simply tap the contact on the Home screen.; Selecting a Ringtone for an Entry; Tap the name of a contact to view its details.
107 Contacts 4. Tap a phone number to edit. 5. Re-enter or edit the number and tap Done . Assigning Direct Dialing Numbers Speed dialing, as available in other feature phones, is not available. However, you are able to directly save a contact to your Home screen. To set a contact as Direct dial: 1. ...
Page 110 - Assigning a Picture to an Entry; Finding Contacts by Name
108 Contacts Assigning a Picture to an Entry Assign a picture to display each time a certain contact calls you. 1. Press > > Contacts . 2. Touch and hold the contact’s entry. 3. Tap Edit Contact . 4. Tap the Picture Frame icon. 5. Tap Take Photo to take a new picture. The camera will launch. –...
Page 111 - Selecting which Contacts are Displayed; To set whether contacts without phone numbers are; Communicating with Your Contacts; To connect by using Quick Contact for Android
109 Contacts Selecting which Contacts are Displayed You can hide contacts that don’t have phone numbers. You can also configure which groups of contacts you want to display in the Contacts list. To set whether contacts without phone numbers are displayed: 1. Press > > Contacts . 2. Press > D...
Page 112 - To communicate with a contact:; To call a contact’s default number:; To send a text or multimedia message to a contact’s default
110 Contacts 2. Tap the icon corresponding to the type of communication you want to start. Depending on the contact information saved, the available actions will be displayed above the name. (For more information, see “Communicating with Your Contacts” on page 109.) To communicate with a contact: 1....
Page 113 - Importing contacts from your microSD card; Insert the microSD card (that contains the vCard files) into; If you have more than one account on your phone, tap the
111 Contacts For more information about sending text and multimedia messages, see “Text Messaging (SMS)” on page 162 and “Multimedia Messaging (MMS)” on page 164. Importing, Exporting, and Sharing Contacts If you have contacts stored in vCard format on a microSD card you can import them into your Co...
Page 114 - Exporting contacts to your microSD card; to confirm your selection and to begin exporting; Sharing a contact
112 Contacts Exporting contacts to your microSD card You can export all of the contacts on your phone to your microSD card, as vCard files. You can then copy this file to a computer or another device that is compatible with this format, such as an address book application. (See “Connecting Your Device...
Page 115 - Accounts; Adding Accounts; You can add multiple Google; Accounts and Exchange; Follow the onscreen steps to enter the required (and
113 Accounts Adding Accounts You can add multiple Google TM Accounts and Exchange accounts. You may also be able to add other kinds of accounts, depending on the applications downloaded and installed on your device. When you add an account, the Contacts application compares any new contacts with you...
Page 116 - Removing an Account; To remove an account:; again to confirm that you want to; and Calendar, have their own synchronization
114 Accounts Depending on the kind of account, you may be asked to configure what kinds of data you want to sync to the device, name of the account, and other details. When you’re finished, the account will be added to the list in the Accounts & Sync settings screen. Removing an Account You can re...
Page 117 - Background Data
115 Accounts For some accounts, syncing is two-directional; changes that you make to the information on your device are synchronized with the accounts on the Web or computer. Your Google Account synchronizes in a two-directional manner. Other accounts support only one-way sync; the information chang...
Page 118 - To sync information manually:; To change an account’s sync settings:
116 Accounts For example, when this option is enabled, changes that 㻊 you make in the Contacts application on your device are automatically made to your on-the-Web Google Contacts TM . If you uncheck this option, you may be able to use an 㻊 application’s tools to sync data manually. To sync informat...
Page 119 - Transferring Music Files to Your Phone; Music; To copy music files onto the phone’s microSD card
117 Music Transferring Music Files to Your Phone The Music application plays audio files that are stored on your phone’s microSD card. Copy audio files from your computer onto the microSD card before you open the Music application. The Music application supports audio files in numerous formats, includi...
Page 120 - application and see your library of music; To open Music and view your music library; application by pressing; Library
118 Music Opening Music and Working with Your Library After you’ve copied some music onto your microSD card you can open the Music application and see your library of music files, sorted in one of four ways. To open Music and view your music library Press 䕪 > > Music . The Music application sea...
Page 121 - To search for music in your library; Delete
119 Music To search for music in your library 1. Open the main Library screen then press . 2. Start typing the name of the artist, album, or track you’re looking for. Matching songs are displayed in the list below the search box. 3. Touch a matching song to play it or touch a matching album or artis...
Page 122 - Playing Music; To play music; Touch a song in your library to listen to it.; Play; application by touching the currently
120 Music Playing Music You can listen to music by using the phone’s built-in speaker, through a wired headset, or through a wireless Bluetooth stereo headset that supports the A2DP profile. To play music Touch a song in your library to listen to it. 䕪 – or – 㻌 㻌 䕪 While viewing a list of tracks in a...
Page 123 - To control playback; To control playback volume; Press the phone’s; Keys
121 Music To control playback The Playback screen contains several icons that you can touch to control the playback of songs, albums, and playlists: Touch to pause playback. Touch to resume playback. Touch to skip to the next track in the album, playlist, or shuffle. Touch to skip to the previous tra...
Page 124 - To play your tracks in a party shuffle
122 Music To play your tracks in a party shuffle When you turn on Party Shuffle, the Music application plays tracks from your microSD card in random until Party Shuffle is turned off. 㻌 㻌 䕪 In the Playback or a Library screen, press > Party Shuffle . The Music application creates a current playlist o...
Page 125 - Working with Playlists; To create a playlist
123 Music Working with Playlists You can create playlists to organize your music files into sets of songs, which you can play in the order you set or in a shuffle. To create a playlist 1. When viewing a list of songs in the Library, touch and hold the first song you want to add to the new playlist. 2. ...
Page 126 - To remove a song from a playlist; Remove from Playlist; To rename or delete a playlist
124 Music To remove a song from a playlist 1. Open a playlist. 2. Touch and hold the song you want to remove, then touch Remove from Playlist or press and touch Clear Playlist to remove all the songs from the current playlist. To rename or delete a playlist 1. Open the Playlist library. 2. Touch and...
Page 127 - Viewing Your Calendar and Events; With the; Calendar; application you can view the events you; Calendar; on the Web, events from each
125 Calendar & Tools Calendar Viewing Your Calendar and Events With the Calendar application you can view the events you have scheduled in the coming days, weeks, or months. To open your Calendar application: Press 䕪 > > Calendar . If you have created or subscribed to more than one calenda...
Page 128 - To change your Calendar view:; Day; Day View; Week View; Month View
126 Calendar & Tools To change your Calendar view: Press 䕪 > Day , Week , Month , or Agenda . Each view displays the events in your calendar for the period of time that you specify. Day View 㻊 Drag left or right to view earlier or later days. Tap an event to view its details. Touch and hold a...
Page 129 - Viewing Event Details; To view information about an event:; Agenda
127 Calendar & Tools Agenda View 㻊 Tap an event to view its details. Drag the screen up or down to view earlier or later events. Repeat indicator Viewing Event Details You can view more information about an event in a number of ways, depending on the current view. To view information about an ev...
Page 130 - Creating an Event
128 Calendar & Tools Creating an Event You can use Calendar on your device to create events that appear on your device and in your Google Calendar on the Web. To create an event: 1. Open the Calendar , and press > More > New Event. You can also touch and hold a spot in 㻊 Day , Week , or Mo...
Page 131 - Editing or Deleting an Event
129 Calendar & Tools Editing or Deleting an Event You can edit or delete an event that you created on the device or on the Web. You can also edit or delete events created by others, if they have given you permission. To edit an event: 1. Open Calendar and tap the event to open it. (See “Viewing ...
Page 132 - Setting an Event Reminder; To set an event reminder:; To delete an event reminder:; Responding to an Event Reminder; To respond to an event reminder:
130 Calendar & Tools Setting an Event Reminder You can set one or more reminders for an event, whether or not you created the event or have permission to edit its other details. To set an event reminder: 1. Open Calendar and touch the event to open it. (See “Viewing Event Details” on page 127.) ...
Page 133 - Displaying and Synchronizing Calendars; To show or hide calendars:
131 Calendar & Tools Tap 䕪 Snooze All in the Calendar Notifications list to receive the reminder again 5 minutes later. Tap 䕪 Dismiss All in the Calendar Notifications list to delete all reminders in the list. Press 䕪 when viewing the Calendar Notifications list to keep the reminders. The reminders...
Page 134 - Changing Calendar Settings; To change Calendar settings:
132 Calendar & Tools To stop syncing calendars to your device: 1. Press > More > Calendars . 2. Tap the button to the right of each calendar stop syncing. If is not displayed, the calendar will not sync. The status of the calendar is also displayed in text under the calendar’s name. To syn...
Page 135 - To add a folder to the home screen:; Folders; To organize items on the home screen in a folder:
133 Calendar & Tools Vibrate 㻊 Allows you to set event reminders to vibrate. Default Reminder Time 㻊 Allows you to select the default time set for event reminders. Folders Folders allow you to organize other Home screen shortcuts and icons, or folders that contain all your contacts, contacts wit...
Page 136 - To open the Clock application:; Clock; Clock
134 Calendar & Tools Clock You use the Clock application to monitor several kinds of information at once, in addition to the current date and time. To open the Clock application: Press 䕪 > > Clock . The Clock application opens with the date and time displayed on your Home screen wallpaper,...
Page 137 - To dim the Clock display:; Alarms; Add Alarm
135 Calendar & Tools To play music: You can play music while the Clock is displayed. Tap 䕪 at the bottom of the Clock screen. The Music application opens, where you can select music to play. You can return to the Clock application or use another application while the music is playing. To dim the...
Page 138 - To change clock alarm settings:
136 Calendar & Tools 4. Tap Repeat to set the days when you want the alarm to sound. If you don’t set a repeat, the alarm sounds only the one day. 5. Tap Ringtone to select a ringtone for the alarm. The ringtone plays briefly when you select it. 6. Tap Vibrate to have the device vibrate, in addit...
Page 139 - Calculator; To open and use the Calculator:; Calculator
137 Calendar & Tools Calculator You can use the Calculator application to solve math problems. To open and use the Calculator: 1. Press > > Calculator . Drag left or right to switch between basic and advanced panels. 2. Enter numbers and arithmetic operators on the basic panel. 3. Drag the...
Page 140 - Voice Services; Voice Dialing; Activating Voice Dialer
138 Voice Services Voice Dialing You can use your device’s built-in automatic speech recognition (ASR) software, called Voice Dialer, to dial a phone number in your Contacts or to launch device functions without having to go through the phone menus. All you have to do is to talk into the phone, and ...
Page 141 - Making a Voice Call With Voice Dialer
139 Voice Services Making a Voice Call With Voice Dialer 1. Press and hold the Voice Dialer Key ( ). You then hear a prompt. – or – Press > > Voice Dialer . 2. When you see “Listening,” say “ Call ” followed by the name and the label for the phone number you wish to call. For example, say “ Ca...
Page 142 - Calling a Phone Number With Voice Dialer; Opening Menus With Voice Dialer
140 Voice Services Calling a Phone Number With Voice Dialer 1. Press and hold the Voice Dialer Key ( ). You then hear a prompt. – or – Press > > Voice Dialer . 2. When you see “Listening,” say “ Dial ” followed immediately by a phone number, for example, say “Call 555 555 5555.” 3. If the loca...
Page 144 - Voice Search; Speak clearly into the microphone. If an error occurs, tap; Speak again; You can then touch a matching entry from the Google
142 Voice Services Voice Search Voice Search uses built-in voice recognition software to listen to your spoken words, convert those to text, then launch a Google search using that text. 1. Press > > Voice Search . 2. Speak clearly into the microphone. If an error occurs, tap Speak again . 3. Y...
Page 145 - microSD Card; Your Device’s microSD Card and Adapter; The microSD Card; Removing the microSD Card
143 microSD Card Your Device’s microSD Card and Adapter The microSD Card Your phone is equipped with a preinstalled microSD TM (Secure Digital) memory card to expand the phone’s available memory space. It allows you to store images, videos, music, and voice data in your device. Removing the microSD ...
Page 146 - Inserting the microSD Card; Gently uncover the microSD slot located on the left side of; microSD Icon Indicators; - card is being prepared for use and for mounting.; microSD Adapter; To insert the microSD card into the microSD adapter:
144 microSD Card Inserting the microSD Card 1. Gently uncover the microSD slot located on the left side of the device. 2. Position the microSD card with the label side facing up and slide it into place until it is fully inserted and locked in place. NOTE : Be sure to use only recommended microSD car...
Page 147 - Write Protection; microSD Card Settings; Viewing Memory in the microSD Card
145 microSD Card Hold the exposed edge of the microSD card, and gently pull 䕪 it out to remove it from the adapter. Write Protection The microSD adapter has a built-in Write Protection lock to prevent accidental overwriting or removal of your data when the microSD card and adapter are inserted in an...
Page 148 - Connecting Your Device to Your Computer; To connect your device to a computer via USB:; USB
146 microSD Card Once completely formatted, the card is automatically re- 㻊 mounted (reconnected for use by the device). NOTE : The formatting procedure erases all the data on the microSD card, after which the files CANNOT be retrieved. To prevent the loss of important data, please check the contents...
Page 149 - To remove the connection:; Turn; again to unmount the microSD card.; Important Connection Information; To avoid loss of data, DO NOT remove the USB cable, the
147 microSD Card To remove the connection: WARNING : Carefully follow your computer’s instructions to unmount, remove, or disconnect any removable USB devices or disks, to avoid losing information on the microSD card when disconnecting your phone from your computer. 1. On your computer, complete the...
Page 150 - Taking Pictures; Press and hold the; Camera Key; ) located on the right; Camera; to activate camera mode.
148 Camera You can take pictures and record videos using the Camera application. You can also view your pictures and videos with the Gallery application. NOTE : s Pictures and videos are stored in a microSD card. Please make sure that the device has a microSD card inserted. s Be sure to clean the pr...
Page 151 - Camera Settings
149 Camera 3. Press ( ) or tap until the shutter sounds. The camera brings the image into focus. When the image is in focus, the focus indicators in each corner turn green and the camera takes a picture. (Your device automatically saves the picture to the Camera folder on the microSD card.) Camera S...
Page 152 - Viewing Your Pictures
150 Camera 㻊 Zoom to zoom in on an object. You can adjust the zoom from 1x to 4x. Viewing Your Pictures The Gallery is where you can access the Gallery of stored camera images. You can view them in a slideshow, share them with your friends, and delete and edit them. 1. Press > > Gallery . 2. S...
Page 153 - Assigning Pictures
151 Camera Tap 㻊 at the top left of the screen to return to the main Gallery screen at any time. Tap 㻊 Slide Show to watch a slideshow of the current album. Tap 㻊 Menu to access the following options: Share s to share the picture via Messaging , Picasa , Bluetooth , Email , Gmail , or other availabl...
Page 154 - Recording Videos; Video Settings
152 Camera Wallpaper 㻊 to assign the picture as a background image, crop the image and tap Save to assign the picture. Recording Videos In addition to taking pictures, you can record, view, and send videos with your device’s built-in video camera. 1. Press and hold the Camera Key ( ) located on the ...
Page 155 - Video Gallery Options
153 Camera 㻊 White Balance to select how the camcorder adjusts colors in different kinds of light in order to achieve the most natural-looking colors for your videos. Choose from Auto , Incandescent , Daylight , Fluorescent , or Cloudy . 㻊 Video quality to set the video quality and maximum length co...
Page 156 - Gallery; to view the gallery stored on the
154 Camera To play a video: 1. Press > > Gallery to view the gallery stored on the microSD card. Scroll left or right to view more albums. 㻊 2. Tap an album to open it and view its contents. (The pictures and videos in the album are displayed in chronological order.) 3. Tap a video in an album...
Page 157 - Bluetooth; About Bluetooth; Turning Bluetooth On and Off; To turn Bluetooth on:; to place a checkmark and activate the; to uncheck and deactivate Bluetooth.; Bluetooth Status Indicators; – Bluetooth is active
155 Bluetooth About Bluetooth Bluetooth is a short-range communications technology that allows you to connect wirelessly to a number of Bluetooth devices, such as headsets and hands-free car kits, and Bluetooth-enabled handhelds, computers, printers, and wireless phones. The Bluetooth communication ...
Page 158 - Using the Bluetooth Settings Menu; To access the Bluetooth Settings menu:
156 Bluetooth Using the Bluetooth Settings Menu The Bluetooth Settings menu allows you to set up many of the characteristics of your device’s Bluetooth service, including: Entering or changing the name your device uses for Bluetooth s communication Setting your device’s visibility (or “discoverabili...
Page 159 - Pairing Bluetooth Devices; Paired Devices; To pair your phone with another Bluetooth device:; Discoverable
157 Bluetooth Pairing Bluetooth Devices Paired Devices The Bluetooth pairing process allows you to establish trusted connections between your device and another Bluetooth device. When you pair devices, they share a passkey, allowing for fast, secure connections while bypassing the discovery and auth...
Page 160 - To disconnect a paired device:; , but retains the knowledge; to confirm disconnection.; Disconnect; From the Bluetooth Settings page, touch and hold the name
158 Bluetooth NOTE : s Due to different specifications and features of other Bluetooth-compatible devices, display and operations may be different, and functions such as transfer or exchange may not be possible with all Bluetooth compatible devices. s Pairing between two Bluetooth devices is a one-ti...
Page 161 - Sending Items via Bluetooth; To send contacts information:
159 Bluetooth 3. Tap Disconnected & unpair or Unpair to confirm deletion. Sending Items via Bluetooth Depending on your paired devices’ settings and capabilities, you may be able to send pictures, videos, Contacts information, or other items using a Bluetooth connection. NOTE : Prior to using thi...
Page 163 - Virgin Mobile Service; Voicemail; Voicemail Notification; By sounding the assigned ringer type.; New Voicemail Message Alerts; To access your voicemail:; To display your Missed Call Log:; Retrieving Your Voicemail Messages; Using the Voicemail Menu to Access Your Messages
161 Virgin Mobile Service Voicemail Voicemail Notification There are several ways your device alerts you to a new message: By sounding the assigned ringer type. s By displaying a notification in the Status Bar. s New Voicemail Message Alerts When you receive a new voice message, your device alerts you...
Page 164 - Virgin Mobile Services; Dialpad; Using Another Phone to Access Messages; Composing Text Messages; Messaging > New Message
162 Virgin Mobile Services 3. Tap Dialpad to use the dialpad to make your selections. NOTE : You are charged for airtime minutes when you are accessing your voicemail from your wireless device. Using Another Phone to Access Messages 1. Dial your wireless phone number. (Make sure your phone is off or...
Page 165 - Accessing Text Messages; To read a text message:
163 Virgin Mobile Service Mobile 㻊 Tap to use the keypad to enter a wireless phone number directly. Email 㻊 You can also enter the recipient’s email address. 3. Tap a matching entry from the onscreen dropdown list. This list is populated by matches found from your managed accounts. 4. Tap the Messag...
Page 166 - Composing MMS Messages
164 Virgin Mobile Services 3. Insert an emoticon or a Smiley. To enter an emoticon, touch and hold on the onscreen keyboard. To enter a smiley from the onscreen keyboard, press 㻊 > Insert Smiley . Make a selection from the list to insert it into the message. 4. You may select additional messaging...
Page 168 - To view and play a multimedia message:; To reply to a multimedia message:
166 Virgin Mobile Services Tap the text field below the image to enter a caption for s the picture. When finished, tap s Done to attach the slideshow to your message. NOTE : To remove or replace a picture or an audio attachment, on the Compose screen, tap the Remove or Replace button next to the attac...
Page 169 - Deleting a Message or Message Thread
167 Virgin Mobile Service Deleting a Message or Message Thread 1. Press > > Messaging . 2. From the message list, touch a message and press . – or – Touch and hold the message thread to display the context menu. 3. Tap Delete Thread and once prompted, tap Delete to complete the process. Adjust...
Page 170 - Call Waiting; To respond to an incoming call while you’re on a call:
168 Virgin Mobile Services If you disable this option, only the MMS message header 㻊 will be retrieved and displayed. Notifications 㻊 : Enable this option if you wish to receive a notification in the Status Bar when a new text or multimedia message arrives. Select Ringtone 㻊 : Allows you to select a r...
Page 171 - Web and Data Services; Getting Started With Data Services; Launching a Web Connection; Browser; Once the Browser loads, you are directed to the home page.; Data Connection Status and Indicators
169 Web and Data Services Getting Started With Data Services IMPORTANT : Certain data services requests may require additional time to process. While your device is loading the requested service, the touchscreen or QWERTY keyboard may appear unresponsive when in fact they are functioning properly. A...
Page 172 - Navigating the Web; Scrolling; To scroll a Web page:; Selecting; To select onscreen items or links:
170 Web and Data Services If you do not see an indicator, your device does not have a current data connection. Navigating the Web Web pages that are optimized for mobile devices typically open at a size appropriate for your device. Often, you can’t zoom or even scroll their contents. Web pages that ...
Page 173 - Going Back; To; To copy text from Web page:
171 Web and Data Services Going Back To go back one page: Press 䕪 on your device. Repeat this process to keep going back through your recently visited pages. Finding and Copying Text on a Web Page To fi nd text on a Web page: 1. Press > More > Find on Page . 2. Enter the text you’re looking fo...
Page 174 - Going to a Specific Website; To go to a particular website by entering a URL (website; Browser Menu; Opening the Browser Menu; Options available within the Browser menu include:
172 Web and Data Services Going to a Specific Website To go to a particular website by entering a URL (website address): 1. Tap the URL field (top of the browser window) and enter a new Web address. As you enter the address, possible matches are displayed 㻊 within a list. Tap an entry to launch the de...
Page 175 - Adjusting Browser Page Settings
173 Web and Data Services Add Bookmark 㻊 Allows you to assign the current Web page as a new bookmark. Find on Page 㻊 Allows you to search the current Web page for a word. Select Text 㻊 Allows you to select text from the current Web page and copies it to the clipboard. Page Info 㻊 Displays the Name a...
Page 178 - Adjusting Browser Security Settings
176 Web and Data Services Enable Location 㻊 : When checkmarked, you permit websites with location-specific content to ask whether you want to share your location, using your device’s GPS. To provide a website with your location, you must also have location sharing enabled in the Settings application....
Page 179 - Setting the Browser Home Page
177 Web and Data Services Setting the Browser Home Page 1. Press to open the Browser menu. 2. Tap More > Settings > Set home page . 3. Delete the current address and enter a new URL. If you are viewing the Web page you want to set as the Home page, tap Use Current Page instead. 4. Tap OK to co...
Page 180 - To create Bookmarks from other Tabs:
178 Web and Data Services History 㻊 : Displays a record of your browsing history. These records are organized into folders such as: Today , Yesterday , 5 days ago , and 1 month ago . 3. In the Bookmarks tab, tap Add . 4. Enter a descriptive name and URL for the new bookmark 5. Tap OK to store the ne...
Page 181 - Adding Bookmarks to Your Home Screen; Bookmarks; – or –; Add Shortcut to Home; to add the selected entry to; Connecting to Wi-Fi Networks; Advanced
179 Web and Data Services Adding Bookmarks to Your Home Screen 1. From any open Web page, press > Bookmarks . – or – From any open Web page, tap . 2. Touch and hold an existing entry from the list to display a popup menu. 3. Tap Add Shortcut to Home to add the selected entry to your Home screen. ...
Page 182 - To receive noti; Network Notification
180 Web and Data Services To turn Wi-Fi on and connect to a Wi-Fi network: 1. Press > . 2. Tap Settings > Wireless & Networks > Wi-Fi Settings . 3. Tap Wi-Fi to turn Wi-Fi on and scan for available Wi-Fi networks. A list of available Wi-Fi networks will be displayed. 㻊 Secured networks ...
Page 183 - drop-down menu and tap the; Save; In the Wi-Fi Settings screen, touch and hold the name of; Forget network
181 Web and Data Services To add a Wi-Fi network: You can add a Wi-Fi network manually if it does not broadcast its name (SSID) or if you want to add a Wi-Fi network when you are out of its range. To add a secured network, you need to contact the network’s administrator to obtain the password or oth...
Page 184 - Email; Email Icons/Shortcuts; - New Email message received
182 Web and Data Services Email Your device’s Email application lets you access and manage multiple email accounts simultaneously in one convenient location. Although there is a separate Gmail application, the main email application can manage both Internet-based email services (Gmail™ and Yahoo™) a...
Page 185 - Gmail; on Google; Gmail is conversation-based; : Every related message is; Gmail is organized by labels, not by folders
183 Web and Data Services Gmail This email client is Google’s web-based email service. (See “Synchronizing Your Google Account” on page 83.) Depending on your synchronization settings, Google Mail (along with calendar events, phone numbers and other contact information) on your device are automatica...
Page 186 - Gmail for the phone is optimized for mobile; Setting Up other Email accounts via the Device
184 Web and Data Services with Gmail you can label a conversation with your mother about your brother’s birthday present with both “Mom” and “Dave.” Later, you can look for the all messages containing either label. Using folders, you’d have to store the message in the “Mom” folder or the “Dave” fold...
Page 187 - Opening Gmail and Your Inbox; Go to Inbox
185 Web and Data Services Opening Gmail and Your Inbox When you open the Gmail application, the most recent conversations are displayed in your Inbox. Press 䕪 > > Gmail. All of your conversations are displayed in your Inbox unless you delete, archive, or filter them. Conversations with new mess...
Page 188 - Reading Your Messages; Tap a conversation that contains the message you want to
186 Web and Data Services To switch accounts: Gmail displays conversations and messages from one Google Account at a time. If you have more than one account, you can open the Accounts screen to view how many unread messages you have in each account and to switch accounts. 1. From your Inbox, press &...
Page 189 - Tap the conversation you want to view, then touch the tab
187 Web and Data Services to undelete it. You can also touch Older to read the next, oldest, unread message in a conversation in your Inbox (or the conversation list you’re working in). You can scroll to the bottom of a message to access buttons for replying to or forwarding the message, as describe...
Page 190 - Composing and Sending a Message; To compose and send a message:
188 Web and Data Services When reading a message or when its tab is selected, you can press > Mark unread to return a read message to the unread state. For example, to remind yourself to read it again later. Composing and Sending a Message You can compose and send a message to people or groups wi...
Page 191 - Replying to or Forwarding a Message; To reply to or forward a message:; Reply; Replying to or forwarding messages without changing; Send
189 Web and Data Services NOTE : If you aren’t connected to a network - for example, if you’re working in Airplane mode - the messages that you send are stored on your device, with the Outbox label until you connect to a network again. Replying to or Forwarding a Message You can continue an email co...
Page 192 - Working with Conversations in Batches
190 Web and Data Services Working with Conversations in Batches With Gmail, you can archive, label, delete, or perform other actions on a batch of conversations at once. 1. From the Inbox or another label, tap the checkmark box to the left of each message for all the messages you want to include in ...
Page 193 - Labeling a Conversation; To label a conversation or change a conversation’s labels:; Change labels; To label a batch of conversations at once:; Labels; Starring a Message; Starred
191 Web and Data Services Labeling a Conversation As mentioned previously, conversations are organized by labels. Gmail has several default labels, but you can also add your own through Gmail on the web. To label a conversation or change a conversation’s labels: 1. When reading a conversation’s mess...
Page 194 - When reading a message, tap the star in its header.; Viewing Conversations by Label; When viewing your Inbox or another label, press; Tap a label to view a list of conversations with that label.
192 Web and Data Services To star a message: When reading a message, tap the star in its header. s – or – When viewing the list of conversations, tap a conversation’s star to star the newest message in the conversation. To unstar a message: Tap its star again. s Viewing Conversations by Label You ca...
Page 195 - Reporting Spam; To report a conversation as spam:; Report spam; Searching for Messages; Search
193 Web and Data Services Reporting Spam The Gmail webmail service is quite effective at preventing spam (junk mail) from reaching your Inbox. When you do receive spam you can help improve the Gmail service by reporting the conversation as spam. To report a conversation as spam: When reading the ema...
Page 196 - Archiving Conversations; To Archive a conversation:; Archive
194 Web and Data Services Archiving Conversations You can archive conversations, to move them out of your Inbox without deleting them. Archived conversations are assigned the All Mail label, and also retain any other labels you’ve assigned to them. Archived conversations are also included in search ...
Page 197 - To select which conversations to synchronize:; Appending a Signature to Your Messages
195 Web and Data Services To select which conversations to synchronize: 1. Press > > Gmail . 2. Press > More > Settings > Labels . The Synchronization settings screen opens, displaying a list of your Gmail labels. Below each label is its current synchronization setting: Sync all , Syn...
Page 198 - Changing Gmail Settings
196 Web and Data Services Changing Gmail Settings You can change a number of settings for Gmail. Each Google account has its own settings, so your changes affect only the current account. (See “To switch accounts:” on page 186.) Notification volumes and some synchronization settings can also be chang...
Page 199 - Setting Up a Corporate Email
197 Web and Data Services Notification settings: Email notifications 㻊 When checkmarked, the phone will notify you whenever you receive new email. (See “Using the Notifications Panel” on page 44.) Select ringtone 㻊 Allows you to choose a ringtone to sound when you receive a new email notification. Vibra...
Page 201 - Opening Corporate Email
199 Web and Data Services Opening Corporate Email 1. Press > > Email . 2. Tap a message to read, manage, or reply to. From your Inbox screen, press 㻊 to select options, such as Refresh , Compose , Folders , Accounts , or Account Settings . While in a message, press 㻊 to select messaging option...
Page 202 - To reply to an email message:; Configuring Corporate Email Settings
200 Web and Data Services To reply to an email message: 1. From the Inbox, tap an email message to view it. 2. With the email message displayed, tap either Reply or Reply All . – or – With the email message displayed, press and tap either Reply or Reply All . If you select 㻊 Forward , you must speci...
Page 204 - To create a Corporate Email Signature:
202 Web and Data Services Out of office settings 㻊 Allows you to set to send an automated reply to each sender while you are out of office. Sync Contacts 㻊 Synchronizes the contacts between your device and the remote exchange server. A checkmark indicates the feature is enabled. Sync Calendar 㻊 Synchr...
Page 205 - Configuring Data Synchronization Settings; Android Market; Accessing the Market
203 Web and Data Services Configuring Data Synchronization Settings This feature allows you to determine which current applications are synchronized with the external server and at what intervals. 1. Press > > Settings > Accounts & Sync . These settings can affect data and minute usage, ...
Page 206 - Selecting and Installing a Google Application; Launching an Installed Google Application
204 Web and Data Services Selecting and Installing a Google Application 1. Press > > Market . 2. Browse through the categories, find an application you’re interested in, and tap the name. 3. Read the application descriptions. 4. Tap Install (for free applications) or Buy (for paid applications)...
Page 207 - Reinstalling a Google Application; Market; Scroll through the list of previously downloaded Google; Data Services FAQs; How do I sign in for the
205 Web and Data Services Reinstalling a Google Application If the Android operating system is ever updated, any data contained on the device will be erased. The only data stored on the device are Google applications available via the Android Market. NOTE : Pictures, videos and music are stored on t...
Page 208 - Can I make calls and use data services at the same time?
206 Web and Data Services Can I make calls and use data services at the same time? No, you cannot use voice and data services simultaneously. When is my data connection active? Your connection is active when data is being transferred. Outgoing calls are allowed; incoming calls go directly to voicema...
Page 209 - YouTube
207 Web and Data Services YouTube TM YouTube™ is a video sharing website on which users can upload and share videos. The site is used to display a wide variety of user-generated video content, including movie clips, TV clips, and music videos, as well as video content such as video blogging, informa...
Page 210 - GPS Navigation; GPS Services; Activating Location Mode; to place a checkmark and activate; Activating Using Wireless Networks; to place a checkmark and
208 GPS Navigation GPS Services Your device’s built-in GPS capability gives you access to a number of location-based services, including Maps and Navigation . Activating Location Mode Before using any of the location-based services, you must turn on your device’s location mode. 1. Press > > Se...
Page 211 - Google Maps; To launch the Google Maps application and view your; Maps; on the top of the screen.
209 GPS Navigation Google Maps TM You can use Google Maps to find your current location; to view real-time traffic conditions; to get detailed directions by foot, public transportation, bicycle, or car; and to navigate by using spoken, turn-by-turn driving instructions using the Google Maps Navigation...
Page 212 - To get an address and additional information for a location:
210 GPS Navigation To get an address and additional information for a location: Touch and hold a location on the map. A balloon with the 䕪 address and a thumbnail from Street View (if available) opens over the location. Tap the balloon to access additional options. 䕪 To utilize Google Maps: 1. Press...
Page 214 - Navigation
212 GPS Navigation Navigation Google Maps Navigation is available on your device. It uses your current location (provided by GPS communication to your device) to provide various location-based services. 1. Press > > Navigation . 2. Read the onscreen disclaimer and tap Accept . 3. Choose from t...
Page 215 - Safety; TIA Safety Information; Exposure to Radio Frequency Signal
213 Safety TIA Safety Information The following is the complete TIA Safety Information for wireless handheld phones. Exposure to Radio Frequency Signal Your wireless handheld portable phone is a low power radio transmitter and receiver. When ON, it receives and sends out Radio Frequency (RF) signals...
Page 216 - Antenna Care; Tips on Efficient Operation; Driving; s'IVEFULLATTENTIONTODRIVINGDRIVINGSAFELYISYOURlRST; Electronic Devices
214 Safety Antenna Care Use only the supplied internal antenna. Unauthorized antennas, modifications, or attachments could damage the phone and may violate FCC regulations. Phone Operation NORMAL POSITION: Hold the phone as you would any other telephone with the antenna pointed up and over your shoul...
Page 217 - Pacemakers; from their pacemaker when the phone is turned ON; Hearing Aids
215 Safety Pacemakers The Health Industry Manufacturers Association recommends that a minimum separation of six (6) inches be maintained between a handheld wireless phone and a pacemaker to avoid potential interference with the pacemaker. These recommendations are consistent with the independent res...
Page 218 - Areas with a potentially explosive atmosphere are often, but
216 Safety Health Care Facilities Turn your phone OFF in health care facilities when any regulations posted in these areas instruct you to do so. Hospitals or health care facilities may use equipment that could be sensitive to external RF energy. Vehicles RF signals may affect improperly installed o...
Page 219 - For Vehicles Equipped with an Air Bag; Safety Information; Charger and Adapter Safety; s/NLYUSETHEAPPROVEDBATTERYCHARGER/THERWISEYOUMAY
217 Safety not always marked clearly. Potential areas may include: fueling areas (such as gasoline stations); below deck on boats; fuel or chemical transfer or storage facilities; vehicles using liquefied petroleum gas (such as propane or butane); areas where the air contains chemicals or particles (...
Page 220 - Battery Information and Care
218 Safety Battery Information and Care s0LEASEDISPOSEOFYOURBATTERYPROPERLYORTAKEITTOYOURLOCAL wireless carrier for recycling. s4HEBATTERYDOESNTNEEDTOBEEMPTYBEFORERECHARGINGs5SEONLY,'APPROVEDCHARGERSSPECIlCTOYOURPHONEMODEL since they are designed to maximize battery life. s$ONOTDISASSEMBLEORSHORTCIR...
Page 221 - General Notice; may cause serious injury.
219 Safety s)FYOUPUTYOURPHONEINAPOCKETORBAGWITHOUTCOVERINGTHE receptacle of the phone (power plug pin), metallic articles (such as a coin, paperclip or pen) may short-circuit the phone. Always cover the receptacle when not in use. s$ONTSHORTCIRCUITTHEBATTERY-ETALLICARTICLESSUCHASACOIN paperclip or p...
Page 222 - not work, take it to an LG Authorized Service Center.; Warning! Important safety information; Avoiding hearing damage; s,IMITTHEAMOUNTOFTIMEYOUUSEYOURPHONEANDORHEADSET
220 Safety not work, take it to an LG Authorized Service Center. s$ONOTPAINTYOURPHONEs4HEDATASAVEDINYOURPHONEMIGHTBEDELETEDDUETO careless use, repair of the phone, or upgrade of the software. Please backup your important phone numbers. (Ringtones, text messages, voice messages, pictures, and videos ...
Page 223 - Using your phone safely; FDA Consumer Update; Do wireless phones pose a health hazard?
221 Safety you. For information about how to set a maximum volume limit on your phone, see the features guide for your phone. Using your phone safely Use of your phone while operating a vehicle is not recommended and is illegal in some areas. Be careful and attentive while driving. Stop using your p...
Page 224 - s3UPPORTNEEDEDRESEARCHINTOPOSSIBLEBIOLOGICALEFFECTSOF2&
222 Safety causes no known adverse health effects. Many studies of low level RF exposures have not found any biological effects. Some studies have suggested that some biological effects may occur, but such findings have not been confirmed by additional research. In some cases, other researchers have h...
Page 225 - Environmental Protection Agency; What kinds of phones are the subject of this update?; These RF exposures are limited by FCC safety guidelines
223 Safety federal agencies that have responsibility for different aspects of RF safety to ensure coordinated efforts at the federal level. The following agencies belong to this working group: s.ATIONAL)NSTITUTEFOR/CCUPATIONAL3AFETYAND(EALTH Environmental Protection Agency s/CCUPATIONAL3AFETYAND(EAL...
Page 226 - What are the results of the research done already?
224 Safety that were developed with the advice of the FDA and other federal health and safety agencies. When the phone is located at greater distances from the user, the exposure to RF is drastically lower because a person’s RF exposure decreases rapidly with increasing distance from the source. The...
Page 227 - What research is needed to decide whether RF exposure
225 Safety of the brain or salivary gland, leukemia, or other cancers. None of the studies demonstrated the existence of any harmful health effects from wireless phone RF exposures. However, none of the studies can answer questions about longterm exposures, since the average period of phone use in t...
Page 228 - How can I find out how much Radio Frequency energy
226 Safety Frequency (RF) energy. The FDA has been a leading participant in the World Health Organization International Electro Magnetic Fields (EMF) Project since its inception in 1996. An influential result of this work has been the development of a detailed agenda of research needs that has driven...
Page 229 - What has the FDA done to measure the Radio Frequency
227 Safety Radiation Protection and Measurement. The exposure limit takes into consideration the body’s ability to remove heat from the tissues that absorb energy from the wireless phone and is set well below levels known to have effects. Manufacturers of wireless phones must report the RF exposure ...
Page 230 - What steps can I take to reduce my exposure to Radio
228 Safety 9 What steps can I take to reduce my exposure to Radio Frequency energy from my wireless phone? If there is a risk from these products — and at this point we do not know that there is — it is probably very small. But if you are concerned about avoiding even potential risks, you can take a...
Page 231 - 1 What about wireless phone interference with medical
229 Safety distributed leaflets containing such a recommendation in December 2000. They noted that no evidence exists that using a wireless phone causes brain tumors or other ill effects. Their recommendation to limit wireless phone use by children was strictly precautionary; it was not based on scie...
Page 232 - 2 Where can I find additional information?; 0 Driver Safety Tips; Get to know your wireless phone and its features such as
230 Safety harmful interference be found to occur, the FDA will conduct testing to assess the interference and work to resolve the problem. 12 Where can I find additional information? For additional information, please refer to the following resources: FDA web page on wireless phones (http://www.fda....
Page 233 - Make sure you place your wireless phone within easy reach
231 Safety and learn to take advantage of valuable features most phones offer, including automatic redial and memory. Also, work to memorize the phone keypad so you can use the speed dial function without taking your attention off the road. 2 When available, use a handsfree device. A number of hands...
Page 234 - Do not engage in stressful or emotional conversations that
232 Safety while driving, follow this simple tip - dial only a few numbers, check the road and your mirrors, then continue. 7 Do not engage in stressful or emotional conversations that may be distracting. Stressful or emotional conversations and driving do not mix; they are distracting and even dang...
Page 235 - Consumer Information on SAR; . Your wireless phone is a radio
233 Safety The above tips are meant as general guidelines. Before deciding to use your mobile device while operating a vehicle, it is recommended that you consult your applicable jurisdiction’s local laws or other regulations regarding such use. Such laws or other regulations may prohibit or otherwi...
Page 237 - with the FCC RF emission guidelines.
235 Safety with the FCC RF emission guidelines. The highest SAR value for this model phone when tested for use at the ear is 0.70 W/kg and when worn on the body, is 0.57 W/kg. While there may be differences between SAR levels of various phones and at various positions, they all meet the government r...
Page 240 - LIMITED WARRANTY STATEMENT; WHAT THIS WARRANTY COVERS:
238 LIMITED WARRANTY STATEMENT 1 WHAT THIS WARRANTY COVERS: LG offers you a limited warranty that the enclosed subscriber unit and its enclosed accessories will be free from defects in material and workmanship, according to the following terms and conditions: (1) The limited warranty for the product...


 LG A7110
User Manual
LG A7110
User Manual
 LG AX5000
User Manual
LG AX5000
User Manual
 LG C1300
User Manual
LG C1300
User Manual
 LG C1300A
User Manual
LG C1300A
User Manual
 LG C1300I
User Manual
LG C1300I
User Manual
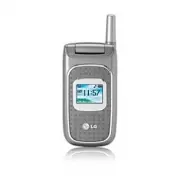 LG C1500
User Manual
LG C1500
User Manual
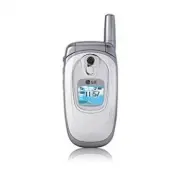 LG C2000
User Manual
LG C2000
User Manual
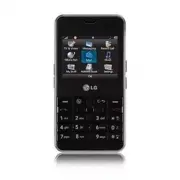 LG CB630
User Manual
LG CB630
User Manual
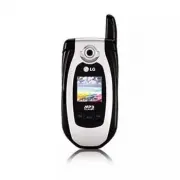 LG CE500
User Manual
LG CE500
User Manual
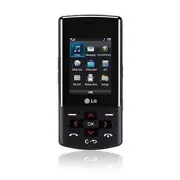 LG CF360
User Manual
LG CF360
User Manual
 LG CF360A
User Manual
LG CF360A
User Manual
 LG CG180
User Manual
LG CG180
User Manual
 LG CG225
User Manual
LG CG225
User Manual
 LG CG300
User Manual
LG CG300
User Manual
 LG CP150
User Manual
LG CP150
User Manual
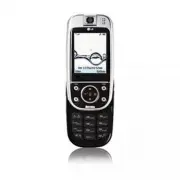 LG CU320
User Manual
LG CU320
User Manual
 LG CU400
User Manual
LG CU400
User Manual
 LG CU405
User Manual
LG CU405
User Manual
 LG CU500
User Manual
LG CU500
User Manual