LG LGP925 - Manuals
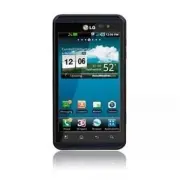
User Manual LG LGP925
1

2

3

4

5

6

7

8

9

10

11

12

13

14

15

16

17

18

19

20

21

22

23

24

25

26

27

28

29

30

31

32

33

34

35

36

37

38

39

40

41

42

43

44

45

46

47

48

49

50

51

52

53

54

55

56

57

58

59

60

61

62

63

64

65

66

67

68

69

70

71

72

73

74

75

76

77

78

79

80

81

82

83

84

85

86

87

88

89

90

91

92

93

94

95

96

97

98

99

100

101

102

103

104

105

106

107

108

109

110

111

112

113

114

115

116

117

118

119

Summary
Page 3 - LIMITED WARRANTY STATEMENT
LIMITED WARRANTY STATEMENT 1. WHAT THIS WARRANTY COVERS : LG offers you a limited warranty that the enclosed subscriber unit and its enclosed accessories will be free from defects in material and workmanship, according to the following terms and conditions: 1. The limited warranty for the product ex...
Page 5 - User Manual
Page 6 - Table of Contents
Table of Contents Important Notice ..............................5 Your Phone ......................................10 Getting Started ...............................12 Charging your phone ............................. 13Inserting a microSD card....................... 13Removing the microSD card.......
LG Cell Phones Manuals
-
 LG A7110
User Manual
LG A7110
User Manual
-
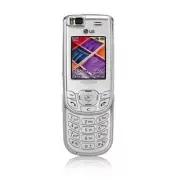
 LG AX5000
User Manual
LG AX5000
User Manual
-
 LG C1300
User Manual
LG C1300
User Manual
-
 LG C1300A
User Manual
LG C1300A
User Manual
-
 LG C1300I
User Manual
LG C1300I
User Manual
-
 LG C1500
User Manual
LG C1500
User Manual
-
 LG C2000
User Manual
LG C2000
User Manual
-
 LG CB630
User Manual
LG CB630
User Manual
-
 LG CE500
User Manual
LG CE500
User Manual
-
 LG CF360
User Manual
LG CF360
User Manual
-
 LG CF360A
User Manual
LG CF360A
User Manual
-
 LG CG180
User Manual
LG CG180
User Manual
-
 LG CG225
User Manual
LG CG225
User Manual
-
 LG CG300
User Manual
LG CG300
User Manual
-
 LG CP150
User Manual
LG CP150
User Manual
-
 LG CU320
User Manual
LG CU320
User Manual
-
 LG CU400
User Manual
LG CU400
User Manual
-
 LG CU405
User Manual
LG CU405
User Manual
-
 LG CU500
User Manual
LG CU500
User Manual
-
LG CU500
Manual