Page 2 - ELECTRICAL SAFETY; SAFETY PRECAUTIONS FOR POWER SUPPLY UNIT; Use the correct external power source
1 When using this product, the safety precautions below must be taken to avoid possible legal liabilities and damages. Retain and follow all product safety and operating instructions. Observe all warnings in the product operating instructions. To reduce the risk of bodily injury, electric shock, fir...
Page 4 - SAFETY PRECAUTIONS FOR DIRECT SUNLIGHT
3 Important Health Information and Safety Precautions unqualified battery may present a risk of fire, explosion, leakage or other hazard. • Avoid dropping the phone or battery. If the phone or battery is dropped, especially on a hard surface, and the user suspects damage, take it to a service center...
Page 6 - ROAD SAFETY; SAFETY PRECAUTIONS FOR RF EXPOSURE; INTERFERENCE WITH MEDICAL EQUIPMENT
5 Important Health Information and Safety Precautions facilities, and areas where the air contains chemicals or particles, such as grain, dust, or metal powders. ROAD SAFETY Vehicle drivers in motion are not permitted to use communication services with handheld devices, except in the case of emergen...
Page 7 - HEARING AIDS
6 Important Health Information and Safety Precautions HEARING AIDS Some digital wireless phones may interfere with some hearing aids. In the event of such interference, you may want to consult your service provider, or call the customer service line to discuss alternatives. NON-IONIZING RADIATION Yo...
Page 10 - Gmail
9 Table of Contents Gmail TM ........................................................................................ 104 Gmail is Different .................................................................................... 104Opening Gmail and Your Inbox .............................................
Page 11 - Google Talk
10 Google Talk TM ............................................................................... 134 Signing in and Opening your Friends List .............................................134Chatting with Friends ..............................................................................136Changi...
Page 12 - Google Maps; YouTube
11 Table of Contents Google Maps TM ............................................................................ 182 Opening Google Maps and Viewing Your Location ..............................182Changing Map Layers .............................................................................184Sear...
Page 13 - Android Market
12 Clock ........................................................................................... 227 Viewing the Date, Time, and Other Information .................................. 227Setting Alarms ........................................................................................229Chang...
Page 17 - FCC RF Exposure Information
16 Technical Details CDMA Standard Designator Description Basic Air Interface TIA/EIA-95ATSB-74ANSI J-STD-008TIA/EIA-IS2000 CDMA Dual-Mode Air Interface 14.4kbps radio link protocol and interband operationsIS-95 adapted for PCS frequency bandCDMA2000 1xRTT Air Interface Network TIA/EIA/IS-634TIA/EIA...
Page 18 - Caution
17 an updated safety standard for human exposure to Radio Frequency (RF) electromagnetic energy emitted by FCC regulated transmitters. Those guidelines are consistent with the safety standard previously set by both U.S. and international standards bodies. The design of this phone complies with the F...
Page 20 - Phone Overview; Front View
19 The Basics Phone Overview Front View Earpiece Home Key Menu Key Send Key Microphone Search Key Back Key Touchscreen Power/ Lock Key 1 Earpiece lets you hear callers and automated prompts. 2 Home Key returns to the Home screen. If you’re already viewing one of the Home screen extension panes, it o...
Page 22 - Rear View
21 The Basics Rear View 3.5mm Headset Jack Camera Flash Camera Lens Back Cover Speaker 10 3.5mm Headset Jack allows you to plug in an optional headset for convenient, hands-free conversations. The 3.5mm jack also allows you to plug in headphones to listen to music. 11 Camera Flash helps picture qual...
Page 23 - Left Side Right Side
22 The Basics Left Side Right Side microSD Slot Camera Key Volume Keys Accessory/ Charger Port 15 Volume Keys allow you to adjust the ringer and media volumes, or to adjust the in-call volume during a call. 16 Accessory/Charger Port allows you to connect the phone charger, USB cable, or other compat...
Page 24 - Slide Out QWERTY Keyboard
23 The Basics Slide Out QWERTY Keyboard Back Key Search KeyAlt Key Caps/ Shift Key Vibrate Key Enter Key Space Key Directional Key OK Key Menu Key Home Key Delete Key 1 Back Key returns to the previous screen. Also closes pop-up display items such as menus and dialog boxes. 2 Search Key opens Quick ...
Page 26 - Installing the Battery and microSD Card; Installing the battery
25 The Basics Installing the Battery and microSD Card NOTE It is important to fully charge the battery before initial use of the phone. The phone comes with a rechargeable battery. Keep the battery charged while not in use in order to maximize talk, use, and standby time. The battery charge level is...
Page 27 - Inserting a microSD card; Removing the microSD card; To unmount the microSD card; Menu Key; Settings
26 The Basics Inserting a microSD card Gently uncover the microSD slot located on the right side of the phone. Position the microSD card facing up and slide it into place until it is fully inserted and locked in place. NOTE The microSD card can be easily damaged by improper operation. Please be care...
Page 28 - Charging the Phone; Battery temperature protection
27 The Basics Charging the Phone Your LG AS740 device comes with a wall/USB adapter and a USB data cable which connect together to charge your phone. To charge your phone: NOTICE Please use only an approved charging accessory to charge your LG phone. Improper handling of the charging port, as well a...
Page 29 - Charging with USB; Turning the Phone On and Off; Turning the phone on; Turning the phone off; Power off
28 The Basics Charging with USB You can use your computer to charge your phone. To be able to charge with the USB data cable, you need to have the necessary USB drivers installed on your PC first. Connect one end of the USB cable to the charging accessory port on your phone and connect the other end...
Page 30 - To unlock the phone; unlock; To turn the phone sounds off; Sounds off
29 The Basics To unlock the phone If you don’t use the phone for a while, the screen and backlight will shut off to conserve battery power. To unlock the phone: 1 Press the Power/Lock Key . Your Lock Screen will appear. See “Locking the Screen” on page 53 2 Touch and drag the unlock icon to the righ...
Page 31 - Getting started with your Android; phone; Your Google account
30 The Basics Getting started with your Android TM phone The first time you power on your phone, you’re prompted to touch the Android logo to begin using your phone.You will be offered a chance to learn about your phone, you will be prompted to create or to sign into your Google Account, and you wil...
Page 32 - Phone’s Status Icons; Status icons
31 The Basics Phone’s Status Icons The Status Bar appears at the top of every screen. It displays icons indicating that you’ve received notifications (on the left) and icons indicating the phone’s status (on the right), along with the current time. Notification icons Status icons If you have more no...
Page 34 - Getting to Know the Home Screen; Android; LG Home
33 The Basics Getting to Know the Home Screen The Home screen is your starting point to access all the features on your phone. It displays application shortcuts, icons, widgets, and other features. You can choose between two Home screen themes: Android Home and LG Home . They work essentially the sa...
Page 35 - Selecting a Home Screen Theme
34 The Basics Quick Keys When using the LG Home theme, the Quick Keys are located on the bottom of the screen. If you choose Android Home as your display theme, these functionalities are moved onto the Home screen. : opens the Phone application which displays the dialpad so you can dial an unsaved n...
Page 36 - To view other Home screen panes
35 The Basics To view other Home screen panes ▶ Slide your finger left or right across the Home screen. The Home screen spans five screen widths allowing more space for icons, widgets, shortcuts, and other items. For more information on sliding, see “Touchscreen” on page 36. Android Home screen Loca...
Page 37 - Touchscreen; Touch and hold; Drag
36 The Basics Touchscreen Your touchscreen provides an excellent way to interact with and use your Android phone. With the touch of your finger, you can download and use available applications, make menu selections, and access data saved to your phone.The following terms are used for describing the ...
Page 38 - Swipe or slide; Rotate the screen
37 The Basics drag to open the Notifications panel, as described in “Managing Notifications” on page 48. Swipe or slide To swipe or slide, quickly move your finger across the surface of the screen, without pausing when you first touch it (so you don’t drag an item instead). For example, you can drag...
Page 39 - QWERTY Keyboard
38 The Basics QWERTY Keyboard Your device has a built-in, slide out QWERTY keyboard, specifically designed for easy and comfortable text entry. The QWERTY keyboard uses the same layout and works just like the keyboard on your computer. Slide the QWERTY keyboard out when you are ready to enter text. ...
Page 40 - Onscreen Keyboard; Using the QWERTY keyboard
39 The Basics Onscreen Keyboard You can also enter text using the onscreen keyboard. The onscreen keyboard displays automatically on the screen when you need to enter text. To manually display the keyboard, simply touch a text field where you want to enter text. Entering Text Using the QWERTY keyboa...
Page 41 - Using the onscreen keyboard
40 The Basics Using the onscreen keyboard 1 Touch a text field where you want to type. The onscreen keyboard will open automatically.Text fields for phone numbers and other special purposes may display numbers and symbols or other custom keyboards to make it easier to enter the required information....
Page 42 - Editing text; Cut all
41 The Basics Editing text You can edit the text you enter in text fields and use menu commands to cut, copy, and paste text, within or across applications. To cut or copy and paste all the text 1 Touch and hold the text field that contains the text to edit. 2 A pop-up menu opens with options for cu...
Page 43 - To cut or copy and paste some of the text; Select text
42 The Basics To cut or copy and paste some of the text 1 Put the cursor on the starting or ending point of the text to copy or paste. • Touch the location where to move the cursor. • Press the Directional Key left or right on the QWERTY Keyboard. 2 Touch and hold the text field that contains the te...
Page 44 - Applications: How to View, Open and Switch; Overview
43 The Basics Applications: How to View, Open and Switch All of the applications on your phone, including any applications that you downloaded and installed from Android Market TM or other sources, are grouped together on one Launch screen that you access from your Home screen. If you have more appl...
Page 45 - Opening and Closing the Launch screen; Customizing the LG Home Launch Screen
44 The Basics Opening and Closing the Launch screen Opening the Launch screen Touch the Launch icon on your Home screen: ▶ From Android Home , touch . ▶ From LG Home , touch . Closing the Launch screen To manually close the Launch screen, press the Home Key , or: ▶ From Android Home , touch . ▶ From...
Page 46 - Opening and Switching Applications; Opening an application; Opening multiple applications
45 The Basics Opening and Switching Applications Multi-tasking is easy with Android TM because open applications keep running even when you open another application. There’s no need to quit an application before opening another. You can use and switch among several open applications. Android manages...
Page 47 - Adding application icons to the Home screen; Setting Keyboard Shortcuts to Applications
46 The Basics Switching between multiple applications 1 Press and hold the Home Key . A small window opens with icons of applications that you’ve used recently. 2 Touch the application icon you want to open. Or touch the Back Key to return to the current application. Adding application icons to the ...
Page 48 - Working with Menus; Options menus; More
47 The Basics Working with Menus There are two kinds of Android menus: Options menus and Context menus. Options menus Options menus contain tools that apply to the activities of the current screen or application, not to any specific item on the screen. To open the available options menu, press the M...
Page 49 - Context menus; Managing Notifications
48 The Basics Context menus Context menus contain options that apply to a specific item on the screen. To open a Context menu, touch and hold an item on the screen. Not all items have Context menus. If you touch and hold an item that has no Context menu, nothing will happen. Managing Notifications N...
Page 50 - To open the Notifications panel; OR; To respond to a notification; Clear; To close the notifications panel
49 The Basics To open the Notifications panel ▶ Touch and drag the Status Bar to the bottom of the screen. OR ▶ From the Home screen, press the Menu Key and touch Notifications . The Notifications panel displays your wireless provider and a list of your current notifications, organized into ongoing ...
Page 51 - Searching Your Phone and the Web; Phone and Web search using text entry; Search Key
50 The Basics Searching Your Phone and the Web You can search for information on your phone and on the web by using the Quick Search Box TM or Google search TM . Some applications, such as Contacts, Gmail TM , and Google Maps TM , have the ability to search contents within those specific application...
Page 52 - Camera
51 The Basics Camera ), touching the Search Key twice will open the Quick Search Box. 2 Enter the text you’re searching for in the Quick Search Box. You can use the Search preferences to configure some aspects of Google web search (for example, whether it makes suggestions below the Quick Search Box...
Page 53 - Web search using voice command
52 The Basics Web search using voice command ▶ Touch and hold the Search Key . OR ▶ Touch the Microphone icon from the Quick Search Box. When you stop speaking, Google Search by Voice analyzes your speech and displays the results of your search. The available Voice Commands are: • Say “Call,” follow...
Page 54 - Locking the Screen; Setting a Lock Pattern; Set unlock pattern
53 The Basics Locking the Screen You can lock your screen so that only you can unlock it to make calls, access your data, buy applications, and so on. See “Location & security” on page 247 for other ways to protect your phone and privacy. Setting a Lock Pattern 1 From the Home screen, press the ...
Page 55 - Customizing the Home Screen; To add an item to the Home screen; Shortcuts; Folders
54 The Basics Customizing the Home Screen You can personalize your Home screen by adding application icons, shortcuts, widgets, and other items to any Home screen pane. You can also change the wallpaper. To add an item to the Home screen 1 Go to the Home screen pane where you want to add the item. F...
Page 56 - To move an item on the Home screen
55 The Basics To move an item on the Home screen 1 Touch and hold the item. 2 Drag the item to a new location on the screen. Pause at the left or right edge of the screen to drag the item onto the next available Home screen pane. 3 When the item is where you want it, lift your finger. To remove an i...
Page 57 - To rename a folder; OK; Connecting Quickly With Your Contacts; Maps
56 The Basics To rename a folder 1 Touch the folder icon to open it. 2 Touch and hold the folder window’s title bar. 3 Touch the current folder name in the text box that appears, then enter the new folder name. 4 Touch OK . Connecting Quickly With Your Contacts As you build up your list of contacts ...
Page 58 - Optimizing Battery Life; Tips to extend the life of your battery
57 The Basics If you add a shortcut for a contact to your Home screen, you will be able to open Quick Contact for that contact. Optimizing Battery Life You can extend your battery’s life between charges by turning off features that run in the background. You can also monitor how applications and sys...
Page 59 - To check the battery charge level; To monitor and control what uses the battery
58 The Basics To check the battery charge level ▶ From the Home screen, press the Menu Key and touch Settings > (scroll the screen up) > About phone > Status . The battery status (charging, discharging) and level (as a percentage of fully charged) will be displayed at the top of the screen....
Page 60 - Connecting to Mobile Networks
59 Connecting to Networks and Devices Connecting to Mobile Networks When you buy your phone and sign up for service, your phone is configured to use your provider’s mobile networks for voice calls and for transmitting data.Different locations may have different mobile networks available. Initially, ...
Page 61 - To disable data when roaming
60 Connecting to Networks and Devices To disable data when roaming You can prevent your phone from transmitting data over other carriers’ mobile networks when you leave an area that is covered by your carrier’s networks. This is useful for controlling expenses if your cell plan doesn’t include data ...
Page 62 - Connecting to Wi-Fi Networks; To turn Wi-Fi on and connect to a Wi-Fi network
61 Connecting to Networks and Devices Connecting to Wi-Fi Networks Wi-Fi is a wireless networking technology that can provide Internet access at distances of up to 100 meters, depending on the Wi-Fi router and your surroundings.To use Wi-Fi on your phone, you must connect to a wireless access point,...
Page 63 - Connect; To receive notifications when open networks are in range; Network notification; To add a Wi-Fi network; Security
62 Connecting to Networks and Devices 4 Touch a network to connect to it. • If the network is open, you will be prompted to confirm that you want to connect to that network by touching Connect . • If the network is secured, you will be prompted to enter a password. (Ask your network administrator fo...
Page 64 - Save; To forget a Wi-Fi network; Forget network
63 Connecting to Networks and Devices 4 Enter the required passwords and security credentials. 5 Touch Save . The phone will connect to the wireless network. Any credentials that you entered are saved, so you are connected automatically the next time you come within range of this network. To forget ...
Page 65 - Connecting to Bluetooth Devices; To turn Bluetooth on or off; Bluetooth
64 Connecting to Networks and Devices Connecting to Bluetooth Devices Bluetooth is a short-range wireless communications technology that devices can use to exchange information over a distance of about 30 feet. The most common Bluetooth devices are headphones for making calls or listening to music, ...
Page 66 - To change your phone’s Bluetooth name
65 Connecting to Networks and Devices To change your phone’s Bluetooth name Your phone has a generic Bluetooth name by default, which is visible to other devices when you set the phone as ‘Discoverable’. You can change the name to customize it to your preference. 1 From the Home screen, press the Me...
Page 67 - To connect to a Bluetooth device
66 Connecting to Networks and Devices To connect to a Bluetooth device Once paired, you can connect to a Bluetooth device as needed. 1 From the Home screen, press the Menu Key . 2 Touch Settings > Wireless & networks > Bluetooth settings . • If Bluetooth is off, touch Bluetooth to turn it ...
Page 68 - To unpair a Bluetooth device; Dial Up Networking; To set dial up networking
67 Connecting to Networks and Devices To unpair a Bluetooth device You can unpair a Bluetooth device and erase all pairing information about it. 1 Touch and hold the device listed in the Bluetooth settings screen. 2 Touch Disconnect , Disconnect and unpair , or Unpair in the menu that opens. Dial Up...
Page 69 - Connecting to a Computer via USB; To connect your phone to a computer via USB; USB connected; To disconnect your phone from the computer
68 Connecting to Networks and Devices Connecting to a Computer via USB You can connect your phone to a computer with a USB cable to transfer music, pictures, and other files between your phone’s microSD card and the computer. WARNING! When connecting your phone to a computer (and mounting its microS...
Page 70 - To safely remove the microSD card from your phone
69 Connecting to Networks and Devices 2 Open the Notifications panel (on your phone) and touch Turn off USB storage to unmount the microSD card. 3 Touch Turn Off on the dialog box that opens. To safely remove the microSD card from your phone You can safely remove the microSD card from your phone any...
Page 71 - Connecting to Virtual Private Networks; To add a VPN
70 Connecting to Networks and Devices Connecting to Virtual Private Networks Virtual private networks (VPNs) allow you to connect to resources inside a secured local network, from outside that network. VPNs are commonly deployed by corporations, schools, and other institutions so that their users ca...
Page 72 - To connect to a VPN
71 Connecting to Networks and Devices To connect to a VPN 1 From the Home screen, press the Menu Key . 2 Touch Settings > Wireless & networks > VPN settings . The VPNs you’ve added are listed on the VPN settings screen. 3 Touch the VPN to which you want to connect. 4 In the dialog box that...
Page 73 - Working With Secure Certificates; To install a secure certificate from the microSD card
72 Connecting to Networks and Devices Working With Secure Certificates If your organization’s VPN or Wi-Fi network relies on secure certificates, you must obtain the certificates and store them in your phone’s secure credential storage before you can configure access to that VPN or Wi-Fi network on ...
Page 74 - Placing and Ending Calls; To open the Phone application; To place a call by dialing
73 Placing and Receiving Calls Placing and Ending Calls You can place calls using the Phone application. You can dial calls manually using the Phone tab. You can dial using your phone’s memory, using the Call log tab (see “Working with the Call Log” on page 76); the Contacts tab (see “Communicating ...
Page 75 - Phone; To end a call; End
74 Placing and Receiving Calls 2 Touch the keys on the Phone tab to enter the phone number. • If you enter a wrong number, touch to erase digits one by one. • To erase the entire number, touch and hold . • To dial an international number, touch and hold the 0 key to enter the plus ( + ) symbol. Then...
Page 76 - Airplane mode (to disable wireless communication); Airplane mode; Answering or Rejecting Calls; To answer a call; Answer; Volume
75 Placing and Receiving Calls Airplane mode (to disable wireless communication) Some locations may require you to turn off your phone’s wireless connections by placing your phone in Airplane mode. 1 Press and hold the Power/Lock Key . 2 Touch Airplane mode . You can set to Airplane mode with the Wi...
Page 77 - To decline a call and divert it to voicemail; Decline; Down Volume; Working with the Call Log; To open the Call log; Send Key
76 Placing and Receiving Calls To decline a call and divert it to voicemail ▶ Drag the Decline button to the left. The caller is sent directly to your voicemail box to leave a message. ▶ To silence the ringer, press the Down Volume Key. Working with the Call Log The Call log is a list of all the cal...
Page 78 - To dial a number in the Call log
77 Placing and Receiving Calls To dial a number in the Call log ▶ From the Call log, touch the Dial button at the right of the entry. You can also touch and hold the entry to open a menu with more options, to communicate with that contact in other ways. To add an entry’s number to your Contacts 1 To...
Page 79 - Calling Your Contacts; To call a contact; To call a favorite contact; Contacts
78 Placing and Receiving Calls Calling Your Contacts Instead of manually dialing phone numbers using the dialpad, you can use your Contacts list to dial quickly and easily. You can also quickly call a contact by using Quick Contact. See “Connecting Quickly With Your Contacts” on page 56. Adding, edi...
Page 80 - Dialing by Voice; To place a call by speaking; Options During a Call; To mute the microphone during a call; Mute
79 Placing and Receiving Calls Dialing by Voice You can search for and dial a contact by speaking, rather than by using the Phone tab or touching a contact’s number. To place a call by speaking You can call a contact by using Google search by voice. 1 Touch and hold the Search Key until the Speak no...
Page 81 - To turn the speakerphone on or off; To switch between a Bluetooth headset and the phone; Managing Multiple Calls; To switch between current calls; Swap
80 Placing and Receiving Calls To turn the speakerphone on or off ▶ Touch the Speaker button Mute Speaker Bluetooth . The Speaker button lights up to indicate that the speakerphone is on. The Speaker icon will appear in the Status Bar and the sound from your call is played through the phone’s speake...
Page 82 - To set up a conference call
81 Placing and Receiving Calls To set up a conference call Contact your wireles s service provider to learn whether they support conference calls and how many participants you can include. 1 Place a call to the first participant. 2 When you’re connected, touch the Add call button . The first partici...
Page 83 - To end a conference call and disconnect all callers; Listening to Your Voicemail; To listen to your voicemail; New voicemail
82 Placing and Receiving Calls To end a conference call and disconnect all callers ▶ Touch the End or press the End key . NOTE If you opened other applications while on a call, press the Send Key to redisplay the Phone keypad, then touch the End button or press the End Key . Listening to Your Voicem...
Page 84 - To set up your voicemail; To access your voicemail from your wireless device
83 Placing and Receiving Calls To set up your voicemail 1 Touch the Phone icon on the Home screen or in the Launch screen. 2 Touch the Voicemail Key or touch and hold . 3 Touch Dialpad so you can enter numbers. 4 If you hear a system greeting, touch # to interrupt it, if applicable. 5 Follow the set...
Page 85 - Using Your Contacts; To open your Contacts application; To open a list of your favorite contacts
84 Contacts Touch to view only your favorite contacts. Touch a contact to view its details. Touch icon to open Quick Contact for that contact. Using Your Contacts Use the Contacts application to add, view, and communicate with your friends and acquaintances. To open your Contacts application ▶ Touch...
Page 86 - To view details about a contact
85 Contacts To view details about a contact 1 Open your Contacts application. 2 Touch the contact whose details you want to view. Touch a contact method to start communicating with the contact.Touch an address to view it on Google Maps TM . Touch to open Quick Contact. Touch the green Phone icon to ...
Page 87 - Adding Contacts; To add a new contact
86 Contacts Adding Contacts You can add contacts on your phone and synchronize them with the contacts in your Google TM Account, Microsoft Exchange ActiveSync account, or other accounts that support syncing contacts. The Contacts application tries to join new addresses with existing contacts, to cre...
Page 88 - Importing, Exporting, and Sharing Contacts; To import contacts from your microSD card
87 Contacts Importing, Exporting, and Sharing Contacts If you have contacts stored in vCard format on a microSD card you can import them into your Contacts application on your phone. You can also export contacts in vCard format onto a microSD card. Export to back them up to a computer or other devic...
Page 89 - To export contacts to your microSD card
88 Contacts To export contacts to your microSD card You can export all of the contacts on your phone to your microSD card, as a vCard files. You can then copy this file to a computer or another device that is compatible with this format, such as an address book application. See “Connecting to a Comp...
Page 90 - Adding a Contact to Your Favorites; To add a contact to your favorites; Searching for a Contact; To search for a contact
89 Contacts Adding a Contact to Your Favorites The Favorites tab contains a short list of the contacts you communicate with most often. To add a contact to your favorites 1 From the Home screen, touch Contacts . 2 Touch a contact to view its details. 3 Touch the star to the right of the contact’s na...
Page 91 - Editing Contact Details; To edit contact details; Edit contact; Done
90 Contacts Editing Contact Details You can change or add details saved in your contact entries. You can also set specific ringtones to specific contacts or determine whether calls from specific contacts are diverted to your voicemail. Some contact entries contain information from multiple sources: ...
Page 92 - To change a contact’s default phone number
91 Contacts To change a contact’s default phone number The default phone number is used when you initiate a call or send a text message using the context menu (by touching and holding a contact). 1 From the Home screen, touch Contacts . 2 Touch the name of a contact in the list to view its details. ...
Page 93 - To delete a contact; Communicating with Your Contacts
92 Contacts To delete a contact 1 From the Home screen, touch Contacts . 2 Touch the name of a contact in the list to view its details. 3 Press the Menu Key and touch Delete contact . If the contact contains information from a read-only account, you will not be able to delete it; you will only be ab...
Page 94 - To connect by using Quick Contact for Android; To communicate with a contact
93 Contacts To connect by using Quick Contact for Android TM 1 Touch a contact’s picture to open Quick Contact for Android. Touch the icon for the way you want to connect. Touch a contact’s picture. 2 Touch the icon corresponding to the type of communication you want to start. Depending on the conta...
Page 95 - To call a contact’s default number
94 Contacts To call a contact’s default number 1 From the Home screen, touch Contacts . 2 Touch and hold the entry for the contact to call. 3 Touch Call contact in the menu that opens. For more information about placing phone calls, see “Placing and Ending Calls” on page 73. To send a text or multim...
Page 96 - Selecting which Contacts are Displayed; To change which groups are displayed
95 Contacts Selecting which Contacts are Displayed You can hide contacts that don’t have phone numbers. You can also configure which groups of contacts you want to display in the Contacts list. To set whether contacts without phone numbers are displayed If you use your list of contacts only to call ...
Page 97 - Joining Contacts; To join contacts
96 Contacts 5 Touch the Done button. A message appears while your changes are made. If your change affects a great many contacts, this can take a short while. Joining Contacts When you add an account or add contacts in other ways, such as by exchanging emails, the Contacts application attempts to av...
Page 98 - Separating Contact Information; To separate contact information
97 Contacts 5 Touch the contact whose information you want to join with the first contact. The information from the two contacts will be merged and displayed under the name from the first contact. See “Separating Contact Information” below for information about how to separate contacts that were pre...
Page 99 - Adding and Removing Accounts; To add an account
98 Accounts Adding and Removing Accounts You can add multiple Google TM Accounts and Exchange ActiveSync accounts. You may also be able to add other kinds of accounts, depending on the applications downloaded and installed on your phone.When you add an account, the Contacts application compares any ...
Page 101 - To remove an account
100 Accounts To remove an account You can remove an account to delete all information associated with it from your phone, including email, contacts, settings, and so on.You can’t remove some accounts, such the first Google Account you set up on the phone. That account can only be removed by resettin...
Page 102 - Configuring Account Sync and Display Options; To configure general sync settings
101 Accounts Configuring Account Sync and Display Options You can configure background data and synchronization options for the applications on your phone. You can also configure synchronization options for each account. Some applications, such as Gmail TM and Calendar, have their own synchronizatio...
Page 103 - To sync information manually
102 Accounts : indicates that some, or all, of an account’s information is configured to sync automatically with your phone. : indicates that none of an account’s information is configured to sync automatically with your phone. 2 Touch Background data to enable or disable whether applications can us...
Page 104 - To change an account’s sync settings
103 Accounts To change an account’s sync settings 1 From the Home screen, press the Menu Key , touch Settings , and touch Accounts & sync . The Accounts & sync settings screen displays your current sync settings and accounts. For more information, see “Configuring Account Sync and Display Op...
Page 105 - Gmail is Different; Gmail is organized by labels, not by folders; Gmail for the phone is optimized for mobile
104 Gmail TM Gmail is Different Gmail is web-based Your messages are stored on-line, on Google TM servers; but you read, write, and organize messages by using the Gmail application on your phone, or by using a web browser on a computer. Because your mail is stored on Google servers, you can search y...
Page 106 - Gmail is for Gmail; Email; Opening Gmail and Your Inbox; To open the Gmail application
105 Gmail TM Gmail is for Gmail Of course you can use Gmail to send email to any email address, and anyone can send email to you at your Gmail address. But if you want to read messages from another email service provider (using your AOL, Yahoo!, or other email account), you must use the Email applic...
Page 107 - To open your Inbox when Gmail is running
106 Gmail TM : indicates that this message was sent directly to you. : indicates that this message was that you were CC’d on. (No indicator): indicates that this message was sent to a group that includes you. To open your Inbox when Gmail is running ▶ Touch the Back Key until you return to your Inbo...
Page 108 - To switch accounts
107 Gmail TM To switch accounts Gmail displays conversations and messages from one Google Account at a time. If you have more than one account, you can open the Accounts screen to view how many unread messages you have in each account and to switch accounts. 1 From your Inbox, press the Menu Key and...
Page 109 - Reading Your Messages; To read a message; Delete
108 Gmail TM Reading Your Messages When viewing a list of conversations in your Inbox or in any list of labeled conversations, you can open a conversation to read its messages. To read a message ▶ Touch a conversation that contains the message you want to read. A conversation opens to the first new ...
Page 110 - To reread a message
109 Gmail TM To reread a message When you open a conversation, messages that you’ve already read are minimized into a tab that indicates the number of hidden messages. 1 From the Home screen, touch Gmail , touch the conversation you want to view, then touch the tab indicating minimized messages. 2 T...
Page 111 - Composing and Sending a Message; To compose and send a message
110 Gmail TM Composing and Sending a Message You can compose and send a message to people or groups with Gmail addresses or other email addresses. To compose and send a message 1 From the Home screen, touch Gmail , press the Menu Key and touch Compose . 2 Enter a recipient’s address. As you enter te...
Page 112 - Replying to or Forwarding a Message; To reply to or forward a message; Send
111 Gmail TM Replying to or Forwarding a Message You can continue an email conversation by replying to a message or by forwarding it. To reply to or forward a message 1 Scroll to the bottom of a message. 2 Touch Reply , Reply to all , or Forward . Replying to or forwarding messages without changing ...
Page 113 - Working with Conversations in Batches
112 Gmail TM Working with Conversations in Batches You can archive, label, delete, or perform other actions on a batch of conversations at once, in your Inbox or in another label views. 1 From the Inbox or messages with another label, touch the checkmark for all the messages you want to include in t...
Page 114 - Labeling a Conversation; To label a conversation
113 Gmail TM Labeling a Conversation As mentioned previously, conversations are organized by labels. Gmail has several default labels, but you can also add your own through Gmail on the web. Viewing labeled conversations is described, along with a list of standard labels, in “Viewing Conversations b...
Page 115 - Starring a Message; To star a message; To unstar a message
114 Gmail TM Starring a Message You can star an important message or conversation to make it easy to locate again. To view just conversations with starred messages, see “Viewing Conversations by Label” on page 115 and view the Starred-labeled messages and conversations. To star a message ▶ When read...
Page 116 - Viewing Conversations by Label; View labels
115 Gmail TM Viewing Conversations by Label You can view a list of the conversations that have the same label, including conversations with starred messages. See “Labeling a Conversation” on page 113 or “Starring a Message” on page 114 for information about assigning labels and stars. 1 When viewing...
Page 117 - Reporting Spam; To report a conversation as spam; Searching for Messages
116 Gmail TM Reporting Spam The Gmail webmail service is quite effective at preventing spam (junk mail) from reaching your Inbox. But when spam does make it through, you can help improve the Gmail service by reporting the conversation as spam. To report a conversation as spam ▶ When reading the emai...
Page 118 - Archiving Conversations; To Archive a conversation:; Archive
117 Gmail TM You can open these emails as you would any email in your Inbox; you also have the same options available. Archiving Conversations You can archive conversations, to move them out of your Inbox without deleting them. Archived conversations are assigned the All Mail label, and also retain ...
Page 119 - Synchronizing Your Messages; To select which conversations to synchronize
118 Gmail TM Synchronizing Your Messages The Gmail webmail service has the resources to store all the messages you’ve ever sent or received; your phone does not. To save space, Gmail downloads only some of your messages to your phone. Use the Settings application to control how and when applications...
Page 120 - To set how many days of conversations to synchronize; Appending a Signature to Your Messages
119 Gmail TM To set how many days of conversations to synchronize 1 From the Home screen, touch Gmail . 2 Press the Menu Key and touch Settings > Labels . 3 Touch Number of days to Sync . 4 Enter the number of days then touch the OK button. Appending a Signature to Your Messages You add informati...
Page 121 - Changing Gmail Settings; General Settings
120 Gmail TM Changing Gmail Settings You can change a number of settings for Gmail. Each Google account has its own settings, so your changes affect only the current account. See “To switch accounts” on page 107. Notification volumes and some synchronization settings can also be changed in the Setti...
Page 122 - Viewing Your Calendar and Events; To open your Calendar application; Calendar
121 Calendar Viewing Your Calendar and Events Open the Calendar application to view the events you have scheduled in the coming days, weeks, or months. To open your Calendar application ▶ Open the Launch screen and touch Calendar . If you have created or subscribed to more than one calendar through ...
Page 123 - To change your Calendar view
122 Calendar To change your Calendar view ▶ Press the Menu Key and touch Agenda , Day , Week , or Month . Each view displays the events in your calendar for the period of time that you specify. For details, see: “Working in Agenda View” on page 123 “Working in Day View” on page 124 “Working in Week ...
Page 124 - Working in Agenda View; To switch to Agenda view; Agenda; To learn more about events in Agenda view
123 Calendar Working in Agenda View Agenda view is a list of your events in chronological order. All-day and multi-day events are listed at the start of each day. To switch to Agenda view ▶ Press the Menu Key and touch Agenda . To learn more about events in Agenda view ▶ Touch an event. A screen wit...
Page 125 - Working in Day View; To switch to Day view; Day; To learn more about events in Day view; To add an event in Day view
124 Calendar Working in Day View Day view displays the events of one day, in a table of one-hour rows. All-day and multi-day events are displayed at the top. Part of the title of each event is displayed in the row(s) that correspond to when it occurs. To switch to Day view ▶ Press the Menu Key and t...
Page 126 - Working in Week View; To switch to Week view; Week; To learn more about events in Week view; To add an event in Week view
125 Calendar Working in Week View Week view displays a chart of the events for one week. All-day and multi-day events are displayed at the top. To switch to Week view ▶ Press the Menu Key and touch Week . To learn more about events in Week view ▶ Touch an event to view its details. See “Viewing Even...
Page 127 - Working in Month View; To switch to Month view; Month; To view more information about events in Month view
126 Calendar Working in Month View Month view displays a chart of the events of the month. Segments of each day with scheduled events are green in the day’s vertical bar. To switch to Month view ▶ Press the Menu Key and touch Month . To view more information about events in Month view ▶ Touch a day ...
Page 128 - Viewing Event Details; To view information about an event; Attending
127 Calendar Viewing Event Details You can view more information about an event in a number of ways, depending on the current view. To view information about an event ▶ In Agenda, Day, or Week view, touch an event to view its details. ▶ In Month view, touch a day to switch to Day view. Then touch an...
Page 129 - Creating an Event; To create an event
128 Calendar Creating an Event You can use Calendar on your phone to create events that appear on your phone and in your Google Calendar on the web. To create an event 1 Open the Calendar, press the Menu Key and touch New event . You can also touch and hold a spot in Day, Week, or Month view. In the...
Page 130 - Editing or Deleting an Event; To edit an event; To delete an event
129 Calendar Editing or Deleting an Event You can edit or delete an event that you created on the phone or on the web. You can also edit or delete events created by others, if they have given you permission. To edit an event 1 Open Calendar and touch the event, to open it. See “Viewing Event Details...
Page 131 - Setting an Event Reminder; To set an event reminder; Add reminder; To delete an event reminder; Minus
130 Calendar Setting an Event Reminder You can set one or more reminders for an event, whether or not you created the event or have permission to edit its other details. To set an event reminder 1 Open Calendar and touch the event, to open it. See “Viewing Event Details” on page 127. 2 Touch the Add...
Page 132 - Responding to an Event Reminder; To respond to an event reminder; Snooze all
131 Calendar Responding to an Event Reminder If you set a reminder for an event, the Upcoming Event icon appears in the Notifications area of the Status Bar when the reminder time arrives. See “Managing Notifications” on page 48. To respond to an event reminder ▶ If you receive notifications in the ...
Page 133 - Displaying and Synchronizing Calendars; To show or hide calendars
132 Calendar Displaying and Synchronizing Calendars Initially, all calendars that you create or subscribe to through Google Calendar on the web are also displayed in the Calendar application on your phone. You can select which calendars to show or hide on the phone, and which to keep synchronized. Y...
Page 134 - Changing Calendar Settings
133 Calendar OK button. Only the calendars that you’ve created or subscribed to on the web, or previously removed from the My Calendars list, are shown in the list of calendars that you can add. Changing Calendar Settings You can change the following settings for how the Calendar application display...
Page 135 - Signing in and Opening your Friends List; To open Google Talk and sign in; Talk
134 Google Talk TM Signing in and Opening your Friends List You sign into Google Talk to chat with your friends. You remain signed in, even when you’re using other applications, until you deliberately sign out. To open Google Talk and sign in ▶ Open the Launch screen and touch Talk icon . When you f...
Page 136 - To return to your friends list; Friends list; To sign out of Google Talk
135 Google Talk TM To return to your friends list You can return to your Friends list when chatting with a friend, so that you can invite another friend to chat, add a friend, and so on. ▶ Press the Menu Key and touch Friends list . To sign out of Google Talk You can sign out of Google Talk. For exa...
Page 137 - Chatting with Friends; To chat with a friend
136 Google Talk TM Chatting with Friends To chat with a friend 1 From the Home screen, open the Launch screen and touch Talk . If you’re already chatting with someone, you can press the Menu Key and touch Friends list to return to the friend’s list. 2 Touch the friend you want to chat with. 3 Enter ...
Page 138 - To accept an invitation to chat; To switch between active chats
137 Google Talk TM To accept an invitation to chat When a friend sends you a Google Talk message, you will receive a notification. The friend’s name in the Friends list turns white and displays the message. ▶ Touch the friend in your Friends list. OR ▶ Open the Notifications panel then touch the cha...
Page 139 - To invite a friend to join a group chat
138 Google Talk TM To invite a friend to join a group chat When you’re chatting, you can invite additional friends to join a group chat. 1 On a chat screen, press the Menu Key and touch Add to chat . 2 Touch the name of the friend to invite. The friend you invited and the current participants will r...
Page 140 - Changing and Monitoring Online Status; To change your online status; Status Icons
139 Google Talk TM Changing and Monitoring Online Status Google Talk allows you to change how you appear to others; you can change your online status and status messages, as well as the picture that appears next to your name on your friend’s Friends list. To change your online status 1 From the Home...
Page 141 - To change your status message; To change your picture; Managing Your Friends List
140 Google Talk TM To change your status message 1 From the Home screen, open the Launch screen and touch Talk . 2 Touch the status message field, at the top of your Friends list. 3 Enter a new status message. 4 Touch the Done button. To change your picture 1 Touch your picture at the top left of yo...
Page 142 - To add a friend to your Friends list
141 Google Talk TM To add a friend to your Friends list You can invite anyone with a Google Account to become your friend in Google Talk, so you can chat with each other and stay up to date with each others’ online status. 1 From the Friends list, press the Menu Key and touch Add friend . 2 Enter yo...
Page 143 - To add a friend to the ‘Most popular’ group
142 Google Talk TM To add a friend to the ‘Most popular’ group You can set a friend to always appear in your Most popular Friends list. 1 From the Friends list, touch and hold a friend’s name. If you don’t see the friend’s name, press the Menu Key and touch All friends . 2 Touch Always show friend i...
Page 144 - Changing Google Talk Settings; To configure notifications for new Google Talk messages
143 Google Talk TM Changing Google Talk Settings You can configure Google Talk to send you a notification with the contents of each message that you receive in a chat, and also to sound a ringtone or vibrate the phone. You can also configure Google Talk to sign you in automatically when you turn on ...
Page 145 - To set whether you sign into Google Talk automatically; Automatically sign in
144 Google Talk TM To set whether you sign into Google Talk automatically 1 From the Friends list, press the Menu Key and touch More > Settings . 2 Checkmark or uncheck Automatically sign in . When Automatically sign in is checked, you are signed into Google Talk when you turn on your phone. Sign...
Page 146 - Opening Email and the Accounts Screen; To open the Email application; The Accounts screen
145 Email Opening Email and the Accounts Screen You can use the Email application to read email from services other than Gmail TM . The Email application supports the following account types: POP3, IMAP and Exchange. To open the Email application ▶ From the Home screen, open the Launch screen and to...
Page 147 - To open your Combined Inbox; Combined Inbox
146 Email Each folder and account on the Accounts screen displays the number of unread messages in green, or will display the number of messages in Starred, Drafts and Outbox in gray. You can touch an account to view its Inbox, or an account’s folder icon to view a list of that account’s folders. Th...
Page 148 - Load more
147 Email Only your account’s most recent emails are downloaded to your phone. To download more (earlier) email messages, touch Load more messages at the bottom of the emails list. An unread message. A previously read message. Messages are color coded according to the account to which they were sent...
Page 150 - Responding to a Message; To mark a message as unread
149 Email Responding to a Message There are many options to how you can respond to a received email message. You can reply to it, forward it or even just delete it. To reply to or forward a message ▶ While reading a message, touch the Reply button or the Reply all button (available at the end of the...
Page 151 - Starring Messages; To view your starred messages
150 Email Starring Messages You can add stars to important messages to make it easy to keep track of them. When you star a message, a Starred folder will be added to the Accounts screen. To star a message ▶ While reading a message, touch the star in its header. OR ▶ From a list of messages in a fold...
Page 152 - Composing and Sending Email
151 Email Composing and Sending Email You can send email to your contacts or to other people or groups. To compose and send a message 1 While in the Email application, press the Menu Key and touch Compose . 2 Enter an address for the message’s intended recipient. As you enter text, matching addresse...
Page 153 - Working with Account Folders; To view an account’s folders
152 Email not be located on the phone; they will, however, be located on the Exchange server itself. If you want to see your sent messages in the Sent folder (or with the Sent label), you will often need to open the Sent folder/label and select Refresh from the options menu. Working with Account Fol...
Page 154 - Adding and Editing Email Accounts; To add an email account
153 Email Adding and Editing Email Accounts The first time you open the Email application, you will be prompted to set up an email account. After that, you can configure Email to send and receive email from additional accounts. The accounts that you configure will be displayed in the Accounts screen...
Page 155 - Manual setup
154 Email your email service provider to validate your account for sending and receiving mail, using just your email address and password. This is sufficient for most email services. Depending on the service provider, you may be asked what kind of email account you have. If you’re not sure, ask your...
Page 156 - To change an account’s settings; Changing Email Account Settings; Email account settings
155 Email To change an account’s settings You can change a number of settings for an account, including how often email is checked and how you’re notified of new mail. 1 Open the Accounts screen. See “Opening Email and the Accounts Screen” on page 145. 2 Touch and hold the account whose settings you...
Page 158 - Incoming server settings; Settings for Microsoft Exchange ActiveSync accounts:; Settings for IMAP accounts:
157 Email Incoming server settings Your account’s incoming settings are different, depending on the kind of email service for the account: POP3, IMAP, Exchange ActiveSync. Settings for Microsoft Exchange ActiveSync accounts: Domain\ Username If your Exchange ActiveSync server requires that you speci...
Page 159 - Settings for POP3 accounts:
158 Email Port Set the Security type (following item) first for the server port number to be entered automatically, if it is available. Or, enter a different port number if your email service provider requires it. Security type Select the security type required by your email service provider. Select...
Page 160 - Outgoing server settings
159 Email Outgoing server settings If you use an IMAP or POP3 account for receiving email, you typically use an SMTP server to send email from that account. Microsoft Exchange ActiveSync accounts do not have separate outgoing server settings. SMTP server The domain name of your email service provide...
Page 161 - Opening Messaging; To open Messaging; To delete a message thread from the Messaging window; Delete thread
160 Opening Messaging To open Messaging ▶ From the Home screen, touch Messaging . The Messaging window will open, where you can create a new message or open an ongoing message thread. ▶ Touch New message to start a new text or multimedia message. ▶ Touch an existing message thread to open it. To del...
Page 162 - Exchanging Messages; To send a text message; New message
161 Exchanging Messages You can send text (SMS) messages of up to 160 characters to another mobile phone. If you keep typing after the limit, your message is delivered as a series of messages. Multimedia (MMS) messages can contain text and a picture, a recorded voice, an audio file, a video, or a pi...
Page 163 - To create and send a multimedia message
162 4 Touch the Send button. The Message window opens, with your message after the word Me . Responses appear in the same window, creating a message thread with that contact. To create and send a multimedia message 1 On the Messaging screen, touch New message . 2 Enter a mobile phone number or email...
Page 165 - To respond to messages you receive; Download; Play; To view details about a message; View message details
164 To respond to messages you receive If you’re working in a message window, messages that you receive from that contact are displayed. Otherwise, you receive a new message notification and a new message icon appears in the Status Bar. When you touch the new message notification, the Message window...
Page 166 - Changing Messaging Settings; Storage settings
165 Changing Messaging Settings You can change a number of Messaging settings. ▶ To change Messaging settings, open the Messaging window, press the Menu Key and touch Settings . Storage settings Delete old messages Touch to place a checkmark and allow the phone to delete older messages in a thread w...
Page 167 - Notification settings
166 Multimedia message (MMS) settings Delivery reports Touch to place a checkmark and allow your phone to receive a report on the messages you send. Read reports Touch to place a checkmark and allow your phone to receive reports when your messages are read or deleted. NOTE Please check with your ser...
Page 168 - Opening Browser; To open Browser; Browser; Browser
167 Opening Browser The Browser application allows you to surf the web. Navigation of the web varies from webpage to webpage depending on the format of the website. Some websites are in full-size format, which are designed for computer-based web browsers, while other websites are in mobile format, d...
Page 169 - To go to a webpage; To refresh the current page
168 To go to a webpage 1 Touch the URL box at the top of the Browser screen. If the URL box isn’t visible, scroll up until the URL box comes into view. 2 Enter the address (URL) of the webpage. As you enter the address, Google TM web search makes suggestions of webpages and queries. You can also tou...
Page 170 - Navigating within a webpage; To scroll a webpage
169 To get more information about the current page ▶ Press the Menu Key and touch More > Page info . A dialog box opens with the page’s title and full address. To set your home page Your home page opens when you open a new Browser window, and when you start the Browser application after restartin...
Page 171 - To zoom in or out on a webpage; Zoom; To quickly zoom into a section of a webpage
170 To zoom in or out on a webpage You may not be able to zoom in or out on webpages that are designed for mobile devices. 1 Slide your finger lightly on the screen to reveal the Zoom control . 2 Touch the plus or minus side of the Zoom control to zoom in or out. To quickly zoom into a section of a ...
Page 172 - To find text on a webpage
171 To find text on a webpage 1 Press the Menu Key and touch More > Find on page . 2 Enter the text you’re looking for. As you type, the first word with matching characters is highlighted on the screen and subsequent matches are boxed. 3 Touch the left or right arrow to jump to and highlight the ...
Page 173 - Navigating Among Webpages; To open a link; To view your Browser history
172 Navigating Among Webpages You can open links on a webpage, navigate back and forth, and review your browsing history just as in any web browser. To open a link ▶ Touch a link to open it. Links that you touch are highlighted in orange until the webpage they refer to opens in the window. To go bac...
Page 174 - To view your most frequently visited pages; Bookmark
173 To view your most frequently visited pages 1 Touch the Bookmark icon at the top right of the screen. 2 Touch the Most visited tab. The pages you’ve visited most frequently are listed in order. Bookmarked pages have a gold star. 3 Touch a page to open it. To follow shortcuts for links, phone numb...
Page 175 - Working with Multiple Browser Windows; To open a new Browser window
174 Working with Multiple Browser Windows You can open up to eight Browser windows at once and switch among them. To open a new Browser window ▶ Press the Menu Key and touch New Window . ▶ Press the Menu Key and touch Windows . In the screen that opens, touch New window . New windows open with your ...
Page 176 - Downloading Files; To allow installing applications from the web or email; To download a file
175 Downloading Files You can download files, webpages, and even applications from the web. The files that you download are stored on your microSD card. To allow installing applications from the web or email By default, your phone is configured to prevent you from installing applications that you do...
Page 178 - Working with Bookmarks; To bookmark a webpage
177 Working with Bookmarks You can bookmark webpages so that you can quickly return to them. To bookmark a webpage 1 Open the webpage you wish to bookmark. 2 Touch the Bookmark icon at the top right side of the screen or press the Menu Key and touch Bookmarks . 3 Touch Add at the top left side of th...
Page 180 - Changing Browser Settings; Page content settings
179 Changing Browser Settings You can configure a number of Browser settings, including several that you can use to manage your privacy. ▶ To open the Browser settings screen, start the Browser, then press the Menu Key and touch More > Settings . Page content settings Text size Allows you to incr...
Page 181 - Privacy settings
180 to run. Remove the checkmark to prevent JavaScript from running. Enable plug-ins When checkmarked, plug-ins are enabled on webpages. Remove the checkmark to disable plug-ins from webpages. Open in background When checkmarked, links opened in a new window will open in the background. If the check...
Page 182 - Security settings; Remember passwords; Advanced settings; Website settings
181 websites want permission to access your location again, you must grant it again. Security settings Remember passwords The Browser can remember your passwords for some webpages that require you to log in to make it quicker to access those pages on repeat visits. Remove checkmark to prevent the Br...
Page 183 - To use location services with Google Maps
182 Opening Google Maps and Viewing Your Location First, turn on location services to use information about your location when navigating and searching in Google Maps. Then open the Google Maps application to view your location. To use location services with Google Maps You must have location servic...
Page 184 - To open Google Maps and view your location; To move the map
183 To open Google Maps and view your location 1 Touch the Google Maps icon on the Home screen or in the Launch screen. 2 Press the Menu Key and touch My location . The map centers on a blue dot that indicates your location. A blue circle around the dot indicates that your actual location is within ...
Page 185 - To clear the map; Clear Map; Changing Map Layers
184 To get an address and additional information for a location ▶ Touch and hold a location on the map. A balloon with the address and a thumbnail from Street View (if available) opens over the location. ▶ Touch the balloon to access additional options. To clear the map After you get directions or s...
Page 186 - To view map, satellite, or traffic layers
185 To view map, satellite, or traffic layers ▶ Press the Menu Key , touch Layers , then touch Traffic , Satellite , Latitude , or another layer. Map layer is the default view. It displays a street map with the names of streets, rivers, lakes, mountains, parks, and other features. Satellite layer us...
Page 187 - Searching For Locations and Places; To search for a location
186 Searching For Locations and Places You can search for a location and view it on a map. You can also search for places on the map that you’re viewing. To search for a location 1 While viewing a map, press the Menu Key and touch Search or touch the Search Key . 2 In the search box, enter the place...
Page 188 - Getting Directions; To get directions
187 Getting Directions Google Maps can provide directions for travel by foot, public transportation, bicycle, or car. You can add a destination shortcut to your Home screen so that you can simply touch the shortcut to get directions to that location from wherever you are. To get directions 1 While v...
Page 191 - To return to Navigation View; To change views of your route
190 ▶ Touch the Back Key to return to Navigation View. To return to Navigation View If you are navigating to a destination and use Google Maps to explore areas, you can quickly return to your current location in Navigation View. ▶ Open the Notifications panel and touch the Navigation ongoing alert. ...
Page 192 - To search for locations along your route
191 ▶ Drag on the map to view adjacent areas or touch the map to see controls for zooming in and out. To search for locations along your route You can search for businesses, points of interest, and other features along your route. When you search while navigating, your results include locations alon...
Page 193 - To preview your route; To view traffic conditions on your route
192 To preview your route You can preview each turn on your route with Navigation, Satellite, and other views. 1 Touch the direction on the screen. Left and right arrows appear. 2 Touch a left or right arrow to preview the next or previous leg of your route. 3 When you’re finished previewing, touch ...
Page 194 - Finding Your Friends with Google Latitude
193 ▶ Touch the Navigation icon to return to your current location in Navigation View. To get an alternate route to your destination If traffic is slow on your current route, or if you just want to try a different route, you can request an alternate route from the Google Maps Navigation service. 1 P...
Page 196 - To respond to an invitation; Accept and share back; Accept, but hide my location; Don’t accept; To view your friends’ locations
195 To respond to an invitation When a friend invites you to share your location in Latitude, you can respond in the following ways. Accept and share back You and your friend can see each other’s locations. Accept, but hide my location You can see your friend’s location, but they can’t see yours. Do...
Page 197 - To connect with and manage connections with your friends
196 To connect with and manage connections with your friends Touch a friend’s contact details balloon in Map view or touch a friend name in List view to open the friend’s profile. In the Profile screen, you can communicate with your friend and set privacy options. Show on map Shows the friend’s loca...
Page 198 - To control what you share
197 To control what you share You have control over how and when your friends can find you. Only the last location sent to Latitude is stored with your Google Account. If you turn off Latitude or are hiding, no location is stored. ▶ Open Latitude, touch your own name, then touch Edit privacy setting...
Page 199 - Opening Camera and Taking Pictures; Gallery; To open the Camera application
198 Opening Camera and Taking Pictures You take pictures and record videos using the Camera application. You can also view your pictures with the Gallery application. IMPORTANT Be sure to clean the protective lens cover with a microfiber cloth before taking pictures. A lens cover with smudges from f...
Page 200 - To take a picture; To take pictures with digital zoom
199 To take a picture 1 Open the Camera application. 2 To control your picture exposure manually, touch the screen to open the camera settings. 3 Frame your subject on the screen. You can zoom in or out by touching the screen and then touching the Zoom control . 4 Touch the Shutter icon . The camera...
Page 201 - To shoot a video
200 To shoot a video 1 Open the Camera application and drag the control to the Video position. 2 To change the length of your video or control your video exposure manually, touch the screen to open the camcorder settings. 3 Point the lens to frame the scene where you want to start. 4 Touch the Recor...
Page 202 - Reviewing Your Pictures; To review your pictures
201 Reviewing Your Pictures You can review the pictures you’ve taken in the Camera application, view them in a slideshow, share them with your friends, and delete and edit them. To review your pictures 1 Open the Camera application. 2 Touch the Picture review icon . The picture review screen opens. ...
Page 203 - Reviewing Your Videos
202 Reviewing Your Videos You can review the videos you’ve recorded, share them with friends, delete them, or view them in a slideshow. 1 Open the Camera application. 2 Touch the Gallery icon . The main Gallery screen opens. Pictures and videos are displayed together. Videos are indicated by a trans...
Page 204 - Changing Camera Settings; To change Camera settings
203 Changing Camera Settings The Camera application has automatic settings that you can use to take quick point-and-shoot photographs and videos. It also has a number of ways to control your exposures, including controlling the focus, turning the flash on and off, and adjusting the white balance. Yo...
Page 205 - Camera settings
204 Camera settings When you change some Camera settings, the current settings are indicated by icons along the left side of the screen. Flash mode Touch to set the Camera’s flash mode. : Automatic : Off : On Image size Touch to set the size (in pixels) of the pictures you take. Scene mode Touch to ...
Page 206 - Camcorder settings; Video quality; Audio recording
205 Camcorder settings In addition to the white balance and color effect controls that the camcorder shares with the camera the camcorder has its own distinct settings. Video quality Touch to set the video quality. Audio recording Touch to set your phone to record audio along with video. Camera
Page 207 - Opening Gallery and viewing Your Albums; To open Gallery and view your albums
206 Opening Gallery and viewing Your Albums Open the Gallery application to view albums of your pictures and videos. To open Gallery and view your albums ▶ Touch the Gallery icon on the Home screen or in the Launcher. OR ▶ Open Gallery from the Camera application by touching the Gallery icon . The G...
Page 208 - Working with Albums; To open an album and view its contents
207 Working with Albums Albums are groups of images and videos in folders on your microSD card or in Picasa web albums. To open an album and view its contents ▶ Open the Gallery application and touch the album whose contents you want to view. ▶ Use the slider bar at the bottom of the screen to scrol...
Page 209 - To change how the contents of an album are displayed
208 To change how the contents of an album are displayed You can view the images and videos in your albums in a chronological grid or in stacks, sorted by the date and the location where they were taken. You switch album views with the Album View switch at the top right of the screen. ▶ Drag the Alb...
Page 210 - To Work with Batches of Pictures or Videos; To share an album
209 To Work with Batches of Pictures or Videos In addition to working with whole albums and with individual pictures, you can select one or more pictures or videos in an album to work on them in batches. For example, to send a few pictures from an album to a friend. 1 Open the album to view the pict...
Page 211 - Working with Pictures; To view and browse pictures
210 To get details about an album 1 Open the main Gallery window. 2 Press the Menu Key twice. 3 Checkmark or uncheck the album(s) you want to see details about. 4 Touch the More button at the bottom right of the screen, then touch Details from the pop-up menu. To delete an album You can delete an al...
Page 212 - To watch a slideshow of your pictures; Slideshow; To rotate a picture
211 ▶ Turn the phone to view the picture in upright (portrait) or sideways (landscape) orientation. The picture is displayed (but not saved) in the new orientation. ▶ Touch the picture to view the Navigation, Zoom, and other control buttons. ▶ Touch the Zoom icon to zoom in or out just double-tap th...
Page 213 - To crop a picture
212 To use a picture as a contact icon or as Home screen wallpaper 1 Press the Menu Key while viewing the picture. 2 Touch the More button. 3 Touch Set as . 4 Touch Contact icon to set the picture to a Contact or touch Wallpaper to set the picture as your wallpaper. To crop a picture You can crop an...
Page 214 - To share a picture
213 To get details about a picture 1 Press the Menu Key while viewing a picture. 2 Touch the More button. 3 Touch Details . To view the location of a picture in Google Maps TM If you have configured the Camera application to save location data with your pictures, you can view the location where you ...
Page 215 - To delete a picture; Working with Videos; To play videos
214 To delete a picture You can delete a picture from your microSD card. 1 Press the Menu Key while viewing the picture to delete. 2 Touch the Delete button then touch Confirm Delete in the dialog box that opens. Working with Videos Use the Gallery application, to play videos that you’ve taken with ...
Page 216 - To share a video; To delete a video
215 To share a video You can share a video by sending it in an email or with a multimedia (MMS) message. MMS messages have size limits, typically 1.2MB, or approximately 1 minute of low-quality video. In the case of hight-quality, the time is shorter than 1 minute.You can also share a video by uploa...
Page 217 - Opening YouTube and Watching Videos; To open the YouTube application
216 Opening YouTube and Watching Videos You can browse, search for, view, upload, and rate YouTube videos on your phone with the YouTube application. To open the YouTube application ▶ Touch the YouTube icon on the Home screen or in the Launch screen. YouTube presents the videos grouped into categori...
Page 218 - To watch and interact with YouTube videos; To search for videos; Search
217 To watch and interact with YouTube videos ▶ On a YouTube screen, touch a video to play it. ▶ Touch the video to view the Playback controls. You can pause, skip forward or backward, or drag the slider to the point in the video you want to watch. ▶ Touch the Back Key to stop playback and return to...
Page 219 - To share your videos on YouTube
218 To share your videos on YouTube You can record and share a video using YouTube. First, you must create a YouTube account and sign into it on your phone. You can also share the videos you record with the Camera application by uploading them to YouTube. 1 Touch the Camera icon at the top right of ...
Page 220 - Transferring Music Files to Your Phone; To copy music files onto the phone’s microSD card
219 Transferring Music Files to Your Phone The Music application plays audio files that are stored on your phone’s microSD card. Copy audio files from your computer onto the microSD card before you open the Music application. The Music application supports audio files in numerous formats, including ...
Page 221 - Opening Music and Working with Your Library; To open Music and view your music library
220 Opening Music and Working with Your Library After you’ve copied some music onto your microSD card you can open the Music application and see your library of music files, sorted in one of four ways. To open Music and view your music library ▶ Touch the Music icon on the Home screen or in the Laun...
Page 222 - To search for music in your library; To delete a song from the microSD card
221 To search for music in your library 1 Open the main Library screen then touch the Search Key . 2 Start typing the name of the artist, album, or track you’re looking for. Matching songs are displayed in the list below the search box. 3 Touch a matching song to play it or touch a matching album or...
Page 223 - Playing Music; To play music; Play all
222 Playing Music You can listen to music by using the phone’s built-in speaker, through a wired headset, or through a wireless Bluetooth stereo headset that supports the A2DP profile. To play music ▶ Touch a song in your library to listen to it. OR ▶ While viewing a list of tracks in an album, pres...
Page 224 - To control playback; To control playback volume; Keys
223 To control playback The Playback screen contains several icons that you can touch to control the playback of songs, albums, and playlists: Touch to pause playback. Touch to resume playback. Touch to skip to the next track in the album, playlist, or shuffle. Touch to skip to the previous track in...
Page 226 - Working with Playlists; To create a playlist
225 Working with Playlists You can create playlists to organize your music files into sets of songs, which you can play in the order you set or in a shuffle. To create a playlist 1 When viewing a list of songs in the library, touch and hold the first song you want to add to the new playlist. 2 Touch...
Page 228 - Viewing the Date, Time, and Other Information; To open the Clock application
227 Viewing the Date, Time, and Other Information You use the Clock application to monitor several kinds of information at once, in addition to the current date and time. To open the Clock application ▶ Touch the Clock icon on the Home screen or in the Launch screen. The Clock application opens with...
Page 229 - To play a slideshow
228 To play a slideshow You can play a slideshow of the pictures in your Gallery albums from the Clock application. ▶ Touch the Slideshow icon at the bottom of the Clock screen. ▶ Press the Back Key to end the show. To play music You can play music while the Clock is displayed. ▶ Touch the Music ico...
Page 230 - To dim the Clock display; Dimmer; Setting Alarms; To set an alarm; Alarm
229 To dim the Clock display ▶ If you want to use your phone as a bedside clock, you can set the screen brightness very low. Touch the Dimmer icon on the top right of the screen to dim the clock. ▶ Touch the Dimmer icon again to restore normal brightness. If you can’t see the Dimmer icon, press and ...
Page 232 - Changing Clock Alarm Settings
231 Changing Clock Alarm Settings You can change a number of settings for the alarms you set. You can also change how times are displayed in Clock in the Settings applications. ▶ To change Clock alarm settings, touch the Alarm icon at the bottom of the Clock screen, press the Menu Key , and touch Se...
Page 233 - Using Car Home
232 Using Car Home You can use the Car Home application whether or not you have a LG AS740 car dock (the optional accessory.) ▶ Insert the phone into the LG AS740 car dock. OR ▶ Touch the Car Home icon on the Home screen or in the Launch screen. The Car Home application opens with five large icons t...
Page 234 - Using the Calculator; To open and use the Calculator; To clear your history of operations
233 Using the Calculator Use the Calculator application to solve math problems. To open and use the Calculator ▶ Touch the Calculator icon on the Home screen or in the Launch screen. Drag to switch between basic and advanced panels. ▶ Enter numbers and arithmetic operators on the basic panel. ▶ Drag...
Page 235 - To open Android Market application; Market; To get help with Android Market
234 Opening Android Market and Finding Applications Open Android Market to browse and search for free and paid applications. To open Android Market application ▶ ouch the Market icon on the Home screen or in the Launch screen. When you open Android Market application for the first time, you must rea...
Page 236 - To browse for applications; Apps; Games; Top paid
235 To browse for applications You can browse applications by category and sort them in different ways. 1 On Android Market home page, touch a top-level category, such as Apps or Games . 2 Scroll to view subcategories and touch the one you want to explore. Touch a subcategory to view its list of app...
Page 238 - Downloading and Installing Applications; To download and install an application; About the developer
237 Downloading and Installing Applications When you find an application you want, you can install it on your phone. To download and install an application Before you can download a paid application, you must set up a billing arrangement. 1 Find an application you want and open its details screen. I...
Page 239 - Buy now; To create a Google Checkout account
238 3 Touch Install (for free applications) or Buy (for paid applications). If the application requires access to your data or control of any functions on your phone, Market tells you what the application can access. WARNING! Read this screen carefully. Be especially cautious with applications that ...
Page 240 - Managing Your Downloads; To view your downloaded applications
239 WARNING! When you’ve used Google Checkout once to purchase an application from Android Market, the phone remembers your password, so you don’t need to enter it the next time. For this reason, you should secure your phone to prevent others from using it without your permission. See “Locking the S...
Page 243 - Opening Settings; To open Settings
242 Settings Opening Settings The Settings application contains most of the tools for customizing and configuring your phone. All of the settings in the Settings application are described in this section. To open Settings ▶ From the Home screen, press the Menu Key and touch Settings . OR ▶ Touch the...
Page 244 - Wi-Fi settings screen
243 Settings Wi-Fi settings screen The Wi-Fi settings menu allows you to set up and manage wireless access points. Wi-Fi Checkmark to turn on Wi-Fi so you can connect to Wi-Fi networks. Network notification Checkmark to receive a notification when an open Wi-Fi network becomes available. Wi-Fi netwo...
Page 245 - Bluetooth settings screen
244 Settings Bluetooth settings screen Bluetooth Checkmark to turn on Bluetooth so you can connect to Bluetooth devices. Device name Allows you to view and edit the name your phone displays to other Bluetooth devices when trying to pair. Discoverable Checkmark to make your phone discoverable to othe...
Page 246 - Call settings; Call settings screen; Other call settings
245 Settings Call settings Use Call settings to configure phone call settings. Call settings screen Voicemail service Allows you to select your carrier’s voicemail service or another service, such as Google Voice TM . Voicemail settings If you are using your carrier’s voicemail service, this option ...
Page 247 - Sound & display settings screen
246 Settings Sound & display Use the Sound & display settings to configure many aspects of call and notification ringtones, music, and other audio, as well as the brightness and other screen settings. Sound & display settings screen Silent mode Allows you to silence all sounds (including...
Page 250 - Applications; Applications settings screen
249 Settings Applications You use the Applications settings to view details about the applications installed on your phone, manage their data, force them to stop, and to set whether you want to permit installation of applications that you obtain from websites and email. Applications settings screen ...
Page 251 - Application Info screen
250 Settings Application Info screen The Application Info screen for each application lists its name and version, along with details about the application. Depending on the application and where it came from, it may also include options for managing the application’s data, forcing the application to...
Page 252 - Accounts & sync settings screen
251 Settings on the phone for long periods of time, or the screen may be marked with that image. Allow mock locations Permits a development tool on a computer to control where the phone believes it is located, rather than using the phone’s own internal tools for this purpose. Accounts & sync Use...
Page 253 - Account screen; Privacy; Use My Location
252 Settings Account screen This screen contains different options, depending on the kind of account.For Google Accounts, it lists the kinds of data you can synchronize to the phone, with checkboxes so you can turn synchronizing on and off for each kind. You can also press the Menu Key and touch Syn...
Page 254 - SD card & phone storage; SD card & phone storage screen; SD card, Total space and Available space; Unmount SD card; Format SD card; Internal phone storage, Available space
253 Settings SD card & phone storage Use the SD card & phone storage settings to monitor the used and available space on your phone and on your microSD card, to manage your microSD card, and if necessary, to reset the phone, erasing all of your personal information. SD card & phone stora...
Page 255 - Search settings screen
254 Settings Search You use the Search settings to configure Google search, Quick Search Box, and the data on the phone that you want to include in searches. Search settings screen Google search settings Opens a screen where you can set your preferences for whether Google search on the web makes sug...
Page 256 - Android Keyboard settings screen; Vibrate on keypress; Device Keyboard settings screen
255 Settings Android Keyboard settings screen The Android Keyboard settings apply to the onscreen keyboard that is included with your phone. The correction and capitalization features affect only the English version of the keyboard. Vibrate on keypress Allows you to set the phone to vibrate briefly ...
Page 257 - Accessibility
256 Settings Accessibility You use the Accessibility settings to configure any accessibility plug-ins you have installed on your phone. Accessibility Allows you to enable all installed accessibility plug-ins. SoundBack Allows the phone to play a sound as you navigate the phone’s user interface. Talk...
Page 258 - About phone; About phone screen
257 Settings Language Allows you to select the language of the text you want the synthesizer to read. This is particularly useful in combination with the Always Use My Settings setting, to ensure that text is spoken correctly in a variety of applications. Date & time Use Date & time settings...
Page 259 - DivX VOD registration; Version information
258 Settings DivX VOD registration Displays information to register your device to play DivX protected videos. Version information Lists details about the model numbers and versions of your phone’s hardware and operating system software. This information is useful if you need to work with your carri...
Page 260 - TIA Safety Information; Exposure to Radio Frequency Signal
259 Safety TIA Safety Information The following is the complete TIA Safety Information for wireless handheld phones. Exposure to Radio Frequency Signal Your wireless handheld portable phone is a low power radio transmitter and receiver. When ON, it receives and sends out Radio Frequency (RF) signals...
Page 261 - Phone Operation
260 Safety Phone Operation NORMAL POSITION: Hold the phone as you would any other telephone with the antenna pointed up and over your shoulder. Tips on Efficient Operation For your phone to operate most efficiently:Don’t touch the antenna unnecessarily when the phone is in use. Contact with the ante...
Page 263 - Aircraft
262 Safety Aircraft FCC regulations prohibit using your phone while in the air. Switch OFF your phone before boarding an aircraft. Blasting Areas To avoid interfering with blasting operations, turn your phone OFF when in a “blasting area” or in areas posted: “Turn off two-way radio”. Obey all signs ...
Page 264 - Safety Information; Charger and Adapter Safety; Battery Information and Care
263 Safety Safety Information Please read and observe the following information for safe and proper use of your phone and to prevent damage. Also, keep the user guide in an accessible place at all times after reading it. Caution! Violation of the instructions may cause minor or serious damage to the...
Page 265 - General Notice
264 Safety • Use of extended backlighting, Browser, and data connectivity kits affect battery life and talk/ standby times. • The self-protection function of the battery cuts the power of the phone when its operation is in an abnormal state. In this case, remove the battery from the phone, reinstall...
Page 266 - Warning! Important safety information; Avoiding hearing damage
265 Safety due to heat generated during use. • When the phone is not used for a long period time, store it in a safe place with the power cord unplugged. • Using the phone in proximity to receiving equipment (i.e., TV or radio) may cause interference to the phone. • Do not use the phone if the anten...
Page 267 - Using your phone safely; FDA Consumer Update; Do wireless phones pose a health hazard?
266 Safety in your ears or muffled speech, stop listening and have your hearing checked. The louder the volume, the less time is required before your hearing could be affected. Hearing experts suggest that to protect your hearing: • Limit the amount of time you use your phone and/or headset at high ...
Page 268 - What is the FDA’s role concerning the safety of wireless phones?
267 Safety levels of Radio Frequency (RF) energy in the microwave range while being used. They also emit very low levels of RF when in standby mode. Whereas high levels of RF can produce health effects (by heating tissue), exposure to low level RF that does not produce heating effects causes no know...
Page 269 - What kinds of phones are the subject of this update?
268 Safety belong to this working group: • National Institute for Occupational Safety and Health Environmental Protection Agency • Occupational Safety and Health Administration • National Telecommunications and Information Administration The National Institutes of Health participates in some interag...
Page 270 - What are the results of the research done already?
269 Safety levels, and thus produce RF exposures far below the FCC safety limits. 4 What are the results of the research done already? The research done thus far has produced conflicting results, and many studies have suffered from flaws in their research methods. Animal experiments investigating th...
Page 271 - What is the FDA doing to find out more about the possible health
270 Safety exists. Epidemiological studies can provide data that is directly applicable to human populations, but ten or more years follow-up may be needed to provide answers about some health effects, such as cancer. This is because the interval between the time of exposure to a cancer-causing agen...
Page 272 - How can I find out how much Radio Frequency energy exposure I
271 Safety 7 How can I find out how much Radio Frequency energy exposure I can get by using my wireless phone? All phones sold in the United States must comply with Federal Communications Commission (FCC) guidelines that limit Radio Frequency (RF) energy exposures. The FCC established these guidelin...
Page 273 - What steps can I take to reduce my exposure to Radio Frequency
272 Safety by the whole body or a small part of the body. It is measured in watts/kg (or milliwatts/g) of matter. This measurement is used to determine whether a wireless phone complies with safety guidelines. 9 What steps can I take to reduce my exposure to Radio Frequency energy from my wireless p...
Page 274 - 1 What about wireless phone interference with medical
273 Safety effects. Their recommendation to limit wireless phone use by children was strictly precautionary; it was not based on scientific evidence that any health hazard exists. 11 What about wireless phone interference with medical equipment? Radio Frequency (RF) energy from wireless phones can i...
Page 275 - 0 Driver Safety Tips
274 Safety htm)Federal Communications Commission (FCC) RF SafetyProgram (http://www.fcc.gov/oet/rfsafety)International Commission on Non-lonizing RadiationProtection (http://www.icnirp.de)World Health Organization (WHO) International EMFProject (http://www.who.int/emf)National Radiological Protectio...
Page 277 - Consumer Information on SAR
276 Safety of fire, traffic accident, road hazard, or medical emergency. Remember, it’s a free call on your wireless phone! 9 Use your wireless phone to help others in emergencies. Your wireless phone provides you a perfect opportunity to be a “Good Samaritan” in your community. If you see an auto a...
Page 280 - Regulations for Wireless Devices
279 Safety FCC Hearing-Aid Compatibility (HAC) Regulations for Wireless Devices On July 10, 2003, the U.S. Federal Communications Commission (FCC) Report and Order in WT Docket 01-309 modified the exception of wireless phones under the Hearing Aid Compatibility Act of 1988 (HAC Act) to require digit...
Page 294 - FAQs with AllyTM
293 This is a step-by-step guide for frequently asked questions. If you run into a problem or are having trouble with a feature, take a look at this section before you contact the Customer Information Center. Thank you. FAQs with Ally™ Contact Contaa Conta C Email Emaill Email Sync Contacts How can ...
Page 298 - Email Information; Unable to access your Email on the AS740?
297 FAQs with Ally™ Contact Contaa Conta C Email Emaill Email Sync Email Information Unable to access your Email on the AS740? You may need to manually set up your account as a POP3 or IMAP4 account. Why can’t I open email attachments? To view some file types, you must first download the application...
Page 299 - Other Email-Related Issues; Why can’t I connect to the Mail Server?
298 FAQs with Ally™ Contact Contaa Conta C Email Emaill Email Sync Other Email-Related Issues Why can’t I connect to the Mail Server? If you are unable to connect to the Mail server but other applications are still able to access the data network, you will need to contact the Email server manager. W...
Page 300 - Supported Email Features
299 Supported Email Features The chart below details which Email account types (EAS, IMAP4, and POP3) support which features. EAS(Exchange AcitveSync) IMAP4 POP3 Notes Push O X X Push Email is a feature that instantly notifies you when a new email is received by your email server. Synchronize with m...
Page 301 - How do I sync Socialite with Facebook?; Add Account; Socialite
300 FAQs with Ally™ Contact Contaa Conta C Email Emaill Email Sync How do I sync Socialite with Facebook? 1 From the Home screen, press the Menu Key and touch Settings > Accounts & sync . 2 Touch the Add Account . 3 Touch the Socialite option. FAQ(Updated)
Page 302 - Log in
301 4 Enter your Email address and Password, then touch Log in . 5 Select the type of synchronization you want to set up, then touch Save . You can sync data only about friends already in Contacts You can sync data about all friends to Contacts You can’t sync FAQ(Updated)
Page 303 - WHAT THIS WARRANTY COVERS:
302 1 WHAT THIS WARRANTY COVERS: LG offers you a limited warranty that the enclosed subscriber unit and its enclosed accessories will be free from defects in material and workmanship, according to the following terms and conditions: (1) The limited warranty for the product extends for TWELVE (12) MO...
Page 305 - DO NOT RETURN YOUR PRODUCT TO THE ABOVE ADDRESS.
304 OF ANY IMPLIED WARRANTIES, INCLUDING THE IMPLIED WARRANTY OF MARKETABILITY, IS LIMITED TO THE DURATION OF THE EXPRESS WARRANTY HEREIN. LG SHALL NOT BE LIABLE FOR THE LOSS OF THE USE OF THE PRODUCT, INCONVENIENCE, LOSS OR ANY OTHER DAMAGES, DIRECT OR CONSEQUENTIAL, ARISING OUT OF THE USE OF, OR I...
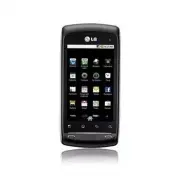


 LG A7110
User Manual
LG A7110
User Manual
 LG AX5000
User Manual
LG AX5000
User Manual
 LG C1300
User Manual
LG C1300
User Manual
 LG C1300A
User Manual
LG C1300A
User Manual
 LG C1300I
User Manual
LG C1300I
User Manual
 LG C1500
User Manual
LG C1500
User Manual
 LG C2000
User Manual
LG C2000
User Manual
 LG CB630
User Manual
LG CB630
User Manual
 LG CE500
User Manual
LG CE500
User Manual
 LG CF360
User Manual
LG CF360
User Manual
 LG CF360A
User Manual
LG CF360A
User Manual
 LG CG180
User Manual
LG CG180
User Manual
 LG CG225
User Manual
LG CG225
User Manual
 LG CG300
User Manual
LG CG300
User Manual
 LG CP150
User Manual
LG CP150
User Manual
 LG CU320
User Manual
LG CU320
User Manual
 LG CU400
User Manual
LG CU400
User Manual
 LG CU405
User Manual
LG CU405
User Manual
 LG CU500
User Manual
LG CU500
User Manual