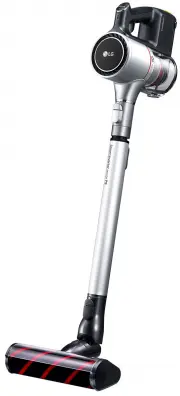
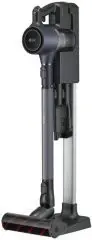
LG LCV800R - Manuals
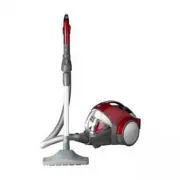
User Manual LG LCV800R


Summary
2 CONTENTS Unpacking the Vacuum Cleaner Assembly Parts The Vacuum Cleaner AssemblyCanisterTelescopic Wand HoseCarpet / Hard Floor NozzleCord Storage ASSEMBLY OPERATION Storing the Vacuum Cleaner Dust Tank and Dust Separator ComponentEmptying the Dust TankCleaning the Dust TankCleaning the Foam Pre F...
3 ENGLISH LG VA C U U M C L E A N E R WA R R A N T Y LG Electronics Inc. will repair or replace your product, at LG’s option, if it proves to be defective in material or workmanship under personal household use, during the warranty period set forth below, effective from the date of original consumer...
4 I M P O RTA N T S A F E T Y I N F O R M AT I O N • Disconnect electrical supply before servicing or cleaning the unit or when cleaner is not in use. Failure to do so could result in electrical shock or personal injury. • Do not use vacuum cleaner to pick up anything that is burning or smoking such...
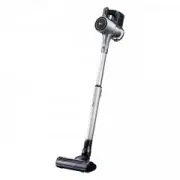
LG Vacuums Manuals
-
 LG A931KWM
User Manual
LG A931KWM
User Manual
-
 LG A9ESSENTIAL
User Manual
LG A9ESSENTIAL
User Manual
-
 LG A9K-AQUA
User Manual
LG A9K-AQUA
User Manual
-
 LG A9K-EVOLVE
User Manual
LG A9K-EVOLVE
User Manual
-
 LG A9MASTER2X
User Manual
LG A9MASTER2X
User Manual
-
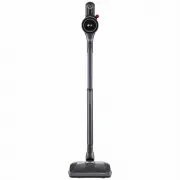
 LG A9MULTI2X CordZero
User Manual
LG A9MULTI2X CordZero
User Manual
-
 LG A9N-CORE
User Manual
LG A9N-CORE
User Manual
-
 LG A9NEOMAX
User Manual
LG A9NEOMAX
User Manual
-
 LG A9N-MULTI
User Manual
LG A9N-MULTI
User Manual
-
 LG A9PETNBED2X
User Manual
LG A9PETNBED2X
User Manual
-
 LG CordZero A9ESSENTIAL
User Manual
LG CordZero A9ESSENTIAL
User Manual
-
 LG CordZero A9-LITE
User Manual
LG CordZero A9-LITE
User Manual
-
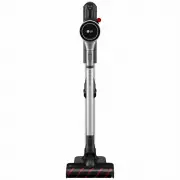
 LG CordZero A9MASTER2X
User Manual
LG CordZero A9MASTER2X
User Manual
-
 LG CordZero A9MULTICARE
User Manual
LG CordZero A9MULTICARE
User Manual
-
 LG CordZero A9N-Core
User Manual
LG CordZero A9N-Core
User Manual
-
 LG FVD3700
User Manual
LG FVD3700
User Manual
-
 LG Kompressor Plus VK8828HQ
User Manual
LG Kompressor Plus VK8828HQ
User Manual
-
 LG Kompressor VC83209UHAV
User Manual
LG Kompressor VC83209UHAV
User Manual
-
 LG KV-PRO
User Manual
LG KV-PRO
User Manual
-
 LG MVK71187HU
User Manual
LG MVK71187HU
User Manual