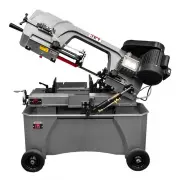
Page 2 - WARNING – To reduce risk of injury:
2 1.0 IMPORTANT SAFETY INSTRUCTIONS Read and understand the entire instruction manual before operating machine. This band saw is designed and intended for use by properly trained and experienced personnel only. If you are not familiar with the proper and safe operation of a band saw, do not use unti...
Page 3 - SAVE THESE INSTRUCTIONS; ON/OFF Switch padlock
3 24. Maintain tools with care. Keep saw blades sharp and clean for the best and safest performance. Follow instructions for lubricating and changing accessories. 25. Turn off the machine before cleaning. Use a brush or compressed air to remove chips or debris — do not use your hands. 26. Do not sta...
Page 4 - About this manual
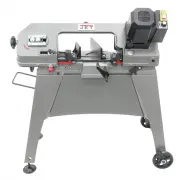
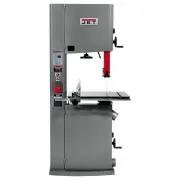
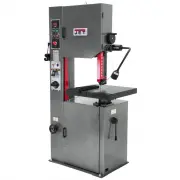
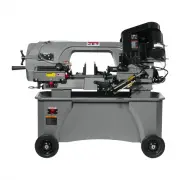
4 2.0 About this manual This manual is provided by JET, covering the safe operation and maintenance procedures for a JET Model HVBS-56V Band Saw. This manual contains instructions on installation, safety precautions, general operating procedures, maintenance instructions and parts breakdown. Your ma...
Page 5 - Table of contents; Section
5 3.0 Table of contents Section Page 1.0 IMPORTANT SAFETY INSTRUCTIONS ....................................................................................................... 2 1.1 ON/OFF Switch padlock ....................................................................................................
Page 6 - Specifications
6 4.0 Specifications Model number HVBS-56V Stock number 414548 Motor and Electricals Motor type DC brushed motor Horsepower 1/2 HP (0.375 kW) Motor phase single Voltage 115 V only Cycle 60 Hz Listed FLA (full load amps) 4 Motor speed 1200-3600 RPM On/off switches Magnetic push-button; toggle shut-of...
Page 7 - Setup and assembly; Shipping contents; Tools required for assembly
7 5.0 Setup and assembly Read and understand all instructions before attempting assembly. Band Saw must be disconnected from power during all assembly procedures. Failure to comply may cause serious injury. 5.1 Shipping contents See Figures 5-1 and 5-2. 1 Band saw (not shown) 2 Wheels – A 2 Adjustab...
Page 8 - Assembling stand; Mounting saw to stand; Additional assembly
8 Figure 5-3: stand assembly 5.4 Assembling stand Refer to Figure 5-3. NOTE: Only make fasteners hand-tight at this time. They will be fully tightened after band saw has been settled atop stand. 1. Assemble legs, cross braces, front panel and shelf, as shown in Figure 5-3. 2. Install handle (G) into...
Page 9 - Vertical cutting plate; Electrical connections; GROUNDING INSTRUCTIONS
9 Figure 5-5 5.7 Vertical cutting plate NOTE: The following steps apply only when using band saw in vertical mode. 1. Disconnect band saw from power source. 2. Raise bow to vertical position. 3. Loosen bolt (S, Figure 5-6) just enough to slide stand (D) behind bolt. Tighten bolt just enough to hold ...
Page 10 - Extension cords; Adjustments; Tools required for adjustments
10 6.2 Extension cords The use of extension cords is discouraged; try to position machines near the power source. If an extension cord is necessary, make sure it is in good condition. When using an extension cord, be sure to use one heavy enough to carry the current your product will draw. An unders...
Page 12 - Feed pressure adjustment; Test cut to verify adjustment
12 Figure 7-5 7.7 Feed pressure adjustment Feed pressure is the amount of weight the bow is allowed to exert upon the workpiece. Turn handle (O, Figure 7-6) clockwise to decrease feed pressure; counterclockwise to increase feed pressure. A good indication of proper feed pressure is the color and sha...
Page 13 - Auto shut-off adjustment; Vise adjustment; Operation; Blade selection
13 Figure 7-8 7.9 Auto shut-off adjustment The saw is properly adjusted when blade shuts off just after cut completion. To set this: • If saw completes cut but blade continues moving, adjust switch trip (P, Figure 7-9) downward. • If blade stops before cut is complete, adjust switch trip (P) upward....
Page 14 - General operating procedure; Evaluating cutting efficiency
14 General rule for band saw blade speed: The harder the material being cut, the slower the blade speed. A minimum of three teeth should be on the work piece at all times for proper cutting. The blade and workpiece can be damaged if the teeth are so far apart that they straddle the workpiece. For ve...
Page 15 - General maintenance; Lubrication
15 9.0 User-maintenance Always disconnect power to the machine before performing maintenance. Failure to do this may result in serious personal injury. 9.1 General maintenance Wipe down saw with a soft rag after each use, and clear metal particles with a small paint brush or parts cleaning brush. Do...
Page 16 - Troubleshooting HVBS-56V Band Saw; Mechanical and electrical problems; Operational problems
16 10.0 Troubleshooting HVBS-56V Band Saw 10.1 Mechanical and electrical problems Symptom Possible Cause Correction * Motor will not start. Low voltage. Check power line for proper voltage. Open circuit in motor or loose connection. Inspect all lead connections on motor for loose or open connections...
Page 17 - Replacement Parts
17 Symptom Possible Cause Correction Rough cut. Improper blade break-in. Follow proper break-in procedure. Improper speed or feed rate. Adjust as needed. Dull or damaged teeth. Replace blade. Poor weld on blade. Replace or re-weld blade. Frequent blade breakage. Workpiece shifting in vise. Properly ...
Page 18 - HVBS-56V Bed Assembly – Exploded View
Page 19 - HVBS-56V Bow Assembly – Exploded View
Page 20 - HVBS-56V – Bow and Bed Assemblies Parts List; Index No Part No
20 11.1.3 HVBS-56V – Bow and Bed Assemblies Parts List Index No Part No Description Size Qty 2 ................. TS-0561011 ................ Hex Nut ........................................................................ 1/4"-20 ............................. 1 3 ................. TS-0680021 ......
Page 24 - Electrical Connections – HVBS-56V Band Saw
24 12.0 Electrical Connections – HVBS-56V Band Saw SQ = Lower (toggle) limit switch S = Electromagnetic switch A = Driver board VR = Variable resistor M = Motor
Page 25 - Warranty and service
25 13.0 Warranty and service JET warrants every product it sells against manufacturers’ defects. If one of our tools needs service or repair, please contact Technical Service by calling 1-800-274-6846, 8AM to 5PM CST, Monday through Friday. Warranty Period The general warranty lasts for the time per...