Page 2 - Control panel / Controlepaneel / Panel sterowania
POLSKI NEDERLANDS START/STOP ON/OFF my favourites HOME clean/setting 3 4 5 6 7 2 1 ESPRESSO COFFEE STEAM HOT WATER Control panel / Controlepaneel / Panel sterowania Beverage menu / Menu dranken / Menu napojów Ristretto Coffee / Koffie / Kawa 30 ml Coffee / Koffie / Kawa Coffee / Koffie / Kawa 120 ml...
Page 4 - First installation / Eerste installatie / Pierwsza instalacja
First installation / Eerste installatie / Pierwsza instalacja 1 2 START/STOP ON/OFF my favourites HOME clean/setting FILLING WATER CIRUIT to start press START/STOP ON/OFF my favourites HOME clean/setting Confermi di voler cambiare la lingua in Italiano? START/STOP ON/OFF my favourites HOME clean/set...
Page 5 - ENGLISH; NEDERLANDS; POLSKI
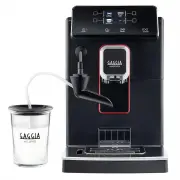
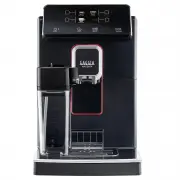
Congratulations on purchasing the Gaggia Cadorna! This easy-to-use machine guarantees excellent coffee drinks, every day. With its intuitive interface, you can choose from among 6 beverages, customise them and save them to the 4 available profiles, where they can be instantly brought up whenever you...
Page 6 - English; Table of Contents; Cleaning the Classic Pannarello
6 English Table of Contents Machine Overview (Fig.2) ..........................................................................................................................................................................................................................................................
Page 8 - Control Panel and Display; Multifunction buttons
8 English Control Panel and Display This coffee machine features an easy-to-use, intuitive display. Please see below for an in-depth explanation of each button. Multifunction buttons Use the multifunction buttons at the sides of the display to select the feature or beverage indicated on the screen. ...
Page 9 - First Installation; Manual rinse cycle
9 English First Installation Before using the machine, it is essential to follow a few simple steps, clearly described in the explanatory drawings found in the quick guide at the beginning of this instruction manual. Note: To make the best-tasting coffee, you should brew 5 coffees initially to allow...
Page 10 - Measuring water hardness; INTENZA+ Water Filter
10 English Measuring water hardness You’ll need to set the water hardness when you instal your machine. Take the water hardness measuring strip that you find in the box and follow the steps shown on the display during installation. To adjust the water hardness setting later, press the CLEAN/SETTING ...
Page 11 - Installing the INTENZA+ water filter; Replacing the INTENZA+ water filter
11 English Installing the INTENZA+ water filter Remove the small white filter from the water tank and store it in a dry place. Immerse the INTENZA+ water filter vertically (with the opening pointing up) in cold water and gently press its sides to let any air bubbles out. Place the INTENZA+ filter in...
Page 12 - Types of Beverage; Espresso tray (only for Cadorna Plus
12 English Types of Beverage Beverage name Description Ristretto A ristretto, served in a small cup, is an espresso whose brewing time is shorter than a regular espresso. As such, a ristretto is a shorter shot and lower in caffeine. Espresso The espresso is known around the globe as true "Italia...
Page 13 - Brewing coffee using pre-ground coffee; Brewing coffee; Brewing coffee from whole coffee beans
13 English Brewing coffee using pre-ground coffee Use the measuring scoop provided to insert the correct dose in the pre-ground coffee compartment. 1 Lift the lid of the pre-ground coffee compartment and add one level measuring scoop of pre-ground coffee. Warning: do not insert anything other than ...
Page 14 - How to Froth Milk
14 English 3 Press the " " button. Note: the "pre-ground coffee" function cannot dispense two cups of coffee at the same time, and it disables the aroma setting, both of which are possible with coffee beans only. 4 Press the START/STOP START/STOP button to start dispensing the coff...
Page 15 - Dispensing Hot Water; Beverage Customisation and Profile; Customisation
15 English Dispensing Hot Water Warning: when the machine starts preparing hot water, the Pannarello spout may spray steam and hot water. 1 Place a container under the Classic Pannarello. 2 Press the HOME HOME button. 3 Press the "HOT WATER" button. Finally, press the START/STOP START/STOP b...
Page 17 - Creating a profile
17 English 3 Press the " ADD DRINK " button. 4 The beverage screens will be displayed. Select the beverage that you want to save to your profile and customise it by following steps 3 to 8 in the "Beverage customisation" chapter. Creating a profile There are two ways to create a profi...
Page 18 - Coffee Grind Settings; Cleaning and Maintenance; Cleaning table
18 English Coffee Grind Settings You can adjust the grind setting using the grinder adjustment knob on the coffee bean container. The ceramic coffee grinder guarantees perfect, even grinding for the preparation of every cup of coffee. The aroma is thus preserved, ensuring the perfect flavour every t...
Page 20 - Removing the brew group
20 English Cleaning the Classic Pannarello 1 Remove the Classic Pannarello and the rubber handle from the steam spout and rinse them under running water. 2 Clean the steam wand with a damp cloth. 3 Reassemble the parts. Cleaning the brew group Warning: do not wash the brew group in the dishwasher an...
Page 21 - Cleaning the brew group under running water
21 English Cleaning the brew group under running water 1 Clean the coffee outlet duct thoroughly with a spoon handle or with another round-tipped kitchen utensil. 2 Thoroughly rinse the brew group using lukewarm water. Carefully wash the upper filter. 3 Let the brew group air dry. Note: to avoid the...
Page 22 - Reinserting the brew group
22 English Reinserting the brew group 1 Before reinserting the brew group into the machine, ensure that the two yellow reference indicators on the side coincide. If this is not the case, perform the following step: Make sure that the lever is in contact with the base of the brew group. 2 Make sure t...
Page 23 - Lubricating the brew group
23 English Lubricating the brew group In order to ensure the perfect performance of the machine, it is necessary to lubricate the brew group. Refer to the following table for the frequency of lubrication. Frequency of use Number of beverages prepared daily Frequency of lubrication Low 1-5 Every 4 mo...
Page 24 - Descaling; Descaling procedure
24 English Descaling Descaling procedure Descaling needs to be carried out when the machine signals it.Use only the Gaggia descaling solution designed to guarantee the machine’s excellent performance. The use of other products could damage the machine and leave residue in the water. Failure to desca...
Page 25 - What to do if the descaling process is interrupted; Various Settings
25 English What to do if the descaling process is interrupted You can exit the descaling procedure by pressing the ON/OFF ON/OFF button on the control panel. If the descaling procedure is interrupted before its completion, proceed as follows: 1 Empty the water tank and wash it thoroughly. 2 Fill the...
Page 26 - Water hardness; Water filter; Measurement units
26 English Timer stand-by When " TIMER STAND-BY " is selected, the timer can be set to: - 15 min - 30 min - 60 min - 180 min START/STOP ON/OFF my favourites HOME clean/setting LANGUAGE TIMER STAND-BY WATER FILTER UNITS START/STOP ON/OFF my favourites HOME clean/setting LANGUAGE TIMER STAND-B...
Page 27 - Error Code Key
27 English Error Code Key The list below reports the error codes that the display can show, their meanings and how to solve the problem. If the indicated solutions are ineffective because the display keeps showing the error code icon and the machine does not function correctly, or if further error c...
Page 28 - Troubleshooting
28 English Troubleshooting This chapter summarises the most common problems you may encounter while using the machine. If you are unable to resolve the problem using the information given below, visit the FAQ sections on www.gaggia.com or www.gaggia.it or contact the Customer Service Centre in your ...
Page 30 - GAGGIA Accessories
30 English Problem Cause Solution The "INTENZA+" filter cannot be inserted. Remove the air from the filter. Let the air bubbles flow out of the filter. The tank still contains some water. Empty the water tank before installing the filter. The rubber seal is not inserted on the "INTENZA+&...
Page 31 - Technical Specifications
31 English Technical Specifications Nominal voltage - Power rating - Power supply See data plate on the inside of the service door Housing material Thermoplastic type Dimensions (Style) 260 x 345 x 440 mm Dimensions (Plus) 260 x 380 x 440 mm Weight (Style) 8.2 kg Weight (Plus) 9 kg Power cord length...
Page 32 - Nederlands; Inhoudsopgave; Waterfilter INTENZA+; Reiniging van de klassieke pannarello; Accessoires GAGGIA
32 Nederlands Inhoudsopgave Overzicht van de machine (afb. 2) .................................................................................................................................................................................................................................................