Autel EVO II Dualgged Bundle (640T) RTK V3 (102001511) - User Manual
Autel EVO II Dualgged Bundle (640T) RTK V3 (102001511) Quadcopter – User Manual, read for free online in PDF format. We hope this helps you resolve any issues you may have. If you have further questions, please contact us through the contact form.
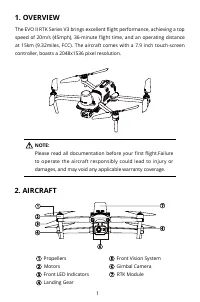

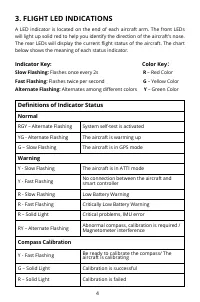

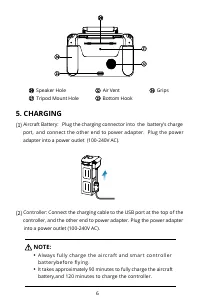
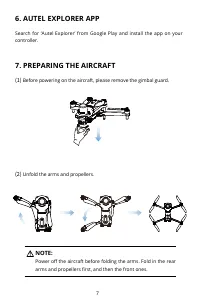
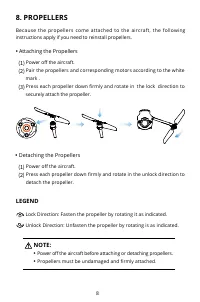
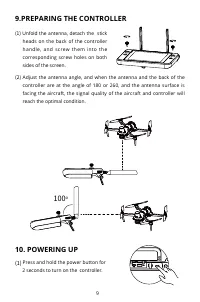
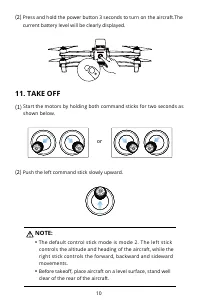
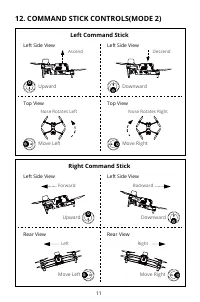
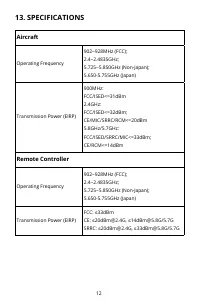
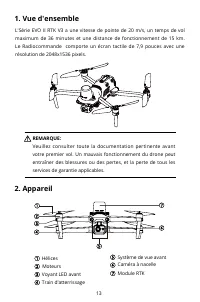


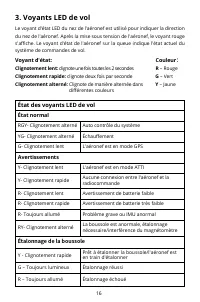
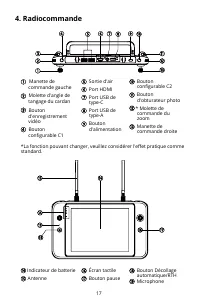
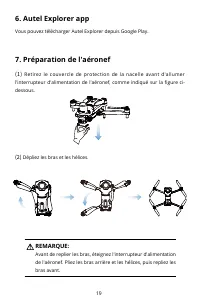
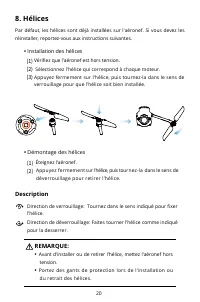
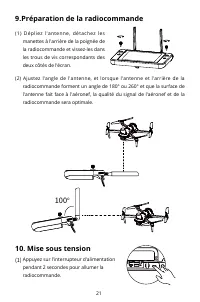
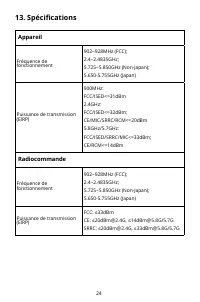

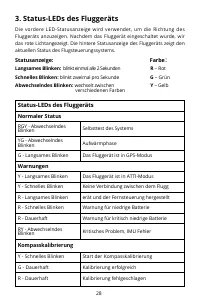
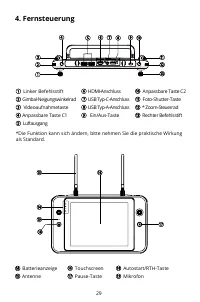
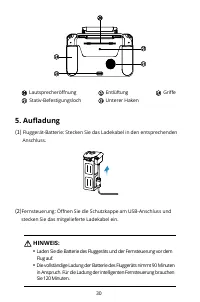
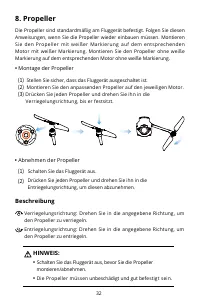
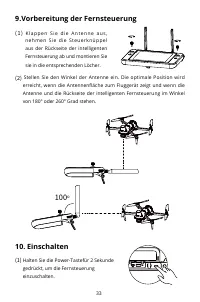


Table of Contents:
- Page 5 – FLIGHT LED INDICATIONS; Color Key; Definitions of Indicator Status; Normal
- Page 9 – LEGEND; Attaching the Propellers
- Page 10 – PREPARING THE CONTROLLER
- Page 11 – or
- Page 13 – Aircraft; Remote Controller
- Page 17 – Voyants LED de vol; Couleur; Clignotement rapide:; État des voyants LED de vol; État normal
- Page 20 – Autel Explorer app
- Page 21 – Description; Installation des hélices; Démontage des hélices
- Page 23 – ou
- Page 29 – Farbe; Abwechselndes Blinken:; Status-LEDs des Fluggeräts; Normaler Status
- Page 32 – Autel Explorer App
- Page 33 – Beschreibung; Montage der Propeller
- Page 34 – Vorbereitung der Fernsteuerung
- Page 35 – oder
- Page 37 – Fluggerät; Fernsteuerung
- Page 38 – FCC and ISED Canada Compliance
- Page 39 – RF Exposure Information; FCC Specific Absorption Rate (SAR) information; ISED Specific Absorption Rate (SAR) information
QUICK START GUIDE
GUIDE DE DÉMARRAGE RAPIDE
SCHNELLSTARTANLEITUNG
Series V3
"Loading the manual" means you need to wait until the file loads and becomes available for online reading. Some manuals are very large, and the time they take to appear depends on your internet speed.
Summary
4 3. FLIGHT LED INDICATIONS A LED indicator is located on the end of each aircraft arm. The front LEDs will light up solid red to help you identify the direction of the aircraft's nose. The rear LEDs will display the current flight status of the aircraft. The chart below shows the meaning of each st...
8 8. PROPELLERS Because the propellers come attached to the aircraft, the following instructions apply if you need to reinstall propellers. Lock Direction: Fasten the propeller by rotating it as indicated. Unlock Direction: Unfasten the propeller by rotating is as indicated. LEGEND • Attaching the P...
9 9.PREPARING THE CONTROLLER (1) Unfold the antenna, detach the stick heads on the back of the controller handle, and screw them into the corresponding screw holes on both sides of the screen. (2) Adjust the antenna angle, and when the antenna and the back of the controller are at the angle of 180 o...