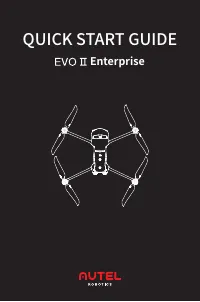
Page 3 - Contents; APP
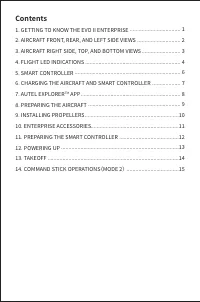
Contents �. GETTING TO KNOW THE EVO II ENTERPRISE�. AIRCRAFT FRONT, REAR, AND LEFT SIDE VIEWS�. AIRCRAFT RIGHT SIDE, TOP, AND BOTTOM VIEWS�. FLIGHT LED INDICATIONS�. SMART CONTROLLER�. CHARGING THE AIRCRAFT AND SMART CONTROLLER�. AUTEL EXPLORER TM APP �. PREPARING THE AIRCRAFT�. INSTALLING PROPELLER...
Page 4 - GETTING TO KNOW THE EVO II ENTERPRISE; IMPORTANT; �. Please consult all reviewable documentation before
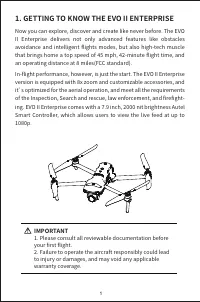
1. GETTING TO KNOW THE EVO II ENTERPRISE Now you can explore, discover and create like never before. The EVO II Enterprise delivers not only advanced features like obstacles avoidance and intelligent flights modes, but also high-tech muscle that brings home a top speed of �� mph, ��-minute flight time...
Page 7 - FLIGHT INDICATION LIGHT; Bottom View; Indicator Key:; R ‒ Red Color
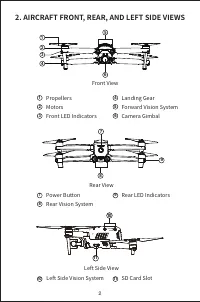
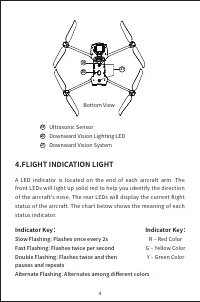
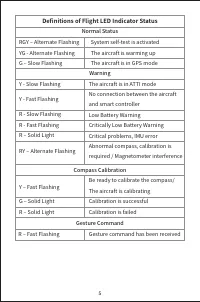
4 21 20 19 19 20 21 4.FLIGHT INDICATION LIGHT A LED indicator is located on the end of each aircraft arm. The front LEDs will light up solid red to help you identify the direction of the aircraft's nose. The rear LEDs will display the current flight status of the aircraft. The chart below shows the m...
Page 8 - Definitions of Flight LED Indicator Status; RY ‒ Alternate Flashing
Gesture Command 5 Normal Status Warning Compass Calibration Definitions of Flight LED Indicator Status RGY ‒ Alternate FlashingYG - Alternate FlashingG ‒ Slow Flashing Y - Slow Flashing Y - Fast Flashing R - Slow FlashingR - Fast FlashingR ‒ Solid Light RY ‒ Alternate Flashing The aircraft is in ATTI...
Page 10 - Rear View; CHARGING THE AIRCRAFT AND SMART CONTROLLER
7 ⑭ Battery Indicator⑮ Antennas⑯ Touch Screen ⑰ Pause Button⑱ Go Home Button⑲ Microphone 20 21 22 23 24 ⑳ Sound Speaker㉑ Tripod Mount㉒ Air Vent ㉓ Bottom Hook㉔ Protection Case Rear View 6. CHARGING THE AIRCRAFT AND SMART CONTROLLER (�) Aircraft Battery: Plug the charging connector into the battery's ...
Page 11 - NOTE
8 (�) Smart Controller: Open the protector on the USB port and plug in the provided charging cable. NOTE · Always fully charge the aircraft and smart controller battery before flying. · It takes approximately �� minutes to fully charge the aircraft battery, and ��� minutes to charge the smart control...
Page 12 - PREPARING THE AIRCRAFT; (�)Before powering on the aircraft, please remove the gimbal
9 8. PREPARING THE AIRCRAFT (�)Before powering on the aircraft, please remove the gimbal guard. Slowly pull it away from the aircraft as shown below. (�) Unfold the arms and propellers IMPORTANT Power off the aircraft before folding the arms. Fold in the rear arms and propellers first, and then the fr...
Page 13 - INSTALLING NEW PROPELLERS; must be undamaged and firmly attached.
10 9. INSTALLING NEW PROPELLERS Because the propellers come attached to the aircraft, the following instructions apply if you need to reinstall propellers. Propellers must be undamaged and firmly attached. · Attaching the Propellers (�)Verify that the aircraft is powered off.(�)Locate and match the pr...
Page 14 - ENTERPRISE ACCESSORIES
11 WARNING Power off the aircraft before attaching or detaching propellers. IMPORTANT Wear protective gloves when attaching or detaching propellers. 10. ENTERPRISE ACCESSORIES The EVO II Enterprise can be equipped with accessories for different applications.Optional accessories: Spotlight, Loudspeaker...
Page 15 - PREPARING THE SMART CONTROLLER; (�) Unfold the antenna, detach the stick heads on the back of the
11.PREPARING THE SMART CONTROLLER (�) Unfold the antenna, detach the stick heads on the back of the smart controller handle, and screw them into the corresponding screw holes on both sides of the screen. 12 · Detach the accessory (�)Please ensure the aircraft is powered off.(�)Lose the screws on both...
Page 17 - (�)Place aircraft on a level surface, Stand well clear of the rear
14 Hold the Takeoff/Landing Button for �s Push the Left Command Stick slowly upward (Mode �) 13. TAKEOFF (�)Place aircraft on a level surface, Stand well clear of the rear of the aircraft. (�)Start the motors by holding both command sticks for two seconds in the one of these positions as shown below:...
Page 18 - COMMAND STICK CONTROLS(MODE 2)
Left Command Stick Right Command Stick 14. COMMAND STICK CONTROLS(MODE 2) Left Side View Top View Top View Ascend Left Side View Top View Top View Rear View Rear View Descend Nose Rotates Left Nose Rotates Right Upward Downward Move Left Move Left Left Right Forward Backward Move Right Move Right Fo...