Page 3 - Intellectual Property
Intellectual Property All Intellectual Property, as defined below, owned by or which is otherwise the property of Samsung or its respective suppliers relating to the SAMSUNG Phone, including but not limited to, accessories, parts, or software relating there to (the “Phone System”), is proprietary to...
Page 4 - Disclaimer of Warranties Exclusion of Liability
Disclaimer of Warranties; Exclusion of Liability EXCEPT AS SET FORTH IN THE EXPRESS WARRANTY CONTAINED ON THE WARRANTY PAGE ENCLOSED WITH THE PRODUCT, THE PURCHASER TAKES THE PRODUCT "AS IS", AND SAMSUNG MAKES NO EXPRESS OR IMPLIED WARRANTY OF ANY KIND WHATSOEVER WITH RESPECT TO THE PRODUCT,...
Page 7 - Table of Contents
Table of Contents 7 Ta ble of Con tents Table of Contents Section 1: Getting Started ............................... 11 Activating Your Phone .................................................... 12Setting Up Your Voicemail .............................................. 12Understanding this User Manu...
Page 11 - Section 1: Getting Started; Topics Covered
Section 1: Getting Started 11 Section 1 Section 1: Getting Started Topics Covered • Activating your phone • Setting Up Voicemail • Understanding this User Manual This section allows you to start using your phone by activating your service, setting up your voice mail, and getting an understanding of ...
Page 12 - Activating Your Phone; If you have; upgraded; your phone to the i830 from an; new; Verizon Wireless customer and the; MY ACCOUNT; Setting Up Your Voicemail
12 Section 1 Activating Your Phone If you have upgraded your phone to the i830 from an existing Verizon Wireless phone, you will need to call Verizon Wireless to have it activated and move your existing mobile number to your new Samsung i830 Global phone. If you are a new Verizon Wireless customer a...
Page 13 - Set up Voicemail
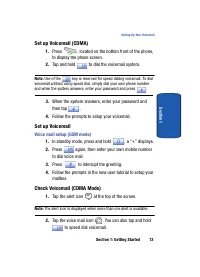
Section 1: Getting Started 13 Setting Up Your Voicemail Section 1 Set up Voicemail (CDMA) 1. Press , located on the bottom front of the phone, to display the phone screen. 2. Tap and hold to dial the voicemail system. Note: Use of the key is reserved for speed dialing voicemail. To dial voicemail wi...
Page 14 - Voice Mail; Understanding this User Manual
14 Section 1 3. Tap the Voice Mail button to connect. 4. When the voicemail system connects, enter your password and then tap . 5. Press to listen to your messages. Check Voicemail (GSM Mode) 1. In standby mode, press and hold the soft key or dial + and your own mobile number to dial voicemail. Afte...
Page 15 - Section 2: Understanding Your Phone
Section 2: Understanding Your Phone 15 Section 2 Section 2: Understanding Your Phone Topics Covered • Features of Your Phone • Front View of Your Phone • Closed View of Your Phone • Key Features and Command Keys • Locking Your Samsung SCH-i830 • Display Icons • Installing Your SIM Card • Battery Thi...
Page 16 - Features of Your Phone; Key Features of the SCH-i830
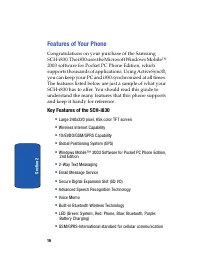
16 Section 2 Features of Your Phone Congratulations on your purchase of the Samsung SCH-i830. The i830 uses the Microsoft Windows Mobile™ 2003 software for Pocket PC Phone Edition, which supports thousands of applications. Using ActiveSync®, you can keep your PC and i830 synchronized at all times. T...
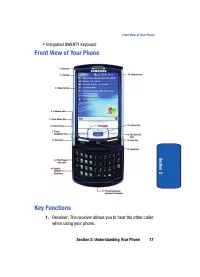
Page 17 - Front View of Your Phone
Section 2: Understanding Your Phone 17 Front View of Your Phone Section 2 • Integrated QWERTY Keyboard Front View of Your Phone Key Functions 1. Receiver: The receiver allows you to hear the other caller when using your phone.
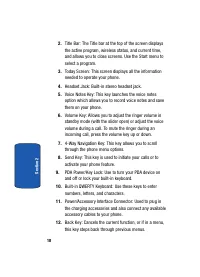
Page 20 - Closed View of Your Phone
20 Section 2 Closed View of Your Phone Key Functions 1. IrDA/LED: Used to exchange data and information between your phone and another device using infrared signaling. Also indicates when certain features are active on your phone such as Bluetooth wireless technology. 2. Context Menu Key: Launches m...
Page 21 - Command Keys; Powering On; To power up the i830, press the; until; Your Pocket PC’s Keypad
Section 2: Understanding Your Phone 21 Command Keys Section 2 3. Calendar Key: Launches your Calendar feature when selected. 4. Reset Button: Resets your phone and ends all applications currently running. 5. Microphone: The Microphone allows other callers to hear you clearly when you speak to them. ...
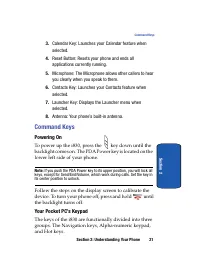
Page 22 - Located on both; Send Key; Press; Back Key; Press the; Navigation/Action Key
22 Section 2 1. 4-Way Navigation Key : Access and scroll through menus and lists, confirm changes that you’ve entered, and interact with menus that appear in the display. 2. Built-in QWERTY Keyboard: Enter text, numbers, and symbols. 3. Hot keys: Located on both sides of the SCH-i830 Pocket PC. Used...
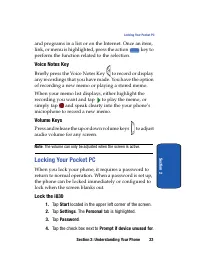
Page 23 - Voice Notes Key; Locking Your Pocket PC; Tap; located in the upper left corner of the screen.; Settings; Tap; Password; Tap the check box next to; Prompt if device unused for
Section 2: Understanding Your Phone 23 Locking Your Pocket PC Section 2 and programs in a list or on the Internet. Once an item, link, or menu is highlighted, press the action key to perform the function related to the selection. Voice Notes Key Briefly press the Voice Notes Key to record or display...
Page 24 - To unlock your phone:; Password Hint
24 Section 2 5. Tap the drop down arrow to select the amount of unused time before you are prompted for a password. 6. Select one of the following options: • Simple 4 digit • Strong alphanumeric 7. Tap the Password box and enter the password you want. 8. Tap , then tap Yes to confirm. Unlock the i83...
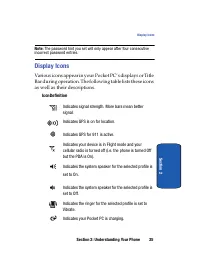
Page 25 - Display Icons; IconDefinition
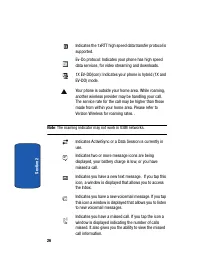
Section 2: Understanding Your Phone 25 Display Icons Section 2 Note: The password hint you set will only appear after four consecutive incorrect password entries. Display Icons Various icons appear in your Pocket PC’s displays or Title Bar during operation. The following table lists these icons as w...
Page 27 - Intalling Your SIM Card
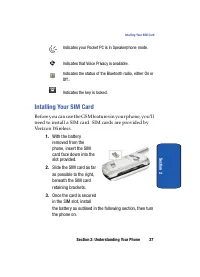
Section 2: Understanding Your Phone 27 Intalling Your SIM Card Section 2 Indicates your Pocket PC is in Speakerphone mode. Indicates that Voice Privacy is available. Indicates the status of the Bluetooth radio, either On or Off.. Indicates the key is locked. Intalling Your SIM Card Before you can us...
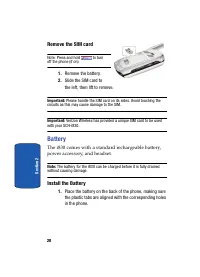
Page 28 - Remove the SIM card; Battery; Install the Battery
28 Section 2 Remove the SIM card Note: Press and hold to turn off the phone (if on). 1. Remove the battery. 2. Slide the SIM card to the left, then lift to remove. Important: Please handle the SIM card on its sides. Avoid touching the circuits as this may cause damage to the SIM. Important: Verizon ...
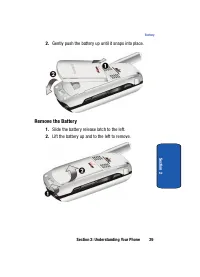
Page 29 - Gently push the battery up until it snaps into place.; Remove the Battery; Slide the battery release latch to the left.
Section 2: Understanding Your Phone 29 Battery Section 2 2. Gently push the battery up until it snaps into place. Remove the Battery 1. Slide the battery release latch to the left. 2. Lift the battery up and to the left to remove.
Page 30 - Charge the Battery; Checking Battery Charge; To perform a battery check using the drop down menu:; Battery Capacity
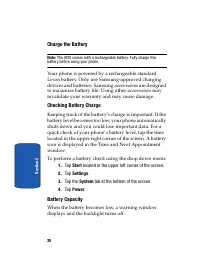
30 Section 2 Charge the Battery Note: The i830 comes with a rechargeable battery. Fully charge this battery before using your phone. Your phone is powered by a rechargeable standard Li-ion battery. Only use Samsung-approved charging devices and batteries. Samsung accessories are designed to maximize...
Page 33 - Section 3: Call Functions
Section 3: Call Functions 33 Sect ion 3 Section 3: Call Functions Topics Covered • Making a Call • Phone Modes • Answering a Call • Using the Speakerphone • Your Phone Number • Call Log • Roaming • TTY • VoiceSignal This section describes how to make or answer calls. It also includes the features an...
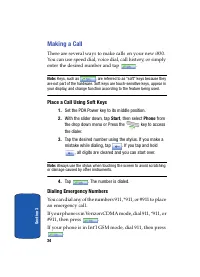
Page 34 - Making a Call; Place a Call Using Soft Keys; Dialing Emergency Numbers; If your phone is in Int’l GSM mode, dial 911, then press
34 Sect ion 3 Making a Call There are several ways to make calls on your new i830. You can use speed dial, voice dial, call history, or simply enter the desired number and tap . Note: Keys, such as , are referred to as “soft” keys because they are not part of the hardware. Soft keys are touch-sensit...
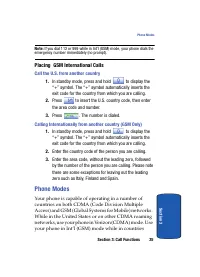
Page 35 - Placing GSM International Calls; Calling Internationally from another country (GSM Only); Phone Modes
Section 3: Call Functions 35 Phone Modes Sect ion 3 Note: If you dial 112 or 999 while in Int’l (GSM) mode, your phone dials the emergency number immediately (no prompt). Placing GSM International Calls Call the U.S. from another country 1. In standby mode, press and hold to display the “+” symbol. ...
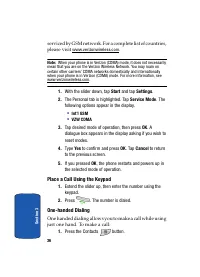
Page 36 - Int’l GSM; Place a Call Using the Keypad
36 Sect ion 3 serviced by GSM network. For a complete list of countries, please visit www.verizonwireless.com . Note: When your phone is in Verizon (CDMA) mode, it does not necessarily mean that you are on the Verizon Wireless Network. You may roam on certain other carriers’ CDMA networks domestical...
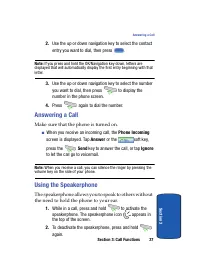
Page 37 - Answering a Call; Make sure that the phone is turned on.; Phone Incoming; Using the Speakerphone
Section 3: Call Functions 37 Answering a Call Sect ion 3 2. Use the up or down navigation key to select the contact entry you want to dial, then press . Note: If you press and hold the OK/Navigation key down, letters are displayed that will automatically display the first entry beginning with that l...
Page 38 - Display Your Phone Number; To access the Call History menu, follow these steps:; Place a Call Using Call History
38 Sect ion 3 Display Your Phone Number 1. Tap Start , then select Phone from the drop down menu. 2. Tap Tools , then select Options . 3. The Settings screen displays with your phone number at the top of the screen. 4. Tap to exit. Call History When a call is received, made, or missed a record of th...
Page 39 - Call History Options; To delete call history entries:
Section 3: Call Functions 39 Call History Sect ion 3 2. Tap the drop down arrow in the upper left corner and select the desired call log list. 3. Tap the phone icon located to the left of the entry to make a call. 4. When finished, tap . Call History Options Call log options allows you to view the c...
Page 40 - Send Message using Call History; To send a new text message from a call history entry:
40 Sect ion 3 1. From the phone screen, tap . 2. Tap the drop down arrow and select the desired call history list you want. 3. To delete a call from the list, tap and hold the entry you want to delete, then tap Delete from the pop-up menu. 4. Tap Yes to confirm the deletion, then tap to exit. 5. To ...
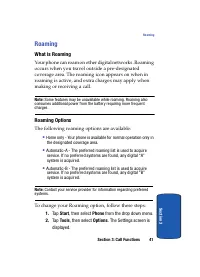
Page 41 - Roaming; What is Roaming; Roaming Options; The following roaming options are available:; To change your Roaming option, follow these steps:; from the drop down menu.; Tools; . The Settings screen is
Section 3: Call Functions 41 Roaming Sect ion 3 Roaming What is Roaming Your phone can roam on other digital networks. Roaming occurs when you travel outside a pre-designated coverage area. The roaming icon appears on when in roaming is active, and extra charges may apply when making or receiving a ...
Page 42 - Service; TTY; Save; VoiceSignal
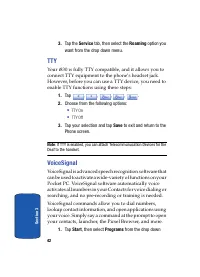
42 Sect ion 3 3. Tap the Service tab, then select the Roaming option you want from the drop down menu. TTY Your i830 is fully TTY compatible, and it allows you to connect TTY equipment to the phone’s headset jack. However, before you can use a TTY device, you need to enable TTY functions using these...
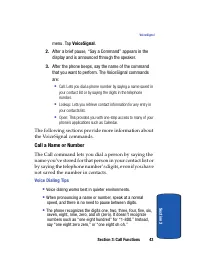
Page 43 - Call a Name or Number; Voice Dialing Tips
Section 3: Call Functions 43 VoiceSignal Sect ion 3 menu. Tap VoiceSignal . 2. After a brief pause, “Say a Command” appears in the display and is announced through the speaker. 3. After the phone beeps, say the name of the command that you want to perform. The VoiceSignal commands are: • Call: Lets ...
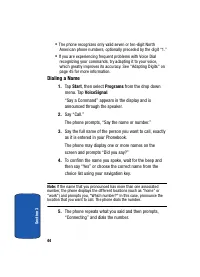
Page 44 - Dialing a Name; from the drop down; The phone prompts, “Say the name or number.”
44 Sect ion 3 • The phone recognizes only valid seven or ten-digit North American phone numbers, optionally preceded by the digit “1.” • If you are experiencing frequent problems with Voice Dial recognizing your commands, try adapting it to your voice, which greatly improves its accuracy. See "A...
Page 45 - Digit Dialing; Adapting Digits
Section 3: Call Functions 45 VoiceSignal Sect ion 3 Digit Dialing 1. Tap Start , then select Programs from the drop down menu. Tap VoiceSignal . “Say a Command” appears in the display and is announced through the speaker. 2. Say “Call.” The phone prompts, “Say the name or number.” 3. Pronounce the n...
Page 46 - Tips for Adapting Digit Dial; Adapt Digit Dial to Your Voice
46 Sect ion 3 Tips for Adapting Digit Dial • Adapt digits in a quiet place. • Make sure you wait for the beep before starting to speak. • Speak clearly, and say each digit distinctly. • If you make a mistake while recording a sequence of digits, or if there is an unexpected noise that spoils the rec...
Page 47 - Reset Digit Dial Adaptation; Looking up Contacts
Section 3: Call Functions 47 VoiceSignal Sect ion 3 If you say “No,” the phone prompts you to pronounce the digits again. Wait for the beep and then re-record. Repeat this step until you’re satisfied with the recording. 8. After confirming that a recording sounds ok, repeat the recording process wit...
Page 48 - Opening Applications
48 Sect ion 3 menu. Tap VoiceSignal . The phone prompts, “Say a command.” 2. Say “Lookup” followed by the name of a person in your Contacts list. After you say a name, you may be prompted, “Did you say?” followed by the first of up to three names. To confirm a name, wait for the beep and then say “Y...
Page 49 - Section 4: Menu Navigation
Sect ion 4 Section 4: Menu Navigation 49 Section 4: Menu Navigation Topics Covered • Navigating your PDA • Menu Types • Launcher • Task Manager This section explains the menu navigation for your phone. It also includes a description of the Launcher and Task Manager applications included with your Sa...
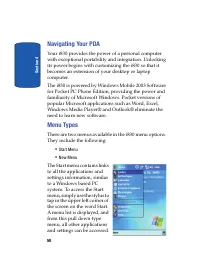
Page 50 - Navigating Your PDA
Sect ion 4 50 Navigating Your PDA Your i830 provides the power of a personal computer with exceptional portability and integration. Unlocking its power begins with customizing the i830 so that it becomes an extension of your desktop or laptop computer. The i830 is powered by Windows Mobile 2003 Soft...
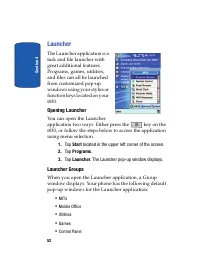
Page 52 - Opening Launcher; key on the; Programs; Launcher; Launcher Groups
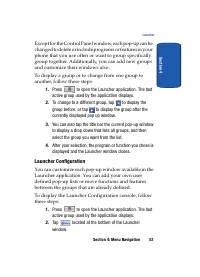
Sect ion 4 52 Launcher The Launcher application is a task and file launcher with great additional features. Programs, games, utilities, and files can all be launched from customized pop-up windows using your stylus or function keys located on your i830. Opening Launcher You can open the Launcher app...
Page 53 - Launcher Configuration
Section 4: Menu Navigation 53 Launcher Sect ion 4 Except for the Control Panel window, each pop-up can be changed to delete or include programs or features in your phone that you use often or want to group specifically group together. Additionally, you can add new groups and customize their windows ...
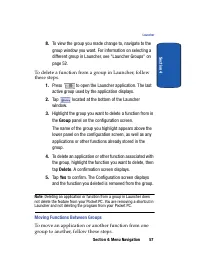
Page 54 - Adding and Deleting Launcher Groups; Delete
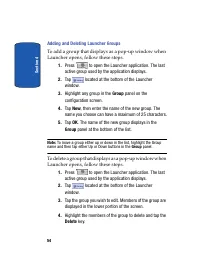
Sect ion 4 54 Adding and Deleting Launcher Groups To add a group that displays as a pop-up window when Launcher opens, follow these steps. 1. Press to open the Launcher application. The last active group used by the application displays. 2. Tap located at the bottom of the Launcher window. 3. Highli...
Page 56 - New
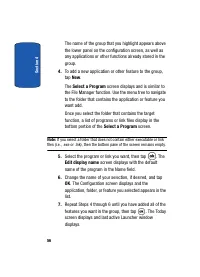
Sect ion 4 56 The name of the group that you highlight appears above the lower panel on the configuration screen, as well as any applications or other functions already stored in the group. 4. To add a new application or other feature to the group, tap New . The Select a Program screen displays and ...
Page 57 - Moving Functions Between Groups
Section 4: Menu Navigation 57 Launcher Sect ion 4 8. To view the group you made change to, navigate to the group window you want. For information on selecting a different group in Launcher, see "Launcher Groups" on page 52. To delete a function from a group in Launcher, follow these steps. 1...
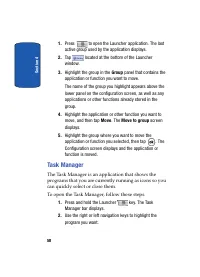
Page 58 - Task Manager; To open the Task Manager, follow these steps:
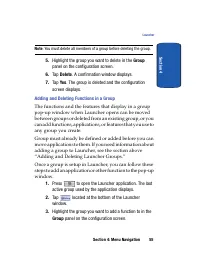
Sect ion 4 58 1. Press to open the Launcher application. The last active group used by the application displays. 2. Tap located at the bottom of the Launcher window. 3. Highlight the group in the Group panel that contains the application or function you want to move. The name of the group you highli...
Page 61 - Section 5: Entering Text
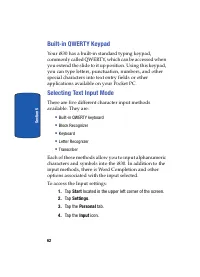
Section 5: Entering Text 61 Section 5 Section 5: Entering Text Topics Covered • Built-in QWERTY Keyboard • Selecting Text Input Mode • Word Completion • Text Entering Options This section outlines how to select the desired text input mode when entering characters into your Samsung SCH-i830. This sec...
Page 62 - Built-in QWERTY Keypad; To access the Input settings:; Personal; Tap the; Input
62 Section 5 Built-in QWERTY Keypad Your i830 has a built-in standard typing keypad, commonly called QWERTY, which can be accessed when you extend the slide to it up position. Using this keypad, you can type letters, punctuation, numbers, and other special characters into text entry fields or other ...
Page 63 - Block Recognizer; Letter Recognizer
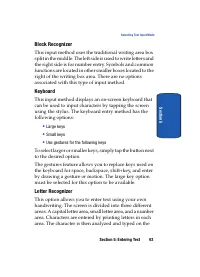
Section 5: Entering Text 63 Selecting Text Input Mode Section 5 Block Recognizer This input method uses the traditional writing area box split in the middle. The left side is used to write letters and the right side is for number entry. Symbols and common functions are located in other smaller boxes...
Page 64 - Transcriber
64 Section 5 screen automatically. The following options are associated with this method: • Quick stroke • Right to left crossbar • Allow accented characters Transcriber The transcriber option is similar to the letter recognizer, except instead of entering characters into a designated area, you can ...
Page 65 - Word Completion; To access the Word Completion settings:; Text Entering Options
Section 5: Entering Text 65 Word Completion Section 5 • Recognition start time - Allows you to set the time of recognition between new writings. Word Completion Word completion settings determine if words automatically display after entering a defined number of characters on the screen. The followin...
Page 66 - To access the Options settings:
66 Section 5 • Voice recording format • Default zoom level for writing • Default zoom level for typing • Capitalize first letter of sentence • Scroll upon reaching the last line To access the Options settings: 1. Tap Start located in the upper left corner of the screen. 2. Tap Settings . 3. Tap the ...
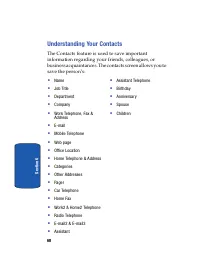
Page 68 - Understanding Your Contacts
68 Section 6 Understanding Your Contacts The Contacts feature is used to save important information regarding your friends, colleagues, or business acquaintances. The contacts screen allows you to save the person’s: • Name • Job Title • Department • Company • Work Telephone, Fax & Address • E-ma...
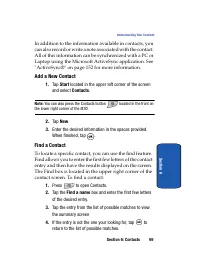
Page 69 - Add a New Contact; Find a Contact; Find a name
Section 6: Contacts 69 Understanding Your Contacts Section 6 In addition to the information available in contacts, you can also record or write a note associated with the contact. All of this information can be synchronized with a PC or Laptop using the Microsoft ActiveSync application. See "Act...
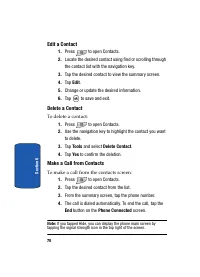
Page 70 - Edit a Contact; To make a call from the contacts screen:
70 Section 6 Edit a Contact 1. Press to open Contacts. 2. Locate the desired contact using find or scrolling through the contact list with the navigation key. 3. Tap the desired contact to view the summary screen. 4. Tap Edit . 5. Change or update the desired information. 6. Tap to save and exit. De...
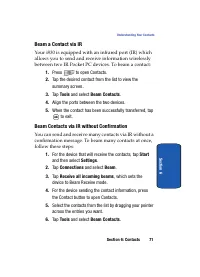
Page 71 - Beam a Contact via IR
Section 6: Contacts 71 Understanding Your Contacts Section 6 Beam a Contact via IR Your i830 is equipped with an infrared port (IR) which allows you to send and receive information wirelessly between two IR Pocket PC devices. To beam a contact: 1. Press to open Contacts. 2. Tap the desired contact f...
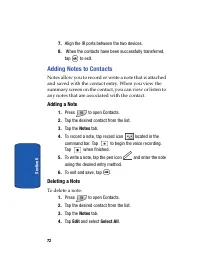
Page 72 - Adding Notes to Contacts; Adding a Note; Deleting a Note; Notes
72 Section 6 7. Align the IR ports between the two devices. 8. When the contacts have been successfully transferred, tap to exit. Adding Notes to Contacts Notes allow you to record or write a note that is attached and saved with the contact entry. When you view the summary screen on the contact, you...
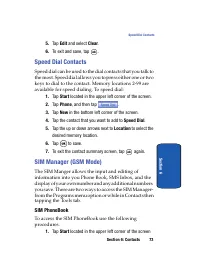
Page 73 - Speed Dial Contacts; SIM PhoneBook
Section 6: Contacts 73 Speed Dial Contacts Section 6 5. Tap Edit and select Clear . 6. To exit and save, tap . Speed Dial Contacts Speed dial can be used to the dial contacts that you talk to the most. Speed dial allows you to press either one or two keys to dial to the contact. Memory locations 2-9...
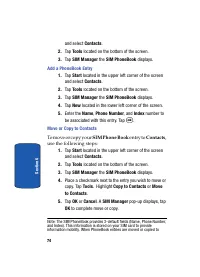
Page 74 - Add a PhoneBook Entry; To move or copy your; SIM Phone Book; entry to; Contacts; use the following steps:
74 Section 6 and select Contacts . 2. Tap Tools located on the bottom of the screen. 3. Tap SIM Manager the SIM PhoneBook displays. Add a PhoneBook Entry 1. Tap Start located in the upper left corner of the screen and select Contacts . 2. Tap Tools located on the bottom of the screen. 3. Tap SIM Man...
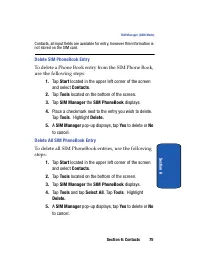
Page 75 - Delete SIM PhoneBook Entry
Section 6: Contacts 75 SIM Manager (GSM Mode) Section 6 Contacts, all input fields are available for entry, however this information is not stored on the SIM card. Delete SIM PhoneBook Entry To delete a Phone Book entry from the SIM Phone Book, use the following steps: 1. Tap Start located in the up...
Page 76 - SIM SMS
76 Section 6 SIM SMS SIM SMS stores up to 15 sent or received SMS messages on the SIM card. For text messaging procedures, see "Create and Send a Text Message" on page 81. SIM Own Number The SIM Own Number option provides the ability to store phone numbers that are used with this SIM card. I...
Page 78 - Types of Messages; To compose a new message, follow these steps:
78 Sect ion 7 Types of Messages The i830 is capable of sending E-mail and text messages. Send text messages by simply entering the phone number of the recipient when creating a new message. Messaging All incoming messages arrive and are stored in the Inbox until deleted. If memory is full, new messa...
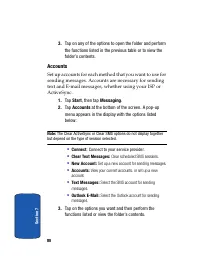
Page 80 - Accounts; Connect
80 Sect ion 7 3. Tap on any of the options to open the folder and perform the functions listed in the previous table or to view the folder’s contents. Accounts Set up accounts for each method that you want to use for sending messages. Accounts are necessary for sending text and E-mail messages, whet...
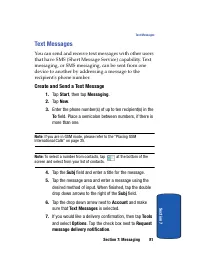
Page 81 - Text Messages; Create and Send a Text Message
Section 7: Messaging 81 Text Messages Sect ion 7 Text Messages You can send and receive text messages with other users that have SMS (Short Message Service) capability. Text messaging, or SMS messaging, can be sent from one device to another by addressing a message to the recipient's phone number. C...
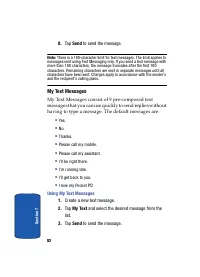
Page 82 - Send; My Text Messages; Using My Text Messages
82 Sect ion 7 8. Tap Send to send the message. Note: There is a 160-character limit for text messages. The limit applies to messages sent using Text Messaging only. If you send a text message with more than 160 characters, the message truncates after the first 160 characters. Remaining characters ar...
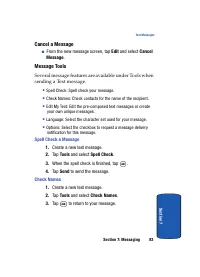
Page 83 - Cancel a Message; Spell Check a Message
Section 7: Messaging 83 Text Messages Sect ion 7 Cancel a Message ■ From the new message screen, tap Edit and select Cancel Message . Message Tools Several message features are available under Tools when sending a Text message. • Spell Check: Spell check your message. • Check Names: Check contacts f...
Page 84 - Edit My Text Messages; To edit My Text Messages, follow these steps:; and select; Edit My Text; Select the message that you want to edit.; Text Message Folders
84 Sect ion 7 Edit My Text Messages To edit My Text Messages, follow these steps: 1. Open a text message. 2. Tap Tools and select Edit My Text . 3. Select the message that you want to edit. 4. Delete the old message from the box and enter a new message. 5. Tap to save and exit. Text Message Folders ...
Page 85 - Access Text Message Folders
Section 7: Messaging 85 About E-mail Setup Sect ion 7 • Sent Items: Sent Items keeps a record of all sent messages from your device. Access Text Message Folders 1. Tap Start , and then select Messaging . 2. Tap Accounts and then select Text Messages . 3. At the top of your screen is an arrow for a d...
Page 86 - Outlook Message Folders
86 Sect ion 7 and is sent to the intended recipient(s) the next time you perform ActiveSync. 1. Tap Start , and then select Messaging . 2. Tap New and enter the E-mail address in the To field. 3. Tap the Subj field and enter a subject. 4. Tap anywhere in the message body field and enter the content ...
Page 87 - Access Outlook Message Folders
Section 7: Messaging 87 E-mail using an ISP Sect ion 7 Access Outlook Message Folders 1. Tap Start in the upper left corner of the screen, then tap Messaging . 2. Tap the drop down arrow next to Inbox . A directory of folders for Outlook and Text messages appears in the display. 3. Tap the + sign to...
Page 88 - Enter the; User name; and; Domain; and enter the domain name for your; Finish
88 Sect ion 7 6. Enter the User name and Password for your account. 7. Tap Domain and enter the domain name for your account. 8. Tap Finish .
Page 89 - Section 8: Changing Your Settings
Sect ion 8 Section 8: Changing Your Settings 89 Section 8: Changing Your Settings Topics Covered • i830 Settings • Button Settings • Sound Settings • Password Settings • Phone Settings (CDMA) • Phone Settings (GSM) This section explains how to either set or change many of the settings available on y...
Page 90 - Buttons Settings; Buttons
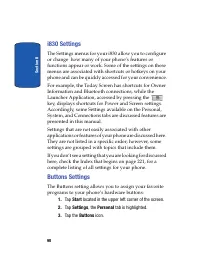
Sect ion 8 90 i830 Settings The Settings menus for your i830 allow you to configure or change how many of your phone’s features or functions appear or work. Some of the settings on these menus are associated with shortcuts or hotkeys on your phone and can be quickly accessed for your convenience. Fo...
Page 91 - Button Assignments
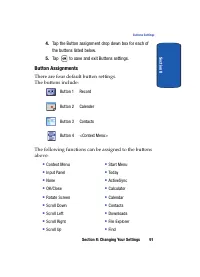
Section 8: Changing Your Settings 91 Buttons Settings Sect ion 8 4. Tap the Button assignment drop down box for each of the buttons listed below. 5. Tap to save and exit Buttons settings. Button Assignments There are four default button settings.The buttons include: Button 1 Record Button 2 Calender...
Page 92 - Sound Settings; PDA/Phone Ringer Volume
Sect ion 8 92 • Help • Internet Explorer • Jawbreaker • Launcher • Messaging • MSN Messenger • Notes • OBEX FTP • Phone • Picsel Browser • Pictures • Pocket Excel • Pocket Word • Record • Remote Control • Ringtone Manager • Solitaire • Sprite Backup • Tasks • Terminal Services Client • VoiceSignal •...
Page 93 - WOW XT Audio Processing
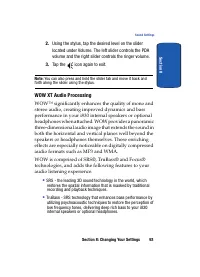
Section 8: Changing Your Settings 93 Sound Settings Sect ion 8 2. Using the stylus, tap the desired level on the slider located under Volume. The left slider controls the PDA volume and the right slider controls the ringer volume. 3. Tap the icon again to exit. Note: You can also press and hold the ...
Page 95 - CarKit Volume
Section 8: Changing Your Settings 95 Sound Settings Sect ion 8 Note: The Sound EQ setting value has changed to allow better sound effects when an earjack is used. Since buffering is used, changes that are made using this menu are real time. There can be as much as a one second delay before you hear ...
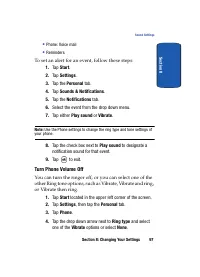
Page 96 - Event Notifications; Event sounds can be set for each of the following events:
Sect ion 8 96 To view the sounds and notifications screen, follow these steps: 1. Tap Start located in the upper left corner of the screen. 2. Tap Settings . 3. Tap the Personal tab. 4. Tap Sounds & Notifications . 5. Select the check boxes for the events, programs, or notifications you want to ...
Page 97 - To set an alert for an event, follow these steps:; Turn Phone Volume Off
Section 8: Changing Your Settings 97 Sound Settings Sect ion 8 • Phone: Voice mail • Reminders To set an alert for an event, follow these steps: 1. Tap Start . 2. Tap Settings . 3. Tap the Personal tab. 4. Tap Sounds & Notifications . 5. Tap the Notifications tab. 6. Select the event from the dr...
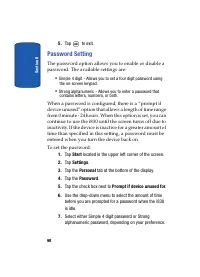
Page 98 - Password Setting
Sect ion 8 98 5. Tap to exit. Password Setting The password option allows you to enable or disable a password. The available settings are: • Simple 4 digit - Allows you to set a four digit password using the on-screen keypad. • Strong alphanumeric - Allows you to enter a password that contains lette...
Page 99 - Yes; to confirm or; Phone Tab
Section 8: Changing Your Settings 99 Phone Settings (CDMA) Sect ion 8 8. Enter a 4 digit password or alphanumeric password in the text box next Password . 9. Tap . You’re prompted to confirm the password change. Tap Yes to confirm or No to return to the Settings-Personal screen. Phone Settings (CDMA...
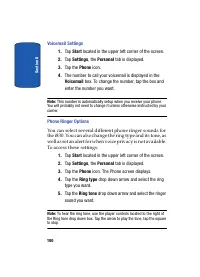
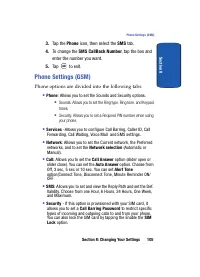
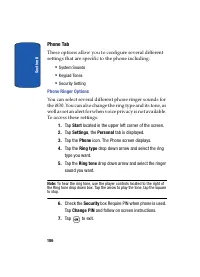
Page 100 - Voicemail Settings; Phone Ringer Options
Sect ion 8 100 Voicemail Settings 1. Tap Start located in the upper left corner of the screen. 2. Tap Settings , the Personal tab is displayed. 3. Tap the Phone icon. 4. The number to call your voicemail is displayed in the Voicemail box. To change the number, tap the box and enter the number you wa...
Page 101 - Tone Length; Option Tab
Section 8: Changing Your Settings 101 Phone Settings (CDMA) Sect ion 8 6. Tap the check box next to Notify me when voice privacy is unavailable if you want to know this. 7. Tap to exit. Tone Length When dialing a phone number, tones are emitted each time a key is tapped. These tones can be modified ...
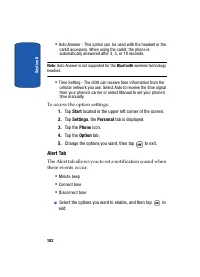
Page 102 - To access the option settings:; Alert Tab
Sect ion 8 102 • Auto Answer - This option can be used with the headset or the carkit accessory. When using the carkit, the phone is automatically answered after 3, 5, or 10 seconds. Note : Auto Answer is not supported for the Bluetooth wireless technology headset. • Time Setting - The i830 can rece...
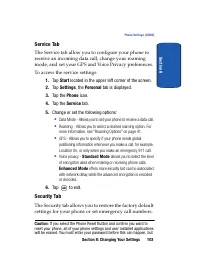
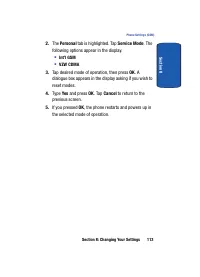
Page 103 - Service Tab; To access the service settings:; Standard Mode; Enhanced Mode; Security Tab
Section 8: Changing Your Settings 103 Phone Settings (CDMA) Sect ion 8 Service Tab The Service tab allow you to configure your phone to receive an incoming data call, change your roaming mode, and set your GPS and Voice Privacy preferences. To access the service settings: 1. Tap Start located in the...
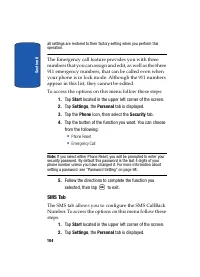
Page 104 - To access the options on this menu follow these steps:; SMS Tab
Sect ion 8 104 all settings are restored to their factory setting when you perform this operation. The Emergency call feature provides you with three numbers that you can assign and edit, as well as the three 911 emergency numbers, that can be called even when your phone is in lock mode. Although th...
Page 105 - Phone; Phone options are divided into the following tabs:
Section 8: Changing Your Settings 105 Phone Settings (GSM) Sect ion 8 3. Tap the Phone icon, then select the SMS tab. 4. To change the SMS CallBack Number , tap the box and enter the number you want. 5. Tap to exit. Phone Settings (GSM) Phone options are divided into the following tabs: • Phone : Al...
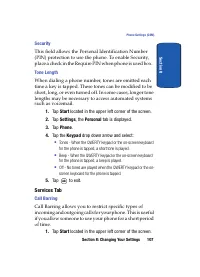
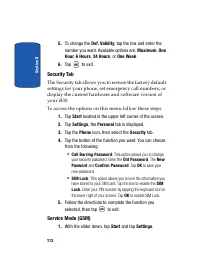
Page 107 - Security; Services Tab; Call Barring
Section 8: Changing Your Settings 107 Phone Settings (GSM) Sect ion 8 Security This field allows the Personal Identification Number (PIN) protection to use the phone. To enable Security, place a check in the Require PIN when phone is used box. Tone Length When dialing a phone number, tones are emitt...
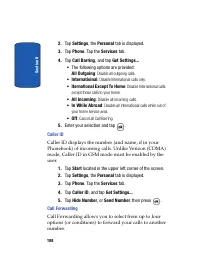
Page 108 - Caller ID
Sect ion 8 108 2. Tap Settings , the Personal tab is displayed. 3. Tap Phone . Tap the Services tab. 4. Tap Call Barring , and tap Get Settings... • The following options are provided: All Outgoing : Disable all outgoing calls. • Internatioinal : Disable International calls only. • Iternational Exce...
Page 109 - Call Waiting
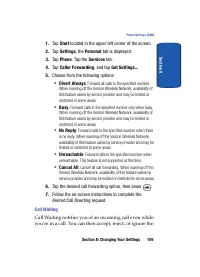
Section 8: Changing Your Settings 109 Phone Settings (GSM) Sect ion 8 1. Tap Start located in the upper left corner of the screen. 2. Tap Settings , the Personal tab is displayed. 3. Tap Phone . Tap the Services tab. 4. Tap Caller Forwarding , and tap Get Settings... 5. Choose from the following opt...
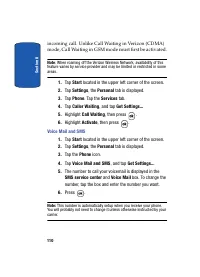
Page 110 - Voice Mail and SMS
Sect ion 8 110 incoming call. Unlike Call Waiting in Verizon (CDMA) mode, Call Waiting in GSM mode must first be activated. Note : When roaming off the Verizon Wireless Network, availability of this feature varies by service provider and may be limited or restricted in some areas. 1. Tap Start locat...
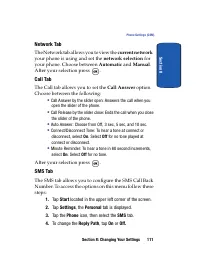
Page 111 - Network Tab; current network; Call Tab; Call Answer; On
Section 8: Changing Your Settings 111 Phone Settings (GSM) Sect ion 8 Network Tab The Network tab allows you to view the current network your phone is using and set the network selection for your phone. Choose between Automatic and Manual . After your selection press . Call Tab The Call tab allows y...
Page 115 - Section 9: Personal Digital Assistant
Section 9: Personal Digital Assistant 115 Section 9 Section 9: Personal Digital Assistant Topics Covered • Your Personal Digital Assistant • Picsel Browser • Microsoft Pocket Applications • Add Dormant Mode • Windows Media Player • Sprite Backup Utility • Application Management • Memory Adjustments ...
Page 116 - Your Personal Digital Assistant; Launching the Picsel Browser; To launch the Picsel Browser, follow these steps:; To view the main menu, tap on the Picsel logo
116 Section 9 Your Personal Digital Assistant The i830 is an integrated communication device with the power of a mobile phone and the intelligence of a PC. The i830 is loaded with familiar Microsoft® pocket applications, like Pocket Outlook, Pocket Internet Explorer, MSN® Messenger, Windows® Media™ ...
Page 117 - Navigating Picsel Browser
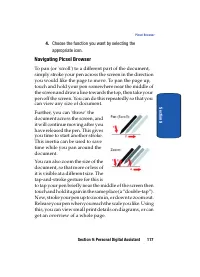
Section 9: Personal Digital Assistant 117 Picsel Browser Section 9 4. Choose the function you want by selecting the appropriate icon. Navigating Picsel Browser To pan (or 'scroll') to a different part of the document, simply stroke your pen across the screen in the direction you would like the page ...
Page 118 - Views; Reflow Layout
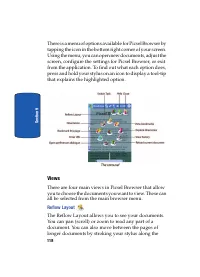
118 Section 9 There is a menu of options available for Picsel Browser by tapping the icon in the bottom right corner of your screen. Using the menu, you can open new documents, adjust the screen, configure the settings for Picsel Browser, or exit from the application. To find out what each option do...
Page 119 - View Bookmarks
Section 9: Personal Digital Assistant 119 Picsel Browser Section 9 bottom of the screen, like turning the pages of a book. You can also rotate the document view between landscape and portrait format to suit your reading style. View Bookmarks The View Bookmarks allows you to keep track of your favori...
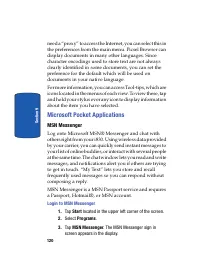
Page 120 - Microsoft Pocket Applications; MSN Messenger; Login to MSN Messenger
120 Section 9 need a “proxy” to access the Internet, you can select this in the preferences from the main menu. Picsel Browser can display documents in many other languages. Since character encodings used to store text are not always clearly identified in some documents, you can set the preference f...
Page 121 - Save password; Next
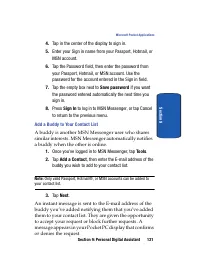
Section 9: Personal Digital Assistant 121 Microsoft Pocket Applications Section 9 4. Tap in the center of the display to sign in. 5. Enter your Sign in name from your Passport, Hotmail, or MSN account. 6. Tap the Password field, then enter the password from your Passport, Hotmail, or MSN account. Us...
Page 122 - Start a Chat Session
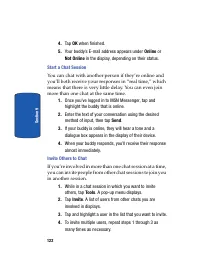
122 Section 9 4. Tap OK when finished. 5. Your buddy’s E-mail address appears under Online or Not Online in the display, depending on their status. Start a Chat Session You can chat with another person if they’re online and you’ll both receive your responses in “real time,” which means that there is...
Page 123 - View Chat Members; To view the list of members in a chat session:; End a Chat Session
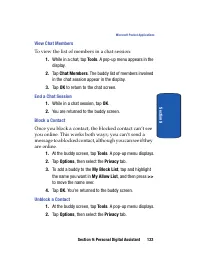
Section 9: Personal Digital Assistant 123 Microsoft Pocket Applications Section 9 View Chat Members To view the list of members in a chat session: 1. While in a chat, tap Tools . A pop-up menu appears in the display. 2. Tap Chat Members . The buddy list of members involved in the chat session appear...
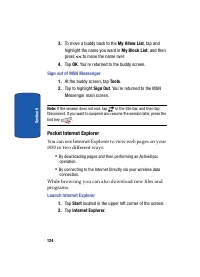
Page 124 - Sign out of MSN Messenger; Pocket Internet Explorer; Launch Internet Explorer
124 Section 9 3. To move a buddy back to the My Allow List , tap and highlight the name you want in My Block List , and then press << to move the name over. 4. Tap OK . You’re returned to the buddy screen. Sign out of MSN Messenger 1. At the buddy screen, tap Tools . 2. Tap to highlight Sign O...
Page 125 - Save Favorites
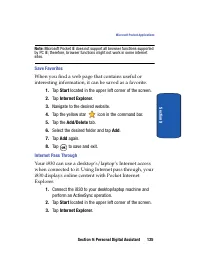
Section 9: Personal Digital Assistant 125 Microsoft Pocket Applications Section 9 Note: Microsoft Pocket IE does not support all browser functions supported by PC IE; therefore, browser functions might not work in some internet sites. Save Favorites When you find a web page that contains useful or i...
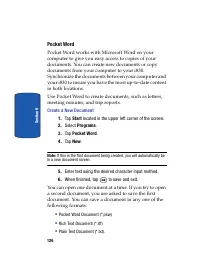
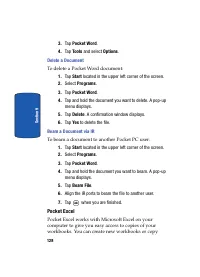
Page 126 - Pocket Word; Create a New Document
126 Section 9 Pocket Word Pocket Word works with Microsoft Word on your computer to give you easy access to copies of your documents. You can create new documents or copy documents from your computer to your i830. Synchronize the documents between your computer and your i830 to insure you have the m...
Page 127 - Attach a Recording; The following options are available in Pocket Word:; Access Pocket Word options
Section 9: Personal Digital Assistant 127 Microsoft Pocket Applications Section 9 • Word 97/2000 Document (*.doc) • Word 97/2000 Template (*.dot) Attach a Recording You can attach a recording to a word document using the Record option. To attach a recording to an existing document: 1. Tap Start loca...
Page 128 - Delete a Document; To delete a Pocket Word document:; Beam a Document via IR; To beam a document to another Pocket PC user:; Pocket Excel
128 Section 9 3. Tap Pocket Word . 4. Tap Tools and select Options . Delete a Document To delete a Pocket Word document: 1. Tap Start located in the upper left corner of the screen. 2. Select Programs . 3. Tap Pocket Word . 4. Tap and hold the document you want to delete. A pop-up menu displays. 5. ...
Page 129 - Create a New Workbook; Delete a Workbook
Section 9: Personal Digital Assistant 129 Microsoft Pocket Applications Section 9 workbooks from your computer to your i830. Synchronize workbooks between your computer and your i830 to insure that you have the most up-to-date content in both locations. Pocket Excel also provides fundamental spreads...
Page 130 - Dormant Mode; at the top of your screen.
130 Section 9 2. Select Programs . 3. Tap Pocket Excel . 4. Tap and hold the workbook you want to beam. A pop-up menu displays. 5. Tap Beam File and align the IR ports. 6. Tap when finished to exit the IR screen. Dormant Mode With your i830 you can seamlessly transition to a voice call and then resu...
Page 131 - The inactive; Windows Media Player®; Launch Media Player
Section 9: Personal Digital Assistant 131 Windows Media Player® Section 9 The inactive icon appears in the title bar, which indicates the Dormant mode is active. To cancel Dormant mode and resume your data session, select the application you were previously using. Windows Media Player® Use Microsoft...
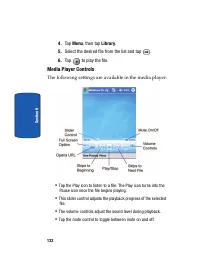
Page 132 - Menu; Select the desired file from the list and tap; Media Player Controls; The following settings are available in the media player:
132 Section 9 4. Tap Menu , then tap Library . 5. Select the desired file from the list and tap . 6. Tap to play the file. Media Player Controls The following settings are available in the media player: • Tap the Play icon to listen to a file. The Play icon turns into the Pause icon once the file be...
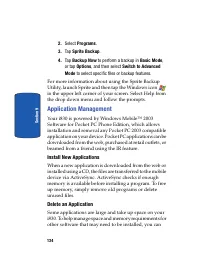
Page 133 - Sprite Backup Utility; Basic Mode and Advanced Mode; Basic Mode; To access the Sprite Backup Utility, follow these steps:
Section 9: Personal Digital Assistant 133 Sprite Backup Utility Section 9 Sprite Backup Utility Sprite Backup helps you protect the data on your Pocket PC from data loss due to hardware failure, drained battery or accidental deletion. Use Sprite Backup to create a backup copy of your Pocket PC's dat...
Page 134 - Application Management; Install New Applications
134 Section 9 2. Select Programs . 3. Tap Sprite Backup . 4. Tap Backup Now to perform a backup in Basic Mode , or tap Options , and then select Switch to Advanced Mode to select specific files or backup features. For more information about using the Sprite Backup Utility, launch Sprite and then tap...
Page 135 - Memory Adjustments; Memory Card
Section 9: Personal Digital Assistant 135 Memory Adjustments Section 9 delete any application not required for your device to operate correctly. To delete an application: 1. Tap Start located in the upper left corner of the screen. 2. Select Settings . 3. Tap the System tab. 4. Tap Remove Programs a...
Page 137 - Section 10: Personal Organizer
Section 10: Personal Organizer 137 Section 10 Section 10: Personal Organizer Topics Covered • Today Screen • Calendar • Task List • New Command • Notes • Alarm • Calculator • Active Sync The topics covered in this section allow you to schedule appointments, view the calendar, create Task lists, set ...
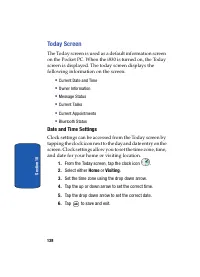
Page 138 - Today Screen; Date and Time Settings; Home
138 Section 10 Today Screen The Today screen is used as a default information screen on the Pocket PC. When the i830 is turned on, the Today screen is displayed. The today screen displays the following information on the screen: • Current Date and Time • Owner Information • Message Status • Current ...
Page 139 - Owner Information; From the Today screen, use the stylus and select “; Name; box in the Owner Information screen.
Section 10: Personal Organizer 139 Today Screen Section 10 Note: The time on the i830 handset does not automatically change when you travel to another time zone. To ensure that you don’t miss any appointments, you must change your clock setting to Visiting and then select the appropriate time zone. ...
Page 140 - Current Appointments; Tap the time in the upper right corner of the screen.; Bluetooth Status; If you tap the Bluetooth icon, the icon appears blue; Calendar; Schedule an Appointment
140 Section 10 Current Appointments To view the next upcoming appointment and battery indicator without launching the calendar or today screen: 1. Tap the time in the upper right corner of the screen. 2. The Time and Next Appointment screen is displayed. Bluetooth Status The Bluetooth Status indicat...
Page 141 - Schedule a Timed Appointment; To schedule a timed appointment for the current date:
Section 10: Personal Organizer 141 Calendar Section 10 • Timed appointments, such as birthdays and meetings, which have a specific date, start, and end time. • Untimed reminders, such as holidays, and anniversaries. These occur on a particular date but have no specific start or end times; they appea...
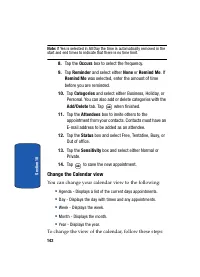
Page 142 - Change the Calendar view; You can change your calendar view to the following:; To change the view of the calendar, follow these steps:
142 Section 10 Note: If Yes is selected in All Day the time is automatically removed in the start and end times to indicate that there is no time limit. 8. Tap the Occurs box to select the frequency. 9. Tap Reminder and select either None or Remind Me . If Remind Me was selected, enter the amount of...
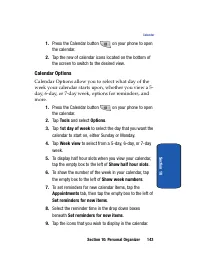
Page 143 - Calendar Options
Section 10: Personal Organizer 143 Calendar Section 10 1. Press the Calendar button on your phone to open the calendar. 2. Tap the row of calendar icons located on the bottom of the screen to switch to the desired view. Calendar Options Calendar Options allow you to select what day of the week your ...
Page 144 - Tasks List; Create a new Task
144 Section 10 10. Select Outlook E-Mail or Text Messages as the default method for sending meeting requests in the drop down box labeled Send meeting requests via . 11. Tap to save your settings and return to the calendar. Tasks List A task is something that needs to be done in a certain amount of ...
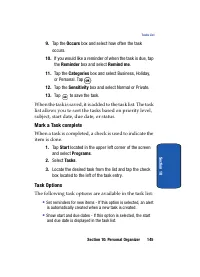
Page 145 - Mark a Task complete; The following task options are available in the task list:
Section 10: Personal Organizer 145 Tasks List Section 10 9. Tap the Occurs box and select how often the task occurs. 10. If you would like a reminder of when the task is due, tap the Reminder box and select Remind me . 11. Tap the Categories box and select Business, Holiday, or Personal. Tap . 12. T...
Page 146 - Activate the Entry Bar; Edit a Task
146 Section 10 Access Task Options 1. Tap Start located in the upper left corner of the screen and select Programs . 2. Select Tasks . 3. Tap Tools and select Options . The Task Entry Bar The task entry bar option automatically places a bar at the top of the screen to allow you to create a new task ...
Page 147 - Beam a Task via IR
Section 10: Personal Organizer 147 Tasks List Section 10 Beam a Task via IR You can beam a task to another Pocket PC using the IR port. This operation requires that both users have the Pocket PC software. To beam a task: 1. Tap Start located in the upper left corner of the screen and select Programs...
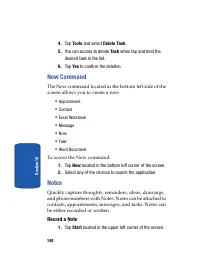
Page 148 - New Command; To access the New command:; Record a Note
148 Section 10 4. Tap Tools and select Delete Task . 5. You can access to delete Task when tap and hold the desired task in the list. 6. Tap Yes to confirm the deletion. New Command The New command located in the bottom left side of the screen allows you to create a new: • Appointment • Contact • Ex...
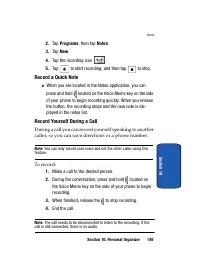
Page 149 - Record a Quick Note
Section 10: Personal Organizer 149 Notes Section 10 2. Tap Programs , then tap Notes . 3. Tap New . 4. Tap the recording icon . 5. Tap to start recording, and then tap to stop. Record a Quick Note ■ When you are located in the Notes application, you can press and hold located on the Voice Memo key o...
Page 150 - Note Options; The following options are available for Notes:
150 Section 10 5. To listen to the recording, tap the entry from the notes list. Write a Note 1. Tap New in the lower left hand corner of the screen. 2. Tap the writing icon . This is the default choice. 3. Select the character input method by tapping the arrow in the right bottom corner. 4. Compose...
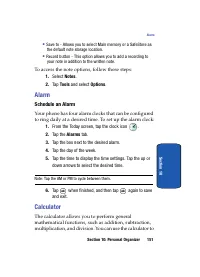
Page 151 - To access the note options, follow these steps:; Alarm; Schedule an Alarm; Alarms; Calculator
Section 10: Personal Organizer 151 Alarm Section 10 • Save to - Allows you to select Main memory or a SafeStore as the default note storage location. • Record button - This option allows you to add a recording to your note in addition to the written note. To access the note options, follow these ste...
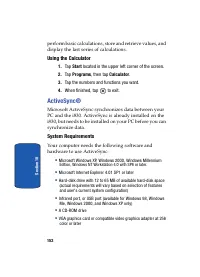
Page 152 - Using the Calculator; Tap the numbers and functions you want.; ActiveSync®; System Requirements
152 Section 10 perform basic calculations, store and retrieve values, and display the last series of calculations. Using the Calculator 1. Tap Start located in the upper left corner of the screen. 2. Tap Programs , then tap Calculator . 3. Tap the numbers and functions you want. 4. When finished, ta...
Page 153 - Install ActiveSync; Connect the Cradle
Section 10: Personal Organizer 153 Install ActiveSync Section 10 Install ActiveSync 1. Search www.microsoft.com to download the ActiveSync software on your PC. 2. Select the Start Here tab. 3. Click the Install ActiveSync 3.7 menu selection. 4. Click Install and follow the onscreen instructions. Con...
Page 154 - ActiveSync via IR
154 Section 10 2. Select how you want to synchronize data and click Next. 3. Enter a unique name for your device and click Next. 4. Select or deselect the desired applications that you wish to synchronize, then click Next. 5. Click Finish. The i830 and the PC should perform the first ActiveSync. Thi...
Page 155 - Section 11: Network Services
Section 11: Network Services 155 Sect ion 11 Section 11: Network Services Topics Covered • Call Forwarding • Three-way Calling • Call Waiting • Caller ID This section allows you to set up the network functions supported by your carrier. Some of these services may not be available due to coverage are...
Page 156 - Call Forwarding; To activate call forwarding, follow these steps:
156 Sect ion 11 Call Forwarding Call Forwarding allows you to forward all your incoming calls to another phone number, even when your phone is turned off. To activate call forwarding, follow these steps: 1. Tap . 2. Enter the area code and phone number where the incoming calls are forwarded. 3. Tap ...
Page 157 - Answering a waiting call; To block caller ID from displaying when you call another
Section 11: Network Services 157 Call Waiting Sect ion 11 and are the first one to hang up, all three calls are disconnected. Call Waiting You can answer an incoming call while on an existing call. If you are on an existing call and another call is received, a tone is heard and a call waiting messag...
Page 159 - Section 12: Bluetooth
Sect ion 12 Section 12: Bluetooth® Services 159 Section 12: Bluetooth ® Services Topics Covered • About Bluetooth Wireless Technology • Bluetooth Service Profiles & Modes • Bluetooth Bonds • Bluetooth Hands-free Device • Bluetooth OBEX FTP • Bluetooth Virtual Serial Port • ActiveSync via Bluetoo...
Page 160 - About Bluetooth Wireless Technology; Your i830 supports the following profile services:
Sect ion 12 160 About Bluetooth Wireless Technology Bluetooth wireless technology provides short range wireless communication exchange over a distance of about 30 feet without requiring a physical connection. Unlike infrared, you don't need to line up the devices to beam information using Bluetooth....
Page 161 - Bluetooth Modes; Bluetooth operates in two modes:; Turning Bluetooth On/Off
Section 12: Bluetooth® Services 161 Bluetooth Modes Sect ion 12 • HID (Human Interface Device Profile - Bluetooth keyboard only) • OBEX (Object Exchange Profile) • SPP (Serial Port Profile) • ActiveSync (Uses SPP to connect to ActiveSync on a computer) Bluetooth Modes Bluetooth operates in two modes...
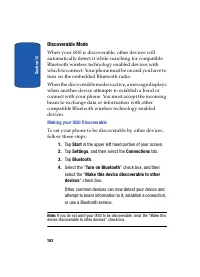
Page 162 - Discoverable Mode; Making your i830 Discoverable
Sect ion 12 162 Discoverable Mode When your i830 is discoverable, other devices will automatically detect it while searching for compatible Bluetooth wireless technology enabled devices with which to connect. Your phone must be on and you have to turn on the embedded Bluetooth radio. When the discov...
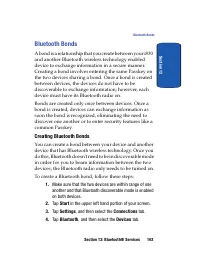
Page 163 - Bluetooth Bonds; Creating Bluetooth Bonds; To create a Bluetooth bond, follow these steps:
Section 12: Bluetooth® Services 163 Bluetooth Bonds Sect ion 12 Bluetooth Bonds A bond is a relationship that you create between your i830 and another Bluetooth wireless technology enabled device to exchange information in a secure manner. Creating a bond involves entering the same Passkey on the tw...
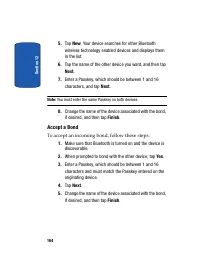
Page 164 - Accept a Bond; To accept an incoming bond, follow these steps:
Sect ion 12 164 5. Tap New . Your device searches for other Bluetooth wireless technology enabled devices and displays them in the list. 6. Tap the name of the other device you want, and then tap Next . 7. Enter a Passkey, which should be between 1 and 16 characters, and tap Next . Note: You must en...
Page 165 - Rename a Bond; Bluetooth Hands-free Device
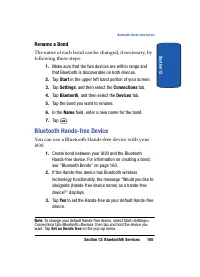
Section 12: Bluetooth® Services 165 Bluetooth Hands-free Device Sect ion 12 Rename a Bond The name of each bond can be changed, if necessary, by following these steps: 1. Make sure that the two devices are within range and that Bluetooth is discoverable on both devices. 2. Tap Start in the upper lef...
Page 166 - Using Bluetooth Hands-free Device; Last number redial; Bluetooth OBEX FTP
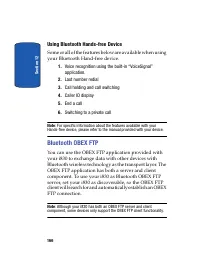
Sect ion 12 166 Using Bluetooth Hands-free Device Some or all of the features below are available when using your Bluetooth Hand-free device. 1. Voice recognition using the built-in “VoiceSignal” application. 2. Last number redial 3. Call holding and call switching 4. Caller ID display 5. End a call...
Page 167 - Bluetooth OBEX FTP Server Setting; OBEX FTP
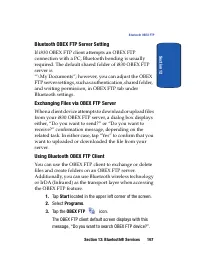
Section 12: Bluetooth® Services 167 Bluetooth OBEX FTP Sect ion 12 Bluetooth OBEX FTP Server Setting If i830 OBEX FTP client attempts an OBEX FTP connection with a PC, Bluetooth bonding is usually required. The default shared folder of i830 OBEX FTP server is“\My Documents”; however, you can adjust ...
Page 168 - Tap Yes to search for OBEX FTP servers.; OK; Bluetooth Virtual Serial Port; Setting Bluetooth Virtual Serial Port
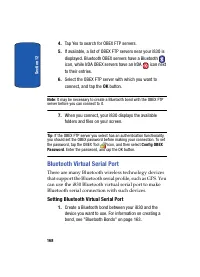
Sect ion 12 168 4. Tap Yes to search for OBEX FTP servers. 5. If available, a list of OBEX FTP servers near your i830 is displayed. Bluetooth OBEX servers have a Bluetooth icon, while IrDA OBEX servers have an IrDA icon next to their entries. 6. Select the OBEX FTP server with which you want to conn...
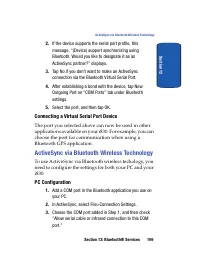
Page 169 - Connecting a Virtual Serial Port Device; ActiveSync via Bluetooth Wireless Technology; PC Configuration
Section 12: Bluetooth® Services 169 ActiveSync via Bluetooth Wireless Technology Sect ion 12 2. If the device supports the serial port profile, this message, “(Device) support synchronizing using Bluetooth. Would you like to designate it as an ActiveSync partner?” displays. 3. Tap No if you don't wa...
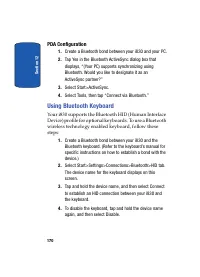
Page 170 - PDA Configuration; Create a Bluetooth bond between your i830 and your PC.; Using Bluetooth Keyboard
Sect ion 12 170 PDA Configuration 1. Create a Bluetooth bond between your i830 and your PC. 2. Tap Yes in the Bluetooth ActiveSync dialog box that displays, “(Your PC) supports synchronizing using Bluetooth. Would you like to designate it as an ActiveSync partner?” 3. Select Start>ActiveSync. 4. ...
Page 171 - Section 13: Accessories and Games
Section 13: Accessories and Games 171 Section 13 Section 13: Accessories and Games Topics Covered • Accessories • Remote Control • Ringtone Manager • Beam & SD I/O Expansion Slot • Games This section outlines the available gaming options and accessories for your phone.
Page 172 - Launch RC Program
172 Section 13 Accessories Your i830 supports many accessories that make your phone truly unique. You can use your phone as a remote control for other electronic devices, such as a TV or VCR, or you can add an optional Hands Free Kit to allow you to operate your phone while you drive, and your phone...
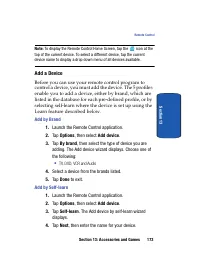
Page 173 - Add a Device; Add by Brand
Section 13: Accessories and Games 173 Remote Control Section 13 Note: To display the Remote Control Home Screen, tap the icon at the top of the current device. To select a different device, tap the current device name to display a drop down menu of all devices available. Add a Device Before you can ...
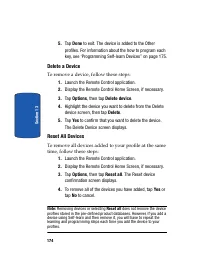
Page 175 - Programming Self-learn Devices; Launch the Remote Control application.
Section 13: Accessories and Games 175 Remote Control Section 13 Programming Self-learn Devices When you add devices using Self-learn, you must program or use the built-in learn feature to setup or teach your remote how to control a device. To use the built-in learn feature, follow these steps: 1. La...
Page 176 - Adding Keys; Options
176 Section 13 Adding Keys Once you have performed the steps in "Programming Self-learn Devices" on page 175 above, you can add other keys or functions to a profile. Note: If you try to add keys before programming a device profile, then the self-learn feature automatically starts when you se...
Page 177 - Delete key; Ringtone Manager
Section 13: Accessories and Games 177 Ringtone Manager Section 13 2. Tap Delete key . A pop up message displays that says to tap the key you want to delete. 3. Tap Yes to confirm that you want to remove the key. The key is removed and the device profile displays. Moving Keys To move a key in a profi...
Page 178 - Launching Ringtone Manager; To launch Ringtone Manager, follow these steps:; Previewing Ringtones; To preview a stored ringtone, follow these steps:; Play
178 Section 13 – XMF, Mobile XMF – Mobile DLS • Legacy Types: – RMF – iMelody, RTTTL, RTX – SMAF MA1, MA2 & MA3 compliant • Set a tone as your phone’s ringtone • Move ringtones from one category to another • Add, rename, or delete ringtone categories Launching Ringtone Manager To launch Ringtone...
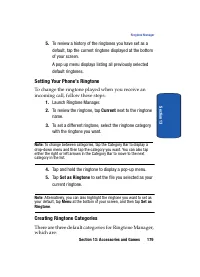
Page 179 - Setting Your Phone’s Ringtone; Current; Set as Ringtone; Creating Ringtone Categories
Section 13: Accessories and Games 179 Ringtone Manager Section 13 5. To review a history of the ringtones you have set as a default, tap the current ringtone displayed at the bottom of your screen. A pop up menu displays listing all previously selected default ringtones. Setting Your Phone’s Rington...
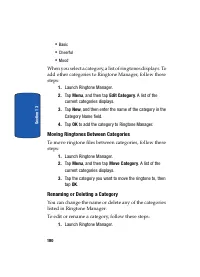
Page 180 - Moving Ringtones Between Categories; To edit or rename a category, follow these steps:
180 Section 13 • Basic • Cheerful • Mood When you select a category, a list of ringtones displays. To add other categories to Ringtone Manager, follow these steps: 1. Launch Ringtone Manager. 2. Tap Menu , and then tap Edit Category . A list of the current categories displays. 3. Tap New , and then ...
Page 181 - To delete a ringtone category, follow these steps:; Beam; Accepting Incoming Beams
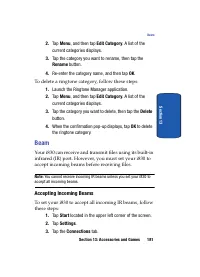
Section 13: Accessories and Games 181 Beam Section 13 2. Tap Menu , and then tap Edit Category . A list of the current categories displays. 3. Tap the category you want to rename, then tap the Rename button. 4. Re-enter the category name, and then tap OK . To delete a ringtone category, follow these...
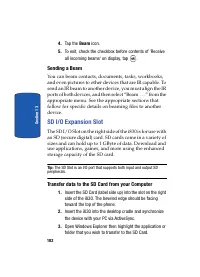
Page 182 - Sending a Beam; SD I/O Expansion Slot; Transfer data to the SD Card from your Computer
182 Section 13 4. Tap the Beam icon. 5. To exit, check the checkbox before contents of 'Receive all incoming beams' on display, tap . Sending a Beam You can beam contacts, documents, tasks, workbooks, and even pictures to other devices that are IR capable. To send an IR beam to another device, you m...
Page 183 - Use the SD Card
Section 13: Accessories and Games 183 SD I/O Expansion Slot Section 13 4. Highlight and copy the file(s) or folder(s) to your computer’s clipboard. 5. Using the ActiveSync menu, click the Explore icon to open the My Pocket PC folder. 6. Double-click on the My Pocket PC folder. 7. Double-click the St...
Page 184 - Games; Jawbreaker; Solitaire
184 Section 13 2. Grasp the exposed section of the card and pull it out with your fingers. Games There are two games included with your i830. Jawbreaker and Solitaire are listed in the Games folder under Programs. You can download other games and add these to your Games folder or you can purchase ma...
Page 188 - Health and Safety Information
188 Section 14 Health and Safety Information Exposure to Radio Frequency (RF) Signals Certification Information (SAR) Your wireless phone is a radio transmitter and receiver. It is designed and manufactured not to exceed the exposure limits for radio frequency (RF) energy set by the Federal Communic...
Page 190 - Consumer Information on Wireless Phones; What kinds of phones are the subject of this update?
190 Section 14 • Head: 1.17 W/Kg. • Body-worn: 0.367 W/Kg. SAR information on this and other model phones can be viewed on-line at www.fcc.gov/oet/fccid. To find information that pertains to a particular model phone, this site uses the phone FCC ID number which is usually printed somewhere on the ca...
Page 191 - Do wireless phones pose a health hazard?
Section 14: Health and Safety Information 191 Consumer Information on Wireless Phones Section 14 agencies. When the phone is located at greater distances from the user, the exposure to RF is drastically lower because a person's RF exposure decreases rapidly with increasing distance from the source. ...
Page 193 - What are the results of the research done already?
Section 14: Health and Safety Information 193 Consumer Information on Wireless Phones Section 14 The National Institutes of Health participates in some interagency working group activities, as well. FDA shares regulatory responsibilities for wireless phones with the Federal Communications Commission...
Page 196 - What about children using wireless phones?
196 Section 14 What steps can I take to reduce my exposure to radio frequency energy from my wireless phone? If there is a risk from these products - and at this point we do not know that there is - it is probably very small. But if you are concerned about avoiding even potential risks, you can take...
Page 200 - Road Safety
200 Section 14 • US food and Drug Administration http://www.fda.gov/cellphones Road Safety Your wireless phone gives you the powerful ability to communicate by voice, almost anywhere, anytime. But an important responsibility accompanies the benefits of wireless phones, one that every user must uphol...
Page 203 - Pacemakers; Persons with pacemakers:; Hearing Aids
Section 14: Health and Safety Information 203 Using Your Phone Near Other Electronic Devices Section 14 Pacemakers Pacemaker manufacturers recommend that a minimum distance of 15 cm (6 inches) be maintained between a wireless phone and a pacemaker to avoid potential interference with the pacemaker. ...
Page 204 - Potentially Explosive Environments
204 Section 14 instruct you to do so. Hospitals or health care facilities may be using equipment that could be sensitive to external RF energy. Vehicles RF signals may affect improperly installed or inadequately shielded electronic systems in motor vehicles. Check with the manufacturer or its repres...
Page 205 - Emergency Calls; To make an emergency call:
Section 14: Health and Safety Information 205 Emergency Calls Section 14 butane), areas where the air contains chemicals or particles, such as grain, dust or metal powders, and any other area where you would normally be advised to turn off your vehicle engine. Emergency Calls This phone, like any wi...
Page 206 - Restricting Children's access to your Phone; FCC Notice and Cautions; FCC Notice
206 Section 14 Remember that your phone may be the only means of communication at the scene of an accident; do not cut off the call until given permission to do so. Restricting Children's access to your Phone Your phone is not a toy. Children should not be allowed to play with it because they could ...
Page 207 - Other Important Safety Information; Getting the Most Out of Your Signal Reception
Section 14: Health and Safety Information 207 Other Important Safety Information Section 14 warranty if said accessories cause damage or a defect to the phone. Although your phone is quite sturdy, it is a complex piece of equipment and can be broken. Avoid dropping, hitting, bending or sitting on it...
Page 209 - Availability of Various Features/Ring Tones
Section 14: Health and Safety Information 209 Availability of Various Features/Ring Tones Section 14 • Hold the phone with the antenna raised, fully-extended and over your shoulder. • Try not to hold, bend or twist the phone's antenna. • Don't use the phone if the antenna is damaged. • Speak directl...
Page 211 - Care and Maintenance
Section 14: Health and Safety Information 211 Care and Maintenance Section 14 temporarily not work, even when the battery is fully charged. Li-ion batteries are particularly affected by temperatures below 0 °C (32 °F). • Do not place the phone in areas that may get very hot, such as on or near a coo...
Page 213 - Section 15: Warranty Information
Section 15: Warranty Information 213 Section 15 Section 15: Warranty Information Topics Covered • Standard Limited Warranty This section explains the warranty information for your new phone.
Page 214 - Standard Limited Warranty; What is Covered and For How Long?
214 Section 15 Standard Limited Warranty What is Covered and For How Long? SAMSUNG TELECOMMUNICATIONS AMERICA, L.P. ("SAMSUNG") warrants to the original purchaser ("Purchaser") that SAMSUNG's Phones and accessories ("Products") are free from defects in material and workmanshi...
Page 215 - During the applicable
Section 15: Warranty Information 215 Standard Limited Warranty Section 15 installation, or adjustment; (f) installation, maintenance, and service of Product, or (g) Product used or purchased outside the United States or Canada. This Limited Warranty covers batteries only if battery capacity falls be...
Page 221 - Index
221 Index A Action key 22 Answering Calls answer call waiting 157 Applications deleting 134 installing 134 Media Player 131 memory adjustments 135Pocket Excel 128 Pocket IE 124 Pocket Word 126 B Back key 22 Battery capacity 30 charging 30 checking charge 30 install 28 remove 29 Beam accepting beams ...