Page 2 - Intellectual Property
Intellectual Property All Intellectual Property, as defined below, owned by or which is otherwise the property of Samsung or its respective suppliers relating to the SAMSUNG Phone, including but not limited to, accessories, parts, or software relating there to (the “Phone System”), is proprietary to...
Page 3 - Disclaimer of Warranties Exclusion of Liability
Licensed by Qualcomm Incorporated under one or more of the following patents: U.S. Patent No. 4, 901, 307; 5, 056, 109; 5, 099, 204; 5, 101, 501; 5, 103, 459; 5, 107, 225; 5, 109, 390. Printed in Korea GH68-07489A Openwave® is a registered Trademark of Openwave, Inc. RSA® is a registered Trademark o...
Page 5 - Table of Contents
Table of Contents 5 Ta bl e o f C o n te n ts Table of Contents Section 1: Getting Started .................................. 9 Turning Your Phone On and Off ........................................ 10Setting Up Voicemail ........................................................ 10Understanding this ...
Page 9 - Section 1: Getting Started; Topics Covered
Section 1: Getting Started 9 S ec tio n 1 Section 1: Getting Started Topics Covered • Turning Your Phone On and Off • Setting Up Voicemail • Understanding this User Manual This section allows you to start using your phone by activating your service, setting up your voicemail, contacting customer sup...
Page 10 - Turning Your Phone On and Off; Turning Your Phone On; Open the flip, then press; Turn Your Phone Off; Press and hold; Setting Up Voicemail
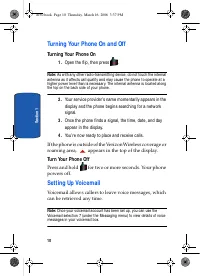
10 S ec ti o n 1 Turning Your Phone On and Off Turning Your Phone On 1. Open the flip, then press . Note: As with any other radio-transmitting device, do not touch the internal antenna as it affects call quality and may cause the phone to operate at a higher power level than is necessary. The intern...
Page 11 - Voicemail Setup; In standby mode, press and hold the; In standby mode, press and hold the; Understanding this User Manual; Notes and Tips
Section 1: Getting Started 11 Understanding this User Manual S ec tio n 1 Voicemail Setup 1. In standby mode, press and hold the key or press , , , . 2. Follow the prompts in the new user tutorial to setup your mailbox. Listen to Voicemail 1. In standby mode, press and hold the key or press , , , . ...
Page 12 - Notes; Tips; Important
12 S ec ti o n 1 • Notes : Explain alternative options within the current feature, menu, or sub-menu. • Tips : Provide quick or innovative methods for performing functions related to the subject at hand. • Important : Points out important information about the current feature that could affect perfo...
Page 13 - Section 2: Understanding Your Phone
Section 2: Understanding Your Phone 13 S ec tio n 2 Section 2: Understanding Your Phone Topics Covered • Features of Your Phone • Front View of Your Phone • Command Keys • Understanding the Display Screen • Battery • Removable Memory Card Storage • Phone Memory Storage This section outlines some key...
Page 14 - Features of Your Phone
14 S ec ti o n 2 Features of Your Phone • Domestic and international voice and text messaging service (available on participating networks). • High speed data (CDMA 2000 1x Technology) • EVDO 1x Technology • Global Positioning (GPS) Technology • PIM Functions • MMS Messaging • TXT Messaging • PIX Me...
Page 15 - Front View of Your Phone; Open View
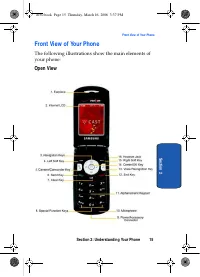
Section 2: Understanding Your Phone 15 Front View of Your Phone S ec tio n 2 Front View of Your Phone The following illustrations show the main elements of your phone: Open View a930.book Page 15 Thursday, March 16, 2006 3:37 PM
Page 16 - Features
16 S ec ti o n 2 Features 1. Earpiece: The earpiece allows you to hear the other caller. 2. Internal LCD: Displays all the information needed to operate your phone. 3. Navigation Keys: This key allows you to scroll through the phone menu options. 4. Left Soft Key Option: This key is used to navigate...
Page 17 - Voice Recognition Key: Press to activate Voice Signal.
Section 2: Understanding Your Phone 17 Front View of Your Phone S ec tio n 2 11. Alpha-numeric Keys: Use these keys to enter numbers, letters, and characters. 12. End Key: Ends a call. If you press and hold the END key, the power goes On or Off. When you receive an incoming call, press to mute the r...
Page 18 - Closed View
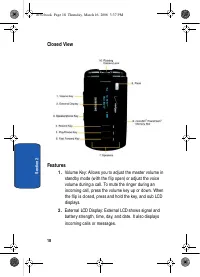
18 S ec ti o n 2 Closed View Features 1. Volume Key: Allows you to adjust the master volume in standby mode (with the flip open) or adjust the voice volume during a call. To mute the ringer during an incoming call, press the volume key up or down. When the flip is closed, press and hold the key, and...
Page 19 - Fast Forward Key: Music fast forward key.; Command Keys; and the right soft key; Left Soft Key; Some functions of the left soft key are as follows.; Message; Settings
Section 2: Understanding Your Phone 19 Command Keys S ec tio n 2 3. Speakerphone Key: Press this key to enable/disable the speakerphone option. 4. Rewind Key: Music rewind key. 5. Play/Pause Key: Music play or pause key. 6. Fast Forward Key: Music fast forward key. 7. Speaker: Music, Ringtones, and ...
Page 20 - Edit; Right Soft Key; Contacts; Clear Key; CLR; End Key; End
20 S ec ti o n 2 • When the left soft key function is Edit, press the Edit (left) soft key to edit a Contact or Profile setting. Right Soft Key Some functions of the right soft key are as follows. • In standby mode, press the Contacts (right) soft key to open your Contacts list. • When the right sof...
Page 21 - Send Key; The; Send; key; Navigation Key; Understanding the Display Screen
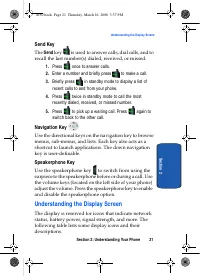
Section 2: Understanding Your Phone 21 Understanding the Display Screen S ec tio n 2 Send Key The Send key is used to answer calls, dial calls, and to recall the last number(s) dialed, received, or missed. 1. Press once to answer calls. 2. Enter a number and briefly press to make a call. 3. Briefly ...
Page 22 - Display icons; Digital; SSL
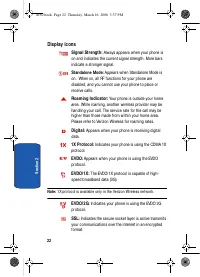
22 S ec ti o n 2 Display icons Signal Strength: Always appears when your phone is on and indicates the current signal strength. More bars indicate a stronger signal. S tandalone Mode: Appears when Standalone Mode is on. When on, all RF functions for your phone are disabled, and you cannot use your p...
Page 23 - Voice Privacy; Location On; Battery Level
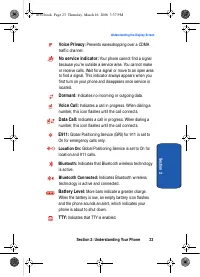
Section 2: Understanding Your Phone 23 Understanding the Display Screen S ec tio n 2 Voice Privacy : Prevents eavesdropping over a CDMA traffic channel. No service indicator: Your phone cannot find a signal because you’re outside a service area. You cannot make or receive calls. Wait for a signal or...
Page 25 - Dialogue boxes
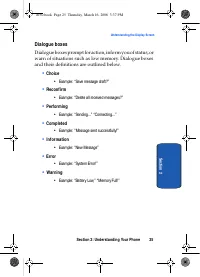
Section 2: Understanding Your Phone 25 Understanding the Display Screen S ec tio n 2 Dialogue boxes Dialogue boxes prompt for action, inform you of status, or warn of situations such as low memory. Dialogue boxes and their definitions are outlined below. • Choice • Example: “Save message draft?” • R...
Page 26 - Battery; Using A Non-Supported Battery; To continue use of your Samsung handset press
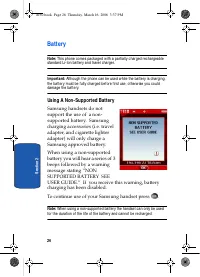
26 S ec ti o n 2 Battery Note: This phone comes packaged with a partially charged rechargeable standard Li-Ion battery and travel charger. Important: Although the phone can be used while the battery is charging, the battery must be fully charged before first use, otherwise you could damage the batte...
Page 27 - Install the Battery; Slide the battery cover down and lift up to remove it.; Remove the Battery
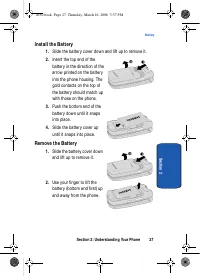
Section 2: Understanding Your Phone 27 Battery S ec tio n 2 Install the Battery 1. Slide the battery cover down and lift up to remove it. 2. Insert the top end of the battery in the direction of the arrow printed on the battery into the phone housing. The gold contacts on the top of the battery shou...
Page 28 - Charge the Battery; Travel Charger; Battery Indicator; The battery indicator
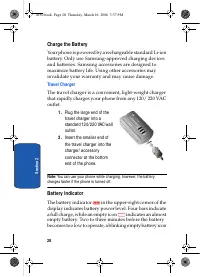
28 S ec ti o n 2 Charge the Battery Your phone is powered by a rechargeable standard Li-ion battery. Only use Samsung-approved charging devices and batteries. Samsung accessories are designed to maximize battery life. Using other accessories may invalidate your warranty and may cause damage. Travel ...
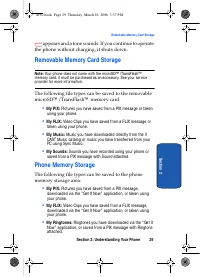
Page 29 - appears and a tone sounds. If you continue to operate; Removable Memory Card Storage; Phone Memory Storage; The following file types can be saved to the phone
Section 2: Understanding Your Phone 29 Removable Memory Card Storage S ec tio n 2 appears and a tone sounds. If you continue to operate the phone without charging, it shuts down. Removable Memory Card Storage Note: Your phone does not come with the microSD™ /TransFlash™ memory card, it must be purch...
Page 31 - Section 3: Call Functions
Section 3: Call Functions 31 S ec tio n 3 Section 3: Call Functions Topics Covered • Making a Call • Answering a Call • Recent Calls • Roaming • TTY • VoiceSignal™ This section allows you to make or answer a call. It also includes the features and functionality associated with making or answering a ...
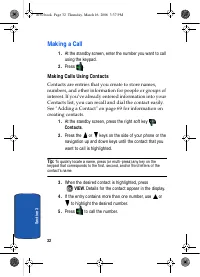
Page 32 - Mak ing a Call; Mak ing Calls Using Contacts
32 S ec ti o n 3 Mak ing a Call 1. At the standby screen, enter the number you want to call using the keypad. 2. Press . Mak ing Calls Using Contacts Contacts are entries that you create to store names, numbers, and other information for people or groups of interest. If you’ve already entered inform...
Page 33 - Answering a Call; key to answer the call; Ignore; soft key to send the call to voicemail, or; Quiet; soft key; Answering Call-Waiting Calls; Recent Calls
Section 3: Call Functions 33 Answering a Call S ec tio n 3 Answering a Call When you receive an incoming call, the Incoming screen appears in the display, press the key to answer the call or Ignore ( ) soft key to send the call to voicemail, or Quiet ( ) soft key to silence the ringer. Note: To chan...
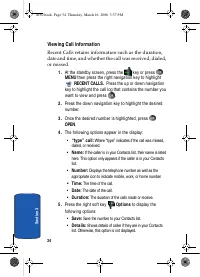
Page 34 - Viewing Call Information; MENU
34 S ec ti o n 3 Viewing Call Information Recent Calls retains information such as the duration, date and time, and whether the call was received, dialed, or missed. 1. At the standby screen, press the key or press MENU then press the right navigation key to highlight RECENT CALLS. Press the up or d...
Page 35 - Call History Icons; OPEN; Creating or Updating Contacts Using Call History; Options
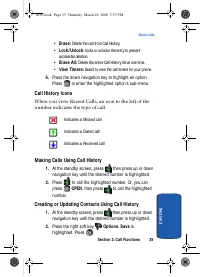
Section 3: Call Functions 35 Recent Calls S ec tio n 3 • Erase: Delete the call from Call History. • Lock / Unlock : locks or unlocks the entry to prevent accidental deletion. • Erase All: Delete the entire Call History list at one time. • View Timers: Select to view the call timers for your phone. ...
Page 36 - Delete Call History Entries
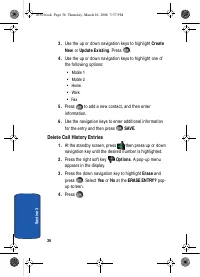
36 S ec ti o n 3 3. Use the up or down navigation keys to highlight Create New or Update Existing . Press . 4. Use the up or down navigation keys to highlight one of the following options: • Mobile 1 • Mobile 2 • Home • Work • Fax 5. Press to add a new contact, and then enter information. 6. Use the...
Page 37 - Delete All Call History Entries; Roaming; Roaming Options; The following roaming options are available:; Home Only
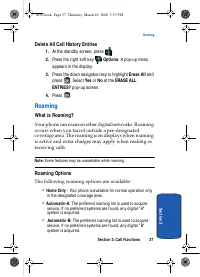
Section 3: Call Functions 37 Roaming S ec tio n 3 Delete All Call History Entries 1. At the standby screen, press . 2. Press the right soft key Options . A pop-up menu appears in the display. 3. Press the down navigation key to highlight Erase All and press . Select Yes or No at the ERASE ALL ENTRIE...
Page 38 - To change your Roaming option, follow these steps:; TTY
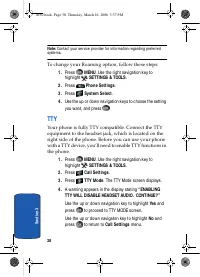
38 S ec ti o n 3 Note: Contact your service provider for information regarding preferred systems. To change your Roaming option, follow these steps: 1. Press MENU . Use the right navigation key to highlight SETTINGS & TOOLS . 2. Press Phone Settings . 3. Press System Select . 4. Use the up or do...
Page 39 - Press; VoiceSignalTM; VoiceSignal Settings
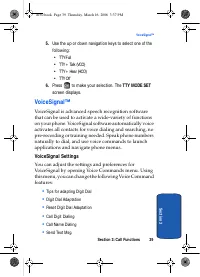
Section 3: Call Functions 39 VoiceSignal™ S ec tio n 3 5. Use the up or down navigation keys to select one of the following: • TTY Full • TTY + Talk (VCO) • TTY + Hear (HCO) • TTY Off 6. Press to make your selection. The TTY MODE SET screen displays. VoiceSignal™ VoiceSignal is advanced speech recog...
Page 40 - At the standby screen, press; navigation key to highlight; Tools
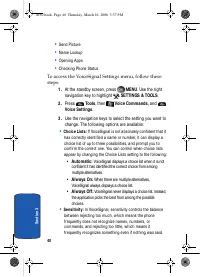
40 S ec ti o n 3 • Send Picture • Name Lookup • Opening Apps • Checking Phone Status To access the VoiceSignal Settings menu, follow these steps: 1. At the standby screen, press MENU . Use the right navigation key to highlight SETTINGS & TOOLS . 2. Press Tools , then Voice Commands , and Voice S...
Page 41 - Reject Less
Section 3: Call Functions 41 VoiceSignal™ S ec tio n 3 When VoiceSignal rejects an utterance, it displays a message such as “Please repeat…” or “No match found.” If you frequently experience these messages, you might be able to get better recognition by adjusting the Sensitivity setting toward Rejec...
Page 42 - Press the left soft key; Adapting VoiceSignal; Tips for adapting Digit Dial
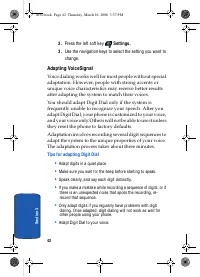
42 S ec ti o n 3 2. Press the left soft key Settings. 3. Use the navigation keys to select the setting you want to change. Adapting VoiceSignal Voice dialing works well for most people without special adaptation. However, people with strong accents or unique voice characteristics may receive better ...
Page 43 - Digit Dial Adaptation; To access the Adapt Digits menu, follow these steps:
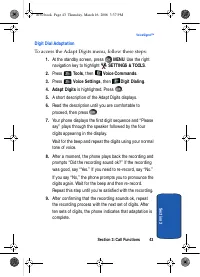
Section 3: Call Functions 43 VoiceSignal™ S ec tio n 3 Digit Dial Adaptation To access the Adapt Digits menu, follow these steps: 1. At the standby screen, press MENU . Use the right navigation key to highlight SETTINGS & TOOLS . 2. Press Tools , then Voice Commands . 3. Press Voice Settings , t...
Page 44 - Reset Digit Dial Adaptation; VoiceSignal Commands
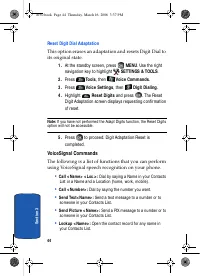
44 S ec ti o n 3 Reset Digit Dial Adaptation This option erases an adaptation and resets Digit Dial to its original state. 1. At the standby screen, press MENU . Use the right navigation key to highlight SETTINGS & TOOLS . 2. Press Tools , then Voice Commands . 3. Press Voice Settings , then Dig...
Page 45 - Call Digit Dialing
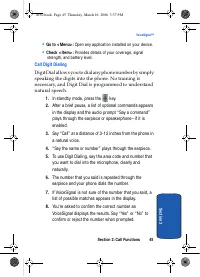
Section 3: Call Functions 45 VoiceSignal™ S ec tio n 3 • Go to < Menu> : Open any application installed on your device. • Check < Item> : Provides details of your coverage, signal strength, and battery level. Call Digit Dialing Digit Dial allows you to dial any phone number by simply spe...
Page 46 - Call Name Dialing; Send Text MSG
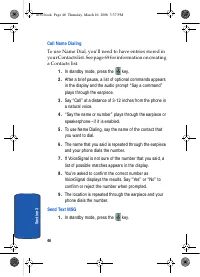
46 S ec ti o n 3 Call Name Dialing To use Name Dial, you’ll need to have entries stored in your Contacts list. See page 69 for information on creating a Contacts list. 1. In standby mode, press the key. 2. After a brief pause, a list of optional commands appears in the display and the audio prompt “...
Page 47 - Send Picture
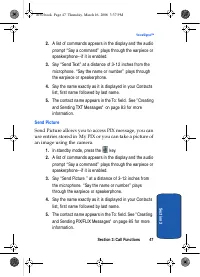
Section 3: Call Functions 47 VoiceSignal™ S ec tio n 3 2. A list of commands appears in the display and the audio prompt “Say a command” plays through the earpiece or speakerphone--if it is enabled. 3. Say “Send Text” at a distance of 3-12 inches from the microphone. “Say the name or number” plays t...
Page 48 - Name Look up; Opening Apps
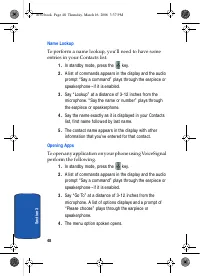
48 S ec ti o n 3 Name Look up To perform a name lookup, you’ll need to have some entries in your Contacts list. 1. In standby mode, press the key. 2. A list of commands appears in the display and the audio prompt “Say a command” plays through the earpiece or speakerphone--if it is enabled. 3. Say “L...
Page 49 - check ing Phone Status
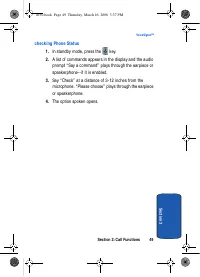
Section 3: Call Functions 49 VoiceSignal™ S ec tio n 3 check ing Phone Status 1. In standby mode, press the key. 2. A list of commands appears in the display and the audio prompt “Say a command” plays through the earpiece or speakerphone--if it is enabled. 3. Say “Check” at a distance of 3-12 inches...
Page 51 - Section 4: Menu Navigation
S ec tio n 4 Section 4: Menu Navigation 51 Section 4: Menu Navigation Topics Covered • Menu Navigation • Menu Outline This section explains the menu navigation for your phone. It also includes an outline of all the available menus associated with your phone. a930.book Page 51 Thursday, March 16, 200...
Page 52 - Menu Navigation; Access menus using the navigation keys, two soft keys; Return to the Previous Menu; Navigate Using Shortcuts
S ec ti o n 4 52 Menu Navigation Access menus using the navigation keys, two soft keys , or use a shortcut. 1. In standby mode press MENU . The first of several menus appear in the display. 2. Use the navigation keys to browse phone menus. 3. Press to enter the menu or sub-menu presently appearing i...
Page 53 - Navigation Key Shortcuts; In standby mode, press; Phone Settings; to save your selection.; following menu items appear in the display.
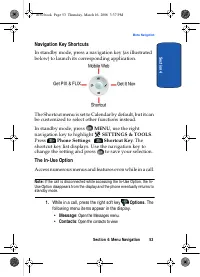
Section 4: Menu Navigation 53 Menu Navigation S ec tio n 4 Navigation Key Shortcuts In standby mode, press a navigation key (as illustrated below) to launch its corresponding application. The Shortcut menu is set to Calendar by default, but it can be customized to select other functions instead. In ...
Page 54 - Send DTMF; Location; Voice Memo; Use the navigation key to highlight a menu. Press; Menu Outline; GET IT NOW
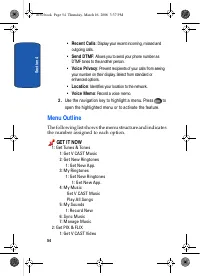
S ec ti o n 4 54 • Recent Calls : Display your recent incoming, missed and outgoing calls. • Send DTMF : Allows you to send your phone number as DTMF tones to the another person. • Voice Privacy : Prevent recipients of your calls from seeing your number on their display. Select from standard or enha...
Page 55 - MESSAGING
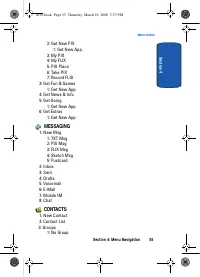
Section 4: Menu Navigation 55 Menu Outline S ec tio n 4 2: Get New PIX 1: Get New App. 3: My PIX4: My FLIX5: PIX Place6: Take PIX7: Record FLIX 3: Get Fun & Games 1: Get New App. 4: Get News & Info5: Get Going 1: Get New App. 6: Get Extras 1: Get New App. MESSAGING 1: New Msg 1: TXT Msg2: PI...
Page 56 - RECENT CALLS
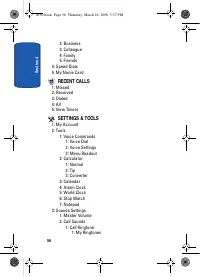
S ec ti o n 4 56 2: Business3: Colleague4: Family5: Friends 4: Speed Dials5: My Name Card RECENT CALLS 1: Missed2: Received3: Dialed4: All5: View Timers SETTINGS & TOOLS 1: My Account2: Tools 1: Voice Commands 1: Voice Dial2: Voice Settings3: Menu Readout 2: Calculator 1: Normal2: Tip3: Converte...
Page 61 - Section 5: Entering Text
Section 5: Entering Text 61 S ec tio n 5 Section 5: Entering Text Topics Covered • Changing the Text Entry Mode • Using Word Mode • Entering Upper and Lower Case • Entering Symbols • Entering Numbers This section outlines how to select the desired text input mode when entering characters into your p...
Page 62 - Changing the Text Entry Mode; Add
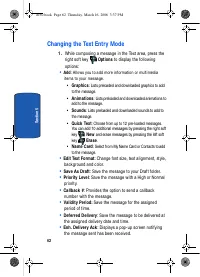
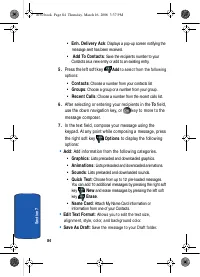
62 S ec ti o n 5 Changing the Text Entry Mode 1. While composing a message in the Text area, press the right soft key Options to display the following options: • Add : Allows you to add more information or multimedia items to your message. • Graphics : Lists preloaded and downloaded graphics to add ...
Page 63 - Using Word Mode; recognizes the most commonly used word for any
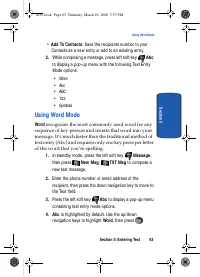
Section 5: Entering Text 63 Using Word Mode S ec tio n 5 • Add To Contacts : Save the recipients number to your Contacts as a new entry or add to an existing entry . 2. While composing a message, press left soft key Abc to display a pop-up menu with the following Text Entry Mode options: • Word • Ab...
Page 64 - to display other words in the dictionary, if; Entering Upper and Lower Case; ABC
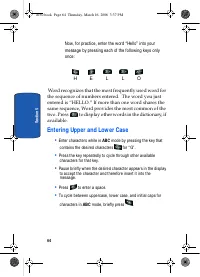
64 S ec ti o n 5 Now, for practice, enter the word “Hello” into your message by pressing each of the following keys only once: Word recognizes that the most frequently used word for the sequence of numbers entered. The word you just entered is “HELLO.” If more than one word shares the same sequence,...
Page 65 - Entering Symbols
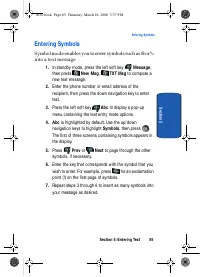
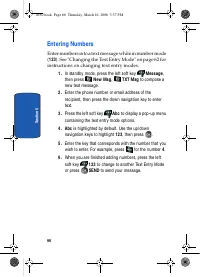
Section 5: Entering Text 65 Entering Symbols S ec tio n 5 Entering Symbols Symbol mode enables you to enter symbols such as @ or% into a text message. 1. In standby mode, press the left soft key Message , then press New Msg , TXT Msg to compose a new text message. 2. Enter the phone number or email ...
Page 66 - Entering Numbers; instructions on changing text entry modes.
66 S ec ti o n 5 Entering Numbers Enter numbers into a text message while in number mode ( 123 ). See "Changing the Text Entry Mode" on page 62 for instructions on changing text entry modes. 1. In standby mode, press the left soft key Message , then press New Msg , TXT Msg to compose a new t...
Page 67 - Section 6: Understanding Your Contacts
Section 6: Understanding Your Contacts 67 S ec tio n 6 Section 6: Understanding Your Contacts Topics Covered • Opening Contacts Menu • Adding a Contact • Adding Pauses • Contact Groups • Finding a Contact Entry • Editing an Existing Contact Entry • Deleting a Contact Entry • Storing Numbers After a ...
Page 68 - Opening Contacts Menu; Contacts Icons; Home
68 S ec ti o n 6 Opening Contacts Menu The Contacts menu provides access to powerful features such as adding Groups, creating and sending V-cards, and viewing the phone number assigned to your phone by Verizon Wireless. 1. In standby mode, press MENU . The CONTACTS menu displays. • New Contact : Add...
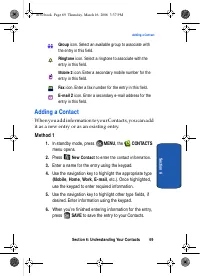
Page 69 - Group; Fax; Adding a Contact; Method 1; New Contact; Enter a name for the entry using the keypad.
Section 6: Understanding Your Contacts 69 Adding a Contact S ec tio n 6 Group icon. Select an available group to associate with the entry in this field. Ringtone icon. Select a ringtone to associate with the entry in this field. Mobile 2 icon. Enter a secondary mobile number for the entry in this fi...
Page 70 - Method 2
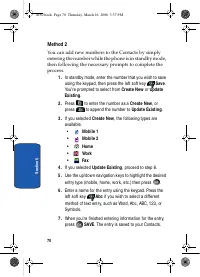
70 S ec ti o n 6 Method 2 You can add new numbers to the Contacts by simply entering the number while the phone is in standby mode, then following the necessary prompts to complete the process. 1. In standby mode, enter the number that you wish to save using the keypad, then press the left soft key ...
Page 71 - Adding Pauses
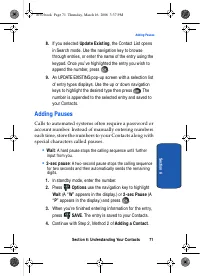
Section 6: Understanding Your Contacts 71 Adding Pauses S ec tio n 6 8. If you selected Update Existing , the Contact List opens in Search mode. Use the navigation key to browse through entries, or enter the name of the entry using the keypad. Once you’ve highlighted the entry you wish to append the...
Page 72 - Contact Groups; .” Groups allow you to search your Contacts; View Groups; Move an Entry to Another Group; In standby mode, press the right soft key
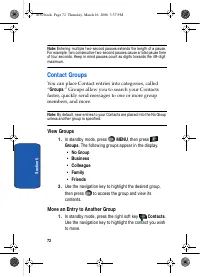
72 S ec ti o n 6 Note: Entering multiple two-second pauses extends the length of a pause. For example, two consecutive two-second pauses cause a total pause time of four seconds. Keep in mind pauses count as digits towards the 48-digit maximum. Contact Groups You can place Contact entries into categ...
Page 73 - Create a New Group; SAVE; Send a Text Message to Members of a Group
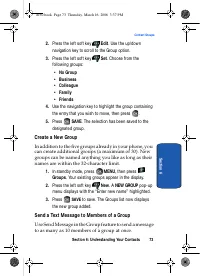
Section 6: Understanding Your Contacts 73 Contact Groups S ec tio n 6 2. Press the left soft key Edit . Use the up/down navigation key to scroll to the Group option. 3. Press the left soft key Set . Choose from the following groups: • No Group • Business • Colleague • Family • Friends 4. Use the nav...
Page 74 - Send a PIX/ FLIX Msg to Members of a Group
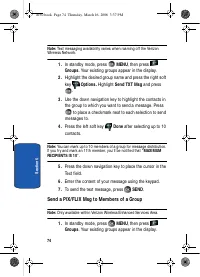
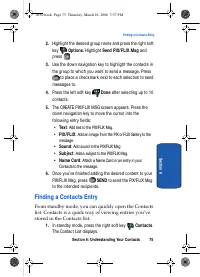
74 S ec ti o n 6 Note: Text messaging availability varies when roaming off the Verizon Wireless Network. 1. In standby mode, press MENU , then press Groups . Your existing groups appear in the display. 2. Highlight the desired group name and press the right soft key Options. Highlight Send TXT Msg a...
Page 75 - Finding a Contacts Entry
Section 6: Understanding Your Contacts 75 Finding a Contacts Entry S ec tio n 6 2. Highlight the desired group name and press the right soft key Options. Highlight Send PIX/ FLIX Msg and press . 3. Use the down navigation key to highlight the contacts in the group to which you want to send a message...
Page 76 - Editing an Existing Contact Entry
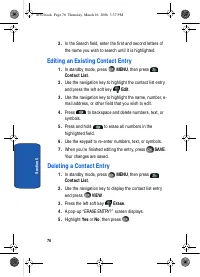
76 S ec ti o n 6 2. In the Search field, enter the first and second letters of the name you wish to search until it is highlighted. Editing an Existing Contact Entry 1. In standby mode, press MENU , then press Contact List . 2. Use the navigation key to highlight the contact list entry and press the...
Page 77 - Storing Numbers After a Call; Save; Save; . Follow the screen prompts to; Speed Dialing; dialing
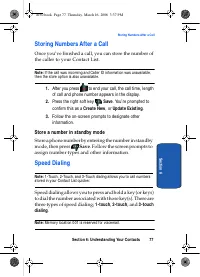
Section 6: Understanding Your Contacts 77 Storing Numbers After a Call S ec tio n 6 Storing Numbers After a Call Once you’ve finished a call, you can store the number of the caller to your Contact List. Note: If the call was incoming and Caller ID information was unavailable, then the store option i...
Page 78 - Assign a speed dial location; . The Speed Dials screen displays with the; SET; SET SPEED DIAL
78 S ec ti o n 6 1-touch dialing Call phone numbers assigned to memory locations 002 - 009 by pressing and holding the any of the 2 - 9 keys. For example, to speed dial the number assigned to location 2, press and hold until the name and number appear in the display and the number is dialed. 2-touch...
Page 79 - My Name Card; My Number; displays the ten-digit number assigned to
Section 6: Understanding Your Contacts 79 My Name Card S ec tio n 6 5. At the pop-up screen, use the navigation key to highlight Yes or No and press . 6. Continue to assign speed dial entries or press the key to return to standby mode. My Name Card My Name Card allows you to create a virtual busines...
Page 82 - Types of Messages; Retrieving a Text Message
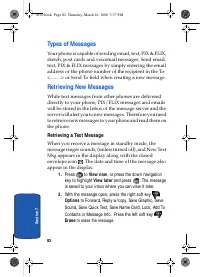
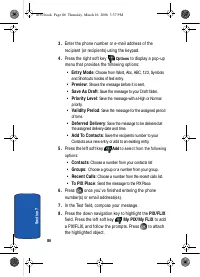
82 S ec ti o n 7 Types of Messages Your phone is capable of sending email, text, PIX & FLIX, sketch, post cards and voicemail messages. Send email, text, PIX & FLIX messages by simply entering the email address or the phone number of the recipient in the To: <.........> or Send To fiel...
Page 83 - Creating and Sending TXT Messages
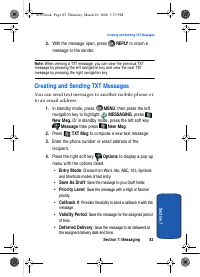
Section 7: Messaging 83 Creating and Sending TXT Messages S ec tio n 7 3. With the message open, press REPLY to return a message to the sender. Note: When viewing a TXT message, you can view the previous TXT message by pressing the left navigation key and view the next TXT message by pressing the ri...
Page 85 - Creating and Sending PIX/ FLIX Messages
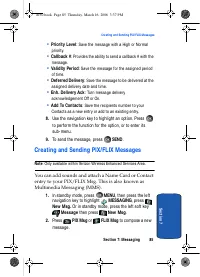
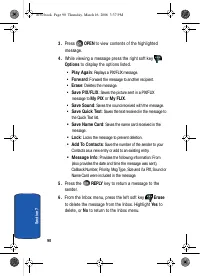
Section 7: Messaging 85 Creating and Sending PIX/ FLIX Messages S ec tio n 7 • Priority Level : Save the message with a High or Normal priority. • Callback # : Provides the ability to send a callback # with the message. • Validity Period : Save the message for the assigned period of time. • Deferred...
Page 87 - Receiving PIX/ FLIX Messages; MSG; appears in the display along with the options; View; or; Reject
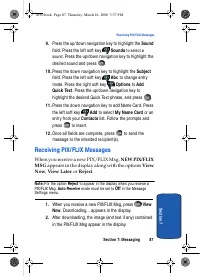
Section 7: Messaging 87 Receiving PIX/ FLIX Messages S ec tio n 7 9. Press the up/down navigation key to highlight the Sound field. Press the left soft key Sounds to select a sound. Press the up/down navigation key to highlight the desired sound and press . 10. Press the down navigation key to highl...
Page 88 - Receive Messages While in a Call; Off; View a PIX/ FLIX Msg Later; and press
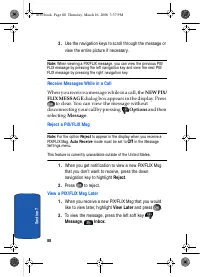
88 S ec ti o n 7 3. Use the navigation keys to scroll through the message or view the entire picture if necessary. Note: When viewing a PIX/FLIX message, you can view the previous PIX/ FLIX message by pressing the left navigation key and view the next PIX/FLIX message by pressing the right navigatio...
Page 89 - New Sk etch Messages; Inbox
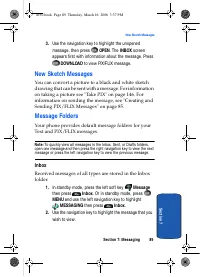
Section 7: Messaging 89 New Sk etch Messages S ec tio n 7 3. Use the navigation key to highlight the unopened message, then press OPEN . The INBOX screen appears first with information about the message. Press DOWNLOAD to view PIX/FLIX message. New Sk etch Messages You can convert a picture to a bla...
Page 91 - Sent; feature in; Review Messages in the Sent Folder
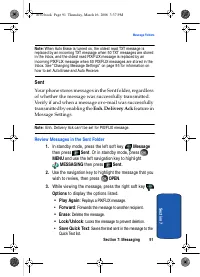
Section 7: Messaging 91 Message Folders S ec tio n 7 Note: When Auto Erase is turned on, the oldest read TXT message is replaced by an incoming TXT message when 50 TXT messages are stored in the Inbox, and the oldest read PIX/FLIX message is replaced by an incoming PIX/FLIX message when 50 PIX/FLIX ...
Page 92 - Drafts; Create a Draft Text Message
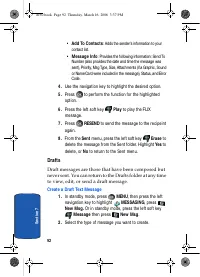
92 S ec ti o n 7 • Add To Contacts : Adds the sender’s information to your contact list. • Message Info : Provides the following information: Send To Number (also provides the date and time the message was sent), Priority, Msg Type, Size, Attachments (if a Graphic, Sound or Name Card were included i...
Page 93 - View and Edit Draft Messages
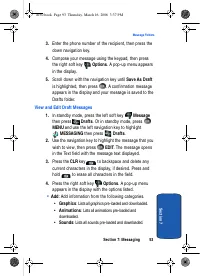
Section 7: Messaging 93 Message Folders S ec tio n 7 3. Enter the phone number of the recipient, then press the down navigation key. 4. Compose your message using the keypad, then press the right soft key Options . A pop-up menu appears in the display. 5. Scroll down with the navigation key until Sa...
Page 94 - Add to Contacts; to perform the function for the highlighted; Erase Options
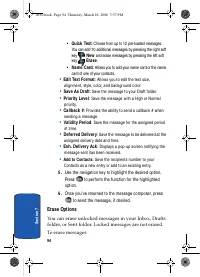
94 S ec ti o n 7 • Quick Text : Choose from up to 12 pre-loaded messages. You can add 10 additional messages by pressing the right soft key New and erase messages by pressing the left soft key Erase . • Name Card : Allows you to add your name card or the name card of one of your contacts. • Edit Tex...
Page 95 - Changing Message Settings; All Msg
Section 7: Messaging 95 Changing Message Settings S ec tio n 7 1. In standby mode, press MENU , then press the left navigation key to highlight MESSAGING , then press the right soft key Options . 2. The following options are available: • Erase Inbox : Erases unlocked messages in your Inbox. • Erase ...
Page 96 - TXT Msg; Voicemail
96 S ec ti o n 7 message when 50 PIX/FLIX messages are stored in the Inbox. Choose from On or Off. • Quick Text : Displays the Quick Text pre-defined entries for Text Msg and PIX/FLIX Msg. Press the right soft key New to add to the Quick Text list. Enter your new text and press . The new Quick Text ...
Page 97 - Receive Voicemail Messages; View Voicemail Messages in the Inbox Folder
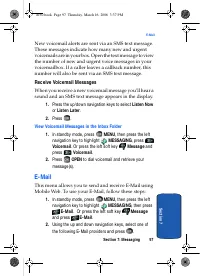
Section 7: Messaging 97 E-Mail S ec tio n 7 New voicemail alerts are sent via an SMS text message. These messages indicate how many new and urgent voicemails are in your box. Open the text message to view the number of new and urgent voice messages in your voicemailbox. If a caller leaves a callback...
Page 98 - Mobile IM; Using Mobile IM
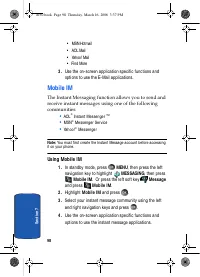
98 S ec ti o n 7 • MSN Hotmail • AOL Mail • Yahoo! Mail • Find More 3. Use the on-screen application specific functions and options to use the E-Mail applications. Mobile IM The Instant Messaging function allows you to send and receive instant messages using one of the following communities: • AOL ...
Page 99 - Chat; To access a chat room from the browser:
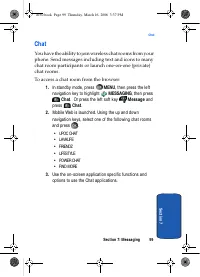
Section 7: Messaging 99 Chat S ec tio n 7 Chat You have the ability to join wireless chat rooms from your phone. Send messages including text and icons to many chat room participants or launch one-on-one (private) chat rooms. To access a chat room from the browser: 1. In standby mode, press MENU , t...
Page 101 - Section 8: Changing Your Settings
Section 8: Changing Your Settings 101 S ec tio n 8 Section 8: Changing Your Settings Topics Covered • My Account • Tools • Sounds Settings • Display Settings • Phone Settings • Call Settings • Bluetooth • Memory • Phone Info This section explains the sound and phone settings for your phone. It inclu...
Page 102 - My Account; . The menus are listed in the
S ec ti o n 8 102 My Account The My Account menu connects to the VZW Mobile Web. You can setup Favorites or choose from the available applications. 1. In standby mode, press MENU , use the right navigation key to highlight SETTINGS & TOOLS . Press My Account . The menus are listed in the display...
Page 103 - Sounds Settings; Master Volume; Ringer Settings
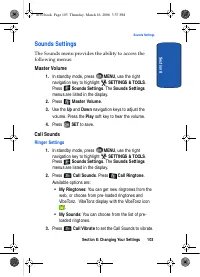
Section 8: Changing Your Settings 103 Sounds Settings S ec tio n 8 Sounds Settings The Sounds menu provides the ability to access the following menus: Master Volume 1. In standby mode, press MENU , use the right navigation key to highlight SETTINGS & TOOLS . Press Sounds Settings . The Sounds Se...
Page 104 - Alert Sounds; TXT Message; Voicemail Msg; Device Connect; Keypad Volume
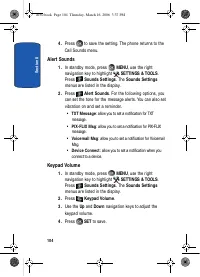
S ec ti o n 8 104 4. Press to save the setting. The phone returns to the Call Sounds menu. Alert Sounds 1. In standby mode, press MENU , use the right navigation key to highlight SETTINGS & TOOLS . Press Sounds Settings . The Sounds Settings menus are listed in the display. 2. Press Alert Sounds...
Page 105 - Earpiece Volume; • ERI
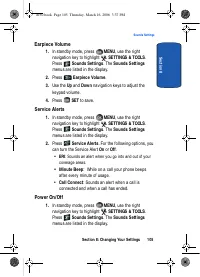
Section 8: Changing Your Settings 105 Sounds Settings S ec tio n 8 Earpiece Volume 1. In standby mode, press MENU , use the right navigation key to highlight SETTINGS & TOOLS . Press Sounds Settings . The Sounds Settings menus are listed in the display. 2. Press Earpiece Volume . 3. Use the Up a...
Page 106 - VibeTonz; Display Settings
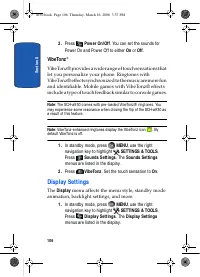
S ec ti o n 8 106 2. Press Power On/ Off . You can set the sounds for Power On and Power Off to either On or Off . VibeTonz ® VibeTonz® provides a wide range of touch sensations that let you personalize your phone. Ringtones with VibeTonz® effects synchronized to the music are more fun and identifia...
Page 107 - Banner; allows you to create your own personalized
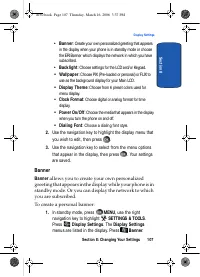
Section 8: Changing Your Settings 107 Display Settings S ec tio n 8 • Banner : Create your own personalized greeting that appears in the display when your phone is in standby mode or choose the ERI Banner which displays the network in which you have subscribed. • Back light : Choose settings for the...
Page 108 - To create an ERI banner:; Back light; Set the
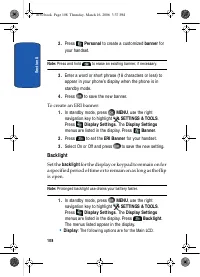
S ec ti o n 8 108 2. Press Personal to create a customized banner for your handset. Note: Press and hold to erase an existing banner, if necessary. 3. Enter a word or short phrase (18 characters or less) to appear in your phone’s display when the phone is in standby mode. 4. Press to save the new ba...
Page 109 - Wallpaper
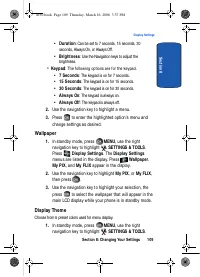
Section 8: Changing Your Settings 109 Display Settings S ec tio n 8 • Duration : Can be set to 7 seconds, 15 seconds, 30 seconds, Always On, or Always Off. • Brightness : Use the Navigation keys to adjust the brightness. • Keypad : The following options are for the keypad. • 7 Seconds : The keypad i...
Page 110 - Clock Format
S ec ti o n 8 110 Press Display Settings . The Display Settings menus are listed in the display. Press Display Theme . 2. Use the navigation keys to select the Display Theme you wish, then press . Clock Format This menu allows you to have time displayed in digital or analog format. • Main Clock: Set...
Page 111 - Dialing Font; Standalone Mode; With
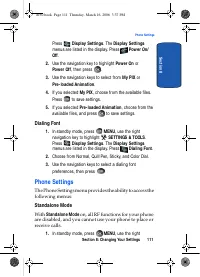
Section 8: Changing Your Settings 111 Phone Settings S ec tio n 8 Press Display Settings . The Display Settings menus are listed in the display. Press Power On/ Off . 2. Use the navigation key to highlight Power On or Power Off , then press . 3. Use the navigation keys to select from My PIX or Pre-l...
Page 112 - Shortcut Key; allows you to select from up to 21 applications; Language
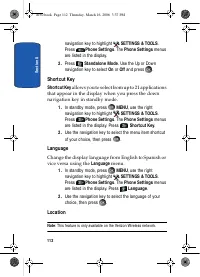
S ec ti o n 8 112 navigation key to highlight SETTINGS & TOOLS . Press Phone Settings . The Phone Settings menus are listed in the display. 2. Press Standalone Mode . Use the Up or Down navigation key to select On or Off and press . Shortcut Key Shortcut Key allows you to select from up to 21 ap...
Page 113 - Security; Common Code; Device
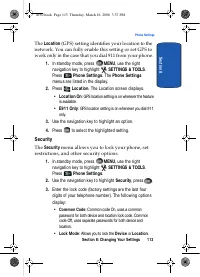
Section 8: Changing Your Settings 113 Phone Settings S ec tio n 8 The Location (GPS) setting identifies your location to the network. You can fully enable this setting or set GPS to work only in the case that you dial 911 from your phone. 1. In standby mode, press MENU , use the right navigation key...
Page 114 - Edit Code; Lock Code; Lock Phone; restricts the use of your phone with the
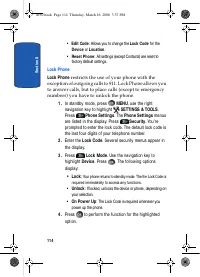
S ec ti o n 8 114 • Edit Code : Allows you to change the Lock Code for the Device or Location . • Reset Phone : All settings (except Contacts) are reset to factory default settings. Lock Phone Lock Phone restricts the use of your phone with the exception of outgoing calls to 911. Lock Phone allows y...
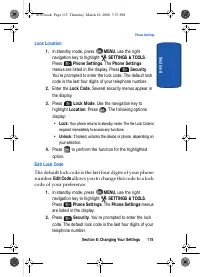
Page 115 - Lock Location; Lock; Unlock; Edit Lock Code; allows you to change this code to a lock
Section 8: Changing Your Settings 115 Phone Settings S ec tio n 8 Lock Location 1. In standby mode, press MENU , use the right navigation key to highlight SETTINGS & TOOLS . Press Phone Settings . The Phone Settings menus are listed in the display. Press Security . You’re prompted to enter the l...
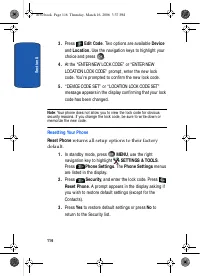
Page 116 - Resetting Your Phone; returns all setup options to their factory
S ec ti o n 8 116 3. Press Edit Code . Two options are available Device and Location. Use the navigation keys to highlight your choice and press . 4. At the “ENTER NEW LOCK CODE” or “ENTER NEW LOCATION LOCK CODE” prompt, enter the new lock code. You’re prompted to confirm the new lock code. 5. “DEVI...
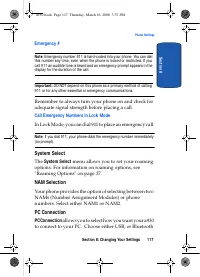
Page 117 - Call Emergency Numbers in Lock Mode; In Lock Mode, you can dial 911 to place an emergency call.; System Select; menu allows you to set your roaming; NAM Selection; PC Connection; allows you to select how you want your a930
Section 8: Changing Your Settings 117 Phone Settings S ec tio n 8 Emergency # Note : Emergency number 911 is hard-coded into your phone. You can dial this number any time, even when the phone is locked or restricted. If you call 911 an audible tone is heard and an emergency prompt appears in the dis...
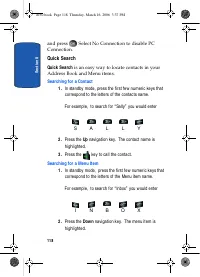
Page 118 - Quick Search; is an easy way to locate contacts in your; Searching for a Contact
S ec ti o n 8 118 and press . Select No Connection to disable PC Connection. Quick Search Quick Search is an easy way to locate contacts in your Address Book and Menu items. Searching for a Contact 1. In standby mode, press the first few numeric keys that correspond to the letters of the contacts na...
Page 119 - Call Settings; Answer Options
Section 8: Changing Your Settings 119 Call Settings S ec tio n 8 3. Press the key to access the content of the menu item. Call Settings The Call Settings menu allows you to select the method for answering incoming calls, setting redial options, setting data rates for data calls, voice privacy, and m...
Page 120 - Auto Retry; automatically redials busy numbers after a; TTY Mode
S ec ti o n 8 120 Auto Retry Auto Retry automatically redials busy numbers after a preset period of time. 1. In standby mode, press MENU , use the right navigation key to highlight SETTINGS & TOOLS . Press Call Settings . The Call Settings menus are listed in the display. 2. Press Auto Retry . T...
Page 121 - (at the Enhanced setting) allows you to; Call Restrictions; allows you to restrict outgoing and
Section 8: Changing Your Settings 121 Call Settings S ec tio n 8 2. Press One Touch Dial . Select On or Off . Press to save. See " Speed Dialing" on page 77 for more information. Voice Privacy Note : This feature is only available on the Verizon Wireless network. Voice Privacy (at the Enhanc...
Page 122 - Data Settings; Use this menu to set DTMF settings to; Normal; • Normal
S ec ti o n 8 122 2. Press Call Restrictions . 3. Use the navigation key to select Outgoing , Incoming , or Contacts , then press . 4. Use the navigation key to highlight On or Off , then press . Your settings are saved. Data Settings 1. In standby mode, press MENU , use the right navigation key to ...
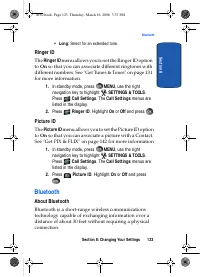
Page 123 - • Long; Ringer ID; On; On; Bluetooth; About Bluetooth
Section 8: Changing Your Settings 123 Bluetooth S ec tio n 8 • Long : Select for an extended tone. Ringer ID The Ringer ID menu allows you to set the Ringer ID option to On so that you can associate different ringtones with different numbers. See "Get Tunes & Tones" on page 131 for more ...
Page 124 - Bluetooth Service Profiles; Your phone supports the following profile service:; The following Bluetooth options are available:
S ec ti o n 8 124 Unlike infrared, you don't need to line up the devices to beam information with Bluetooth. If the devices are within a range of one another, you can exchange information between them, even if they are located in different rooms. Note: When connected to your Bluetooth headset, press...
Page 125 - Search
Section 8: Changing Your Settings 125 Bluetooth S ec tio n 8 use is prohibited, such as airline traveling, you can turn off the Bluetooth wireless technology. 1. In standby mode, press MENU key and use the right navigation key to highlight SETTINGS & TOOLS . Press Bluetooth . The Bluetooth menus...
Page 126 - Bluetooth Settings; My Phone Name; Memory; The Manage Memory menu allows you to set your; Phone Memory; Card Memory
S ec ti o n 8 126 Bluetooth Settings The Bluetooth wireless technology settings menu provides the ability to view and change the device name, show the visibility, and set the security for the device. 1. In standby mode, press MENU , use the right navigation key to highlight SETTINGS & TOOLS . Pr...
Page 127 - Phone Info
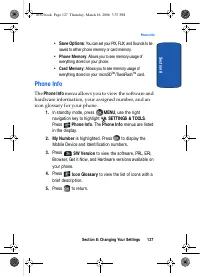
Section 8: Changing Your Settings 127 Phone Info S ec tio n 8 • Save Options : You can set your PIX, FLIX, and Sounds to be saved to either phone memory or card memory. • Phone Memory : Allows you to see memory usage of everything stored on your phone. • Card Memory : Allows you to see memory usage ...
Page 129 - Section 9: Multimedia
Section 9: Multimedia 129 S ec tio n 9 Section 9: Multimedia Topics Covered • Get It Now • Get Tunes & Tones • Get PIX & FLIX • Get Fun & Games • Get News & Info • Get Going • Get Extras This section describes how you receive tunes, tones, images, games, news and information. You can...
Page 130 - Get It Now
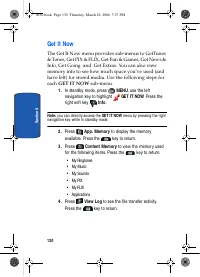
130 S ec ti o n 9 Get It Now The Get It Now menu provides sub-menus to GetTunes & Tones, Get PIX & FLIX, Get Fun & Games, Get News & Info, Get Going and Get Extras. You can also view memory info to see how much space you’ve used (and have left) for stored media. Use the following ste...
Page 131 - Help; memory card, be sure to format it as described below.; Formatting microSDTM / TransFlashTM Card using your PC; For best playback of songs stored to the microSD; My Computer
Section 9: Multimedia 131 Get Tunes & Tones S ec tio n 9 5. Press Help to display a list of frequently asked questions. Use the navigation key to highlight an item and press to display help text. Press the key to return. Get Tunes & Tones This menu allows you to get new tunes and tones, reco...
Page 132 - Formatting microSDTM / TransFlashTM Card using your a930
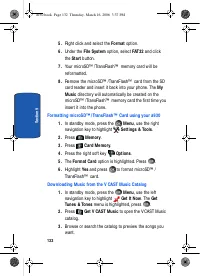
132 S ec ti o n 9 5. Right click and select the Format option. 6. Under the File System option, select FAT32 and click the Start button. 7. Your microSD™ /TransFlash™ memory card will be reformatted. 8. Remove the microSD™ /TransFlash™ card from the SD card reader and insert it back into your phone....
Page 133 - Get New Ringtones
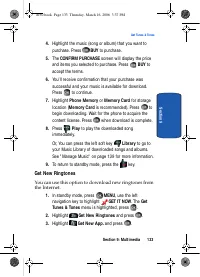
Section 9: Multimedia 133 Get Tunes & Tones S ec tio n 9 4. Highlight the music (song or album) that you want to purchase. Press BUY to purchase. 5. The CONFIRM PURCHASE screen will display the price and items you selected to purchase. Press BUY to accept the terms. 6. You’ll receive confirmatio...
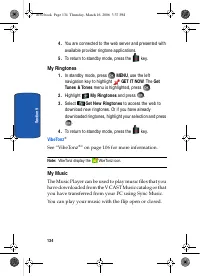
Page 134 - My Ringtones; See “VibeTonz; My Music; You can play your music with the flip open or closed.
134 S ec ti o n 9 4. You are connected to the web server and presented with available provider ringtone applications. 5. To return to standby mode, press the key. My Ringtones 1. In standby mode, press MENU , use the left navigation key to highlight GET IT NOW . The Get Tunes & Tones menu is hig...
Page 135 - Playing Music with the Flip Closed; The external keys which you will use are labeled below.; Playing Music with the Flip Open
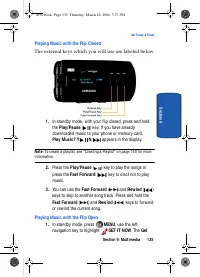
Section 9: Multimedia 135 Get Tunes & Tones S ec tio n 9 Playing Music with the Flip Closed The external keys which you will use are labeled below. 1. In standby mode, with your flip closed, press and hold the Play/ Pause ( ) key. If you have already downloaded music to your phone or memory card...
Page 137 - My Sounds
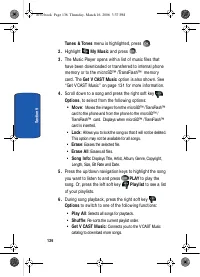
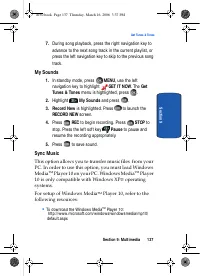
Section 9: Multimedia 137 Get Tunes & Tones S ec tio n 9 7. During song playback, press the right navigation key to advance to the next song track in the current playlist, or press the left navigation key to skip to the previous song track. My Sounds 1. In standby mode, press MENU , use the left...
Page 139 - Manage Music
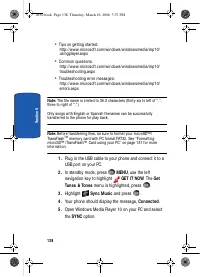
Section 9: Multimedia 139 Get Tunes & Tones S ec tio n 9 6. The left-hand side of the Windows Media Player will display the files on your PC. Check the songs you want to download. 7. On the right-hand side of the Windows Media Player, select whether you want to download the music to Removable st...
Page 140 - Creating a Playlist
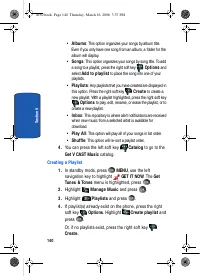
140 S ec ti o n 9 • Albums : This option organizes your songs by album title. Even if you only have one song from an album, a folder for the album will display. • Songs : This option organizes your songs by song title. To add a song to a playlist, press the right soft key Options and select Add to p...
Page 141 - Editing a Playlist
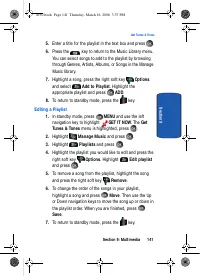
Section 9: Multimedia 141 Get Tunes & Tones S ec tio n 9 5. Enter a title for the playlist in the text box and press . 6. Press the key to return to the Music Library menu. You can select songs to add to the playlist by browsing through Genres, Artists, Albums, or Songs in the Manage Music libra...
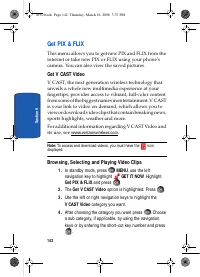
Page 142 - Get V CAST Video; Browsing, Selecting and Playing Video Clips
142 S ec ti o n 9 Get PIX & FLIX This menu allows you to get new PIX and FLIX from the internet or take new PIX or FLIX using your phone’s camera. You can also view the saved pictures. Get V CAST Video V CAST, the next generation wireless technology that unveils a whole new multimedia experience...
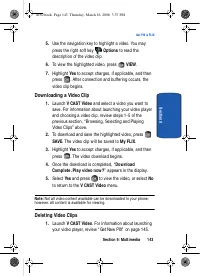
Page 143 - Downloading a Video Clip; Deleting Video Clips
Section 9: Multimedia 143 Get PIX & FLIX S ec tio n 9 5. Use the navigation key to highlight a video. You may press the right soft key Options to read the description of the video clip. 6. To view the highlighted video, press VIEW . 7. Highlight Yes to accept charges, if applicable, and then pre...
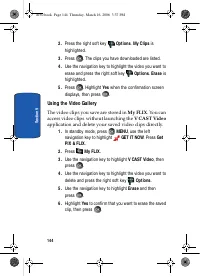
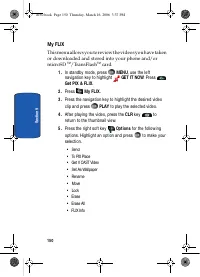
Page 144 - Using the Video Gallery; The video clips you save are stored in; My FLIX; access video clips without launching the; V CAST Video; application and delete your saved video clips directly.
144 S ec ti o n 9 2. Press the right soft key Options . My Clips is highlighted. 3. Press . The clips you have downloaded are listed. 4. Use the navigation key to highlight the video you want to erase and press the right soft key Options . Erase is highlighted. 5. Press . Highlight Yes when the conf...
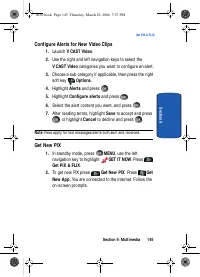
Page 145 - Configure Alerts for New Video Clips; Get New PIX
Section 9: Multimedia 145 Get PIX & FLIX S ec tio n 9 Configure Alerts for New Video Clips 1. Launch V CAST Video . 2. Use the right and left navigation keys to select the V CAST Video categories you want to configure an alert. 3. Choose a sub category if applicable, then press the right soft ke...
Page 146 - Tak e PIX; This menu launches the camera.
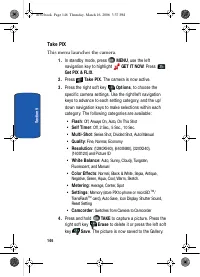
146 S ec ti o n 9 Tak e PIX This menu launches the camera. 1. In standby mode, press MENU , use the left navigation key to highlight GET IT NOW . Press Get PIX & FLIX . 2. Press Tak e PIX . The camera is now active. 3. Press the right soft key Options , to choose the specific camera settings. Us...
Page 147 - PIX Gallery
Section 9: Multimedia 147 Get PIX & FLIX S ec tio n 9 5. To exit the camera, press the key. PIX Gallery 1. In standby mode, press MENU , use the left navigation key to highlight GET IT NOW . Press Get PIX & FLIX . 2. Press Tak e PIX . The camera is now active. Note : When the phone memory is...
Page 148 - Tak e FLIX; This menu launches the camcorder.
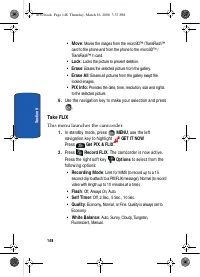
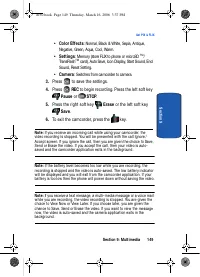
148 S ec ti o n 9 • Move : Moves the images from the microSD™ /TransFlash™ card to the phone and from the phone to the microSD™ /TransFlash™ h card. • Lock : Locks the picture to prevent deletion. • Erase : Erases the selected picture from the gallery. • Erase All : Erases all pictures from the gall...
Page 151 - PIX Place; Send a PIX to your online album.
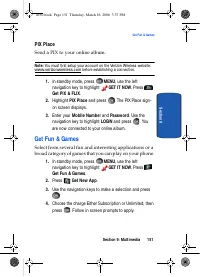
Section 9: Multimedia 151 Get Fun & Games S ec tio n 9 PIX Place Send a PIX to your online album. Note: You must first setup your account on the Verizon Wireless website: www.verizonwireless.com before establishing a connection. 1. In standby mode, press MENU , use the left navigation key to hig...
Page 152 - It presents on-screen items in any of the following ways:; You can utilize the options or links by using the soft keys.
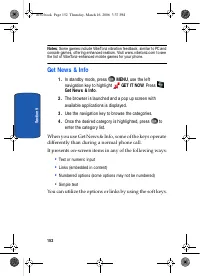
152 S ec ti o n 9 Notes : Some games include VibeTonz vibration feedback, similar to PC and console games, offering enhanced realism. Visit www.vibetonz.com to see the list of VibeTonz-enhanced mobile games for your phone. Get News & Info 1. In standby mode, press MENU , use the left navigation ...
Page 153 - Get Going; Get Extras; is a backup assistant for your Address Book.
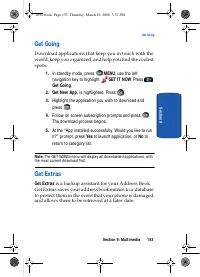
Section 9: Multimedia 153 Get Going S ec tio n 9 Get Going Download applications that keep you in touch with the world, keep you organized, and help you find the coolest spots. 1. In standby mode, press MENU , use the left navigation key to highlight GET IT NOW . Press Get Going . 2. Get New App. is...
Page 156 - Voice Commands
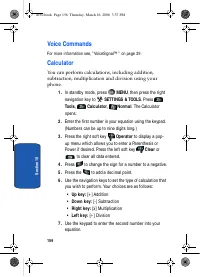
156 S ec ti o n 1 0 Voice Commands For more information see, " VoiceSignal™ " on page 39. Calculator You can perform calculations, including addition, subtraction, multiplication and division using your phone. 1. In standby mode, press MENU , then press the right navigation key to SETTINGS &...
Page 157 - Tip; Converter
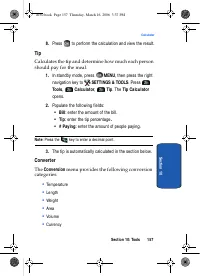
Section 10: Tools 157 Calculator S ec tio n 1 0 8. Press to perform the calculation and view the result. Tip Calculates the tip and determine how much each person should pay for the meal. 1. In standby mode, press MENU , then press the right navigation key to SETTINGS & TOOLS . Press Tools , Cal...
Page 158 - To convert any of the above categories, do the following:; Calendar; Add a new event
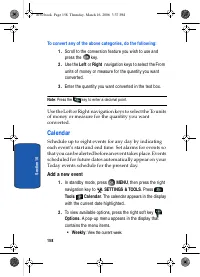
158 S ec ti o n 1 0 To convert any of the above categories, do the following: 1. Scroll to the conversion feature you wish to use and press the key. 2. Use the Left or Right navigation keys to select the From units of money or measure for the quantity you want converted. 3. Enter the quantity you wa...
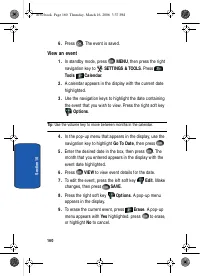
Page 160 - View an event
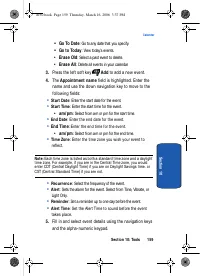
160 S ec ti o n 1 0 6. Press . The event is saved. View an event 1. In standby mode, press MENU , then press the right navigation key to SETTINGS & TOOLS . Press Tools Calendar . 2. A calendar appears in the display with the current date highlighted. 3. Use the navigation keys to highlight the d...
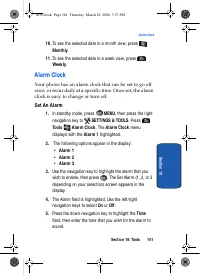
Page 161 - Alarm Clock; Set An Alarm
Section 10: Tools 161 Alarm Clock S ec tio n 1 0 10. To see the selected date in a month view, press Monthly . 11. To see the selected date in a week view, press Week ly . Alarm Clock Your phone has an alarm clock that can be set to go off once, or recur daily at a specific time. Once set, the alarm...
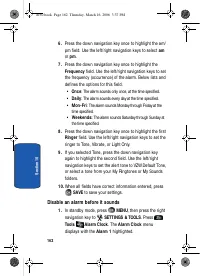
Page 162 - Disable an alarm before it sounds
162 S ec ti o n 1 0 6. Press the down navigation key once to highlight the am/pm field. Use the left/right navigation keys to select am or pm . 7. Press the down navigation key once to highlight the Frequency field. Use the left/right navigation keys to set the frequency (occurrence) of the alarm. B...
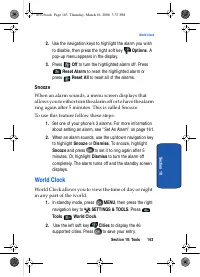
Page 163 - Snooze; To use this feature follow these steps:; World Clock
Section 10: Tools 163 World Clock S ec tio n 1 0 2. Use the navigation keys to highlight the alarm you wish to disable, then press the right soft key Options . A pop-up menu appears in the display. 3. Press Off to turn the highlighted alarm off. Press Reset Alarm to reset the highlighted alarm or pr...
Page 164 - Stop Watch; Reset
164 S ec ti o n 1 0 3. Press the right soft key Options to view the following options: • Set As Local Time : Sets the time according to the city chosen in the Cities field. • DST On : Sets the Daylight Savings time option. 4. You can scroll through other cities by pressing the navigation keys. 5. Pr...
Page 165 - Notepad
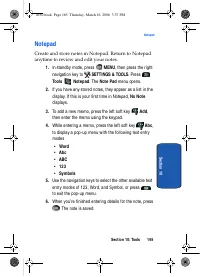
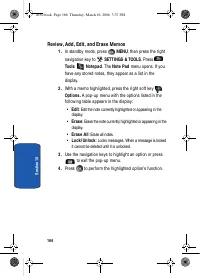
Section 10: Tools 165 Notepad S ec tio n 1 0 Notepad Create and store notes in Notepad. Return to Notepad anytime to review and edit your notes. 1. In standby mode, press MENU , then press the right navigation key to SETTINGS & TOOLS . Press Tools Notepad . The Note Pad menu opens. 2. If you hav...
Page 167 - Section 11: Mobile Web; This section outlines the available mobile web options.
Section 11: Mobile Web 167 S ec tio n 1 1 Section 11: Mobile Web Topics Covered • Mobile Web • Launching Mobile Web • Exit Mobile Web • Navigate the Web • Mobile Web Soft keys • Links • Place a Call While Using Mobile Web This section outlines the available mobile web options. a930.book Page 167 Thu...
Page 168 - Mobile Web; Use the navigation key to browse the categories.; Exit Mobile Web; To exit the Mobile Web, press the
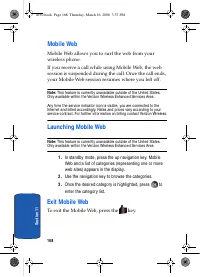
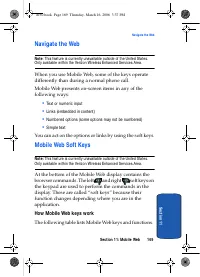
168 S ec ti o n 1 1 Mobile Web Mobile Web allows you to surf the web from your wireless phone. If you receive a call while using Mobile Web, the web session is suspended during the call. Once the call ends, your Mobile Web session resumes where you left off. Note: This feature is currently unavailab...
Page 169 - Navigate the Web; You can act on the options or links by using the soft keys.; Mobile Web Soft Keys; and right; How Mobile Web k eys work; The following table lists Mobile Web keys and functions.
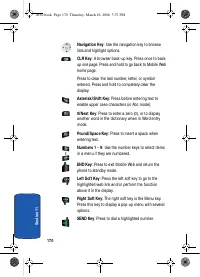
Section 11: Mobile Web 169 Navigate the Web S ec tio n 1 1 Navigate the Web Note : This feature is currently unavailable outside of the United States. Only available within the Verizon Wireless Enhanced Services Area. When you use Mobile Web, some of the keys operate differently than during a normal...
Page 171 - Link s; is used to select a highlighted link.; Place a Call While Using Mobile Web; to call the
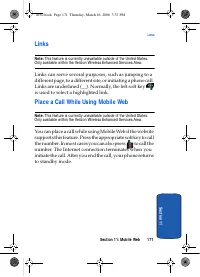
Section 11: Mobile Web 171 Link s S ec tio n 1 1 Link s Note: This feature is currently unavailable outside of the United States. Only available within the Verizon Wireless Enhanced Services Area. Links can serve several purposes, such as jumping to a different page, to a different site, or initiati...
Page 174 - Health and Safety Information
S ec ti o n 1 2 174 Health and Safety Information Exposure to Radio Frequency (RF) Signals Certification Information (SAR) Your wireless phone is a radio transmitter and receiver. It is designed and manufactured not to exceed the exposure limits for radio frequency (RF) energy set by the Federal Com...
Page 176 - UL Certified Travel Adapter; INJURY AND POSSIBLE PROPERTY DAMAGE
S ec ti o n 1 2 176 it may be necessary to remove the battery pack to find the number. Once you have the FCC ID number for a particular phone, follow the instructions on the website and it should provide values for typical or maximum SAR for a particular phone. Additional product specific SAR inform...
Page 177 - Consumer Information on Wireless Phones; What k inds of phones are the subject of this update?
Section 12: Health and Safety Information 177 Consumer Information on Wireless Phones S ec tio n 1 2 Consumer Information on Wireless Phones The U.S. Food and Drug Administration (FDA) has published a series of Questions and Answers for consumers relating to radio frequency (RF) exposure from wirele...
Page 179 - FDA shares regulatory responsibilities for wireless
Section 12: Health and Safety Information 179 Consumer Information on Wireless Phones S ec tio n 1 2 • Design wireless phones in a way that minimizes any RF exposure to the user that is not necessary for device function; and • Cooperate in providing users of wireless phones with the best possible in...
Page 180 - What are the results of the research done already?
S ec ti o n 1 2 180 thus not the primary subject of the safety questions discussed in this document. What are the results of the research done already? The research done thus far has produced conflicting results, and many studies have suffered from flaws in their research methods. Animal experiments...
Page 183 - What about children using wireless phones?
Section 12: Health and Safety Information 183 Consumer Information on Wireless Phones S ec tio n 1 2 • If you must conduct extended conversations by wireless phone every day, you could place more distance between your body and the source of the RF, since the exposure level drops off dramatically wit...
Page 186 - Road Safety
S ec ti o n 1 2 186 testing to assess the interference and work to resolve the problem. Additional information on the safety of RF exposures from various sources can be obtained from the following organizations: • FCC RF Safety Program: http://www.fcc.gov/oet/rfsafety/ • Environmental Protection Age...
Page 189 - Operating Environment
Section 12: Health and Safety Information 189 Operating Environment S ec tio n 1 2 10. Call roadside assistance or a special non-emergency wireless assistance number when necessary. If you see a broken-down vehicle posing no serious hazard, a broken traffic signal, a minor traffic accident where no ...
Page 190 - Using Your Phone Near Other Electronic Devices; Pacemak ers; Persons with pacemak ers:; Hearing Aid Compatibility with Mobile Phones
S ec ti o n 1 2 190 Using Your Phone Near Other Electronic Devices Most modern electronic equipment is shielded from radio frequency (RF) signals. However, certain electronic equipment may not be shielded against the RF signals from your wireless phone. Consult the manufacturer to discuss alternativ...
Page 191 - Phones rated M3 or M4 meet FCC
Section 12: Health and Safety Information 191 Using Your Phone Near Other Electronic Devices S ec tio n 1 2 interference noise, and phones also vary in the amount of interference they generate. The wireless telephone industry has developed ratings for some of their mobile phones, to assist hearing d...
Page 192 - Other Medical Devices; Potentially Explosive Environments
S ec ti o n 1 2 192 Other Medical Devices If you use any other personal medical devices, consult the manufacturer of your device to determine if it is adequately shielded from external RF energy. Your physician may be able to assist you in obtaining this information. Switch your phone off in health ...
Page 193 - Emergency Calls; To make an emergency call:
Section 12: Health and Safety Information 193 Emergency Calls S ec tio n 1 2 (fuel storage and distribution areas), chemical plants or where blasting operations are in progress. Areas with a potentially explosive atmosphere are often but not always clearly marked. They include below deck on boats, c...
Page 194 - Restricting Children's access to your Phone; FCC Notice and Cautions; FCC Notice
S ec ti o n 1 2 194 If certain features are in use (call barring, for example), you may first need to deactivate those features before you can make an emergency call. Consult this document and your local cellular service provider. When making an emergency call, remember to give all the necessary inf...
Page 195 - Cautions; Other Important Safety Information
Section 12: Health and Safety Information 195 Other Important Safety Information S ec tio n 1 2 Cautions Any changes or modifications to your phone not expressly approved in this document could void your warranty for this equipment, and void your authority to operate this equipment. Only use approve...
Page 196 - Product Performance; Getting the Most Out of Your Signal Reception
S ec ti o n 1 2 196 • Failure to observe these instructions may lead to the suspension or denial of telephone services to the offender, or legal action, or both. Product Performance Getting the Most Out of Your Signal Reception The quality of each call you make or receive depends on the signal stren...
Page 197 - Maintaining Your Phone's Peak Performance; Availability of Various Features/ Ring Tones
Section 12: Health and Safety Information 197 Availability of Various Features/ Ring Tones S ec tio n 1 2 Maintaining Your Phone's Peak Performance For the best care of your phone, only authorized personnel should service your phone and accessories. Faulty service may void the warranty. There are se...
Page 198 - Battery Standby and Talk Time
S ec ti o n 1 2 198 Battery Standby and Talk Time Standby and talk times will vary depending on phone usage patterns and conditions. Battery power consumption depends on factors such as network configuration, signal strength, operating temperature, features selected, frequency of calls, and voice, d...
Page 200 - Non-Supported Battery; WARNING TO USER; : If you have received the message; Care and Maintenance
S ec ti o n 1 2 200 • Dispose of used batteries in accordance with local regulations. In some areas, the disposal of batteries in household or business trash may be prohibited. For safe disposal options for Li-Ion batteries, contact your nearest Samsung authorized service center. Always recycle. Do ...
Page 203 - Section 13: Warranty Information
Section 13: Warranty Information 203 S ec tio n 1 3 Section 13: Warranty Information Topics Covered • Standard Limited Warranty This section explains the warranty information for your new phone. a930.book Page 203 Thursday, March 16, 2006 3:37 PM
Page 204 - Standard Limited Warranty; What is Covered and For How Long?
204 S ec ti o n 1 3 Standard Limited Warranty What is Covered and For How Long? SAMSUNG TELECOMMUNICATIONS AMERICA, L.P. ("SAMSUNG") warrants to the original purchaser ("Purchaser") that SAMSUNG's Phones and accessories ("Products") are free from defects in material and workm...
Page 205 - During the applicable
Section 13: Warranty Information 205 Standard Limited Warranty S ec tio n 1 3 ancillary/peripheral equipment not furnished or approved by SAMSUNG; (e) defects or damage from improper testing, operation, maintenance, installation, or adjustment; (f) installation, maintenance, and service of Product, ...
Page 209 - Printed in South Korea
Section 13: Warranty Information 209 Standard Limited Warranty S ec tio n 1 3 OF ANY SUCH THIRD-PARTY SOFTWARE OR EQUIPMENT LIE SOLELY WITH THE PURCHASER AND THE DIRECT VENDOR, OWNER OR SUPPLIER OF SUCH THIRD-PARTY SOFTWARE OR EQUIPMENT, AS THE CASE MAY BE. This Limited Warranty allocates risk of Pr...
Page 211 - Index; Numerics
211 Index Numerics 1-touch dialing 78 2-touch dialing 78 3G protocol icon 22 3-touch dialing 78 911, notes about 117 A Adding a New Contact En-try 69 Alarm clock icon 24 snooze 163 turn off the alarm 162 Answer options 119 Auto answer 119 Auto answer icon 24 Auto retry 120 B Back up to last menu 52 ...


 Samsung A740
User Manual
Samsung A740
User Manual
 Samsung A840
User Manual
Samsung A840
User Manual
 Samsung SCH E250
User Manual
Samsung SCH E250
User Manual
 Samsung SCH i830
User Manual
Samsung SCH i830
User Manual
 Samsung SCH N391
User Manual
Samsung SCH N391
User Manual
 Samsung SCH-A101
User Manual
Samsung SCH-A101
User Manual
 Samsung SCH-A212
User Manual
Samsung SCH-A212
User Manual
 Samsung SCH-A302
User Manual
Samsung SCH-A302
User Manual
 Samsung SCH-X969
User Manual
Samsung SCH-X969
User Manual
 Samsung SPH A740
User Manual
Samsung SPH A740
User Manual
 Samsung SPH A860
User Manual
Samsung SPH A860
User Manual
 Samsung SPH i700
User Manual
Samsung SPH i700
User Manual
 Samsung A920
Manual
Samsung A920
Manual
 Samsung 830
Manual
Samsung 830
Manual