Page 2 - SPECIAL FEATURES; An FCC warning
SPECIAL FEATURES Thank you for buying a Samsung Digital Camera.This digital camera has the following features. Digimax 410 : A high resolution of 4.0 mega pixelsDigimax 340 : A high resolution of 3.2 mega pixelsA 3 X optical and 2 X digital zoom lensMovie clip recording functionVoice Recording &...
Page 3 - MANUFACTURER’S CONTENTS; Manufacturer's contents; READY
MANUFACTURER’S CONTENTS Manufacturer's contents Please check that you have the correct contents before using this product. READY AC Adapter Digital camera CompactFlash TM card (CF CARD) 4 AA Alkaline Batteries Pouch User manual Accessories (optional) Product warranty Applications S/ W , Driver CD-RO...
Page 4 - THIS DIGITAL CAMERA CAN BE USED FOR; Printing images
THIS DIGITAL CAMERA CAN BE USED FOR Editing imageson a PC Recording imagesonto CD Printing images Viewing imageson TV
Page 6 - CONTENTS; Ready
CONTENTS Ready Getting to Know your camera 7 Safety note 8 Identification of features 10 Product Exterior 10 Viewfinder 12 LCD panel indicator 14 LCD monitor indicator 15 LCD monitor menu indicator 17 Preparation 19 Connecting to Power 19 Using the batteries 19 Using the AC power adapter 20 Attachin...
Page 7 - GETTING TO KNOW YOUR CAMERA; Symbol Explanations; Warning; Reference
GETTING TO KNOW YOUR CAMERA Symbol Explanations Prior to using this camera, please read the user manual thoroughly. Keep the manual in a safe place. This manual contains instructions on using this camera that will help you to use this camera safely and correctly. This will help prevent danger and in...
Page 10 - IDENTIFICATION OF FEATURES
IDENTIFICATION OF FEATURES Product Exterior (Front / Top / Bottom) Microphone Shutter button (page 31) Mode dial (page 26) Strap eyelet Lens Self-timer lamp Viewfinder Flash fading control sensor LCD panel Flash Battery chamber cover Tripod socket Cover lock
Page 12 - Viewfinder
IDENTIFICATION OF FEATURES Product Exterior (side) Viewfinder Close range picture area mark Picture area frame Optimum picture area over 1.5m Autofocus frame Optimum picture area within 0.8m ~ 1.5m DC input connection point (DC 6V IN) Video connection terminal USB connection terminal Card cover CF C...
Page 13 - Note
READY IDENTIFICATION OF FEATURES Reference Vertical and Horizontal shots are taken in the same way. Avoid obstructing the lens or the flash when you take a picture. Note As there can be some differences between what is seen through the Viewfinder and the resulting image when taken at a range closer ...
Page 14 - LCD panel indicator
IDENTIFICATION OF FEATURES LCD panel indicator The LCD panel displays information about the shooting conditions. Image size Digimax 410 Digimax 340 L : 2272X1704 L : 2048X1536 M : 1600X1200 M : 1024X 0 768 S : 0 640X 0 480 S : 640X 0 480 Shooting information MACRO SHOT mode : Number of available sho...
Page 15 - LCD monitor indicator
READY IDENTIFICATION OF FEATURES LCD monitor indicator The LCD monitor displays information about the shooting conditions. SHOT mode Whenever you press the LCD button, the LCD monitor will change in the following order : Image & Status Image only LCD Off. 1 Battery condition page 14 2 Flash page...
Page 16 - REC
IDENTIFICATION OF FEATURES 9 ISO page 49 10 Focusing Methods page 39 11 Sharpness page 50 12 Image quality page 43 13 Image size page 42 14 Number of available shots remaining 15 Zoom / Digital zoom page 33 16 Movie clip shot page 30 17 Shooting mode page 40 PLAY mode 13/13 15SEC 2002/ 01/ 01 00 : 0...
Page 17 - LCD monitor menu indicator
READY IDENTIFICATION OF FEATURES LCD monitor menu indicator Each mode has a menu as shown below. The default settings in each mode are printed below. FOCUSING : select focusing methods (page 39) SHOOTING MODE : select shooting mode (page 40) IMAGE SIZE : select image size (page 42) Digimax 410 : 227...
Page 19 - Connecting to Power; Important information about battery usage
READY PREPARATION Connecting to Power There are two ways in which to provide the camera with power. You can use batteries (AA Alkaline, Ni-MH), or alternatively, you can use an AC Adapter (DC 6V / 2.0A). Using the batteries 1 Pull the battery chamber cover lock in the direction of the arrow( ) and o...
Page 20 - PREPARATION; Refer to the illustrations below; WARNING; Attaching the strap
PREPARATION Using the AC power adapter If you have access to a mains supply, using an AC Adapter allows the camera to be used for long periods of time. If you connect the camera to a computer, it is advisable to use an AC adapter, as this will enable extended use. Plug the adapter into the connectio...
Page 21 - Inserting the CF CARD
READY PREPARATION Inserting the CF CARD 1 Pull the card cover in the direction of the arrow to open. 2 Insert the card towards the arrow. The back side of the CFCARD and the LCD monitor should face in the samedirection when the card is inserted. 3 To close the card cover, push the card cover against...
Page 23 - Instructions on how to use the CF CARD; Using a new CF CARD for the first time
READY PREPARATION Instructions on how to use the CF CARD Using a new CF CARD for the first time Before using the CF CARD, it must be initialized. Initializing prepares the CF CARD for recording data. For more details, please refer to page 65. Preserving the CF CARD data If the card is subjected to a...
Page 24 - Selecting the date and time
PREPARATION Selecting the date and time You will need to check and select the correct Date / Time when : The camera is used for the firsttime. The batteries have been removed. The DATE / TIME will only be displayed on the LCD monitor. When you print the image, the DATE/TIME will not be printed.The D...
Page 26 - CAMERA WORKING MODE; Camera working mode
CAMERA WORKING MODE Camera working mode You can select the desired working mode by using the mode dial located on the top of thecamera.This digital camera has 6 working modes. These are listed below. STILL IMAGE mode ( )This mode is used for taking still images from 0.8 ~ infinity andtaking a moving...
Page 27 - Now let's take a picture
ADV ANCED TAKING PHOTOS Now let's take a picture 1 To switch on the camera, press the POWER button ( ). 2 Select the desired shot mode (STILL IMAGE / MACRO SHOT / MOVIE CLIP ) according to the image range or subject by using the mode dial ( ) on the top of the camera. 3 Change the camera functions b...
Page 28 - TAKING PHOTOS; CARD FULL
TAKING PHOTOS Note Select MACRO SHOT mode when the subject is between 0.2m ~ 0.8m from the camera. Refer to page 26 for information on MACRO SHOT. If you do not select the correct shot mode appropriate to the distance from the subject to the camera, you will not be able to obtain a clear shot of the...
Page 29 - next to the viewfinder.; Backlight compensated shot
ADV ANCED TAKING PHOTOS Reference There are two LED lamps (one green, one red) positioned next to the viewfinder. If the camera is in focus when you press the shutter button halfway, the green LED will light up and you can take an image. If the red lamp lights up, the flash can fire. If the red lamp...
Page 30 - SETTING UP THE SHOOTING FUNCTION; Movie clip shot
SETTING UP THE SHOOTING FUNCTION Movie clip shot In a movie clip shot, sound and movie clip are recorded at the same time.Sound recording is optional in MOVIE CLIP mode. When the mode dial is rotated to MOVIE CLIP mode, the LCD monitor will be displayed asshown below. Press the shutter button once a...
Page 31 - Using the camera button to adjust the camera; POWER button; SHUTTER button
ADV ANCED SETTING UP THE SHOOTING FUNCTION Using the camera button to adjust the camera POWER button - Used for turning the camera power on / off. - The camera power will be turned off automatically during periods of inactivity. The camera can be reactivated by pressing the power button again. SHUTT...
Page 32 - MENU button; LANDSCAPE button
SETTING UP THE SHOOTING FUNCTION MENU button - When you press the MENU button, a menu related to each camera mode will be displayed on the LCD monitor. Pressing it again will return the LCD to the initial display. - A menu option can be displayed when the following are selected : shot(STILL IMAGE / ...
Page 33 - Digital zoom; Cancel Digital zoom
ADV ANCED SETTING UP THE SHOOTING FUNCTION ZOOM (W/T) button Used for digital or optical zooming in / out in SHOT mode (STILL IMAGE / MACRO SHOT / MOVIE CLIP). Digital zooming is not available in MOVIE CLIP mode When you press the zoom (W/T) button, the zoom bar will display in the upper centre of t...
Page 34 - OK button; UP button; DOWN button
SETTING UP THE SHOOTING FUNCTION OK button Used as a confirming data that is changed by using / / / buttons. UP button When the menu is displayed on the LCD monitor, pressing the UP ( ) button makes the cursor shift to up, or changes the sub menu. DOWN button When the menu is displayed on the LCD mo...
Page 36 - Auto flash and Red eye reduction
SETTING UP THE SHOOTING FUNCTION Flash mode indicator Reference Using the flash frequently will reduce the life of the batteries. Under normal operating conditions the charging time for the flash is normally within 7 seconds. If the batteries are weak, the charging time will be longer. The default o...
Page 38 - Using the LCD monitor to adjust the camera
SETTING UP THE SHOOTING FUNCTION Using the LCD monitor to adjust the camera Shooting functions can be changed by using the LCD monitor.In the shot mode, pressing the MENU button displays the menu on the LCD monitor.The following functions are available, depending on the mode you have selected (STILL...
Page 42 - SIZE
SETTING UP THE SHOOTING FUNCTION SIZE In STILL IMAGE and MACRO SHOT mode, you can select the image size. A large image uses more memory, so increasing image size will reduce the total number of shots you can store on a CF CARD. The image sizes are listed below. 1. Turn the camera power on. 2. Rotate...
Page 48 - METERING
SETTING UP THE SHOOTING FUNCTION METERING This button can be used to obtain the right exposure. 1. Turn the camera power on. 2. Rotate the mode dial to the STILL IMAGE mode or MACRO SHOT mode. 3. Do not turn the LCD monitor off. 4. Press MENU button to display the menu on the LCD monitor. Press UP (...
Page 53 - SETTING UP PLAY BACK FUNCTIONS; Starting PLAY Mode; ADV; Camera button
SETTING UP PLAY BACK FUNCTIONS Starting PLAY Mode ADV ANCED Turn the camera on and select PLAY mode ( ) on the mode dial. The camera can now play back the images stored on the CF CARD. Sound can also be added to images in this mode. You can setup the PLAY mode function by using the camera buttons an...
Page 54 - Setting up play back function by using the camera button; THUMBNAIL / ZOOM W button
SETTING UP PLAY BACK FUNCTIONS Setting up play back function by using the camera button THUMBNAIL / ZOOM W button You can view up to 6 images at a time by using the THUMBNAIL function. 1. Turn the camera power on.2. Rotate the mode dial to the PLAY mode.3. An image displays on the LCD monitor.4. Pre...
Page 55 - ZOOM T button
SETTING UP PLAY BACK FUNCTIONS ADV ANCED ZOOM T button When viewing a single image in PLAY mode, use the zoom T button to enlarge theselected image. 1. Turn the camera on.2. Rotate the mode dial to the PLAY mode ( ).3. Select the desired image.4. Enlarge the image to 2X scale of enlargement by using...
Page 56 - DELETE button; NO
SETTING UP PLAY BACK FUNCTIONS DELETE button This deletes images stored on the CF CARD. 1. Turn the camera power on. 2. Rotate the mode dial to the PLAY mode. 3. Press the LEFT ( ) / RIGHT ( ) buttons to select the image that you wish to delete. 4. When you press the DELETE ( ) button, a message wil...
Page 58 - PLAY & PAUSE explained
SETTING UP PLAY BACK FUNCTIONS PLAY & PAUSE explained If an image is showing, but there is no sound (or movement) : Press the PLAY& PAUSE ( ) button to play the sound clip or to start the movie clip. If the image is playing : The progress is paused. If the PLAY & PAUSE ( ) button is pres...
Page 59 - Setting up play back function using the LCD monitor
SETTING UP PLAY BACK FUNCTIONS Setting up play back function using the LCD monitor ADV ANCED DELETE ALL This enables you to clear all images from the CF CARD. Remember that this will permanently delete images. Important shots should be stored on a computer before deletion takes place. 1. Turn the ca...
Page 61 - QUANTITY
SETTING UP PLAY BACK FUNCTIONS DPOF (Digital Print Order Format) ADV ANCED DPOF stores printing information onto the CF CARD, enabling you to have images printed directly from the CF CARD. Images can then be printed on DPOF printers, or at an increasing number of photo laboratories. This function is...
Page 62 - INDEX
SETTING UP PLAY BACK FUNCTIONS INDEX The images are printed as a thumbnail on a page by this function. 1. Turn the camera power on. 2. Rotate the mode dial to the PLAY mode. 3. Press the MENU button to display the menu on the LCD monitor. 4. Press UP ( ) / DOWN ( ) button and select [DPOF]. 5. The c...
Page 63 - CANCEL
SETTING UP PLAY BACK FUNCTIONS ADV ANCED CANCEL This will cancel the STD(standard) and INDEX DPOF function. 1. Turn the camera power on. 2. Rotate the mode dial to the PLAY mode. 3. Press the MENU button to display the menu on the LCD monitor. 4. Press UP ( ) / DOWN ( ) button and select [DPOF]. 5. ...
Page 65 - Starting SETUP mode
ADV ANCED SETTING UP THE CAMERA SYSTEM Starting SETUP mode Rotate the mode dial to SETUP mode, allowing you to set up the basic camera settings. FORMAT This is used for formatting the CF CARD. 1. Turn the camera power on.2. Rotate the mode dial to the SETUP mode.3. A menu will display on the LCD mon...
Page 66 - SETTING UP THE CAMERA SYSTEM; POWER OFF
SETTING UP THE CAMERA SYSTEM POWER OFF This function switches the camera off after a set amount of time in order to prevent unnecessary battery drainage. You can set the power to switch off at any specified time(1, 3, 5, 10, 30MIN) from the last operation. Note that the automatic power off does not ...
Page 69 - VIDEO OUT
ADV ANCED SETTING UP THE CAMERA SYSTEM VIDEO OUT The video output signal from the camera can be NTSC or PAL. Your choice of output will be governed by the type of machine (monitor or TV, etc.) to which the camera is connected. Select the correct video standard for the outer monitor. PAL mode can sup...
Page 70 - LANGUAGE
SETTING UP THE CAMERA SYSTEM LANGUAGE There is a choice of languages that can be displayed on the LCD monitor. 1. Turn the camera power on. 2. Rotate the mode dial to the SETUP mode. 3. A menu will display on the LCD monitor. 4. Press UP ( ) / DOWN ( ) button and select [LANGUAGE]. 5. The cursor can...
Page 74 - CONNECTING TO AN EXTERNAL MONITOR; Connecting to an external monitor
CONNECTING TO AN EXTERNAL MONITOR Connecting to an external monitor In PLAY mode, you can view the stored images or movie clips by connecting the camera to an external monitor via the video cable. When the camera is connected to an external monitor, the LCD monitor will be turned off automatically. ...
Page 75 - Functions of PC mode; Downloading stored images
ADV ANCED PC MODE Functions of PC mode Note The USB Storage Driver must be installed before using PC mode. Refer to page 86 regarding installation. To save battery power, it is recommended that you use an AC adaptor(Optional) when connecting the camera to a computer. Downloading stored images Once y...
Page 76 - IMPORTANT NOTES
IMPORTANT NOTES Caution! Your new Samsung camera is a precision instrument. Whilst it is designed to withstand general wear and tear, there are some important points that will help you get maximum service and reliability from your camera. The following should be avoided : Severe changes in temperatu...
Page 78 - IMPORTANT NOTE; Warning indicator
IMPORTANT NOTE Warning indicator There are several warnings that may appear in the LCD display : Warning message NO CARD NO IMAGES CARD FULL Reason for message No CF CARD. The camera cannot recognize the CF CARD. There are no images stored on the CF CARD. There is insufficient memory capacity to tak...
Page 79 - Please check the following
ADV ANCED BEFORE CONTACTING A SERVICE CENTER Please check the following Symptom The camera doesn’t switch on. The camera powers down whilst in use. The batteries are exhausted. Camera is turned off automatically due to the Auto power function. Adapter plug is not connected securely. Batteries drain ...
Page 80 - BEFORE CONTACTING A SERVICE CENTER
BEFORE CONTACTING A SERVICE CENTER Please check the following Symptom The images are unclear. The flash does not fire. Incorrect date and time is displayed. The camera buttons do not operate. Cause The focus mode is not correct. FLASH OFF mode has been selected. The date and time have been set incor...
Page 82 - SPECIFICATIONS
SPECIFICATIONS 1/1.8” CCDApprox. 4.0 (Digimax 340 : 3.2) Mega pixelsApprox. 4.1 (Digimax 340 : 3.3) Mega pixelsSHD Lens f = 7.0 ~ 21.0mm (35mm film equivalent : 34 ~ 102mm)F2.6 ~ F4.5STILL IMAGE/MACRO SHOT mode : 2XPLAY mode : 2XReal image optical viewfinder 1.6" color TFT LCDTTL autofocus (Cent...
Page 84 - About software; SOFTWARE MANUAL
About software USB Storage Driver This camera uses a USB Storage Driver as the camera driver. You can use the cameraas a USB card reader. After installing the driver and connecting this camera to the PC,you can find [Removable Disk] in [Windows Explorer] or [My computer].USB Storage Driver is provid...
Page 85 - How to set up the software
SOFTW ARE HOW TO SET UP THE SOFTWARE FOR WINDOWS How to set up the software After inserting the CD-ROM provided with this camera into the CD-ROM drive, the following frame is automatically run. 1. Driver : This enables images to transfer between the camera and PC. Driver installation for Windows : r...
Page 86 - HOW TO SET UP THE SOFTWARE FOR WINDOWS; Setting up USB driver for Windows
HOW TO SET UP THE SOFTWARE FOR WINDOWS Setting up USB driver for Windows 1 Click [Storage Driver] menu on the Autorun frame and the ‘Welcome’ Window will open. Click [Next >]. 2 [Storage Driver] installation has started. 3 Installation is complete. Restart your computer. To use this camera with a...
Page 88 - Setting up DirectX 8.1 for Windows
HOW TO SET UP THE SOFTWARE FOR WINDOWS Setting up DirectX 8.1 for Windows 1 After driver installation, [Microsoft DirectX 8.1 Setup] window will open automatically. Click [Yes]. 2 The software license agreement window will open. If you agree to it, click [Yes]. This will take you to the next step. I...
Page 89 - Setting up DirectX 8.1 for windows
HOW TO SET UP THE SOFTWARE FOR WINDOWS SOFTW ARE Setting up DirectX 8.1 for windows 4 Your system will be updated. 5 Installation is complete. Restart your computer.
Page 90 - Setting up Digimax Viewer
HOW TO SET UP THE SOFTWARE FOR WINDOWS Setting up Digimax Viewer This software is only compatible with Windows. 1 Click [Digimax Viewer] on the Autorun frame. 2 The installation window will be displayed as shown alongside. Click [Next]. 3 The Software License Agreement window will display. If you ag...
Page 92 - Setting up the MGI PhotoSuite lll SE
HOW TO SET UP THE SOFTWARE FOR WINDOWS Setting up the MGI PhotoSuite lll SE 2 Select language. 3 A Welcome window will be displayed. Click [Next >] to move to the next step. 4 The Software License Agreement window will be displayed. If you agree to this, click [Yes], the window will then move to ...
Page 95 - Connecting USB cable to the Camera for Windows; CONNECTING THE CAMERA FOR WINDOWS; Removable Disk
SOFTW ARE Connecting USB cable to the Camera for Windows CONNECTING THE CAMERA FOR WINDOWS To download images, you will need Windows 98 or later and a USB port on your computer. 1 Connect the USB cable to the USB port on the computer. 2 Connect the other end of the USB cable to the USB connection te...
Page 96 - REMOVABLE DISK
REMOVABLE DISK Note Important information whilst using the Removable Disk The [Removable Disk] indicator will not show when the camera power is off. We recommend that you should copy the images to the PC to view them. Opening images directly from the removable disk may be subject to unexpected disco...
Page 97 - Digimax Viewer
SOFTW ARE HOW TO USE THE SOFTWARE Digimax Viewer This software is only compatible with Windows. To open Digimax Viewer, click the [ Start Programs Samsung Digimax Viewer 1.0 Digimax Viewer 1.0 ] and Digimax Viewer 1.0 will then open. The stored images will be displayed as thumbnail image. You can ea...
Page 98 - HOW TO USE THE SOFTWARE; MGI PhotoSuite
HOW TO USE THE SOFTWARE MGI PhotoSuite SE This software is only compatible with Windows. To open MGI PhotoSuite lll SE, click the [Start Programs MGI PhotoSuite lll SE MGI PhotoSuite lll SE] and MGI PhotoSuite lll SE will then open.
Page 101 - MGI PhotoSuite lll SE; GET
SOFTW ARE HOW TO USE THE SOFTWARE MGI PhotoSuite lll SE GET To obtain images from the computer 1 To acquire images, Click the large [Get] button on the Welcome screen, or the [Get] button on the Navigation bar. Click [Computer] from the list of options displayed on the activity panel. 2 The Open fil...
Page 105 - PREPARE; Touchup; Special Effects; Stitching
SOFTW ARE HOW TO USE THE SOFTWARE MGI PhotoSuite lll SE PREPARE When the image is loaded, the step changes to Prepare automatically. Menu for the [PREPARE] step Rotate & Crop You can rotate, flip or crop images along with a host of others. Touchup Remove Red eye, Remove Scratches etc.. are avail...
Page 106 - COMPOSE; Collages : A collage consists of several photos; Photo Layouts : The Photo Layouts activity; Cards & tags : Use your photos to create items
HOW TO USE THE SOFTWARE MGI PhotoSuite lll SE COMPOSE Add Text , Compound Images etc.. are available in this step. Menu for the [COMPOSE] steps Collages : A collage consists of several photos or sections of photos arranged together on a common background. Photo Layouts : The Photo Layouts activity i...
Page 107 - ORGANIZE
SOFTW ARE HOW TO USE THE SOFTWARE MGI PhotoSuite lll SE ORGANIZE Organize your photos and other media files into albums. Menu for the [ORGANIZE] step Choose a photo album to view or edit Select Album : To create an Album, click [Organize] in the welcome screen or navigation bar. Album.. : Open Maste...
Page 109 - SHARE; Save
SOFTW ARE HOW TO USE THE SOFTWARE MGI PhotoSuite lll SE SHARE Saving images 1 Saving or sharing images. Menu for the [SHARE] step Save To save the active file according to its current name and path. Save As To assign a new name or path to the file. Send E-mail e-mailing images. Slide Show Viewing im...
Page 110 - PRINT; Print
HOW TO USE THE SOFTWARE MGI PhotoSuite lll SE Reference For more information, please refer to the Help file in [Help MGI PhotoSuite lll help]. PRINT Printing images 1 You can print images. Menu for the [PRINT] step Print Printing images. Print Multiples Print multiple copies of a photo or project, o...
Page 111 - Removing USB Driver for Windows
SOFTW ARE REMOVING THE USB DRIVER FOR WINDOWS Removing USB Driver for Windows 1 Click [Add/Remove programs] in Controller. 2 After selecting [Samsung Digimax 410], click [Add/Remove] and the following window will be displayed.
Page 112 - REMOVING THE USB DRIVER FOR WINDOWS
REMOVING THE USB DRIVER FOR WINDOWS Reference If you are a Windows 2000/ME/XP user, follow the procedure below to remove the USBDriver. 1. Connect the PC to the camera (PC mode, power on)2. As mentioned above, remove [Samsung Digimax 410] in [Add/Remove programs] 3. Click [Unplug or Eject Hardware] ...
Page 113 - Connecting the USB cable to the camera for MAC
SOFTW ARE CONNECTING THE CAMERA FOR MAC Connecting the USB cable to the camera for MAC The USB port has to be in the Macintosh or keyboard. 1 Connect the USB cable to the USB port on the Macintosh. 2 Connect the other end of the USB cable to the USB port of the camera. 3 Rotate the mode dial to PC m...
Page 114 - HOW TO INSTALL AND USE THE USB DRIVER FOR MAC; Setting up the USB Driver for MAC
HOW TO INSTALL AND USE THE USB DRIVER FOR MAC Setting up the USB Driver for MAC 1 The USB Driver for MAC is not included with the Application CD as MAC OS support the camera driver. 2 Check MAC OS. This camera is available in MAC OS 9.0~10.1.3. 3 Connect the camera to the Macintosh and turn the came...
Page 115 - About USB
SOFTW ARE FAQ About USB Please check the following if the USB connection malfunctions. [Case 1] The camera power is off. Turn the camera power on. We recommend using an AC power adapter in PC mode. If you use batteries, check the battery condition. [Case 2] The mode dial is not set to PC mode. Rotat...
Page 116 - FAQ
FAQ About USB [Case 7] There is an unexpected error during file transfer. Turn the camera power off and on again. Transfer the file again. [Case 8] How do I know my computer supports a USB Interface? Check the USB port in your computer or keyboard. Check OS version. USB Interface is available in Win...
Page 118 - MEMO


 Samsung Digimax 200 Manual
 Samsung Digimax 201 Manual
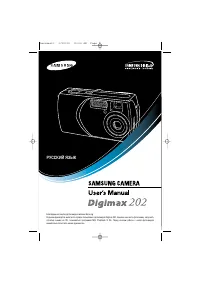 Samsung Digimax 202 Manual
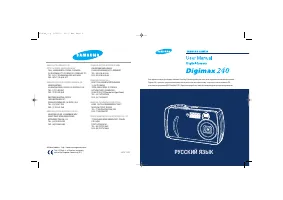 Samsung Digimax 240 Manual
 Samsung Digimax 250 Manual
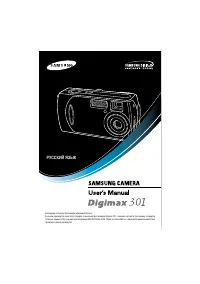 Samsung Digimax 301 Manual
 Samsung Digimax A4 Manual
 Samsung Digimax A402 Manual
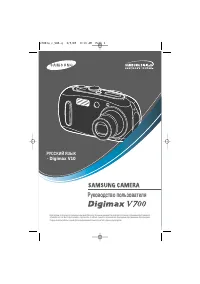 Samsung Digimax V10 Manual
 Samsung Digimax V4000 Manual
 Samsung DV50 Manual
 Samsung DV90 Manual