Page 2 - Instructions
2 Instructions Use this camera in the following order Insert the USB cable Set up the camera driver Before connecting the camera to a PC, via theUSB cable, you will need to set up the cameradriver. Install the camera driver that is contained inthe Application S/W CD-ROM.(p.73) Take a picture (p.21) ...
Page 3 - Contents; READY
3 Contents Getting to know your camera 5 About the icons 5 Danger 6 Warning 6 Caution 7 An FCC warning 7 This digital camera can be used for 8 Manufacturer's contents 10 Identification of features 11 Front & Top 11 Back & Bottom 11 Side/ 5-function button 12 Mode dial 12 Connecting to a Powe...
Page 4 - SOFTWARE
4 Contents Delete button 45 Setting up the play back function using the LCD monitor 46 Starting the slide show 47 Protecting images 48 Deleting all images 49 Copy to card 50 DPOF : Setting the Number of Copies to Print 51 Rotating an image 52 Resize 53 Setup menu 54 File name 55 Auto power off 56 La...
Page 5 - Getting to know your camera; About the icons
5 Getting to know your camera Thank you for buying a Samsung Digital Camera. Prior to using this camera, please read the user manual thoroughly. When you require After Sales service, please bring the camera and the cause of the camera malfunction (such as Batteries, Memory card etc.) to the A/S cent...
Page 6 - Danger; Warning
6 Danger Do not attempt to modify this camera in any way. This may result in fire, injury, electric shock or severe damage to you or your camera. Internal inspection, maintenance and repairs should be carried out by your dealer or Samsung Camera Service Center. Please do not use this product in clos...
Page 7 - Caution; An FCC warning
7 Caution Leaking, overheating, or burst batteries could result in fire or injury. Use batteries with the correct specification for the camera. Do not short circuit, heat or dispose of batteries in fire. Do not insert the batteries with the reverse polarities. Remove the batteries when not planning ...
Page 8 - This digital camera can be used for
8 This digital camera can be used for Printing images using a dedicatedprinter, DPOF-compatible printer orDPOF-equipped photo lab.(refer to page 51) Downloading image files fromcamera to computer. (refer to page 81) Editing images on a PC.(refer to page 88) Taking a picture. (refer to page 21)
Page 10 - Manufacturer's contents
10 Manufacturer's contents Please check that you have the correct contents before using this product. marked contents are optional. Digital Camera USB cable Pouch 2 AA Alkaline Batteries Camera strap Software CD Product warranty User manual AC adapter (3.3V) Battery pack (SBP-3603) SD memory card Ba...
Page 11 - Identification of features
11 Identification of features Front & Top Back & Bottom * When using the digital zoom to take a picture, the composition of the picture may be different depending on whether you are using the LCD monitor or the viewfinder. The picture will betaken in the composition of the picture as it appe...
Page 12 - Mode dial
12 Identification of features You can select the desired working mode by using the mode dial located on the back of thecamera. This digital camera has 6 recording modes. These are listed below. Side/ 5-function button Mode dial Memory card slot Battery chamber Memory card cover/ Battery chamber cove...
Page 14 - Connecting to a Power Source
14 Identification of features Camera status lamp Color Status Camera Status Blinking and off Power on processing When the LCD monitor is turned off When the USB cable is connected Blinking slowly Flash recharging Image processing(compression/decompression) USB busy On Blinking fast Green Self-timer ...
Page 15 - INFORMATION
15 Connecting to a Power Source If you have access to a mains supply, using an ACAdapter (3.3V 2.0A) allows the camera to be usedfor long periods of time.P l u g t h e a d a p t e r i n t o t h e c o n n e c t i o n p o i n t (DC IN 3.3V) on the camera.Remove the batteries from the camera when using...
Page 17 - Instructions on how to use the memory card
17 Instructions on how to use the memory card The camera comes with 6MB of internal flash memory, allowing you to store images andmovie clips in the camera. However, you can expand the memory capacity by using anoptional memory card so that you can store more images and movie clips. Be sure to forma...
Page 19 - Inserting the memory card; Removing the memory card
19 Inserting the memory card Do not insert the memory card the wrong way round . Doing so may damage thememory card slot. INFORMATION 1. Turn the power off using the power button. Open the battery chamber cover and press the memory cardas shown in the image and release. 2. Remove the memory card and...
Page 20 - LCD monitor indicator
LCD monitor indicator 20 [ Image & Full Status ] No. Description Icons Page 1 Battery p.16 2 Recording mode p.12~13 3 Camera shake warning p.24 4 Flash p.28 5 Self-timer p.29 6 Macro p.31 7 Metering p.36~37 8 Time 01:00 PM p.59 9 Date 2004/ 01/ 01 p.59 10 Exposure compensation -2.0 ~ 0 ~ +2.0 EV...
Page 21 - Starting the recording mode
LCD monitor indicator 21 14 Image quality p.35~36 15 Image size 1600, 1024, 640 p.35 Number of available shots remaining 9 Remaining time 00:24 p.22 17 Digital Zoom rate X2.0 p.26 18 Digital zoom Starting the recording mode 1. Insert the batteries (p.16). Insert the batteries taking note of the pola...
Page 25 - Using the camera buttons to adjust the camera
25 Using the camera buttons to adjust the camera The RECORDING mode function can be set up by using the camera buttons. POWER button SHUTTER button Used for digital zooming in / out.When you press the zoom (W/T) button, the zoom bar willdisplay in the upper and center part of the LCD monitor. Used f...
Page 31 - Focus lever
31 Focus lever To prevent the image from being dim, maintain the focus range at 0.19m ~ 0.21m. INFORMATION To prevent the image from being dim, maintain the focus range at 1.0m ~ infinity. INFORMATION Normal( ) focus modeThe focus range is 1.0m ~ infinity. No icons will display onthe LCD monitor whe...
Page 32 - LCD button
32 MENU/ OK button If the menu is displayed, use the 5-Function buttons to change the data values and for yourchanges to be accepted. If the menu is not displayed, press the MENU/OK button to display a menu for the currentcamera mode on the LCD monitor. Press the button again to return to the previo...
Page 33 - Using the LCD monitor to adjust the camera settings
33 Using the LCD monitor to adjust the camera settings You can use the menu on the LCD monitor to set up recording functions. The following functions are available, depending on the mode you have selected.The items indicated by are default settings. The menu will not be displayed on the LCD monitor ...
Page 34 - How to use the menu
34 Using the LCD monitor to adjust the camera settings How to use the menu 3. Use the UP and DOWN buttons to select a sub menu. 4. Select a sub menu, and then press the OK button. The value you set will be saved and the menu will disappear. 1. Turn on the camera and press the MENU button. A menu for...
Page 35 - Size; Quality
35 Size You can select the image size appropriate for your application. This menu is not available inthe MOVIE CLIP mode. The higher the resolution, the lower the number ofavailable shots will be because high resolution imagesrequire more memory than lower resolution images. Quality You can select t...
Page 37 - Metering
37 Metering If the subject is not the centre of the focus area, do not use the spot metering as this mayresult in an exposure error. In this circumstance, rather use exposure compensation. INFORMATION Sharpness You can adjust the sharpness of the picture you want to take. You cannot check thesharpne...
Page 38 - White balance
38 White balance White balance : The white balance control allows you to adjust the colours to appear more natural looking. This menu is available in every recording mode. White balance - AUTO : The camera automatically selects the appropriate white balance settings, depending on the prevailing ligh...
Page 39 - Effect; Photo Frame
39 Effect Selecting a Photo Frame 1. Rotate the Mode Dial to Photo Frame mode ( ).2. Press the MENU button, and then use the LEFT and RIGHT buttons to select [P. FRAME]. 3. Press the OK button. A window where you can choose a photo frame will open. 4. Use the UP, DOWN, LEFT, and RIGHT buttons to sel...
Page 41 - Starting play mode
41 Starting play mode Turn the camera on and select Play mode by pressing the play mode button ( ). The camera can now play back the images stored in the memory. Press the play mode button ( ) again to switch to the Recording mode. You can set up the PLAY mode function by using the camera buttons an...
Page 46 - Setting up the play back function using the LCD monitor
46 Setting up the play back function using the LCD monitor PLAY mode functions can be changed by using the LCD monitor. In the PLAY mode,pressing the MENU button displays the menu on the LCD monitor. The menus you can setup in Play mode are as follows. To capture an image after setting up the play m...
Page 47 - Starting the slide show
47 Images can be displayed continuously at pre-set intervals. Starting the slide show 1. Press the play mode button and press the menu button.2. Press the LEFT/ RIGHT button and select the [SLIDE] menu tab. 3. Press the DOWN button.4. Use the UP and DOWN buttons to select the desired submenu value, ...
Page 48 - Protecting images
48 Protecting images Protecting Images 1. Press the play mode button and press the menu button.2. Press the LEFT/ RIGHT button and select the [PROTECT] menu tab. 3. Select a desired sub menu by pressing the UP/ DOWN button and press the OK button. - [ONE PIC] : Only an image that is displayed on the...
Page 49 - Deleting all images
49 Of all the files stored in the memory card, the unprotected files in the DCIM subfolder will bedeleted. Deleting all images Deleting All images 1. Press the play mode button and press the menu button.2. P r e s s t h e L E F T / R I G H T b u t t o n a n d s e l e c t t h e [DEL.ALL] menu tab. 3....
Page 50 - Copy to card
50 Copy to card This enables you to copy image files to the memory card. Copy to card 1. Press the play mode button and press the MENU button.2. Select the [COPY TO CARD] menu tab by pressing the LEFT/ RIGHT button. 3. Select the desired sub menu by pressing the UP/DOWN button and press the OK butto...
Page 51 - DPOF : Setting the Number of Copies to Print
51 DPOF : Setting the Number of Copies to Print This function allows you to embed print quantity information on your memory card. This function is not available for Movie clips. The DPOF file is only stored on the memory card. Specifying the Number of Prints 1. Press the play mode button and press t...
Page 52 - Rotating an image
52 Rotating an image You can rotate the stored images by 90, 180, or 270 degrees. 1. Press the play mode button and press the menu button.2. P r e s s t h e L E F T / R I G H T b u t t o n a n d s e l e c t t h e [ROTATE] menu tab. 3. Select a desired sub menu by pressing the UP/ DOWN button. If [OF...
Page 53 - Resize
53 A stored image size can be changed and used as a logo image. The resized image will havea new file name. Resize 1. Press the play mode button and press the menu button.2. Press the LEFT/ RIGHT button and select the [RESIZE] menu tab. 3. Select a desired sub menu by pressing the UP/ DOWN button an...
Page 54 - Setup menu
54 Setup menu In this mode, you can set up basic settings. You can use the setup menu in all camera modes.The items indicated by are default settings. Menu tab Main menu Sub menu Secondary menu Page RESET - SERIES - ENGLISH - KOREAN - FRENCH - GERMAN - SPANISH - ITALIAN - S.CHINESE - T.CHINESE - NO ...
Page 55 - File name
55 Setup menu Menu tab Main menu Sub menu Secondary menu Page ON OFF 50Hz 60Hz OFF NO YES NO YES 1 ~ 3 SEC BEEP FREQUENCY Q.VIEW LATEST RESET This function allows the user to select the file naming format. Assigning File Names 1. Press the MENU button.2. Press the LEFT/ RIGHT button and select the [...
Page 57 - Language; Formatting a memory card
57 Language Setting Language 1. Press the MENU button.2. Press the LEFT/ RIGHT button and select the [SETUP] menu tab. 3. Select the [LANGUAGE] menu by pressing the UP/ DOWN button and press the RIGHT button. 4. Select a desired sub menu by pressing the UP/ DOWN button and press the OK button. - LAN...
Page 58 - Setting up the Date type
58 Formatting a memory card Formatting a Memory Card from a PCWhen formatting a memory card from a Windows 2000 or XP-based PC, format the cardunder the "FAT" files system. When formatting a memory card, connect the camera to yourPC with the USB cable. (See p. 80) 3. Select [FAT] file format...
Page 59 - Date Setup; Time Setup
59 Date Setup You can change the time that will be displayed on the captured images. Setting the Time 1. Press the MENU button.2. Press the LEFT/ RIGHT button and select the [SETUP] menu tab. 3. Use the UP and DOWN buttons to select [TIME], and then press the RIGHT button. 4. Use the UP, DOWN, LEFT,...
Page 60 - Imprinting date recording; Beep
60 Imprinting date recording There is an option to include DATE/TIME on still images. Beep If you set the operation sound to ON, various sounds will be activated for camera startup,when buttons are pressed, and if there is a card error, so that you can be aware of thecamera operation status. Setting...
Page 61 - Frequency
61 Frequency The alternating current frequency influences the image quality.If you don't select the same [FREQUENCY] sub menu as your nation's alternating currentfrequency, there will be a line on a stored image. Should this be the case, change the[FREQUENCY] sub menu. Selecting frequency type 1. Pr...
Page 62 - Quick view
62 Quick view If you enable Quick View before capturing an image, you can view the image you justc a p t u r e d o n t h e L C D m o n i t o r f o r t h e d u r a t i o n s e t i n t h e [ Q . V I E W ] s e t u p . Quick view is possible only with still images. Setting Quick View 1. Press the MENU b...
Page 63 - Latest; Setting up the MYCAM menu
63 Latest The most recent changes made to the camera setting values since [LATEST] has been set to[YES] will be maintained. The changed setting values are maintained even after the camerais turned off and then back on. Saving Camera Functions 1. In any mode other than MySET mode, press the MENU butt...
Page 64 - Start up sound; Start up image
64 Start up sound You can set the startup sound at power-on. Setting the Startup Sound 1. Press the MENU button.2. Press the LEFT/ RIGHT button and select the [MYCAM] menu tab. 3. Select the [S.BEEP] menu by pressing the UP/ DOWN button and press the RIGHT button. 4. Select a desired sub menu by pre...
Page 65 - Important notes
65 Important notes Be sure to observe the following precautions! This unit contains precision electronic components. Do not use or store this unit in thefollowing locations. - Areas exposed to severe changes in temperature and humidity.- Areas exposed to dust and dirt.- Areas exposed to direct sunli...
Page 67 - Warning indicator
67 Warning indicator There are several warnings that may appear on the LCD display Warning indicator Causes Remedy Insert a new CARD or delete storedimages to free up some memory. There is insufficient memorycapacity to take an image. When taking pictures in dark places. The memory card is locked Th...
Page 68 - Before contacting a service center
68 Before contacting a service center Please check the following Symptom Causes Remedy - Insert fresh batteries- Connect an AC Power Adapter - There is low battery capacity- An AC Power Adapter is not connected - The batteries are exhausted- The Camera is turned off automatically.- The Adapter plug ...
Page 70 - Specifications
70 Specifications Type 1/2" CMOS mage Sensor Effective Pixels Approx. 2.0 Mega-pixels Total Pixels Approx. 2.1 Mega-pixels Lens f = 9.0mm (35mm film equivalent : 47mm) Lens F No. F3.5 Still Image mode : 1.0X ~ 2.0X Play mode : 1.0X ~ 3.0X (depends on image size) Optical Viewfinder Optical virtua...
Page 72 - Software Notes; System Requirements
72 Software Notes Please ensure that you read the instruction manual carefully before use. The attached software is a camera driver and image editing software tool for Windows.Under no circumstances should all or part of either the software or the user manual bereproduced.Copyrights for software are...
Page 73 - About the software
73 About the software After inserting the CD-ROM provided with this camera into the CD-ROM drive, the followingwindow should automatically run. Before connecting the camera to thePC, you should first install the cameradriver. Camera driver : This enables images to transfer between the camera and PC....
Page 74 - Setting up the application software
74 Setting up the application software To use this camera with a PC, install the application software first. After this has been done, thestored images in the camera can be moved to the PC and can be edited by an image editingprogram. You can visit the Samsung web-site through the internet. http://w...
Page 80 - Starting PC Mode
80 Starting PC Mode If you insert the USB cable into the USB connection terminal, the camera working mode willchange to the PC mode automatically. In this mode, you can download stored images to your PC through the USB cable. The LCD monitor is always turned off in PC mode. The camera status lamp wi...
Page 83 - Removing the USB Driver for Windows 98SE
83 Removing the USB Driver for Windows 98SE To remove the USB driver, refer to the process shown below. 1. Trace [Start Settings] and click [Control Panel]. [Click!] [Click!] 4. A window will open. Click the [YES] button and the camera driver will be removed. 2. Double-click [Add/Remove programs]. 3...
Page 84 - Removable Disk
84 Removable Disk To use this camera as a Removable Disk, install (p.73) the USB Driver. 1. Before turning the camera power on, connect the camera to the PC with the USB cable. 2. Click [Removable Disk] under [My computer] or [Windows Explorer]. 3. Image files stored in the Removable Disk (DCIM 100S...
Page 85 - Removing the removable disk
85 Removing the removable disk [Click!] [Double-click!] [Click!] [Click!] Windows 98SE 1. Check whether the camera and PC are transferring a file. If the camera status lamp blinks, you have to wait until the lamp illuminates. 2. Unplug the USB cable. Windows 2000/ME/XP 1. Check whether the camera an...
Page 86 - Using the USB Driver for MAC
86 Removing the removable disk 1. A USB Driver for MAC is not included with the software CD as MAC OS supports the camera driver. 2. Check the MAC OS. You can check the MAC OS version during MAC OS start-up. This camera is compatible with MAC OS 9.1~10.2. 3. Connect the camera to the Macintosh and t...
Page 87 - Digimax Viewer
87 Digimax Viewer This software is only compatible with Windows. 1. To open Digimax Viewer, click the [ Start Programs Samsung Digimax Viewer 2.0 Digimax Viewer 2.0 ] and Digimax Viewer 2.0 will then open. 2. If the [Auto Launch] option is selected, this program will be executed automatically upon r...
Page 88 - MGI PhotoSuite III SE
88 MGI PhotoSuite III SE This software is only compatible with Windows.To open MGI PhotoSuite lll SE, click the [Start Programs MGI PhotoSuite lll SE MGI PhotoSuite lll SE] and MGI PhotoSuite lll SE will then open. An introduction to the Welcome screen Get Get images. Prepare A number of photo editi...
Page 98 - FAQ
98 FAQ Please check the following if the USB connection malfunctions. [Case 1] The camera power is off.Turn the camera power on. We recommend using an AC power adapter in PCmode. [Case 2] USB Driver is not installed correctly.Install the USB Driver correctly. Refer to page. 73. [Case 3] The USB cabl...


 Samsung WB152F Manual
 Samsung WB350F Manual
 Samsung WB351F Manual
 Samsung WB352F Manual
 Samsung Digimax 200 Manual
 Samsung Digimax 201 Manual
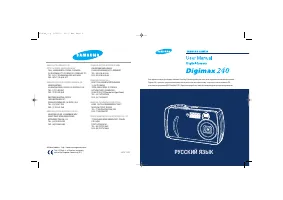 Samsung Digimax 240 Manual
 Samsung Digimax 250 Manual
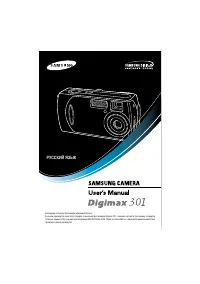 Samsung Digimax 301 Manual
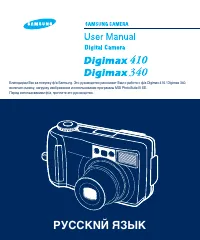 Samsung Digimax 340 Manual
 Samsung Digimax A4 Manual
 Samsung Digimax A402 Manual
 Samsung Digimax V10 Manual