Mikrotik LHGG LTE6 kit (RBLHGR R11e-LTE6) - User Manual
Mikrotik LHGG LTE6 kit (RBLHGR R11e-LTE6) Access Point – User Manual, read for free online in PDF format. We hope this helps you resolve any issues you may have. If you have further questions, please contact us through the contact form.
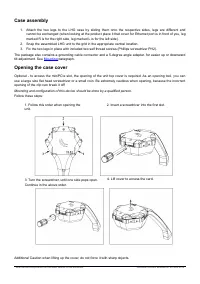
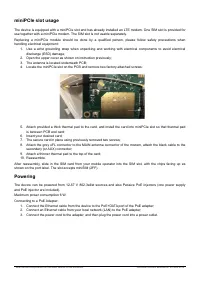
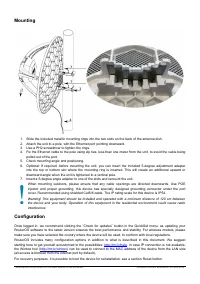


Table of Contents:
- Page 2 – Case assembly; Mounting; Opening the case cover; Insert a screwdriver into the first slot.
- Page 3 – miniPCIe slot usage; is between PCB and card; Powering
- Page 4 – pulled out of the port.; Configuration; . In case IP connection is not available,
- Page 6 – Federal Communication Commission Interference Statement; Reorient or relocate the receiving antenna.
- Page 7 – Innovation, Science and Economic Development Canada
- Page 8 – Frequency bands terms of use
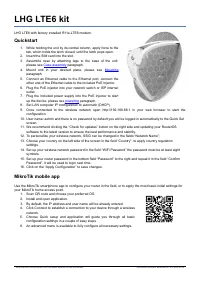
LHG LTE6 kit
LHG LTE6 with factory installed R11e-LTE6 modem.
Quickstart
1. While holding the unit by its central column, apply force to the
tab, which holds the latch closed, until the latch pops open.
2. Insert the SIM card into the slot.
3. Assemble case by attaching legs to the base of the unit,
4. Mount unit in your desired place, please see
paragraph.
5. Connect an Ethernet cable to the Ethernet port, connect the
other end of the Ethernet cable to the included PoE injector.
6. Plug the PoE injector into your network switch or ISP internet
outlet.
7. Plug the included power supply into the PoE injector to start
8. Set LAN computer IP configuration to
automatic
(DHCP).
9. Once connected to the wireless network open http://192.168.88.1 in your web browser to start the
configuration.
10. User name: a
dmin
and there is no password by default you will be logged in automatically to the Quick Set
screen.
11. We recommend clicking the “Check for updates” button on the right side and updating your RouterOS
software to the latest version to ensure the best performance and stability.
12. To personalize your wireless network, SSID can be changed in the fields “Network Name”;
13. Choose your country on the left side of the screen in the field “Country”, to apply country regulation
settings.
14. Set up your wireless network password in the field “WiFi Password” the password must be at least eight
symbols.
15. Set up your router password in the bottom field “Password” to the right and repeat it in the field “Confirm
Password”, it will be used to login next time.
16. Click on the “Apply Configuration” to save changes.
MikroTik mobile app
Use the MikroTik smartphone app to configure your router in the field, or to apply the most basic initial settings for
your MikroTik home access point.
1. Scan QR code and choose your preferred OS.
2. Install and open application.
3. By default, the IP address and user name will be already entered.
4. Click Connect to establish a connection to your device through a wireless
network.
5. Choose Quick setup and application will guide you through all basic
configuration settings in a couple of easy steps.
6. An advanced menu is available to fully configure all necessary settings.
See mikrotik.com/products for the latest version of this document.
Document #53364 Modified on: 20.NOV.2019
"Loading the manual" means you need to wait until the file loads and becomes available for online reading. Some manuals are very large, and the time they take to appear depends on your internet speed.
Summary
Case assembly 1. Attach the two legs to the LHG case by sliding them onto the respective sides, legs are different and cannot be exchanged (when looking at the product place it that cover for Ethernet port is in front of you, legmarked R is for the right side, leg marked L is for the left side). 2. ...
miniPCIe slot usage The device is equipped with a miniPCIe slot and has already installed an LTE modem. One SIM slot is provided foruse together with a miniPCIe modem. The SIM slot is not usable separately.Replacing a miniPCIe module should be done by a qualified person, please follow safety precaut...
Mounting 1. Slide the included metallic mounting rings into the two slots on the back of the antenna dish.2. Attach the unit to a pole, with the Ethernet port pointing downward.3. Use a PH2 screwdriver to tighten the rings.4. Fix the Ethernet cable to the pole using zip ties, less than one meter fro...