Page 2 - Contents; Language
Contents 2 Warning and safety instructions ................................................................................ 6 Caring for the environment ......................................................................................... 16 Guide to the appliance ..................................
Page 5 - Notes for test institutes; Test food in accordance with EN 60705 (microwave operating mode; Technical data
Contents 5 Notes for test institutes ............................................................................................... 99 Test food according to EN 60350-1 ............................................................................ 99 Test food in accordance with EN 60705 (microwave o...
Page 6 - Warning and safety instructions; Appropriate use
Warning and safety instructions 6 For the sake of simplicity, the microwave combination oven will subsequently be referred to as the “oven”. This oven complies with all current local and national safetyrequirements. However, inappropriate use can lead to personalinjury and damage to property.Read ...
Page 7 - Safety with children
Warning and safety instructions 7 The oven compartment is equipped with special lamps to cope with particular conditions (e.g. temperature, moisture, chemicalresistance, abrasion resistance and vibration). These special lampsmust only be used for the purpose for which they are intended. Theyare no...
Page 8 - Technical safety
Warning and safety instructions 8 Technical safety Unauthorised installation, maintenance and repairs can cause considerable danger for the user. Installation, maintenance andrepairs must only be carried out by a Miele authorised technician. Damage to the oven can compromise your safety. Check t...
Page 10 - Correct use
Warning and safety instructions 10 Correct use Risk of injury caused by hot surfaces. The oven gets hot during operation. You could burn yourself on the heating elements, ovencompartment, accessories or food.Wear oven gloves when placing hot food in the oven or removing itand when adjusting oven s...
Page 12 - This is
Warning and safety instructions 12 When heating food, and in particular liquids, using the Microwave function, the boiling point may be reached without the production of typical bubbles. The liquid does not boil evenlythroughout. This boiling delay can result in the liquid boiling overexplosive...
Page 13 - Do not use thermometers containing mercury or liquid as these
Warning and safety instructions 13 Food with a thick skin or peel, such as tomatoes, sausage, potatoes and aubergines can burst when heated or cooked.Pierce or score the skin of these types of food several times to allowsteam to escape. Do not use thermometers containing mercury or liquid as the...
Page 14 - Always; The following applies to stainless steel surfaces:
Warning and safety instructions 14 Heat-retaining bags usually contain a thin layer of aluminium foil that reflects microwave radiation. This reflected energy can, in turn,cause the outer paper covering to become so hot that it ignites.Do not use heat-retaining packaging, such as bags for grilled ...
Page 15 - Cleaning and care
Warning and safety instructions 15 Cleaning and care Risk of injury due to electric shock. The steam from a steam cleaning appliance could reach live electrical components and causea short circuit. Do not use a steam cleaner to clean the appliance. Scratches on the door glass can cause the glass...
Page 16 - Caring for the environment; Disposing of your old appliance
Caring for the environment 16 Disposing of the packagingmaterial The packaging material is used forhandling and protects the appliancefrom transport damage. The packagingmaterial used is selected from materialswhich are environmentally friendly fordisposal and can generally be recycled.Recycling the...
Page 17 - Guide to the appliance; Oven
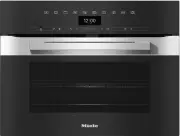
Guide to the appliance 17 Oven a Control elements b Grill element c 3 shelf levels for the glass tray and rack d Air inlet for the fan with ring heating element behind it e Front frame with data plate f Door
Page 18 - Controls; OK
Controls 18 a Recessed On/Off sensor control For switching the oven on and off b Optical interface(For Miele Service only) c sensor control For controlling the oven via yourmobile device d sensor control For starting the Quick MW function e DisplayFor displaying the time of day andinformati...
Page 19 - On/Off sensor control; The; Display; will appear in the main menu.; Sensor controls; Sensor controls above the display
Controls 19 On/Off sensor control The On/Off sensor control is recessed and reacts to touch.Use this sensor control to switch theoven on and off. Display The display is used for showing the timeof day or information about functions,temperatures, cooking durations,automatic programmes and settings...
Page 20 - Sensor controls under the display; setting and touch this sensor control. The sensor control
Controls 20 Sensor controls under the display Sensor control Function If you want to control the oven from your mobile device, you musthave the Miele@home system, switch on the Remote control setting and touch this sensor control. The sensor control then lights up and the MobileStart function is ...
Page 21 - Sensor control Function
Controls 21 Sensor control Function OK Functions highlighted in the display can be selected by touchingthe OK sensor control. The selected function can then be changed. Confirm with OK to save changes. If information appears in the display, select OK to confirm the message. If no cooking progra...
Page 22 - Symbols; The following symbols may appear in the display:; Symbol
Controls 22 Symbols The following symbols may appear in the display: Symbol Meaning This symbol indicates that there is additional information andadvice about using the appliance. Press the OK sensor control to confirm the information. Minute minder A tick indicates the option which is curren...
Page 23 - Using the appliance; Selecting a menu option; Changing a setting in a list
Using the appliance 23 Use the and arrow buttons or the area between them in the navigation area to use the oven.As soon as you reach a confirmablevalue, message or setting, the OK sensor control will light up orange. Selecting a menu option Touch the or arrow buttons o...
Page 24 - Changing the function; Entering numbers; Entering letters; Activating MobileStart
Using the appliance 24 Changing the function You can change to another functionduring a cooking programme.The sensor control for the previouslyselected function lights up orange. Touch the sensor control of the newfunction or operating mode. The new function appears in the displaywith its correspo...
Page 25 - Features; Data plate; Glass tray
Features 25 A list of the models described in theseoperating and installation instructionscan be found on the back page of thisbooklet. Data plate The data plate is located on the frontframe, visible when the door is open.The data plate states the model number,the serial number as well as connection...
Page 26 - Rack with non-tip safety notches; The rack is; not; suitable for use with the; function. You can use the; Using the rack
Features 26 Rack with non-tip safety notches The rack is not suitable for use with the Microwave function. You can use the rack for all other functions which use ordo not use microwave power. Risk of injury caused by hot surfaces.The rack gets hot during cookingprogrammes.Use oven gloves when...
Page 27 - Round baking trays; or; solid round baking tray HBF 27-1; is; perforated round baking and; can be used for; Gourmet
Features 27 Round baking trays The round baking trays can sufferdamage when subjected tomicrowaves.Do not use the round baking trayswith the Microwave , MW + Auto roast , MW + Fan plus , MW + Grill or MW + Fan grill functions. The solid round baking tray HBF 27-1 is suitable for...
Page 28 - Accessories for cleaning and care; Safety features; System lock; PerfectClean treated surfaces; perforated
Features 28 Accessories for cleaning and care - Miele all-purpose microfibre cloth- Miele oven cleaner Safety features - System lock (see “Settings – Safety”) - Sensor lock (see “Settings – Safety”) - Cooling fan (see “Settings – Cooling fan run-on”) - Safety switch-off A function which does not...
Page 29 - Before using for the first time; Availability of the WiFi connection
Before using for the first time 29 Miele@home Your oven is equipped with anintegrated WiFi module. In order to use it, you will need: - A WiFi network- The Miele app- A Miele user account The user account can be created via the Mieleapp. The Miele app will guide you as youconnect your oven to your h...
Page 30 - Basic settings; Setting the language; Setting the date; Setting the time
Before using for the first time 30 Basic settings The following settings must be madebefore starting up for the first time. Youcan change these settings again at alater time (see “Settings”). Risk of injury caused by hot surfaces.The oven gets hot during operation.For safety reasons, the oven may ...
Page 32 - Settings; Settings overview; Menu option; * Factory default setting
Settings 32 Settings overview Menu option Available settings Language ... | deutsch | english | ... Location Time Show On * | Off | Night dimming Clock format 12 h | 24 h * Set DateLighting On“On” for 15 seconds * Off Display Brightness QuickTouch On | Off * Volume Buzzer tone...
Page 34 - Opening the “Settings” menu; Show; Date
Settings 34 Opening the “Settings” menu In the Further | Settings menu, you can personalise your oven by adaptingthe factory default settings to suit yourrequirements. Select Further . Select Settings . Select the desired setting. You can check settings or change them. Settings can...
Page 35 - Lighting
Settings 35 Lighting - On The oven interior lighting is switchedon during the entire cooking period. - “On” for 15 seconds The oven interior lighting switches off15 seconds after a cookingprogramme has begun. Press the sensor control to switch the oven interior lighting on again for15 seconds. - ...
Page 36 - Units; Weight
Settings 36 Units Weight For automatic programmes, you can setthe weight of food in grams ( g ), pounds/ ounces ( lb/oz ) or pounds ( lb ). Temperature You can set the temperature in degreesCelsius ( °C ) or degrees Fahrenheit ( °F ). Quick MW The maximum microwave power level of1000 W and the maxim...
Page 37 - Recommended power levels; Safety; Sensor lock
Settings 37 Recommended power levels If you often cook with different powerlevels, it makes sense to change therecommended microwave power levels.You can change the recommendedpower levels for the Microwave function and for the functions which usemicrowave power.After selecting this menu option,...
Page 39 - Performing Scan & Connect; Activating /deactivating
Settings 39 Performing Scan & Connect Initial commissioning has been carriedout without Miele@home having beenset up. Scan the QR code. If you have installed the Miele app andhave a user account, you will be takendirectly to the networking steps.If you have not yet installed the Mieleapp, you ...
Page 40 - Remote control; Software version; Demo mode; Factory default
Settings 40 Remote control If you have installed the Miele app onyour mobile device, have access to theMiele@home system and haveactivated the remote control function( On ), you can use the MobileStart function and for example retrieveinformation about oven cookingprocesses that are in progress or e...
Page 41 - Minute minder; Using the Minute minder function; Setting the minute minder
Minute minder 41 Using the Minute minder function The minute minder can be used to time other activities in the kitchen,e.g. boiling eggs.The minute minder can also be used atthe same time as a cooking programmefor which the cooking duration start andfinish times have been set (e.g. as areminder ...
Page 44 - Microwave operation; How it works; Advantages of the microwave oven; Selecting crockery
Microwave operation 44 How it works The oven contains a magnetron thatconverts electrical energy intoelectromagnetic waves (microwaves).These microwaves are distributedevenly throughout the ovencompartment, and are reflected off themetal appliance walls. The microwaves penetrate inside thefood from ...
Page 45 - Suitable crockery
Microwave operation 45 Suitable crockery Fire hazard due to inflammable materials.Disposable containers made out ofplastic, paper or other inflammablematerials can ignite, causing damageto the oven.Do not leave the oven unattendedwhen reheating or cooking food indisposable containers made ofplasti...
Page 46 - supplied
Microwave operation 46 Tip: Metal tins are less suitable for operating modes which use microwavepower because the metal reflects themicrowaves. The microwaves only reachthe cake from above, which extends thebaking duration. If you use metal tins,place the tin on the glass tray so that itcannot touch...
Page 47 - - Plastic containers where the; Testing dishes; Select the
Microwave operation 47 - Plastic containers where the aluminium lid has not beencompletely removed - Crystal glass- Cutlery and crockery with metallic decoration (e.g. gold rims, cobalt blue) - Crockery with hollow handles- Plasticware made of melamine Melamine absorbs microwave energyand gets hot.W...
Page 48 - Cover
Microwave operation 48 Cover Tip: Covers are available from retail outlets. - A cover prevents too much steam escaping, especially when reheatingfoods over a longer period of time. - It speeds up the cooking process of the food. - It prevents food from drying out.- It helps keep the oven compartment...
Page 49 - Operation; always; do not use; which use; Changing values and settings
Operation 49 Placing food directly on the floor ofthe oven when using the Microwave operating mode can damage the oven.When using the Microwave operating mode, place the glass tray on level 1 and always place cooking containers on the glasstray. Switch the oven on. The main menu will appe...
Page 50 - Changing the temperature; Changing the microwave power level; Setting cooking durations
Operation 50 Changing the temperature Select Further | Settings | Recommended temperatures , to permanently reset the recommendedtemperatures to suit your cookingpreferences. Select the or arrow buttons or swipe to the right or left in the area. The desired temperatu...
Page 52 - Booster
Operation 52 Cancelling a cookingprogramme You can cancel a cooking programmeusing the function sensor control thatlights up orange or using the sensor control.The oven compartment heating andlighting will then switch off. Any cookingdurations set will be deleted.Touch the function sensor control...
Page 53 - Switching on Pre-heat
Operation 53 Delicate items (e.g. sponge orbiscuits) will brown too quickly onthe top if the Booster function is used. Switch off the Booster function for these items. Switching the Booster on and off for acooking programme If you have selected the Booster | On setting, you can switch off the fun...
Page 54 - Quick MW and Popcorn; Popcorn
Quick MW and Popcorn 54 These functions can only be usedwhen no other cooking programmesare in use.Always use the glass tray. Quick MW If you select the sensor control, the microwave oven starts with a setmicrowave power level and cookingduration, e.g. to reheat a drink.The maximum microwave powe...
Page 55 - Categories; Handy hints
Automatic programmes 55 The wide range of automaticprogrammes enables you to achieveexcellent results with ease. Categories The automatic programmes are sorted into categories to provide abetter overview. Simply select theappropriate programme for the type offood you are cooking and follow theins...
Page 56 - Further applications; Tips
Further applications 56 This section provides information on thefollowing applications: - Defrost- Reheat- Drying- Heat crockery- Prove dough- Keeping warm- Cooking- Frozen food/ready meals Defrost Gentle defrosting of frozen goodsmeans that the vitamins and mineralsare generally retained. Use one...
Page 57 - Using the Defrost special application; Using the Microwave function
Further applications 57 Using the Defrost special application This programme has been developed forgently defrosting frozen goods. Use crockery that is microwave safe. Select Further . Select Defrost . A list will appear in the display. Select the desired food category. Enter the weigh...
Page 58 - Defrosting with the Microwave function; Quantity
Further applications 58 Defrosting with the Microwave function Food to be defrosted Quantity [W] [min] 1 [min] Butter 250 g 80 8–10 5–10 Milk 1000 ml 450 12–16 10–15 Sponge cake (3 slices) Approx. 300 g 150 4–6 5–10 Fruit cake (3 slices) Approx. 300 g 150 6–8 10–15 Butter cake (3 slices) Appro...
Page 59 - Reheat; Risk of injury caused by hot food.; function, the boiling
Further applications 59 Reheat It is essential that the section entitled“Correct use” in the “Warning andsafety instructions” is observed. Risk of injury caused by hot food. If food for babies and children isreheated at too high a temperature,they can burn themselves.Only heat food for babies andc...
Page 60 - Using the Reheat special application
Further applications 60 Using the Reheat special application This programme is designed forreheating food.The time required depends on thenature of the food, its initial temperatureand the amount to be cooked. Forexample, food taken straight from therefrigerator takes longer to reheat thanfood which...
Page 61 - Reheating with the Microwave function
Further applications 61 Reheating with the Microwave function Drink/food Quantity [W] [min] 1 [min] Drinks (drinking temperature60–65 °C) 1 cup/1 glass (200 ml) 1000 00:50–1:10 – Baby bottle (milk) 2 Approx. 200 ml 450 00:50–1:00 3 1 Food for babies and children 3 1 jar (200 g) 450 00:30–1:00 ...
Page 62 - Drying; Removing the dried food
Further applications 62 Drying Dehydrating or drying is a traditionalmethod of preserving fruit, certainvegetables and herbs.It is important that fruit and vegetablesare ripe and not bruised before they aredried. Prepare the food for drying by cuttingit up, and peeling and coring it ifnecessary. ...
Page 63 - Heat crockery
Further applications 63 Heat crockery By pre-heating the crockery, the fooddoes not cool down as quickly. Use heat-resistant crockery. Place the rack on shelf level 1 andplace the crockery to be warmed onit. Depending on the size of thecrockery, you can also place the rackon the oven floor. Sele...
Page 64 - Cooking
Further applications 64 Cooking It is essential that the section entitled“Correct use” in the “Warning andsafety instructions” is observed. Food with a thick skin or peel, suchas tomatoes, sausage, potatoes andaubergines can burst when reheatedor cooked.Pierce or score the skin of thesetypes of food...
Page 65 - Cooking with the Microwave function
Further applications 65 Cooking with the Microwave function Soups/stewsVegetables [g] 850 W [min] + 450 W [min] 1 [min] Stew 1500 10 + 20 1 Soup 1500 11 + 24 1 Peas 500 5 + 10 2 Peas (frozen) 450 5 + 12 2 Carrots 500 5 + 10 2 Broccoli florets 500 6 + 8 2 Broccoli (frozen) 450 5 + 11 2 Caul...
Page 66 - Frozen food/Ready meals; Tips for cakes, pizza and baguettes
Further applications 66 Frozen food/Ready meals Tips for cakes, pizza and baguettes - Bake cakes, pizza and baguettes on baking paper on the rack. - Use the lowest temperature recommended on the packaging. Tips for french fries, croquettes andsimilar items - Bake these frozen products on baking pape...
Page 67 - User programmes; Creating User programmes
User programmes 67 You can create and save up to 20 Userprogrammes. - You can combine up to 10 cooking stages to accurately programme yourfavourite or most frequently usedrecipes. In each cooking stage, youcan select settings such as thefunction, temperature and cookingduration or core temperature. ...
Page 68 - Starting User programmes; Changing cooking stages
User programmes 68 Starting User programmes Place the food in the ovencompartment. Select Further . Select User programmes . Select the desired programme. Select Allow . Depending on the programme settings,the following menu options appear inthe display: - Start now The programme wi...
Page 69 - Changing the name; Deleting User programmes
User programmes 69 Changing the name Select Further . Select User programmes . Select the programme you want tochange. Select Change name . Change the programme name. Select . Once you have changed theprogramme name, select Save . A message will appear in the displayconfirmi...
Page 70 - Baking; Tips on baking; - Position rectangular tins with the; Notes on the cooking charts; Selecting the; Notes on the functions; Using Automatic programmes; Follow the instructions in the display.
Baking 70 Handling food carefully will helpprotect your health.Cakes, pizzas and french fries shouldbe cooked until golden, not darkbrown. Tips on baking - Set a cooking duration. If used for baking, do not delay the start for toolong. Cake mixture or dough will dryout, and the raising agents will l...
Page 71 - Using Fan plus
Baking 71 Using Fan plus You can use any type of baking traymade of heat-resistant material.Use this function if you are baking onseveral levels at the same time. 1 shelf level: place cakes in baking tinson shelf level 1. 1 shelf level: place flat items (e.g.biscuits, tray cakes) on shelf lev...
Page 72 - Roasting; Tips for roasting
Roasting 72 Tips for roasting - Pre-heating the oven compartment is only required when roasting beefsirloin joints and fillet. Pre-heating isgenerally not necessary. - Use a closed roasting dish for roasting meat, such as an oven dish.The meat stays succulent. The ovencompartment will also stay clea...
Page 74 - Grilling; Tips for grilling
Grilling 74 Risk of injury caused by hot surfaces.If you grill with the door open, hot airwill escape from the oven instead ofbeing cooled by the cooling fan. Thecontrol elements will get hot.Grill with the oven door closed. Tips for grilling - Pre-heating is necessary when grilling. For pre-heati...
Page 75 - To
Grilling 75 Selecting the cooking duration Grill thinner cuts of meat/slices of fishfor approx. 6–8 minutes per side.It is best to grill food of a similarthickness at the same time so thatthe cooking duration does not varytoo much. Grill thicker pieces for about7–9 minutes per side. When gr...
Page 76 - Unsuitable cleaning agents
Cleaning and care 76 Risk of injury caused by hot surfaces.The oven gets hot during operation.You could burn yourself on theheating elements, oven compartmentor accessories.Allow the heating elements, ovencompartment and the accessories tocool before manual cleaning. Risk of injury due to electr...
Page 77 - Soiling caused by spilt fruit juices; Removing normal soiling; Removing stubborn soiling; Using oven cleaners
Cleaning and care 77 If soiling is left on for any length oftime, it may become impossible toremove. If items are used frequentlywithout being cleaned, it maybecome very difficult to clean them.It is therefore best to remove anysoiling immediately. Only the glass tray is dishwasherproof. Tip: Soilin...
Page 78 - Dry all surfaces with a soft cloth.; Lowering the grill element; Risk of injury caused by hot
Cleaning and care 78 You can then also use the scouringpad on the back of a washing-upsponge to remove the soiling. Remove all cleaning agent residuesthoroughly with clean water. Dry all surfaces with a soft cloth. Lowering the grill element If the oven compartment roof is badlysoiled, the gri...
Page 79 - Problem solving guide; Problem
Problem solving guide 79 Many malfunctions and faults that can occur in daily operation can be easilyremedied. You can save time and money in many cases, as you do not need to callthe Miele Customer Service Department.Information to help you rectify faults yourself can be found at www.miele.com/serv...
Page 80 - appears
Problem solving guide 80 Problem Cause and remedy The sensor con-trols do not re-spond. You have selected the Display | QuickTouch | Off setting. When the oven is switched off, the sensor controls do not respond. As soon as the oven is switched on, the sensor controlswill respond. If you want th...
Page 81 - and a fault
Problem solving guide 81 Problem Cause and remedy Maximum operatinghours reached ap- pears in the dis-play. The oven has been operating for an unusually long time. Thishas triggered the safety switch-off function. Confirm with OK . The oven is now ready to use. Fault and a fault code not listedh...
Page 82 - Select the temperature required for the recipe.
Problem solving guide 82 Problem Cause and remedy Cakes/biscuitsare not cookedproperly after theduration given inthe cooking chart. A different temperature from the one given in the recipe wasused. Select the temperature required for the recipe. The ingredient quantities are different from those g...
Page 84 - Service; Contact in the event of a fault
Service 84 Information to help you rectify faultsyourself and about Miele spare partscan be found at www.miele.com/service. Contact in the event of a fault In the event of any faults which youcannot remedy yourself, please contactyour Miele dealer or the MieleCustomer Service Department. You can boo...
Page 85 - Installation; Installation dimensions; Dimensions are given in mm.; Installation in a tall or base unit
Installation *INSTALLATION* 85 Installation dimensions Dimensions are given in mm. Installation in a tall or base unit When building the oven into a base unit underneath a hob, please also observethe installation instructions for the hob as well as the building-in depth requiredfor the hob.
Page 86 - Side view
Installation *INSTALLATION* 86 Side view A H 73xx: 43 mm H 74xx: 47 mm
Page 87 - Connections and ventilation; Front view
Installation *INSTALLATION* 87 Connections and ventilation a Front view b Mains connection cable, length = 2000 mm c No connections permitted in this area d Ventilation cut-out, min. 150 cm ²
Page 88 - Installing the oven
Installation *INSTALLATION* 88 Installing the oven Connect the oven to the electricalsupply. Push the oven into the housing unitand align it. Open the door and use the screwssupplied to secure the oven to theside walls of the housing unit.
Page 89 - Electrical connection; Connection data; is given on the data
Installation *INSTALLATION* 89 Electrical connection The oven is equipped with a mainsconnection cable and plug forconnection to a 50 Hz, 230 Valternating current supply.The fuse rating must be at least 16 A.The appliance must only be connectedto a correctly installed earthed socket.The electrical i...
Page 90 - Cooking charts; Batter; Muffins
Cooking charts 90 Batter Cakes/biscuits (accessories) + [°C] + [W] [min] Muffins 150–160 2 35–45 Small cakes (1 glass tray)* 150 – 2 25–35 Small cakes (2 glass trays)* 140 – 2+3 35–45 Madeira cake (loaf tin, 30 cm) 1 160–170 + 80 1 35–45 Ring cake (ring tin/Bundt cake tin...
Page 91 - Shortcrust pastry
Cooking charts 91 Shortcrust pastry Cakes/biscuits (accessories) [°C] [min] Biscuits (1 glass tray) 140–150 2 20–30 Drop cookies (1 glass tray)* 140 – 2 40–50 Drop cookies (2 glass trays)* 140 – 2+3 45–55 2 Flan base (flan base tin, 28 cm) 150–160 2 30–40 Cheesecake (springf...
Page 92 - Yeast dough; Quark dough
Cooking charts 92 Yeast dough Cakes/biscuits (accessories) + [°C] + [W] [min] Bundt cake (Bundt cake tin, 24 cm) 140–150 1 55–65 Stollen (1 glass tray) 150–160 1 60–70 Streusel cake with/without fruit (1 glasstray) 160–170 2 40–50 170–180 + 150 – 2 30–40 Fresh fruit ...
Page 93 - Sponge mixture
Cooking charts 93 Sponge mixture Cakes/biscuits (accessories) [°C] [min] Sponge cake base (2 eggs, springform caketin, 26 cm) 170–180 1 – 1 15–25 Sponge cake base (4 eggs, springform caketin, 26 cm) 170–180 1 – 1 30–40 Whisked sponge (springform cake tin, 26 cm)* 190 – 2 20–...
Page 94 - Savoury dishes; Food
Cooking charts 94 Savoury dishes Food (accessories) + [°C] + [W] [min] Savoury flan (1 glass tray) 190–200 2 2 30–40 Onion tart (1 glass tray) 180– 190 + 150 – 2 30–40 Pizza, yeast dough (1 glass tray) 160–170 + 80 – 2 25–35 Pizza, quark dough (1 glass tray) 150–160 – 2 25–...
Page 95 - Beef; Burgers; Veal
Cooking charts 95 Beef Food (accessories) [°C] [min] 8 [°C] Braised beef, approx. 1 kg(roasting dish with lid) 2 150–160 1 120–130 6 – Fillet of beef, approx. 1 kg 1 2 150–160 4 – 1 30–70 45–75 Sirloin joint, approx. 1 kg 1 2 150–160 4 1 25–70 45–75 Burgers *,1 3 3 5 – 2 1: 1...
Page 96 - Pork
Cooking charts 96 Pork Food (accessories) + [°C] + [W] [min] 7 [°C] Pork joint/pork neck roast,approx. 1 kg (roasting dish withlid) 1 160–170 + 150 1 80–90 4 80–90 Pork joint with crackling,approx. 2 kg (roasting dish) 1 170–180 + 150 1 70–80 5 80–90 Gammon joint, approx. 1...
Page 99 - Test food
Notes for test institutes 99 Test food according to EN 60350-1 Test food (accessories) [°C] [min] Small cakes (1 glass tray 1 ) 150 – 2 25–35 Small cakes (2 glass trays 1 ) 140 – 2+3 35–45 Drop cookies (1 glass tray 1 ) 140 – 2 40–50 Drop cookies (2 glass trays 1 ) 140 – 2+3 45–55 ...
Page 101 - Frequency range of the WiFi module; EU Conformity declaration; UK Conformity declaration; manuals and enter the name of the product or the serial number; This; Statement of Compliance; confirms this Miele product fully complies with the; Paul Wright
Technical data 101 Frequency range of the WiFi module 2.4000–2.4835 GHz Maximum transmission power of the WiFi module < 100 mW EU Conformity declaration Miele hereby declares that this oven complies with Directive 2014/53/EU. The complete text of the EU declaration of conformity is available from...
Page 102 - Copyrights and licences for the communication module
Technical data 102 Copyrights and licences for the communication module For the purpose of operating and controlling the communication module, Mieleuses proprietary or third-party software that is not covered by open sourcelicensing terms. These items of software/software components are protected by...
Page 103 - United Kingdom
United Kingdom Miele Co. Ltd., Fairacres, Marcham Road, Abingdon, Oxon, OX14 1TWTel: 0330 160 6600, Internet: www.miele.co.uk, E-mail: [email protected] Australia Miele Australia Pty. Ltd.ACN 005 635 398ABN 96 005 635 398Level 4, 141 Camberwell RoadHawthorn East, VIC 3123Tel: 1300 464 353E-mail: [em...


 Miele WWD380 WCS PWash&Steam&9kg User Manual
 Miele W 1614 Manual
 Miele G 5266 SCVi SFP Active Plus User Manual
 Miele Classic C1 Turbo Team PowerLine - SBAN0 User Manual
![Miele PDR 307 [EL]](https://manualsarea.com/img/product/thumbs/48/ba/fd/bafde84806e8abc8b420f34eaf8fcd6e.webp) Miele PDR 307 [EL] User Manual
Miele PDR 307 [EL] User Manual Miele F 1911 Vi Manual
![Miele PDR 908 [EL MAR 3N AC 400V 50-60Hz]](https://manualsarea.com/img/product/thumbs/48/05/b7/05b705998b251f92b271e908423e1ecb.webp) Miele PDR 908 [EL MAR 3N AC 400V 50-60Hz] Installation Manual
Miele PDR 908 [EL MAR 3N AC 400V 50-60Hz] Installation Manual Miele K 9757 iD Manual
 Miele H 7262 BP User Manual
 Miele H 7263 BP User Manual
 Miele H 7264 BP User Manual
 Miele H 7270 BM User Manual
 Miele H 7280 BP User Manual
 Miele H 7364 BP User Manual
 Miele H 7440 BMX User Manual
 Miele H 7464 BP User Manual
 Miele H 7464 BPX User Manual
 Miele H 7570 BM User Manual
 Miele H 7640 BM User Manual
 Miele H 7660 BP User Manual