Page 2 - Contents; Language
Contents 2 Warning and safety instructions ................................................................................ 5 Caring for the environment ......................................................................................... 12 Guide to the appliance ..................................
Page 4 - Problem solving guide
Contents 4 Lowering the top heat/grill element ............................................................................. 65 Problem solving guide .................................................................................................. 66 Service ...........................................
Page 5 - Warning and safety instructions; Appropriate use; This oven is intended for domestic use and use in other similar
Warning and safety instructions 5 This oven complies with all current local and national safetyrequirements. However, inappropriate use can lead to personalinjury and damage to property.Read the operating and installation instructions carefully beforeusing the oven. They contain important informatio...
Page 6 - Safety with children
Warning and safety instructions 6 Safety with children Activate the system lock to ensure that children cannot switch the oven on by mistake. Children under 8 years of age must be kept away from the oven unless they are constantly supervised. Children aged 8 and older may only use the oven wit...
Page 8 - If the connection cable is damaged, it must be replaced with a; Correct use; Risk of injury caused by hot surfaces. The oven gets hot during
Warning and safety instructions 8 If the oven is delivered without a power connection cable, a special cable must be installed by a Miele authorised service technician (see“Installation”, “Electrical connection”). If the connection cable is damaged, it must be replaced with a special connection ...
Page 10 - The following applies to stainless steel surfaces:; Cleaning and care
Warning and safety instructions 10 Risk of injury caused by steam. Pouring a cold liquid onto a hot surface creates steam, which can cause severe scalding. The suddentemperature change can also cause damage to hot enamelledsurfaces. Never pour cold liquids directly onto hot enamelledsurfaces. It...
Page 11 - Accessories
Warning and safety instructions 11 Risk of injury caused by hazardous steam. During pyrolytic cleaning, steam, which can irritate mucous membranes, can be released.During pyrolytic cleaning, do not stay in the kitchen for longer periodsof time and do not let children and pets enter the kitchen. It...
Page 12 - Caring for the environment; Disposing of your old appliance
Caring for the environment 12 Disposing of the packagingmaterial The packaging material is used forhandling and protects the appliancefrom transport damage. The packagingmaterial used is selected from materialswhich are environmentally friendly fordisposal and can generally be recycled.Recycling the...
Page 13 - Guide to the appliance; Oven
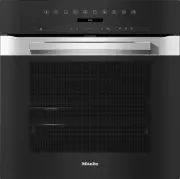
Guide to the appliance 13 Oven a Control elements b Door lock c Top heat/grill element d Connection socket for the food probe e Air inlet for the fan with ring heating element behind it f Side runners with 5 shelf levels g Oven floor with bottom heat element underneath it h Front frame with data pla...
Page 14 - Controls; OK
Controls 14 a Recessed On/Off sensor control For switching the oven on and off b Optical interface(For Miele Service only) c DisplayFor displaying the time of day andinformation on operation d sensor control For going back a step and cancellinga cooking programme e Navigation area with and ...
Page 15 - On/Off sensor control; The; Display; will appear in the main menu.; Sensor controls; Sensor controls above the display
Controls 15 On/Off sensor control The On/Off sensor control is recessed and reacts to touch.Use this sensor control to switch theoven on and off. Display The display is used for showing the timeof day or information about functions,temperatures, cooking durations,automatic programmes and settings...
Page 16 - Sensor controls under the display
Controls 16 Sensor controls under the display Sensor control Function Depending on which menu you are in, this sensor control will takeyou back a level or back to the main menu. If a cooking programme is in progress at the same time, use thissensor control to cancel the programme. ...
Page 17 - Symbols; The following symbols may appear in the display:; Symbol
Controls 17 Symbols The following symbols may appear in the display: Symbol Meaning This symbol indicates that there is additional information andadvice about using the appliance. Press the OK sensor control to confirm the information. Minute minder A tick indicates the option which is curren...
Page 18 - Using the appliance; Selecting a menu option; Changing a setting in a list
Using the appliance 18 Use the and arrow buttons or the area between them in the navigation area to use the oven.As soon as you reach a confirmablevalue, message or setting, the OK sensor control will light up orange. Selecting a menu option Touch the or arrow buttons o...
Page 19 - Changing the function; Entering numbers
Using the appliance 19 Selecting a function oroperating mode The sensor controls for the functionsand operating modes (e.g. Further ) are located above the display (see“Controls” and “Settings”). Touch the sensor control for thedesired function. The sensor control on the fascia panellights up ...
Page 20 - Features; Data plate; Side runners
Features 20 A list of the models described in theseoperating and installation instructionscan be found on the back page of thisbooklet. Data plate The data plate is located on the frontframe, visible when the door is open.The data plate states the model number,the serial number as well as connection...
Page 21 - Universal tray HUBB 71:; FlexiClip runners HFC 70-C
Features 21 Baking tray, universal tray and rackwith non-tip notches Baking tray HBB 71: Universal tray HUBB 71: Rack HBBR 71: These accessories are inserted into theoven between the two rails of a shelf inthe side runner.Always place the rack with the loadingsurface in the lower position.These acce...
Page 22 - - Make sure that they are sitting
Features 22 To prevent the risk of accessories slidingoff the runners: - Make sure that they are sitting securely on their runners in betweenthe stoppers at either end of eachrunner. - Always place the rack with the loading surface in the lower position on theFlexiClip runners. The FlexiClip runners...
Page 23 - Fitting the FlexiClip runners; Risk of injury caused by hot; do not
Features 23 Fitting the FlexiClip runners Risk of injury caused by hot surfaces.The oven gets hot during operation.You could burn yourself on theheating elements, oven compartmentor accessories.Allow the heating elements, ovencompartment and the accessories tocool before fitting or removing theFle...
Page 25 - - Browning on the underside of baked; round baking and AirFry tin,; can be used for; Baking stone HBS 70
Features 25 Gourmet baking and AirFry tray,perforated HBBL 71 The fine perforations of the Gourmetbaking and AirFry tray optimise cookingprocesses: - Browning on the underside of baked goods made from fresh yeast andquark doughs as well as bread androlls is improved.Roll out the dough on a level sur...
Page 26 - Safety features; for pyrolytic cleaning
Features 26 Food probe Using the food probe enables thetemperature during the cookingprogramme to be monitored veryprecisely (see “Roasting” – “Foodprobe”). When using the food probe, do notinsert the FlexiClip runners with wirerack on shelf level 4, otherwise thiswill block the socket. Handle HEG...
Page 27 - PerfectClean treated surfaces; perforated
Features 27 PerfectClean treated surfaces PerfectClean surfaces have very goodnon-stick properties and areexceptionally easy to clean.Food can be easily removed from thesesurfaces. Soiling from baking androasting can be easily removed fromthese surfaces.Food can be sliced or cut up onPerfectClean su...
Page 28 - Before using for the first time; Basic settings; Setting the language; Select the desired language.; Setting the location; Select the required location.; Setting the time; Confirm with
Before using for the first time 28 Basic settings The following settings must be madebefore starting up for the first time. Youcan change these settings again at alater time (see “Settings”). Risk of injury caused by hot surfaces.The oven gets hot during operation.For safety reasons, the oven may ...
Page 30 - Settings; Settings overview; Menu option; * Factory default setting
Settings 30 Settings overview Menu option Available settings Language ... | deutsch | english | ... Location Time Display On * | Off | Night dimming Clock format 12 h | 24 h * Set Lighting On“On” for 15 seconds * Off Display Brightness QuickTouch On | Off * Volume Buzzer tones...
Page 31 - Opening the “Settings” menu; Lighting; Brightness
Settings 31 Opening the “Settings” menu In the Further | Settings menu, you can personalise your oven by adaptingthe factory default settings to suit yourrequirements. Select Further . Select Settings . Select the desired setting. You can check settings or change them. Settings can...
Page 32 - Volume
Settings 32 QuickTouch Select how the sensor controls shouldrespond when the oven is switched off: - On If you have also selected the Time | Display | On or Night dimming setting, the sensor controls will also respondwhen the oven is switched off. - Off Independently of the Time | Display setting...
Page 33 - Select the relevant operating mode.; Pyrolytic reminder; and leave food in the oven; Safety; Sensor lock; The sensor lock is activated. Touch the
Settings 33 Recommended temps. If you often cook with differenttemperatures, it makes sense to changethe recommended temperatures.After selecting this menu option, the listof operating modes will appear in thedisplay together with theirrecommended temperatures. Select the relevant operating mode. ...
Page 34 - System lock; Software version; Demo mode; Factory default
Settings 34 System lock The system lock prevents the ovenbeing switched on by mistake.The minute minder can still be usedwhen the system lock is active. The system lock will remain activatedeven after a mains outage. - On The system lock has been activated.Before you can use the oven, touchthe OK ...
Page 35 - Using the Min. minder function; Setting the minute minder; without
Min. minder 35 Using the Min. minder function The minute minder can be used to time other activities in the kitchen,e.g. boiling eggs.The minute minder can also be used atthe same time as a cooking programmefor which the cooking duration start andfinish times have been set (e.g. as areminder to s...
Page 37 - Energy saving tips; Cooking programmes
Energy saving tips 37 Cooking programmes - If possible, use the automatic programmes for cooking food. - Remove all accessories from the oven compartment that are not required forcooking. - In general, if a range of temperatures is given in a recipe or chart, it is bestto select the lower temperatur...
Page 38 - Residual heat utilisation
Energy saving tips 38 Residual heat utilisation - In cooking programmes using temperatures greater than 140 °C andwith cooking durations longer than30 minutes, the temperature can beturned down to the lowest possiblelevel about 5 minutes before the endof the cooking programme. Theresidual heat in th...
Page 39 - Operation
Operation 39 Switch the oven on. The main menu will appear. Place the food in the ovencompartment. Select the operating mode you wantto use. The operating mode will appear first,followed by the recommendedtemperature. Change the recommendedtemperature if necessary. The recommended temperatur...
Page 40 - Setting cooking durations; Changing the set cooking durations; Deleting the set cooking durations
Operation 40 Setting cooking durations Cooking results can be impaired ifthere is a long delay between thefood being placed in the oven and thestart of cooking. Fresh food canchange colour and even deteriorate.When baking, the cake mixture ordough can dry out, and the raisingagents can lose their ef...
Page 41 - Booster
Operation 41 Cancelling a cookingprogramme Touch the sensor control for theselected function or the sensor control. When Cancel process appears in the display, confirm with OK . The oven compartment heating andlighting will then switch off. Any cookingdurations set will be deleted.The main m...
Page 42 - Categories; Handy hints
Automatic programmes 42 The wide range of automaticprogrammes enables you to achieveexcellent results with ease. Categories The automatic programmes are sorted into categories to provide abetter overview. Simply select theappropriate programme for the type offood you are cooking and follow theins...
Page 43 - Further applications; Defrost; Tips; Drying
Further applications 43 This section provides information on thefollowing applications: - Defrost- Drying- Low temperature cooking- Frozen food/ready meals- Heating crockery Defrost Gentle defrosting of frozen goodsmeans that the vitamins and mineralsare generally retained. Select Further . ...
Page 44 - Fruit; Removing the dried food; Low temperature cooking
Further applications 44 Food fordrying [°C] [h] Fruit 60–70 2–8 Vegetables 55–65 4–12 Mushrooms 45–50 5–10 Herbs* 30–35 4–8 Operating mode, Temperature, Drying time, Fan plus, Conventional heat * When drying herbs, always use the universal tray on shelf level 2 and use t...
Page 45 - Using Conventional heat; Frozen food/Ready meals; Tips for cakes, pizza and baguettes
Further applications 45 If using the food probe, please observethe information under “Roasting –Food probe”. Using Conventional heat Take a look at the information in thecooking charts at the end of thisbooklet. Use the universal tray with the rackplaced on top of it. Place the rack together wi...
Page 46 - Heat crockery; Use the; operating mode for; Set the temperature to 50–80 °C.
Further applications 46 Heat crockery Use the Fan plus operating mode for pre-heating crockery. Only pre-heat heat-resistant crockery. Place the wire rack on shelf level 1and place the crockery to be pre-heated on it. Depending on the size ofthe crockery, you can also place therack on the oven...
Page 47 - Baking; Tips on baking; - Position rectangular tins with the; Using baking parchment; Notes on the cooking charts; Selecting the
Baking 47 Handling food carefully will helpprotect your health.Cakes, pizzas and french fries shouldbe cooked until golden, not darkbrown. Tips on baking - Set a cooking duration. If used for baking, do not delay the start for toolong. Cake mixture or dough will dryout, and the raising agents will l...
Page 48 - Notes on the functions
Baking 48 Notes on the functions You can find an overview of all thefunctions with their recommendedvalues in “Main and sub-menus”. Using Automatic programmes Follow the instructions in the display. Using Fan plus Because the fan distributes the heataround the oven compartment straightaway, ...
Page 49 - Roasting; Tips for roasting
Roasting 49 Tips for roasting - You can use all crockery made from temperature-resistant materials, e.g.roasting dishes, roasting pans with lid,ovenproof glass dishes, roasting bags,dishes made from earthenware orcast iron, the universal tray, rack and/or anti-splash insert (if available) ontop of t...
Page 51 - Food probe; How it works; Important usage notes; - You can place the meat in a pot or on; Using the food probe
Roasting 51 Food probe The food probe allows the temperatureto be monitored precisely during acooking programme. How it works The metal tip of the food probe must befully inserted into the centre of the foodall the way to the handle. There is atemperature sensor in the metal tipwhich measures the co...
Page 52 - and; Time left display; Select the
Roasting 52 Insert the plug of the food probe intothe socket until you feel it engage. Close the door. Select the function or automaticprogramme. Set the temperature and the coretemperature if necessary. The core temperatures cannot bechanged for the automaticprogrammes.Follow the instructio...
Page 53 - Grilling; Tips for grilling
Grilling 53 Risk of injury caused by hot surfaces.If you grill with the door open, hot airwill escape from the oven instead ofbeing cooled by the cooling fan. Thecontrol elements will get hot.Grill with the oven door closed. Tips for grilling - Pre-heating is necessary when grilling. Pre-heat the ...
Page 54 - To
Grilling 54 Selecting the cooking duration Grill thinner cuts of meat/slices of fishfor approx. 6–8 minutes per side.It is best to grill food of a similarthickness at the same time so thatthe cooking durations do not vary toomuch. As a general rule, check whether thefood is cooked after the s...
Page 55 - Unsuitable cleaning agents
Cleaning and care 55 Danger of injury caused by hot surfaces.The oven gets hot during operation.You could burn yourself on theheating elements, oven compartmentor accessories.Allow the heating elements, ovencompartment and the accessories tocool before manual cleaning. Risk of injury due to elec...
Page 56 - Removing normal soiling
Cleaning and care 56 Removing normal soiling There is a delicate fibreglass sealaround the oven compartment toseal the glass in the oven door. Thiscan be damaged by rubbing orscouring.Avoid cleaning the fibreglass seal. Removing normal soiling Remove normal soiling immediatelywith warm water, wash...
Page 57 - Dry all surfaces with a soft cloth.
Cleaning and care 57 Remove all cleaning agent residuesthoroughly with clean water. Dry all surfaces with a soft cloth. Stubborn soiling on theFlexiClip runners Cleaning FlexiClip telescopic runnersin a dishwasher would remove thespecial grease which is essential fortheir smooth functioning.Neve...
Page 58 - Preparing for pyrolytic cleaning
Cleaning and care 58 Preparing for pyrolytic cleaning Accessories will be damaged by thehigh temperatures in pyrolyticcleaning.Remove all accessories from theoven before starting the pyrolyticcleaning programme. This alsoapplies to the side runners and anyoptional accessories. Coarse soiling in the ...
Page 60 - Door removal
Cleaning and care 60 Door removal The door weighs approx. 10 kg. The oven door is connected to the doorhinges by retainers.Before removing the door from theretainers, the locking clamps on bothdoor hinges have to be released. Open the door fully. Release the locking clamps by turningthem as far ...
Page 61 - Dismantling the door; Risk of injury caused by the door; Gently; lift the inner pane up and out
Cleaning and care 61 Dismantling the door The oven door is an open system with 4glass panes which have a heat-reflectivecoating on some of their surfaces.When the oven is operating, air isdirected through the door to keep theouter pane cool.If soiling has worked its way in betweenthe glass panes, th...
Page 62 - Dry all parts with a soft cloth.
Cleaning and care 62 Remove the seal. Carefully lift the upper of the twomiddle panes up and take it out. Then lift the lower of the two middlepanes up carefully and take it out. Clean the door panes and other partswith a clean sponge and a solution ofhot water and washing-up liquid or aclea...
Page 63 - The door is now reassembled.; Fitting the door
Cleaning and care 63 Push the inner pane with the mattprinted side facing downwards intothe plastic strip and place it betweenthe retainers. Flip both the glass pane retainersinwards to close them. The door is now reassembled. Fitting the door Hold the door securely on both sidesand carefully ...
Page 64 - Danger of injury caused by hot; Reassemble; by following these
Cleaning and care 64 To relock the locking clamps, turnthem back up to the horizontalposition as far as they will go. Removing the side runners withFlexiClip runners The side runners can be removedtogether with the FlexiClip runners (ifinserted).If you wish to remove the FlexiCliprunners separatel...
Page 66 - Problem
Problem solving guide 66 Many malfunctions and faults that can occur in daily operation can be easilyremedied. You can save time and money in many cases, as you do not need to callthe Miele Customer Service Department.Information to help you rectify faults yourself can be found at www.miele.com/serv...
Page 68 - and a fault code not
Problem solving guide 68 Problem Cause and remedy Fault and a fault code not listed here appears inthe display. A fault has occurred that you cannot resolve. Call the Miele Customer Service Department. A noise can be heardafter a cooking pro-gramme. The cooling fan remains switched on after a coo...
Page 70 - Service; Contact in the event of a fault
Service 70 Information to help you rectify faultsyourself and about Miele spare partscan be found at www.miele.com/service. Contact in the event of a fault In the event of any faults which youcannot remedy yourself, please contactyour Miele dealer or the MieleCustomer Service Department. You can boo...
Page 71 - Installation; Installation dimensions; Dimensions are given in mm.; Installation in a tall or base unit
Installation *INSTALLATION* 71 Installation dimensions Dimensions are given in mm. Installation in a tall or base unit When building the oven into a base unit underneath a hob, please also observethe installation instructions for the hob as well as the building-in depth requiredfor the hob.
Page 72 - Side view
Installation *INSTALLATION* 72 Side view A H 71xx: 43 mm H 72xx: 47 mm
Page 73 - Connections and ventilation; Front view
Installation *INSTALLATION* 73 Connections and ventilation a Front view b Mains connection cable, length = 1500 mm c No connections permitted in this area d Ventilation cut-out, min. 150 cm ²
Page 74 - Installing the oven
Installation *INSTALLATION* 74 Installing the oven For safety reasons, the oven may onlybe used when it has been fullyinstalled. The oven requires a sufficient supplyof cool air for efficient operation. Therequired supply of cool air must notbe excessively heated by other heatsources (e.g. solid fue...
Page 75 - Electrical connection; Connection to a switched socket; or if the; Connection data; is given on the data
Installation *INSTALLATION* 75 Electrical connection Danger of injury! Installation, repairs and othermaintenance work by unqualifiedpersons could be dangerous. Mielecannot be held liable forunauthorised work. The appliance may only beconnected to the mains electricitysupply by a qualified electri...
Page 77 - Cooking charts; Batter
Cooking charts 77 Batter Cakes/biscuits (accessories) [°C] [min] +HFC: -HFC: Muffins (1 tray) 150–160 – 1 2 25–35 Muffins (2 trays) 150–160 – 1+3 3 1+3 30–40 4 Small cakes* (1 tray) 150 – 1 2 25–35 160 2 – 2 3 20–30 Small cakes* (2 trays) 150 2 – 1+3 3 1+3 25–35 Madeira cake (bak...
Page 78 - Shortcrust pastry
Cooking charts 78 Shortcrust pastry Cakes/biscuits (accessories) [°C] [min] +HFC: -HFC: Biscuits (1 tray) 140–150 – 1 2 25–35 150–160 – 1 2 25–35 Biscuits (2 trays) 140–150 – 1+3 3 1+3 25–35 4 Drop cookies* (1 tray) 140 – 1 2 35–45 160 2 – 2 3 20–30 Drop cookies* (2 trays) 140 ...
Page 79 - Yeast dough
Cooking charts 79 Yeast dough Cakes/biscuits (accessories) [°C] [min] +HFC: -HFC: Bundt cake (baking and roasting rack,Bundt cake tin, 24 cm) 1 150–160 – 1 2 50–60 160–170 – 1 2 50–60 Stollen (1 tray) 150–160 – 1 2 55–65 160–170 1 2 55–65 Streusel cake with/without fruit(1 tra...
Page 80 - Quark dough; Sponge mixture
Cooking charts 80 Quark dough Cakes/biscuits (accessories) [°C] [min] +HFC: -HFC: Fresh fruit cake (1 tray) 160–170 1 2 40–50 170–180 2 3 50–60 Apple turnovers/raisin whirls (1 tray) 160–170 – 2 3 25–35 Apple turnovers/raisin whirls (2 trays) 150–160 1+3 1 1+3 25–35 2 Oper...
Page 82 - Savoury dishes; Food
Cooking charts 82 Savoury dishes Food (accessories) [°C] [min] +HFC: -HFC: Savoury flan (1 tray) 220–230 1 – 1 35–45 180–190 – – 1 30–40 Onion tart (1 tray) 180–190 1 1 2 25–35 170–180 – 1 2 30–40 Pizza, yeast dough (1 tray) 170–180 1 2 25–35 210–220 1 – 1 2 20–30 Pizza, ...
Page 83 - Beef
Cooking charts 83 Beef Food (accessories) [°C] [min] 10 [°C] Braised beef, approx. 1 kg (oven dishwith lid) 2 150–160 3 2 6 120–130 7 – 2 170–180 3 2 6 120–130 7 – 2 180–190 – 2 6 160–180 8 – Fillet of beef, approx. 1 kg (universaltray) 2 180–190 3 2 6 25–60 45–75 Fillet of...
Page 84 - Veal
Cooking charts 84 Veal Food (accessories) [°C] [min] 7 [°C] Braised veal, approx. 1.5 kg (oven dishwith lid) 2 160–170 3 2 5 120–130 6 – 2 170–180 3 2 5 120–130 6 – Fillet of veal, approx. 1 kg (universaltray) 2 160–170 3 2 5 30–60 45–75 Fillet of veal (pink), approx. 1 kg 1 ...
Page 85 - Pork; Bacon
Cooking charts 85 Pork Food (accessories) [°C] [min] 10 [°C] Pork joint/pork neck roast,approx. 1 kg (oven dish with lid) 160–170 2 5 130–140 6 80–90 170–180 2 5 130–140 6 80–90 Pork joint with crackling,approx. 2 kg (oven dish) 180–190 2 5 130–150 7 80–90 190–200 2 5 130...
Page 88 - Notes for test institutes; Test food
Notes for test institutes 88 Test food according to EN 60350-1 Test food (accessories) [°C] 6 [min] +HFC: -HFC: Small cakes (1 baking tray 1 ) 150 – 1 2 25–35 160 4 – 2 3 20–30 Small cakes (2 baking trays 1 ) 150 4 – 1+3 7 1+3 25–35 Drop cookies (1 baking tray 1 ) 140 – 1 2 35–45 ...
Page 89 - Energy efficiency class according to EN 60350-1; - Testing is undertaken using the; Data sheet for household ovens
Notes for test institutes 89 Energy efficiency class according to EN 60350-1 The energy efficiency class is determined in accordance with EN 60350-1. Energy efficiency class: A+Please observe the following when conducting testing: - Testing is undertaken using the Eco Fan heat function. - Select...
Page 91 - United Kingdom
United Kingdom Miele Co. Ltd., Fairacres, Marcham Road, Abingdon, Oxon, OX14 1TWTel: 0330 160 6600, Internet: www.miele.co.uk, E-mail: [email protected] Australia Miele Australia Pty. Ltd.ACN 005 635 398ABN 96 005 635 398Level 4, 141 Camberwell RoadHawthorn East, VIC 3123Tel: 1300 464 353E-mail: [em...


 Miele WWD380 WCS PWash&Steam&9kg User Manual
 Miele W 1614 Manual
 Miele G 5266 SCVi SFP Active Plus User Manual
 Miele Classic C1 Turbo Team PowerLine - SBAN0 User Manual
![Miele PDR 307 [EL]](https://manualsarea.com/img/product/thumbs/48/ba/fd/bafde84806e8abc8b420f34eaf8fcd6e.webp) Miele PDR 307 [EL] User Manual
Miele PDR 307 [EL] User Manual Miele F 1911 Vi Manual
![Miele PDR 908 [EL MAR 3N AC 400V 50-60Hz]](https://manualsarea.com/img/product/thumbs/48/05/b7/05b705998b251f92b271e908423e1ecb.webp) Miele PDR 908 [EL MAR 3N AC 400V 50-60Hz] Installation Manual
Miele PDR 908 [EL MAR 3N AC 400V 50-60Hz] Installation Manual Miele K 9757 iD Manual
 Miele H 7164 BP User Manual
 Miele H 7170 BM User Manual
 Miele H 7180 BP User Manual
 Miele H 7240 BM User Manual
 Miele H 7240 BM AM User Manual
 Miele H 7260 BP User Manual
 Miele H 7263 BP User Manual
 Miele H 7264 BP User Manual
 Miele H 7270 BM User Manual
 Miele H 7280 BP User Manual
 Miele H 7364 BP User Manual
 Miele H 7440 BM User Manual