Page 2 - TABLE OF CONTENTS; SAFETY INSTRUCTIONS
TABLE OF CONTENTS This manual may contain images or content that may be different from the model you purchased.This manual is subject to revision by the manufacturer. SAFETY INSTRUCTIONS READ ALL INSTRUCTIONS BEFORE USE .................................................... 5 Safety Messages ............
Page 5 - READ ALL INSTRUCTIONS BEFORE USE; Safety Messages; Technical Safety; WARNING
5 SAFETY INSTRUCTIONS ENGLISH SAFETY INSTRUCTIONS READ ALL INSTRUCTIONS BEFORE USE The following safety guidelines are intended to prevent unforeseen risks or damage from unsafe or incorrect operation of the appliance. The guidelines are separated into ‘WARNING’ and ‘CAUTION’ as described below. Saf...
Page 6 - Maximum Capacity; Programme; WARNING - To avoid a fire
6 SAFETY INSTRUCTIONS • Children should be supervised to ensure that they do not play with the appliance. • If the power cord is damaged, it must be replaced by the manufacturer, its service agent or similarly qualified persons in order to avoid a hazard. • Use a new hose or hose-set supplied with t...
Page 7 - Installation
7 SAFETY INSTRUCTIONS ENGLISH with an extra amount of detergent before being dried in the appliance. • Never stop the appliance before the end of the drying cycle unless all items are quickly removed and spread out so that the heat is dissipated. • Items such as foam rubber (latex foam), shower caps...
Page 8 - Operation
8 SAFETY INSTRUCTIONS • Improper connection of the equipment-grounding conductor can result in risk of electric shock. Check with a qualified electrician or service personnel if you are in doubt as to whether the appliance is properly grounded. Operation • Never attempt to operate the appliance if i...
Page 9 - Maintenance
9 SAFETY INSTRUCTIONS ENGLISH thinner, petroleum, insecticide, air freshener, cosmetics, etc.) near the appliance. • Never reach into the appliance while it is operating. Wait until the drum has completely stopped. • Do not touch the door during a high temperature programme.• In case of a water leak...
Page 10 - Disposal
10 SAFETY INSTRUCTIONS • Securely plug the power plug in the outlet socket after completely removing any moisture and dust. • Do not spray water inside or outside the appliance to clean it.• Never unplug the appliance by pulling on the power cable. Always grip the power plug firmly and pull straight...
Page 11 - INSTALLATION; Parts and Specifications; NOTE; Front View
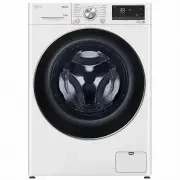
11 INSTALLATION ENGLISH INSTALLATION Parts and Specifications NOTE • Appearance and specifications may change without notice to improve the quality of the appliance. Front View a Control Panel b Detergent Dispenser Drawer c Drum d Door e Cover Cap f Drain Plug g Drain Pump Filter h Levelling Feet Re...
Page 12 - Specifications
12 INSTALLATION Specifications Dimension(mm) Model WVC9-1412W, 0 2 2 y l p p u S r e w o P 240 V~, 50 Hz g k 6 7 t h g i e W t c u d o r P W 600 D 615 D'' 1145 H 850 D' 655 W D D’’ D’ H global_main.book.book Page 12 T hursday, July 7, 2022 11:34 A M WVC9-1412B
Page 13 - Accessories
13 INSTALLATION ENGLISH Accessories *1 The included accessories vary depending on the model you purchased. Cold Supply Hose Anti–slip Sheets*1 Spanner Elbow Bracket for Securing Drain Hose Caps for Covering Transit Bolt Holes Tie Strap*1 global_main.book.book Page 13 Thursday, July 7, 2022 11:34 AM
Page 14 - Installation Place; Installation Location; Wooden Floors (Suspended; CAUTION
14 INSTALLATION Installation Place Requirements Before installing the appliance, check the following information to make sure that the appliance should be installed in a correct place. Installation Location • This appliance must be installed on firm flooring to minimize vibration during the spin cyc...
Page 16 - Levelling the Appliance; Checking the Level; Adjusting and Levelling the
16 INSTALLATION 1 Starting with the bottom two transit bolts a , use the spanner (included) to fully loosen all transit bolts by turning them counterclockwise. 2 Remove the bolt assemblies by wiggling them slightly while pulling them out. 3 Install the hole caps.• Locate the hole caps b included in ...
Page 17 - Using Anti-Slip Sheets
17 INSTALLATION ENGLISH • Make sure that all four feet are stable and resting on the floor. NOTE • Do not install the washing machine on a plinth, stand or elevated surface unless it is manufactured by LG Electronics for use with this model. 2 Check if the appliance is perfectly level using a spirit...
Page 18 - Connecting the Water; Note for Connection; Checking the Rubber Seal
18 INSTALLATION 3 Place the adhesive side a of the anti-slip sheets on the floor.• The most effective way is to install the anti- slip sheets under the front feet. If it is difficult to place the sheets under the front feet of the appliance, attach them under the rear feet. 4 Put the appliance on th...
Page 19 - Connecting the Hose to the
19 INSTALLATION ENGLISH Connecting the Hose to the Water Tap Connecting Screw-Type Hose to Tap with Thread Screw the supply hose connector onto the water supply tap. Connecting Screw-Type Hose to Tap Without Thread 1 Loosen the 4 fixing screws a . 2 Remove the guide plate b if the tap is too large t...
Page 20 - Installing the Drain Hose; Installing the Drain Hose with
20 INSTALLATION connector latch plate. Make sure the adapter locks into place. NOTE • After connecting the water inlet hose to the water tap, turn on the water tap to flush out foreign substances (dirt, sand, sawdust, and etc.) in the water lines. Let the water drain into a bucket, and check the wat...
Page 22 - OPERATION; Operation Overview; Using the Appliance
22 OPERATION OPERATION Operation Overview Using the Appliance Before the first wash, select the Cotton wash programme and add a half amount of the detergent. Start the appliance without clothes. This will remove possible residues and water from the drum that may have been left during manufacturing. ...
Page 23 - Control Panel; Control Panel Features
23 OPERATION ENGLISH Control Panel The actual control panel may differ from model to model. Control Panel Features Description a Power On/Off Button • Press this button to turn the washing machine on or off. b Programme Knob • Programmes are available according to the clothes type.• The lamp will li...
Page 24 - Time and Status Display
24 OPERATION Time and Status Display e Customizing Washing Programme Buttons Use these buttons to adjust the water temperature or spin speed settings for the selected programme.• The current settings are shown in the display.• Press the button for that option to select other settings. f Display • Th...
Page 26 - Preparing the Wash Load; Sorting the Clothes; Symbols on the Care Labels; Checking the Clothes before; Adding Detergents and; Detergent Dosage
26 OPERATION Preparing the Wash Load Sort the wash load for best washing results, and then prepare the clothes according to the symbols on their care labels. Sorting the Clothes • Soil level (Heavy, Normal, Light): Separate clothes according to soil level. If possible, do not wash heavily soiled ite...
Page 27 - Using the Dispenser; Fabric Softener Compartment
27 OPERATION ENGLISH detergents that are suitable for Drum (front load) type washers. • If too many suds occur, reduce the detergent amount. • If too much detergent is used, too many suds can occur and this will result in poor washing results or cause heavy load to the motor. • If you wish to use li...
Page 28 - Adding Detergent Tablets; Adding Water Softener
28 OPERATION • Pour fabric softener to the maximum fill line. Pouring excessive fabric softener over the maximum fill line can cause it to dispense too early, which may stain the clothes. NOTE • Do not pour fabric softener directly onto the clothes in the wash drum, doing so will cause dark staining...
Page 29 - Programme Table; Washing Programme
29 OPERATION ENGLISH Programme Table Washing Programme Cotton 40 ℃ (Cold to 95 ℃ ) Max. Load: Rating Description Washes normally soiled clothes by combining various drum motions. Cotton Eco 40 ℃ (Cold to 60 ℃ ) Max. Load: Rating Description Washes normally soiled clothes by combining various drum mo...
Page 31 - Extra Options
31 OPERATION ENGLISH • Neutral detergent is recommended. Extra Options *1 This option is automatically inserted in the programme and can not be deselected. NOTE • Rinse+ option can be selected for every washing programme in this table except the Dry Only and Steam Refresh programmes. • Delay End and...
Page 32 - Selectable Maximum Spin Speed
32 OPERATION Selectable Maximum Spin Speed NOTE • Actual maximum spin speed may vary depending on the load conditions. The values above are rounded to the nearest hundred. Programme Spin Speed Default Available Cotton 1400 rpm All Cotton Eco 1400 rpm All TurboClean 39 1200 rpm 400 to 1400 rpm Mixed ...
Page 33 - Drying Programme; General Tips for Drying; Using a Dry Programme
33 OPERATION ENGLISH Drying Programme General Tips for Drying Use the automatic programmes to dry most loads. Electronic sensors measure the temperature of the exhaust to increase or decrease drying temperatures for faster reaction time and tighter temperature control.• Cold water tap must be left o...
Page 35 - Using Air Condensing Dry without
35 OPERATION ENGLISH • Iron ( - ) - For damp drying items for ironing • Low Temperature ( * ) - For delicate fabrics • Normal Eco ( ( ) - For heavier fabrics 4 Press the Start/Pause button. NOTE • If you select the programme, you will be unable to select a dry programme. If this occurs, press the Po...
Page 36 - Extra Options and; Customizing a Washing; Using Special Options
36 OPERATION Extra Options and Functions You can use the extra options and functions to customize the programmes. Customizing a Washing Programme Each programme has default settings that are selected automatically. You may also customize these settings using these buttons. Temp. This button selects ...
Page 37 - Follow the next steps to use a special; Using Basic Options
37 OPERATION ENGLISH Turbo Clean Adding this option reduces the programme time but the similar washing results will be provided. Follow the next steps to use a special option. 1 Press the Power button. 2 Select a washing programme. 3 Change the washing programme ( Temp. or Spin ) as necessary. 4 To ...
Page 38 - Settings
38 OPERATION Settings Child Lock Use this option to disable the controls. This function can prevent children from changing cycles or operating the appliance. NOTE • Once this function is set, all buttons are locked except the Power button. • When the controls are locked, CL and the remaining time ar...
Page 39 - SMART FUNCTIONS; LG ThinQ Application; LG ThinQ Application Features; Installing LG ThinQ App and; Models with QR Code
39 SMART FUNCTIONS ENGLISH SMART FUNCTIONS LG ThinQ Application The LG ThinQ application allows you to communicate with the appliance using a smartphone. LG ThinQ Application Features Communicate with the appliance from a smartphone using the convenient smart features. Remote Start It allows you to ...
Page 40 - Using the Appliance Remotely; RF Radiation Exposure
40 SMART FUNCTIONS 2 Run the LG ThinQ app and sign in with your existing account or create an LG account to sign in. 3 Touch the add ( ~ ) button on the LG ThinQ app to connect your LG appliance. Follow the instructions in the app to complete the process. NOTE • To verify the Wi-Fi connection, check...
Page 41 - Smart Diagnosis
41 SMART FUNCTIONS ENGLISH Open Source Software Notice Information To obtain the source code that is contained in this product, under GPL, LGPL, MPL, and other open source licenses that have the obligation to disclose source code, and to access all referred license terms, copyright notices and other...
Page 42 - MAINTENANCE; What to Clean; Exterior; Tub Clean
42 MAINTENANCE MAINTENANCE WARNING • Unplug the appliance before cleaning to avoid the risk of electric shock. Failure to follow this warning may result in serious injury, fire, electric shock, or death. • Never use harsh chemicals, abrasive cleaners, or solvents to clean the appliance. They may dam...
Page 43 - Cleaning the Water Inlet Filter
43 MAINTENANCE ENGLISH Run this function once a month (or more often if needed) to reduce build-up of detergent and softener and other residue.• If there is a bad smell or mildew inside the appliance, run this function once a week for 3 weeks in addition to the regularly prompted intervals. NOTE • T...
Page 44 - Cleaning the Dispenser Drawer
44 MAINTENANCE 2 Open the cover cap and pull out the drain tube. 3 Remove the drain plug from the drain tube first a , and then drain the water. Then slowly unscrew the drain pump filter b to drain the remaining water and then proceed to remove any debris or objects from the filter. 4 After cleaning...
Page 45 - TROUBLESHOOTING; Before Calling for Service; Error Messages
45 TROUBLESHOOTING ENGLISH TROUBLESHOOTING Operation of your appliance can lead to errors and malfunctions. The following tables contain possible causes and notes for resolving an error message or malfunction. It is recommended to read the tables carefully below in order to save your time and money ...
Page 46 - Noises You Might Hear
46 TROUBLESHOOTING Noises You Might Hear OE WATER OUTLET ERROR The drain filter is clogged. • Check and clean the drain filter. dE dE1 dEz dE4 DOOR ERROR Door sensor malfunctions. • Please call LG service centre. You can find your local LG service centre phone number in the warranty card. tE CONTROL...
Page 49 - Performance
49 TROUBLESHOOTING ENGLISH Performance Appliance does not drain water. Kinked drain hose. • Ensure that the drain hose is not kinked. Drain located higher than 1 m above the floor. • Make sure that the drain hose is no higher than 1 m above the bottom of the appliance. Detergent is not dispensed com...
Page 50 - Odour
50 TROUBLESHOOTING Odour Staining Clothes were not properly sorted. • Always wash dark colours separately from light colours and whites to prevent discoloration. • Never wash heavily soiled items with lightly soiled items. Wrinkling Appliance is not unloaded promptly. • Always remove items from the ...
Page 51 - Drying
51 TROUBLESHOOTING ENGLISH Drying Wi-Fi Symptoms Possible Cause & Solution Dry problem Check water supply tap. • Do not overload. Check that the washing machine is draining properly to extract adequate water from the load. When load of laundry is too small to tumble properly. Add a few towels. •...
Page 53 - Memo
Memo global_main.book.book Page 53 Thursday, July 7, 2022 11:34 AM