Page 2 - TABLE OF CONTENTS; SAFETY INSTRUCTIONS
TABLE OF CONTENTS This manual may contain images or content that may be different from the model you purchased.This manual is subject to revision by the manufacturer. SAFETY INSTRUCTIONS READ ALL INSTRUCTIONS BEFORE USE .................................................... 5 Safety Messages ............
Page 5 - READ ALL INSTRUCTIONS BEFORE USE; Safety Messages; Technical Safety; WARNING
5 SAFETY INSTRUCTIONS EN SAFETY INSTRUCTIONS READ ALL INSTRUCTIONS BEFORE USE The following safety guidelines are intended to prevent unforeseen risks or damage from unsafe or incorrect operation of the appliance. The guidelines are separated into ‘WARNING’ and ‘CAUTION’ as described below. Safety M...
Page 6 - Maximum Capacity; Programme; Installation
6 SAFETY INSTRUCTIONS EN • Children should be supervised to ensure that they do not play with the appliance. • If the power cord is damaged, it must be replaced by the manufacturer, its service agent or similarly qualified persons in order to avoid a hazard. • Use a new hose or hose-set supplied wit...
Page 7 - Operation
7 SAFETY INSTRUCTIONS EN • Do not modify the power plug provided with the appliance. If it does not fit the power outlet, have a proper outlet installed by a qualified electrician. • This appliance is equipped with a power cord having an equipment- earthing / grounding conductor (earthing pin) and a...
Page 9 - Maintenance
9 SAFETY INSTRUCTIONS EN • When the air temperature is high and the water temperature is low, condensation may occur and thus wet the floor. • Wipe off dirt or dust on the contacts of the power plug. Maintenance • Disconnect the appliance from the power supply before cleaning the appliance. Setting ...
Page 10 - INSTALLATION; Parts and Specifications; NOTE; Front View
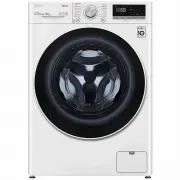
10 INSTALLATION EN INSTALLATION Parts and Specifications NOTE • Appearance and specifications may change without notice to improve the quality of the appliance. Front View a Control Panel b Detergent Dispenser Drawer c Drum d Door e Cover Cap f Drain Plug g Drain Pump Filter h Levelling Feet Rear Vi...
Page 12 - Installation Location; Floor Installation; Wooden Floors (Suspended; CAUTION
12 INSTALLATION EN Installation Place Requirements Before installing the appliance, check the following information to make sure that the appliance should be installed in a correct place. Installation Location • This appliance must be installed on firm flooring to minimize vibration during the spin ...
Page 13 - Ventilation; Lifting the Appliance Off the
13 INSTALLATION EN NOTE • You can purchase rubber cups (part No. 4620ER4002B ) from the LG service centre. Ventilation • Make sure that air circulation around the appliance should not be impeded by carpets, rugs, etc. Ambient Temperature • Do not install the appliance in rooms where freezing tempera...
Page 14 - Levelling the Appliance; Checking the Level; Adjusting and Levelling the
14 INSTALLATION EN Removing the Transit Bolt Assemblies To prevent the appliance from severe vibration and breakage, remove transit bolts and retainers. 1 Starting with the bottom two transit bolts a , use the spanner (included) to fully loosen all transit bolts by turning them counterclockwise. 2 R...
Page 15 - Using Anti-Slip Sheets
15 INSTALLATION EN NOTE • Do not install the washing machine on a plinth, stand or elevated surface unless it is manufactured by LG Electronics for use with this model. 2 Check if the appliance is perfectly level using a spirit level a . 3 Secure the levelling feet with the lock nuts b by turning an...
Page 16 - Note for Connection; Checking the Rubber Seal
16 INSTALLATION EN Connecting the Water Supply Hose Note for Connection • Water pressure must be between 100 kPa and 800 kPa (1.0 – 8.0 kgf/cm²). If the water pressure is more than 800 kPa , a decompression device should be installed. • Periodically check the condition of the water supply hose and r...
Page 17 - Installing the Drain Hose; Installing the Drain Hose with
17 INSTALLATION EN Connecting the Hose to the Appliance Screw the supply hose to the water inlet valve on the back of the appliance. • Do not connect the hose to the hot water supply for models with one water inlet. Connect to the cold water supply only. NOTE • After completing connection, if water ...
Page 18 - OPERATION; Operation Overview; Using the Appliance
18 OPERATION EN OPERATION Operation Overview Using the Appliance Before the first wash, select the Cotton wash programme and add a half amount of the detergent. Start the appliance without clothes. This will remove possible residues and water from the drum that may have been left during manufacturin...
Page 19 - Control Panel; Control Panel Features
19 OPERATION EN Control Panel The actual control panel may differ from model to model. Control Panel Features Description a Power On/Off Button • Press this button to turn the washing machine on. b Programme Knob • Programmes are available according to the clothes type.• The lamp will light up to in...
Page 20 - Time and Status Display
20 OPERATION EN Time and Status Display e Customizing Washing Programme Buttons Use these buttons to adjust the water temperature or spin speed settings for the selected programme.• The current settings are shown in the display.• Press the button for that option to select other settings. f Display •...
Page 22 - Preparing the Wash Load; Sorting the Clothes; Symbols on the Care Labels; Checking the Clothes before; Adding Detergents and; Detergent Dosage
22 OPERATION EN Preparing the Wash Load Sort the wash load for best washing results, and then prepare the clothes according to the symbols on their care labels. Sorting the Clothes • For best washing results, sort your clothes according to the care label stating fabric type and washing temperature. ...
Page 23 - Using the Dispenser; Fabric Softener Compartment
23 OPERATION EN detergents that are suitable for Drum (front load) type washers. • If too many suds occur, reduce the detergent amount. • If too much detergent is used, too many suds can occur and this will result in poor washing results or cause heavy load to the motor. • If you wish to use liquid ...
Page 24 - Adding Detergent Tablets; Adding Water Softener
24 OPERATION EN maximum fill line can cause it to dispense too early, which may stain the clothes. NOTE • Do not pour fabric softener directly onto the clothes in the wash drum, doing so will cause dark staining on the clothes that will be difficult to remove. • Do not leave the fabric softener in t...
Page 25 - Programme Table; Washing Programme
25 OPERATION EN Programme Table Washing Programme Cotton 40 °C (Cold to 95 °C) Max. Load: Rating Description Washes normally soiled clothes by combining various drum motions.• Pressing the Start/Pause button without selecting a programme will cause the Cotton programme to begin immediately, using th...
Page 27 - Extra Options
27 OPERATION EN Extra Options NOTE • Rinse+ , Delay End and Add Item options can be selected for every washing programme in this table. Programme Intensive Pre Wash Cotton # # Cotton Eco # Mixed Fabric # # Easy Care # # Quiet Wash # Allergy Care # Baby Care # Delicates # Hand/Wool # Sportswear # Qui...
Page 28 - Selectable Maximum Spin Speed
28 OPERATION EN Selectable Maximum Spin Speed NOTE • Actual maximum spin speed may vary depending on the load conditions. The values above are rounded to the nearest hundred. Programme Spin Speed Default Available Cotton 1400 rpm All Cotton Eco 1400 rpm All Mixed Fabric 1000 rpm All Easy Care 1400 r...
Page 29 - Customising a Washing; Using Basic Options
29 OPERATION EN Extra Options and Functions You can use the extra options and functions to customize the programmes. Customising a Washing Programme Each programme has default settings that are selected automatically. You may also customise these settings using these buttons. Temp. This button selec...
Page 30 - Settings
30 OPERATION EN Add Item You can use this option in order to add or remove clothes after the washing programme has started. 1 Press the Power button. 2 Select a washing programme. 3 Press the Start/Pause button. 4 Press the Add Item button as necessary. 5 Open the door after it unlocks itself and ad...
Page 31 - SMART FUNCTIONS; LG ThinQ Application; LG ThinQ Application Features; Before Using LG ThinQ
31 SMART FUNCTIONS EN SMART FUNCTIONS LG ThinQ Application The LG ThinQ application allows you to communicate with the appliance using a smartphone. LG ThinQ Application Features Communicate with the appliance from a smartphone using the convenient smart features. Remote Start It allows you to contr...
Page 32 - Installing the LG ThinQ; RF Radiation Exposure
32 SMART FUNCTIONS EN NOTE • To verify the Wi-Fi connection, check that f icon on the control panel is lit. • The appliance supports 2.4 GHz Wi-Fi networks only. To check your network frequency, contact your Internet service provider or refer to your wireless router manual. • LG ThinQ is not respons...
Page 33 - Smart Diagnosis
33 SMART FUNCTIONS EN Open Source Software Notice Information To obtain the source code under GPL, LGPL, MPL, and other open source licenses, that is contained in this product, please visit http:// opensource.lge.com.In addition to the source code, all referred license terms, warranty disclaimers an...
Page 34 - MAINTENANCE; What to Clean; Cleaning the Exterior; Exterior
34 MAINTENANCE EN MAINTENANCE WARNING • Unplug the appliance before cleaning to avoid the risk of electric shock. Failure to follow this warning may result in serious injury, fire, electric shock, or death. • Never use harsh chemicals, abrasive cleaners, or solvents to clean the appliance. They may ...
Page 35 - Tub Clean; Cleaning the Water Inlet Filter
35 MAINTENANCE EN Cleaning the Appliance Periodically & Performing an Emergency Water Evacuation Tub Clean This is a special function to help clean the inside of the appliance by soaking, washing, rinsing and spinning.Run this function once a month (or more often if needed) to reduce build-up of...
Page 36 - Cleaning the Dispenser Drawer
36 MAINTENANCE EN Cleaning the Drain Pump Filter and Performing an Emergency Water Evacuation The drain filter collects threads and small objects that may have been accidentally left in the clothes. Check regularly that the filter is clean to ensure smooth running of your appliance.Allow the water t...
Page 38 - TROUBLESHOOTING; Before Calling for Service; Error Messages
38 TROUBLESHOOTING EN TROUBLESHOOTING Operation of your appliance can lead to errors and malfunctions. The following tables contain possible causes and notes for resolving an error message or malfunction. It is recommended to read the tables carefully below in order to save your time and money that ...
Page 42 - Performance
42 TROUBLESHOOTING EN Performance Appliance is not filling properly. Inlet filter clogged. • Make sure the inlet filters on the fill valves are not clogged. Inlet hoses may be kinked. • Check that inlet hoses are not kinked or clogged. Insufficient water supply. • Make sure that both hot and cold wa...
Page 44 - Odour
44 TROUBLESHOOTING EN Odour Symptoms Possible Cause & Solution Musty or mildewy odour in appliance Inside of drum is not cleaned properly. • Run the Tub Clean function regularly. The drain hose is not properly installed, causing siphoning (water flowing back inside of the appliance). • When inst...
Page 46 - Memo