Page 2 - TABLE OF CONTENTS
TABLE OF CONTENTS This manual may contain images or content different from the model you purchased.This manual is subject to revision by the manufacturer. IMPORTANT SAFETY INSTRUCTIONS ........................................ 3 READ ALL INSTRUCTIONS BEFORE USE ..........................................
Page 3 - IMPORTANT SAFETY INSTRUCTIONS; READ ALL INSTRUCTIONS BEFORE USE
3 EN IMPORTANT SAFETY INSTRUCTIONS READ ALL INSTRUCTIONS BEFORE USE The following safety guidelines are intended to prevent unforeseen risks or damage from unsafe or incorrect operation of the appliance. The guidelines are separated into ‘WARNING’ and ‘CAUTION’ as described below. Safety Messages Th...
Page 5 - Operation
5 EN • This appliance should only be transported by two or more people holding the appliance securely. • Do not install the appliance in a damp and dusty place. Do not install or store the appliance in any outdoor area, or any area that is subject to weathering conditions such as direct sunlight, wi...
Page 8 - INSTALLATION; Front View; Parts and Specifications
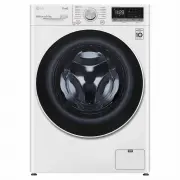
8 EN INSTALLATION Front View a Control Panel b Detergent Dispenser Drawer c Drum d Door e Cover Cap f Drain Pump Filter g Drain Plug h Levelling Feet Rear View a Power Plug b Transit Bolts c Drain Hose Parts and Specifications NOTE • Appearance and specifications may change without notice to improve...
Page 10 - Installation Location; WARNING; Wooden Floors (Suspended
10 EN Installation Place Requirements Before installing the appliance, check the following information to make sure that the appliance should be installed in a correct place. Installation Location • Install the appliance on a flat hard floor. (Allowable slope under the appliance: 1°) • Never try to ...
Page 11 - Ventilation; Unpacking the Appliance; Lifting the Appliance Off the Foam
11 EN • If possible, install the appliance in one of the corners of the room, where the floor is more stable. • Fit the rubber cups to reduce vibration. NOTE • You can purchase rubber cups (Part No.4620ER4002B) from the LG Electronics service centre. Ventilation • Make sure that air circulation arou...
Page 12 - Removing the Bolt Assemblies; Levelling the Appliance; Checking the Level; Adjusting and Levelling the Feet
12 EN Removing the Bolt Assemblies 1 Starting with the bottom two transit bolts a , use the spanner (included) to fully loosen all transit bolts by turning them counterclockwise. 2 Remove the bolt assemblies by wiggling them slightly while pulling them out. 3 Install the hole caps. • Locate the hole...
Page 13 - Using Anti-Slip Sheets; Connecting the Water Inlet; Note for Connection
13 EN 3 Secure the levelling feet with the lock nuts b by turning counterclockwise against the bottom of the appliance. 4 Check if all lock nuts at the bottom of the appliance are secured properly. NOTE • Proper placement and leveling of the appliance will ensure long, regular, and reliable operatio...
Page 15 - Connecting the Hose to the
15 EN 4 Push the supply hose vertically upwards so that the rubber seal within the hose can adhere completely to the tap and then tighten it by screwing it to the right. Plate Supply hose Connecting One Touch Type Hose to Tap Without Thread 1 Unscrew the adapter ring plate and loose the four fixing ...
Page 16 - Installing the Drain Hose; Installing the Drain Hose with the
16 EN Installing the Drain Hose Installing the Drain Hose with the Elbow Bracket The drain hose should not be placed higher than 100 cm above the floor. Water in the appliance may not drain or may drain slowly. • Securing the drain hose correctly will protect the floor from damage due to water leaka...
Page 17 - OPERATION; Operation Overview; Using the Appliance; Preparing the Wash Load; Sorting the Wash Load
17 EN OPERATION Operation Overview Using the Appliance Before the first wash, select the Cotton wash programme and add a half amount of the detergent. Start the appliance without laundry. This will remove possible residues and water from the drum that may have been left during manufacturing. 1 Sort ...
Page 18 - Checking the Clothes Care Label; Checking the Clothes before; CAUTION
18 EN Checking the Clothes Care Label The symbols tell you about the fabric content of your garment and how it should be washed. Symbols on the care labels Symbol Wash / Fabric type • Normal Wash • Cotton, Mixed Fabrics • Easy Care • Synthetic, Mixed Fabrics • Special Delicate Wash • Delicates • Han...
Page 19 - Detergent Dosage; Adding Detergent
19 EN Adding Detergents and Softeners Detergent Dosage • Detergent should be used according to the instruction of the detergent manufacturer and selected according to type, colour, soiling of the fabric and the washing temperature. Use only detergents that are suitable for Drum (front load) type was...
Page 20 - Adding Detergent Tablet; Adding Fabric Softener; Adding Water Softener
20 EN Adding Detergent Tablet Detergent tablets can also be used when washing as an alternative to powder or liquid. 1 Open the door and put detergent tablets into the drum. 2 Load the clothes into the drum and close the door. NOTE • Do not put tablets into the drawer. Adding Fabric Softener • Do no...
Page 21 - Control Panel; Control Panel Features
21 EN Control Panel Control Panel Features a Power Button • Press the Power button to turn on or off the appliance. b Programme Knob • Programmes are available according to the laundry type. • The lamp will light up to indicate the selected programme. c Start/Pause Button • This Start/Pause button i...
Page 23 - Programme Table; Washing Programme
23 EN Programme Table Washing Programme Programme Cotton Description Provides better performance by combining various drum motions.Use for coloured fast garments (shirts, nightdresses, pajamas, etc.). Proper Temperature 40 °C (Cold to 95 °C) Max. Load Rating Max. Spin Speed 1400 rpm Programme Cotton...
Page 26 - Drying Programme
26 EN Drying Programme Programme Normal % Description Reduces the drying time and energy usage during dry cycle for cottons. Use for cotton or linen fabrics such as cotton towels, T-shirts. Max. Load Rating Programme Iron - Description Suitable for ironing to dry clothes easily in damp condition. Us...
Page 27 - Extra Options; Extra Options and
27 EN Extra Options Programme Dry Intensive Add Item Pre Wash Rinse+ Cotton # # # # # Cotton Eco # # # # Mixed Fabric # # # # # Easy Care # # # # # Quiet Wash # # # # Allergy Care # # # # Baby Care # # # # Delicates # # # Hand/Wool # # # Quick 30 # # # # # Dry Only #* # Wash+Dry #* # # # # Download ...
Page 28 - Add Item; Spin
28 EN Delay End You can set this function so that the appliance starts automatically and finishes after a specified time interval. 1 Press the Power button. 2 Select a washing programme. 3 Press the Delay End button to set a required time. 4 Press the Start/Pause button. NOTE • The delay time is the...
Page 29 - Child Lock; Dry
29 EN NOTE • When you select No , the tub will still rotate for a short time to drain quickly. Beep On/Off q This function can only be selected when the appliance is in operation and a wash is in progress. • Press and hold the Rinse+ and Dry button simultaneously for 3 seconds to set the this functi...
Page 31 - SMART FUNCTIONS; Using LG ThinQ Application; Before Using LG ThinQ; Installing LG ThinQ
31 EN SMART FUNCTIONS Using LG ThinQ Application This feature is only available on the model with a or b logo. Before Using LG ThinQ 1 Check the distance between the appliance and the wireless router (WLAN network). • If the distance between the appliance and the wireless router is too far, the sign...
Page 32 - Using the Appliance Remotely
32 EN Wi-Fi Function Communicate with the appliance from a smartphone using the convenient smart features. Washer Cycle (Remote Start, Download Cycle) Set or download any preferred cycle and operate by remote control. Tub Clean Coach This function shows how many cycles remain before It is time to ru...
Page 33 - Standby Power Consumption; Open Source Software Notice; Using Smart Diagnosis; Smart Diagnosis through the
33 EN Standby Power Consumption Standby power consumption 0.5 W Network standby power consumption 2.0 W The period of time after which the power management function, or a similar function, switches the equipment automatically into standby and/or off mode and/or the condition providing networked stan...
Page 34 - MAINTENANCE; Cleaning After Every Wash; Care After Wash; Cleaning the Interior; Cleaning the Appliance
34 EN MAINTENANCE WARNING • Unplug the appliance before cleaning to avoid the risk of electric shock. Failure to follow this warning may result in serious injury, fire, electric shock, or death. • Never use harsh chemicals, abrasive cleaners, or solvents to clean the appliance. They may damage the f...
Page 36 - Cleaning the Dispenser Drawer
36 EN 4 After cleaning the drain pump filter, carefully reinsert the filter and screw the Drain cap back in clockwise carefully to avoid cross threading and leakage. Reinsert the plug back into the drain tube and place the tube into its holder. 5 Close the cover cap. CAUTION • Be careful when draini...
Page 37 - TROUBLESHOOTING; Before Calling for Service; Error Messages
37 EN TROUBLESHOOTING Operation of your appliance can lead to errors and malfunctions. The following tables contain possible causes and notes for resolving an error message or malfunction. It is recommended to read the tables carefully below in order to save your time and money that may cost for cal...
Page 38 - Noises You Might Hear
38 EN Symptoms Possible Cause & Solution dE dE1 dEz dE4 DOOR ERROR Door sensor malfunctions. • Please call LG Electronics service centre. You can find your local LG Electronics service centre phone number in the warranty card. tE CONTROL ERROR This is a control error. • Unplug the power plug and...
Page 41 - Drying
41 EN Symptoms Possible Cause & Solution Cycle time is longer than usual. The load is too small. • Add more items to allow the appliance to balance the loads. Heavy articles are mixed with lighter items. • Always try to wash articles with similar weight in order to allow the appliance to evenly ...
Page 42 - Performance
42 EN Performance Symptoms Possible Cause & Solution Poor stain removal Previously set stains. • Articles that have been previously washed may have stains which have been set. These stains may be difficult to remove and may require hand washing or pre-treating to aid in stain removal. Staining B...
Page 45 - Memo