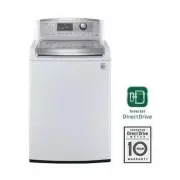
Page 2 - PRODUCT FEATURES
2 PRODUCT FEATURES PRODUCT FEATURES INVERTER DIRECT-DRIVE MOTOR The inverter direct drive motor, which is directly attached to the drum, is capable of producing multiple distinct different motions for optimal washing performance with very little noise and vibration. The motor assembly also contains ...
Page 3 - IMPORTANT SAFETY INSTRUCTIONS; READ ALL INSTRUCTIONS BEFORE USE; WARNING; DANGER; WARNING
3 IMPORTANT SAFETY INSTRUCTIONS ENGLISH IMPORTANT SAFETY INSTRUCTIONS READ ALL INSTRUCTIONS BEFORE USE WARNING For your safety, the information in this manual must be followed to minimize the risk of fire or explosion, electric shock, or to prevent property damage, injury to persons, or death. Your ...
Page 6 - SAVE THESE INSTRUCTIONS
6 IMPORTANT SAFETY INSTRUCTIONS IMPORTANT SAFETY INSTRUCTIONS READ ALL INSTRUCTIONS BEFORE USE WARNING For your safety, the information in this manual must be followed to minimize the risk of fire or explosion, electric shock, or to prevent property damage, injury to persons, or death. SAFETY INSTRU...
Page 7 - TABLE OF CONTENTS
7 TABLE OF CONTENTS ENGLISH TABLE OF CONTENTS 2 PRODUCT FEATURES 3 IMPORTANT SAFETY INSTRUCTIONS 3 BASIC SAFETY PRECAUTIONS 4 GROUNDING INSTRUCTIONS 5 SAFETY INSTRUCTIONS FOR INSTALLATION 6 SAFETY INSTRUCTIONS FOR USE, CARE, CLEANING, AND DISPOSAL 8 INTRODUCING YOUR WASHING MACHINE 8 Parts and Acces...
Page 8 - NOTE; Parts and Accessories; Parts; NOTE
8 INTRODUCING YOUR WASHING MACHINE NOTE y Contact LG Customer Service at 1-800-243-0000 (1-888-542-2623 in Canada) if any accessories are missing or to purchase accessories. y Always purchase good quality hoses. Leaking caused by poor quality hoses or by improper installation is not covered by the m...
Page 9 - Control panel features; Operation
9 INTRODUCING YOUR WASHING MACHINE ENGLISH Button Description y POWER ON/OFF BUTTON - Press to turn the washer ON. Press again to turn the washer OFF. NOTE: If the washer remains idle for 4 minutes after turning the washer off, the water in the tub will drain. ‘dr’ will appear on the display. You ma...
Page 10 - Display
10 INTRODUCING YOUR WASHING MACHINE Display Button Description y ESTIMATED TIME REMAINING - When the START/PAUSE button is pressed, the washer automatically detects the wash load (weight) and optimizes the washing time based on the selected cycle and options. The display will then indicate the estim...
Page 11 - INSTALLATION INSTRUCTIONS; Installation Overview
11 INSTALLATION INSTRUCTIONS ENGLISH INSTALLATION INSTRUCTIONS Installation Overview (1) (2) (3) (4) (7) (5) (6) WARNING y Washer is heavy! Two or more people are required when moving and unpacking the washer. Failure to do so can result in back or other injury. y Store and install the washer where ...
Page 12 - Checking and choosing the proper
12 INSTALLATION INSTRUCTIONS Checking and choosing the proper location Install the washing machine on a solid floor that is strong and rigid enough to support the weight of the washing machine, even when fully loaded, without flexing or bouncing. If the floor has too much flex, you may need to reinf...
Page 13 - Unpacking the washer
13 INSTALLATION INSTRUCTIONS ENGLISH Unpacking the washer 1 After the washer is in the home, remove the carton and Styrofoam® shipping base from the washer. When removing the washer from the carton base, be sure to remove the tub support in the middle of the carton base. If you must lay the washer d...
Page 14 - Connecting the water lines
14 INSTALLATION INSTRUCTIONS Connecting the water lines 1 Check the rubber seals on both sides of the hose. - Insert a rubber seal into the threaded fittings on each hose to prevent leaking. Rubber seal Water hose (To water inlet on the washing machine) Rubber seal Water hose (To tap) WARNING y Do n...
Page 15 - Connecting the drain line
15 INSTALLATION INSTRUCTIONS ENGLISH Connecting the drain line Secure the drain hose in place to prevent moving and leaking. NOTE y The drain hose should be properly secured. Failure to properly secure the drain hose can result in flooding and malfunction. y Total height of the house end should not ...
Page 16 - Leveling the Washing machine
16 INSTALLATION INSTRUCTIONS Leveling the Washing machine The washer spins at very high speeds, up to 1,100 RPM. NOTE y Adjust the leveling feet only as far as necessary to level the washer. Extending the leveling feet more than necessary can cause the washer to vibrate. y All four leveling feet mus...
Page 17 - Plugging in the power cord and; Test run
17 INSTALLATION INSTRUCTIONS ENGLISH Plugging in the power cord and grounding Make sure to ground the washing machine to prevent a short circuit or an electric shock when plugging in. Using a 3-prong outlet Plug in the electrical outlet without additional grounding. WARNING y The power outlet must b...
Page 18 - CAUTION; PREPARATION; Sorting wash loads; Precautions for fabric care before wash cycle; Fabric care labels
18 PREPARATION CAUTION Do not wash or spin any item labeled or known to be water-proof or water-resistant, even if the product care label on the item permits machine washing. Failure to follow these instructions could result in bodily injury, severe damage to your laundry, your washer and/or propert...
Page 19 - Loading the dispenser; Using detergent/fabric softener; Recommended detergent
19 PREPARATION ENGLISH Loading the dispenser The detergent dispenser drawer of the washing machine has a dispenser compartment for each detergent type. Add the appropriate detergents into its respective compartments. 1 Pull out the detergent dispenser drawer. 2 Add the appropriate detergent to its a...
Page 21 - USING YOUR WASHING MACHINE; Basic operation
21 USING YOUR WASHING MACHINE ENGLISH USING YOUR WASHING MACHINE Basic operation 1 2 3 4 7 5 8 6 WARNING y To reduce the risk of fire, electric shock, or injury to persons, read the IMPORTANT SAFETY INSTRUCTIONS before operating this appliance. SORT LAUNDRY AND LOAD WASHER. ADD DETERGENT BLEACH AND ...
Page 22 - Cycle guide
22 USING YOUR WASHING MACHINE Cycle guide The cycle guide below shows the options and recommended fabric types for each cycle. =Default setting - Cycle time depends on water pressure, type and amount of load and chosen additional options.NOTE: To protect your garments, not every Wash Temp., Spin Spe...
Page 23 - Sports or exercise items,; Main cycle; Blankets or bulky items,
23 USING YOUR WASHING MACHINE ENGLISH Mixed items, TOWELS Use this cycle for washing towels , shirts , jeans and mixed loads. Sports or exercise items, SPORTS WEAR Use this cycle for garments that are specially designed and treated for sport. Lightly soiled items, PURE COLOR™ Use this cycle for a li...
Page 24 - Cycle setting buttons; Setting options before cycle; Setting the water temperature,; Setting soil level of laundry,; SPIN SPEED; SPECIAL USE
24 USING YOUR WASHING MACHINE Cycle setting buttons Each cycle has preset settings that are selected automatically. You may also customize the settings using the cycle setting buttons. Press the button for that option to view and select other settings.The washer automatically adjusts the water level...
Page 25 - Setting STAIN CARETM,; Adding extra rinse cycle,
25 USING YOUR WASHING MACHINE ENGLISH Setting RINSE + SPIN, RINSE + SPIN Select this option to rinse and spin a load separately from a regular cycle. This can be helpful in preventing fresh stains from setting in fabrics. You can change spin speed by pressing SPIN SPEED respectively. 1 Press the POW...
Page 26 - Presetting the start time,; To recall a custom program:; Setting options during cycle; Button lock feature,; WATER PLUS
26 USING YOUR WASHING MACHINE Presetting the start time, DELAY WASH You can set the desired start time. 1 Turn the cycle selector knob to the desired cycle. 2 Press the desired option to use the other options. 3 Press repeatedly to select the desired start time. - light will turn on. - The set start...
Page 27 - Setting add garments of laundry,
27 USING YOUR WASHING MACHINE ENGLISH Setting add garments of laundry, ADD GARMENTS Laundry may be added to the load at the proper time in the wash cycle. When the ADD GARMENTS light is illuminated, it is safe to pause the cycle and add more items to the load.If garments are added when the ADD GARME...
Page 28 - Care; Cleaning the Water Inlet Filters; MAINTENANCE; Care in cold climates
28 MAINTENANCE Care Cleaning the Water Inlet Filters If the washer detects that water is not entering the dispenser, an error message will show on the display. If you live in an area with hard water, this may be caused by clogged inlet filters. NOTE y Use extreme care when removing and cleaning the ...
Page 29 - Cleaning the detergent box; Cleaning; TUB CLEAN
29 MAINTENANCE ENGLISH Cleaning the detergent box Leaving detergent in the detergent for an extended period of time or using the washing machine for a long period of time may cause the build-up of scales in the detergent. Pull out and clean the detergent once a week. 1 Remove the drawer by pulling i...
Page 30 - TROUBLESHOOTING; Checking error messages
30 TROUBLESHOOTING TROUBLESHOOTING Checking error messages If the following message appears on the display, check the following and take the appropriate corrective action. Message Possible Causes Solutions Water in the washer drains slowly or not at all, or the display shows: y Drain hose is bent, p...
Page 32 - Normal sounds you may hear
32 TROUBLESHOOTING Normal sounds you may hear The following sounds may be heard while the washer is operating. They are normal. Clicking: • Lid lock relay when the lid locks and unlocks.• The washer will make a series of clicking noises as it changes the cleaning mode. High pitched noise: The wash b...
Page 35 - USING SMARTDIAGNOSISTM
35 SPECIFICATIONS/USING SMARTDIAGNOSIS™ ENGLISH - Only use this feature when instructed to do so by the call center. The transmission sounds similar to a fax machine, and so has no meaning except to the call center. - SMARTDIAGNOSIS™ cannot be activated if the washer does not power up. If this happe...
Page 36 - LG WASHING MACHINE LIMITED WARRANTY (USA)
36 WARRANTY THIS LIMITED WARRANTY DOES NOT COVER:1. Service trips to deliver, pick up, or install the product or for instruction on product use.2. Replacing house fuses or resetting of circuit breakers, correction of house wiring or plumbing, or correction of product installation.3. Damage or failur...
Page 37 - LG WASHING MACHINE LIMITED WARRANTY (CANADA)
37 WARRANTY ENGLISH LG WASHING MACHINE LIMITED WARRANTY (CANADA) WARRANTY: Should your LG Washer (“Product”) fail due to a defect in material or workmanship under normal home use during the warranty period set forth below, LG Canada will at its option repair or replace the Product upon receipt of pr...
Page 39 - MANUAL DE PROPIETARIO; LAVADORA
MANUAL DE PROPIETARIO LAVADORA WT5170HWWT5170HV Antes de comenzar la instalación, lea atentamente estas instrucciones. Esto simplifi cará la instalación y asegurará que la lavadora está instalada en forma correcta y segura. Conserve estas instrucciones cerca de la lavadora luego de la instalación pa...
Page 40 - CARACTERÍSTICAS DEL PRODUCTO
2 CARACTERÍSTICAS DEL PRODUCTO CARACTERÍSTICAS DEL PRODUCTO MOTOR DIRECT-DRIVE INVERTER El motor inverter direct drive, montado en el tambor, puede producir diferentes movimientos para lograr unos resultados de lavado óptimos, con muy poco ruido y vibraciones. El conjunto del motor también contiene ...
Page 41 - INSTRUCCIONES IMPORTANTES DE SEGURIDAD; LEA TODAS LAS INSTRUCCIONES ANTES DE USAR; ADVERTENCIA; PELIGRO; ADVERTENCIA
3 INSTRUCCIONES IMPORTANTES DE SEGURIDAD ESP AÑOL INSTRUCCIONES IMPORTANTES DE SEGURIDAD LEA TODAS LAS INSTRUCCIONES ANTES DE USAR ADVERTENCIA Por su seguridad, debe seguir la informacion indicada en este manual para minimizar el riesgo de incendio o explosion, descarga electrica, o para prevenir da...
Page 44 - GUARDE ESTAS INSTRUCCIONES
6 INSTRUCCIONES IMPORTANTES DE SEGURIDAD INSTRUCCIONES IMPORTANTES DE SEGURIDAD LEA TODAS LAS INSTRUCCIONES ANTES DE USAR ADVERTENCIA Por su seguridad, se debe seguir la informacion indicada en este manual para minimizar el riesgo de incendio o explosion, descarga electrica, o para prevenir danos a ...
Page 45 - ÍNDICE
7 ÍNDICE ESP AÑOL ÍNDICE 2 CARACTERÍSTICAS DEL PRODUCTO 3 INSTRUCCIONES IMPORTANTES DE SEGURIDAD 3 PRECAUCIONES BÁSICAS DE SEGURIDAD 4 INSTRUCCIONES PARA LA CONEXIÓN A TIERRA 5 INSTRUCCIONES DE SEGURIDAD PARA LA IN-STALACIÓN 6 INSTRUCCIONES DE SEGURIDAD PARA LA UTI-LIZACIÓN, CUIDADO Y LIMPIEZA, Y LA...
Page 46 - NOTA; INTRODUCCIÓN A LA LAVADORA; Partes y Accesorios; Partes; NOTA
8 INTRODUCCIÓN A LA LAVADORA NOTA y Póngase en contacto con el Departamento de atención al cliente de LG, en el número 1-800-243-0000 (1-888-542-2623 en Canadá) si falta alguno de los accesorios. y Compre mangueras de buena calidad. Las fugas causadas por mangueras de baja calidad o una instalación ...
Page 47 - Características del panel de control; Funcionamiento
9 INTRODUCCIÓN A LA LAVADORA ESP AÑOL Características del panel de control Funcionamiento Pantalla LED Botón de Selección de Nivel de Suciedad Botón de Selección de Temperatura de Agua Botón de Selección de Velocidad de Centrifugado Botón de Selección de señal Botón de Inicio/ Pausa Botón de Encendi...
Page 48 - Pantalla
10 INTRODUCCIÓN A LA LAVADORA Pantalla Botón Descripción y TIEMPO RESTANTE ESTIMADO - Al pulsar el botón de INICIO/PAUSA, la lavadora detecta automáticamente la carga (peso) del lavado y optimiza el tiempo de lavado según el ciclo y las opciones seleccionadas. La pantalla indicará entonces el tiempo...
Page 49 - INSTRUCCIONES DE INSTALACIÓN; Perspectiva general de instalación
11 INSTRUCCIONES DE INSTALACIÓN ESP AÑOL INSTRUCCIONES DE INSTALACIÓN Perspectiva general de instalación (1) (2) (3) (4) (7) (5) (6) Mas bajo Mas alto ADVERTENCIA y La lavadora es pesada. Se necesitan dos o más personas para instalar y trasladar el electrodoméstico. Si esto no se cumple se podrán su...
Page 50 - Comprobación y elección de la ubicación
12 INSTRUCCIONES DE INSTALACIÓN Comprobación y elección de la ubicación adecuada Instale la lavadora sobre un suelo con la resistencia y rigidez suficiente para soportar el peso de la máquina, incluso con la carga completa, sin que se flexione o rebote. Si el suelo tiene una flexibilidad excesiva, q...
Page 51 - Desembalaje de la lavadora
13 INSTRUCCIONES DE INSTALACIÓN ESP AÑOL Desembalaje de la lavadora 1 Cuando reciba la lavadora en su casa, retire la base de cartón y poliestireno utilizada para el envío del electrodoméstico. Al retirar la lavadora de la caja de cartón, asegúrese de retirar el Soporte de base del medio de la base ...
Page 52 - Conexión de las tuberías de agua
14 INSTRUCCIONES DE INSTALACIÓN Conexión de las tuberías de agua 1 Revise las juntas herméticas de goma de ambos extremos de la manguera. - Inserte una junta de goma en los acoples roscados de cada manguera para evitar fugas. Junta hermética de goma Manguera de agua (Al grifo) Junta hermética de gom...
Page 53 - Conexión del tubo de desagüe
15 INSTRUCCIONES DE INSTALACIÓN ESP AÑOL Conexión del tubo de desagüe Fije el tubo de desagüe para evitar que se mueva y que se produzcan fugas. NOTA y La manguera de desagüe debe fijarse correctamente. En caso contrario, podría resultar en inundación o funcionamiento incorrecto y La longitud total ...
Page 54 - Nivelado de la lavadora; PRECAUCIÓN
16 INSTRUCCIONES DE INSTALACIÓN Nivelado de la lavadora La lavadora centrifuga a velocidades muy elevadas, de hasta 1100 rpm. NOTA y Ajuste el pie de nivelación sólo si es preciso para nivelar la lavadora. La lavadora puede vibrar si extiende el pie de nivelación más de lo necesario. y Los cuatro pi...
Page 55 - Conexión del enchufe y la toma de tierra; Prueba de funcionamiento
17 INSTRUCCIONES DE INSTALACIÓN ESP AÑOL Conexión del enchufe y la toma de tierra Conecte a tierra la lavadora para evitar un cortocircuito o descargas eléctricas durante la conexión. Utilización de una toma de 3 clavijas Conecte el enchufe en la toma sin conexión a tierra adicional. PRECAUCIÓN y El...
Page 56 - PREPARACIÓN; Clasificación de las cargas de lavado; Etiquetas de cuidado de las telas
18 PREPARACIÓN PREPARACIÓN Clasificación de las cargas de lavado Precauciones para el cuidado de los tejidos antes del ciclo de lavado Lea y cumpla con las siguientes instrucciones para evitar que la ropa se encoja o se dañe. PRECAUCIÓN No lave o seque por centrifugado ningún artículo etiquetado o q...
Page 57 - Cargando el dispensador; Utilización de detergente/suavizante; Detergente recomendado
19 PREPARACIÓN ESP AÑOL Cargando el dispensador El cajón dispensador de detergente de la lavadora tiene un compartimiento dispensador para cada tipo de detergente.Añada los detergentes adecuados en sus compartimentos respectivos 1 Saque el cajón dispensador de detergente. 2 Añada el detergente aprop...
Page 59 - UTILIZACIÓN DE LA LAVADORA; Funcionamiento básico
21 UTILIZACIÓN DE LA LAVADORA ESP AÑOL UTILIZACIÓN DE LA LAVADORA Funcionamiento básico ADVERTENCIA y Para reducir el riesgo de fuego, descargas electricas o danos personales, lea las INSTRUCCIONES IMPORTANTES DE SEGURIDAD antes de utilizar el dispositivo. 1 2 3 4 7 5 8 6 ELIJA LA ROPA A LAVAR Y LA ...
Page 60 - Guía de ciclos
22 UTILIZACIÓN DE LA LAVADORA Guía de ciclos La siguiente guía de ciclos muestra las opciones y los tipos de prendas que se recomiendan para cada ciclo. = Ajuste predeterminado Ciclo Tipo de tela o de carga Temperatura del agua Velocidad de centrif. Niv suciedad Remojo STAIN CARE™ COLDWASH™ Enjuague...
Page 62 - Botones de ajuste de ciclo; Opciones de ajuste antes del ciclo; Ajuste de la temperatura del agua,; Ajuste del nivel de suciedad de la colada,; Ajuste de la velocidad de centrifugado,
24 UTILIZACIÓN DE LA LAVADORA Botones de ajuste de ciclo Cada ciclo tiene ajustes preprogramables que se seleccionan automaticamente. Tambien puede personalizar los ajustes utilizando los botones de programacion de ciclos. Apriete el boton para ver esa opcion y seleccionar otros ajustes.La lavadora ...
Page 63 - Encender/apagar la melodía y los tonos de; Ajuste de SPIN ONLY,; SOAk; COLDWASH
25 UTILIZACIÓN DE LA LAVADORA ESP AÑOL Encender/apagar la melodía y los tonos de los botones, SIGNAL ON/OFF La lavadora emite una melodía cuando el ciclo de lavado ha terminado. Los botones hacen un sonido cada vez que se pulsan. Los tonos de la melodía y los botones se puede activar y desactivar si...
Page 64 - Añadiendo ciclo de enjuague extra,; Preajuste del tiempo de inicio,; Para acceder a un programa personalizado:
26 UTILIZACIÓN DE LA LAVADORA NOTA Cuando seleccione la opcion COLDWASH™, el tiempo y de lavado se elevara hasta en 10 minutos.Para una eficiencia de lavado elevada, se recomienda y utilizar menos de 8 libras. Añadiendo ciclo de enjuague extra, EXTRA RINSE *WATER PLUS Puede añadir un ciclo de enjuag...
Page 65 - Opciones de ajuste durante el ciclo; Botón de función de bloqueo,; Ajuste de water plus,; Ajuste del añadir prendas de la colada,
27 UTILIZACIÓN DE LA LAVADORA ESP AÑOL Opciones de ajuste durante el ciclo Puede añadir las opciones deseadas durante el ciclo de lavado. Botón de función de bloqueo, SIGNAL OFF-LOW-HIGH *CHILD LOCk La lavadora emite una melodía cuando el ciclo de lavado ha terminado. Los botones hacen un sonido cad...
Page 66 - Cuidados; Limpieza de los filtros de entrada de agua; MANTENIMIENTO; Cuidados en climas fríos
28 MANTENIMIENTO Cuidados Limpieza de los filtros de entrada de agua Si la lavadora detecta que el agua no está entrando en el dispensador, un mensaje de error se mostrará en la pantalla. Si usted vive en una zona con agua dura, esto puede ser causado por filtros de entrada obstruida. NOTA y Tenga s...
Page 67 - Limpieza; Limpieza del tambor,; Cuidado y limpieza de la lavadora
29 MANTENIMIENTO ESP AÑOL Limpieza Limpie la lavadora periódicamente para mantenerla en perfecto estado y evitar fallos de funcionamiento. Limpieza del tambor, TUB CLEAN La utilización de la lavadora en un lugar con humedaddurante un período de tiempo prolongado puede causarla acumulación de moho ne...
Page 68 - SOLUCIÓN DE PROBLEMAS; Comprobación de los mensajes de error
30 SOLUCIÓN DE PROBLEMAS SOLUCIÓN DE PROBLEMAS Comprobación de los mensajes de error Si aparece el siguiente mensaje en la pantalla, compruebe lo siguiente y tome la acción correctiva apropiada. Problema Causas posibles Solución El agua de la lavadora sale lentamente, no sale o en la pantalla se lee...
Page 70 - Ruidos normales que puede escuchar; Antes de solicitar asistencia técnica
32 SOLUCIÓN DE PROBLEMAS Ruidos normales que puede escuchar Los siguientes sonidos se pueden escuchar mientras que la lavadora está en funcionamiento. Son normales. Chasquidos: • La cerradura de la puerta cuando el relé de la cerradura de la puerta se abre.• La lavadora hará una serie de chasquidos ...
Page 73 - ESPECIFICACIONES; UTILIZACIÓN DEL SMARTDIAGNOSISTM
35 ESPECIFICACIONES/UTILIZACIÓN DEL SMARTDIAGNOSIS™ ESP AÑOL ESPECIFICACIONES Model WT5170HW, WT5170HV Descripción Lavadora de carga superior. Requisitos eléctricos 120 VAC @ 60 Hz. Presión máx. de agua 100 - 800 kPa (14.5 - 116 PSI) Medidas 27”(An) X 28 3 / 8 ”(F) X 45 3 / 8 ”(Al), 55 3 / 4 ”(F con...