Page 2 - OWNER’S MANUAL; WASHING; for reference at all times.
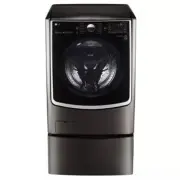
ENGLISH ESP AÑOL WM5000H*AWM5005H*A MFL67737699 OWNER’S MANUAL WASHING MACHINE Please read this owner's manual thoroughly before operating and keep it handy for reference at all times. www.lg.com Copyright © 2015 - 2017 LG Electronics Inc. All Rights Reserved.
Page 3 - TABLE OF CONTENTS
2 TABLE OF CONTENTS TABLE OF CONTENTS 3 IMPORTANT SAFETY INSTRUCTIONS 3 BASIC SAFETY PRECATUTIONS 4 GROUNDING INSTRUCTIONS 5 SAFETY INSTRUCTIONS FOR INSTALLATION 6 SAFETY INSTRUCTIONS FOR USE, CARE, CLEANING, AND DISPOSAL 7 PRODUCT FEATURES 8 INTRODUCING YOUR WASHING MACHINE 8 Parts and Accessories ...
Page 4 - ENGLISH; IMPORTANT SAFETY INSTRUCTIONS; READ ALL INSTRUCTIONS BEFORE USE; WARNING; DANGER; BASIC SAFETY PRECAUTIONS; WARNING
3 ENGLISH IMPORTANT SAFETY INSTRUCTIONS IMPORTANT SAFETY INSTRUCTIONS READ ALL INSTRUCTIONS BEFORE USE WARNING For your safety, the information in this manual must be followed to minimize the risk of fire or explosion, electric shock, or to prevent property damage, injury to persons, or death. Your ...
Page 5 - GROUNDING INSTRUCTIONS
4 IMPORTANT SAFETY INSTRUCTIONS IMPORTANT SAFETY INSTRUCTIONS READ ALL INSTRUCTIONS BEFORE USE WARNING For your safety, the information in this manual must be followed to minimize the risk of fire or explosion, electric shock, or to prevent property damage, injury to persons, or death. GROUNDING INS...
Page 6 - SAFETY INSTRUCTIONS FOR INSTALLATION
5 ENGLISH IMPORTANT SAFETY INSTRUCTIONS IMPORTANT SAFETY INSTRUCTIONS READ ALL INSTRUCTIONS BEFORE USE WARNING For your safety, the information in this manual must be followed to minimize the risk of fire or explosion, electric shock, or to prevent property damage, injury to persons, or death. SAFET...
Page 7 - SAVE THESE INSTRUCTIONS
6 IMPORTANT SAFETY INSTRUCTIONS IMPORTANT SAFETY INSTRUCTIONS READ ALL INSTRUCTIONS BEFORE USE WARNING For your safety, the information in this manual must be followed to minimize the risk of fire or explosion, electric shock, or to prevent property damage, injury to persons, or death. SAFETY INSTRU...
Page 8 - PRODUCT FEATURES
7 ENGLISH PRODUCT FEATURES PRODUCT FEATURES INVERTER DIRECT DRIVE MOTOR The inverter motor, which is directly connected to the tub, produces little noise and vibration and offers great durability and a long lifespan. SMART DIAGNOSIS™ Should you experience any problems with the appliance, it has the ...
Page 9 - NOTE; INTRODUCING YOUR WASHING MACHINE; Parts and Accessories; Parts; Included; Optional Accessories
8 INTRODUCING YOUR WASHING MACHINE NOTE y Contact LG Customer Service at 1-800-243-0000 (1-888-542-2623 in Canada) if any accessories are missing. y For your safety and for extended product life, use only authorized components. The manufacturer is not responsible for product malfunction or accidents...
Page 10 - Control Panel Features; Operation
9 ENGLISH INTRODUCING YOUR WASHING MACHINE Button Description y Turns the washing machine on and off. y (During the wash cycle) stops operation, and cancels the settings. y Bright Whites™ - For white fabrics (see page 24) y Allergiene™ - For cotton, underwear (see page 24) y Sanitary - For underwear...
Page 11 - Display
10 INTRODUCING YOUR WASHING MACHINE Operation (continued) Button Description y (Press before starting wash cycle) Use Steam option for extra cleaning power (See page 26). y (Press and hold 3 seconds) Fresh Care tumbles clothes to prevent wrinkles (See page 28). y Use Smart Grid to lower your energy ...
Page 12 - INSTALLATION INSTRUCTIONS; Preview installation order
11 ENGLISH INSTALLATION INSTRUCTIONS INSTALLATION INSTRUCTIONS Preview installation order WARNING y Washer is heavy! Two or more people are required when moving and unpacking the washer. Failure to do so can result in back or other injury. y Store and install the washer where it will not be exposed ...
Page 13 - Checking and choosing the proper; Space requirements; Clearances; Installing on a pedestal
12 INSTALLATION INSTRUCTIONS Checking and choosing the proper location Install the washing machine on a solid floor that is strong and rigid enough to support the weight of the washing machine, even when fully loaded, without flexing or bouncing. If the floor has too much flex, you may need to reinf...
Page 14 - Unpacking and removing shipping bolts
13 ENGLISH NOTE y Save the bolt assemblies for future use. To prevent damage to internal components, DO NOT transport the washer without reinstalling the shipping bolts. y Failure to remove shipping bolts and retainers may cause severe vibration and noise, which can lead to permanent damage to the w...
Page 15 - Connecting the water lines
14 INSTALLATION INSTRUCTIONS Connecting the water lines 1 Check the rubber seals on both sides of the hose.- Insert a rubber seal into the threaded fittings on each hose to prevent leaking. Rubber seal Water hose (To water inlet on the washing machine) Rubber seal Water hose (To faucet) 2 Connect th...
Page 16 - Connecting the drain line; Using a standpipe
15 ENGLISH INSTALLATION INSTRUCTIONS Connecting the drain line Secure the drain hose in place to prevent moving and leaking. NOTE y The drain hose should be properly secured. Failure to properly secure the drain hose can result in flooding and malfunction. y Total height of the house end should not ...
Page 17 - Leveling the washing machine
16 INSTALLATION INSTRUCTIONS Leveling the washing machine The washer tub of your new washing machine spins at very high speeds. To minimize vibration, noise, and unwanted movement, the floor must be perfectly level and solid. 1 Check the washing machine’s level. - Check the precise level by rocking ...
Page 18 - Plugging in the power cord and; Using a 3-prong outlet; Test run
17 ENGLISH INSTALLATION INSTRUCTIONS Plugging in the power cord and grounding Make sure to ground the washing machine to prevent a short circuit or an electric shock when plugging in. Using a 3-prong outlet Plug in the electrical outlet without additional grounding. WARNING y The power outlet must b...
Page 19 - PREPARATION; Sorting wash loads; Precautions for fabric care before wash cycle
18 PREPARATION Check all pockets to make sure that they are empty. - Items such as clips, matches, pens, coins, and keys can damage both your washer and your clothes. Close zippers, hooks, and drawstrings to prevent these items from snagging or tangling on other clothes. Pretreat heavily stain...
Page 20 - Fabric care labels; Using the detergent dispenser lid; Opening the lid; Closing the lid
19 ENGLISH PREPARATION Category Label Directions Washing Hand Wash Machine Wash, Normal Cycle Use Permanent Press/Wrinkle Resistant washing machine setting (which has a cool down or cold spray before the reduced spin) Use Gentle/Delicate washing machine setting (slow agitation and/ or reduced wash t...
Page 21 - Loading the dispenser; Using detergent/fabric softener; Recommended detergent
20 Loading the dispenser The detergent dispenser of the washing machine has a dispenser compartment for each detergent type. Add each detergent to its appropriate compartment. 1 Slide the detergent dispenser lid open. 2 Add each detergent to its appropriate compartment. - If you use a liquid deterge...
Page 22 - Pre-Wash Detergent Compartment; Main Wash Detergent Compartment; Liquid Bleach Compartment; Fabric Softener Compartment
21 ENGLISH PREPARATION Pre-Wash Detergent Compartment Add liquid or powdered detergent to this compartment when using the pre-wash option. Always use HE (High-Efficiency) detergent with your washing machine. NOTE y If liquid detergent is to be used for the main wash when using the pre-wash option, t...
Page 23 - USING YOUR WASHING MACHINE; Basic operation
22 USING YOUR WASHING MACHINE USING YOUR WASHING MACHINE Basic operation Load the laundry into the washing machine and close the door. 1 2 3 4 5 6 Press . - The lights around the cycle selector knob will illuminate and a chime will sound. Turn to the desired cycle. - The proper default option is aut...
Page 24 - Cycle guide
23 ENGLISH USING YOUR WASHING MACHINE Cycle guide The cycle guide below shows the options and recommended fabric types for each cycle. = Available option Cycle Fabric Type Display Time(min) (Option : Default) Basic Option ( =Default) Additional Options Wash Temp. Spin Speed Soil Level Steam Cold...
Page 25 - Main cycle; Reduce laundry allergen,; Reduce laundry bacteria,; Blankets or bulky items,
24 Main cycle You can wash laundry items more thoroughly by selecting the wash cycle that best suits the type of items to be washed. Turn the to the desired cycle. When you select a wash cycle, the light for the corresponding wash cycle will turn on. See page 22, Basic operation , for more details o...
Page 26 - Cycle modifier buttons; Setting the water temperature,; Spin; Setting soil level of laundry,
25 ENGLISH Cycle modifier buttons Each cycle has preset settings that are selected automatically. You may also customize the settings using the cycle modifier buttons. Press the button for that option to view and select other settings.The washer automatically adjusts the water level for the type and...
Page 27 - Setting options before cycle; Steam; Adjusts the melody and button tones,
26 Setting options before cycle You can select and add the desired optional functions before you start the washing machine. High temperature, Steam Adding the Steam option to these cycles helps to enhance washing performance.By using hot steam fabrics get the cleaning benefits of a super hot wash. 1...
Page 28 - Adding extra rinse cycle,; Presetting the start time,; To recall a cycle
27 ENGLISH Saving energy, Cold Wash Adding the Cold Wash option reduces energy usage and provides the same washing performance as a warm water wash. By using 6 different washing motions (Tumbling, Rolling, Stepping, Scrubbing, Swing, Filtration), fabrics get the cleaning benefits, without the energy...
Page 29 - Setting the options during cycle; Tumble clothes to prevent wrinkles,; Saving customized wash cycle,; PGM Save; To save a cycle; Drum Light; To enable child lock
28 Setting the options during cycle Add the desired options during the wash cycle. Tumble clothes to prevent wrinkles, Fresh Care Use this function when you are not able to take out your clothes as soon as the wash cycle ends. 1 Press and turn to the desired cycle. 2 Press and hold for 3 seconds dur...
Page 30 - Smart ThinQ Application; Installing Smart ThinQ Application; Using Washer Cycle
29 ENGLISH SMART FUNCTIONS Smart ThinQ Application The Smart ThinQ application allows you to communicate with the appliance using a smartphone. Installing Smart ThinQ Application Search for the LG Smart ThinQ application from the Google Play Store or Apple App Store on a smart phone. Follow instruct...
Page 31 - Wireless LAN Module Specifications; FCC Notice; FCC RF Radiation Exposure Statement; Open Source Software Notice Information
30 SMART FUNCTIONS Wireless LAN Module Specifications Model LCW-003 Frequency Range 2412 to 2462 MHz Output Power (Max) IEEE 802.11 b : 17.56 dBmIEEE 802.11 g : 25.53 dBmIEEE 802.11 n : 25.29 dBm FCC Notice This equipment has been tested and found to comply with the limits for a Class B digital devi...
Page 32 - Smart DiagnosisTM Function; Smart DiagnosisTM through the Customer; Smart ThinQ Smart DiagnosisTM
31 ENGLISH SMART FUNCTIONS Smart Diagnosis™ Function Should you experience any problems with theappliance, it has the capability of transmitting datavia your telephone to the LG Customer InformationCenter. NFC or Wi-Fi equipped models can alsotransmit data to a smartphone using the LG SmartThinQ app...
Page 33 - MAINTENANCE; Care; Care after wash; Care in cold climates; Storing the washing machine for an extended period of time; When the water line is frozen
32 MAINTENANCE MAINTENANCE Care Care after wash After the cycle is finished, wipe the door and the inside of the door seal to remove any moisture. Leave the door open to dry the washer tub interior. Wipe the body of the washing machine with a dry cloth to remove any moisture. WARNING y Unplug the wa...
Page 34 - When the Drain Line is Frozen; Cleaning; Tub Clean
33 ENGLISH MAINTENANCE When the Drain Line is Frozen 1 Pour hot water in the washer tub and close the door. - Leave it for 10 minutes. 2 Press after 10 minutes. 3 Press for draining and spinning. 4 Press . - Check if the water drains. Cleaning Periodically clean the washing machine to help maintain ...
Page 35 - Cleaning the detergent dispenser; Automatic alert for cleaning washing machine; Removing lime buildup on stainless steel
34 Cleaning the detergent dispenser Leaving detergent in the detergent dispenser for an extended period of time or using the washing machine for a long period of time may cause the build-up of scales in the detergent dispenser. Pull out and clean the detergent dispenser once a week. 1 Slide the dete...
Page 36 - Cleaning the water inlet filters
35 ENGLISH MAINTENANCE Cleaning the water inlet filters Clean the water inlet filters periodically to prevent clogging. Take extra care to clean the water inlet filters for areas using hard water. Water may not be supplied if there are foreign objects, such as rust, sand, or stones in the water inle...
Page 37 - Cleaning the drain pump filter
36 6 Recap the plug onto the drain hose and reattach the drain hose. 7 Insert the drain pump filter. 8 Close the drain pump filter cover. WARNING y Make sure to pull out the plug before cleaning. Failure to do so may cause electric shock. y Opening the drain filter will result in water overflowing i...
Page 38 - Cleaning the door seal; CAUTION
37 ENGLISH Cleaning the door seal Clean the door seal once a month to prevent build-up of dirt in the door seal. 1 Wear rubber gloves and protective goggles. 2 Dilute 3/4 cup (177 ml) of liquid chlorine bleach in 1 gallon (3.8 L) of water. 3 Soak a sponge or a soft cloth in this diluted solution and...
Page 39 - TROUBLESHOOTING; Checking error messages
38 TROUBLESHOOTING Message Possible Causes Solutions Item of clothing has gathered on one side of the tub. y There are not enough items in the machine. y Have your items gathered in one area, or is the load too small? y Did you wash a stuffed animal, a mat, or knitwear? y Did you wash two different ...
Page 40 - Before calling for service
39 ENGLISH TROUBLESHOOTING Before calling for service Check the following before calling for service. Problem Possible Causes Solutions Clicking sound y Do you hear a sound when you close or lock and unlock the door? y This sound is normal and occurs when the door is closed, locked or unlocked. Spra...
Page 41 - SPECIFICATIONS
40 SPECIFICATIONS Model WM5000H*A / WM5005H*A Description Front-Loading Washer Electrical requirements 120 VAC @ 60 Hz. Max. water pressure 20 and 120 psi (138 - 827 kPa) Dimensions 68.6cm(W) X 83.2cm(D) X 99cm(H), 139.6cm (D with door open)27”(W) X 32 13 / 16 ”(D) X 38 13 / 16 ”(H) X 55” (D with do...
Page 42 - LG WASHING MACHINE LIMITED WARRANTY (USA)
41 ENGLISH WARRANTY THIS LIMITED WARRANTY DOES NOT COVER: 1. Service trips to deliver, pick up, or install the product or for instruction on product use. 2. Replacing house fuses or resetting of circuit breakers, correction of house wiring or plumbing, or correction of product installation. 3. Damag...
Page 43 - THIS LIMITED WARRANTY DOES NOT COVER IN THE
42 With regard to damages or failures resulting from misuse, improper installation, maintenance, natural disaster or repair (unauthorized technician or parts, as specified by LG), Customer will be charged for the repair. Strange vibration or noisecaused by not removing transit bolts or tub support. ...
Page 50 - MANUAL DE; LAVADORA
ESP AÑOL WM5000H*AWM5005H*A MANUAL DE PROPIETARIO LAVADORA Por favor lea atentamente este manual del usuario antes de operar la máquina y consérvelo en un lugar a mano en todo momento en caso de que necesite consultarlo. www.lg.com Copyright © 2015 - 2017 LG Electronics Inc. Todos los Derechos Reser...
Page 51 - ÍNDICE
2 ÍNDICE ÍNDICE 3 INSTRUCCIONES IMPORTANTES DE SEGURIDAD 3 PRECAUCIONES BÁSICAS DE SEGURIDAD 4 INSTRUCCIONES PARA LA CONEXIÓN A TIERRA 5 INSTRUCCIONES DE SEGURIDAD PARA LA INSTALACIÓN 6 INSTRUCCIONES DE SEGURIDAD PARA LA UTILIZACIÓN, CUIDADO Y LIMPIEZA, Y LA ELIMINACIÓN 7 CARACTERÍSTICAS DEL PRODUCT...
Page 52 - INSTRUCCIONES IMPORTANTES DE SEGURIDAD; LEA TODAS LAS INSTRUCCIONES ANTES DE USAR; ADVERTENCIA; PELIGRO; PRECAUCIONES BÁSICAS DE SEGURIDAD; ADVERTENCIA
3 ESP AÑOL INSTRUCCIONES IMPORTANTES DE SEGURIDAD INSTRUCCIONES IMPORTANTES DE SEGURIDAD LEA TODAS LAS INSTRUCCIONES ANTES DE USAR ADVERTENCIA Por su seguridad, debe seguir la informacion indicada en este manual para minimizar el riesgo de incendio o explosion, descarga electrica, o para prevenir da...
Page 53 - INSTRUCCIONES PARA LA CONEXIÓN A TIERRA
4 INSTRUCCIONES IMPORTANTES DE SEGURIDAD INSTRUCCIONES IMPORTANTES DE SEGURIDAD LEA TODAS LAS INSTRUCCIONES ANTES DE USAR ADVERTENCIA Por su seguridad, se debe seguir la informacion indicada en este manual para minimizar el riesgo de incendio o explosion, descarga electrica, o para prevenir danos a ...
Page 54 - INSTRUCCIONES DE SEGURIDAD PARA LA INSTALACIÓN
5 ESP AÑOL INSTRUCCIONES IMPORTANTES DE SEGURIDAD INSTRUCCIONES IMPORTANTES DE SEGURIDAD LEA TODAS LAS INSTRUCCIONES ANTES DE USAR ADVERTENCIA Por su seguridad, se debe seguir la informacion indicada en este manual para minimizar el riesgo de incendio o explosion, descarga electrica, o para prevenir...
Page 55 - GUARDE ESTAS INSTRUCCIONES
6 INSTRUCCIONES IMPORTANTES DE SEGURIDAD INSTRUCCIONES IMPORTANTES DE SEGURIDAD LEA TODAS LAS INSTRUCCIONES ANTES DE USAR ADVERTENCIA Por su seguridad, se debe seguir la informacion indicada en este manual para minimizar el riesgo de incendio o explosion, descarga electrica, o para prevenir danos a ...
Page 56 - CARACTERÍSTICAS DEL PRODUCTO
7 ESP AÑOL CARACTERÍSTICAS DEL PRODUCTO CARACTERÍSTICAS DEL PRODUCTO MOTOR INVERSOR DIRECT DRIVE El motor inversor, que está conectado directamente a la cuba, produce poco ruido y poca vibración y ofrece gran durabilidad y una larga vida útil. SMART DIAGNOSIS™ En caso de experimentar algún problema ...
Page 57 - NOTA; Accesorios; INTRODUCCIóN A LA LAvADORA; Partes y Accesorios; Partes; Accesorios incluidos
8 INTRODUCCIóN A LA LAVADORA NOTA y Póngase en contacto con el Departamento de atención al cliente de LG, en el número 1-800-243-0000 (1-888-542-2623 en Canadá) si falta alguno de los accesorios. y Para su seguridad, y con el fin de extender la vida útil de su lavadora, utilice sólo componentes auto...
Page 58 - Características del panel de control; Funcionamiento
9 ESP AÑOL INTRODUCCIóN A LA LAVADORA Botón Descripción y Enciende y apaga la lavadora. y (Durante el ciclo de lavado) Detiene el funcionamiento, y cancela los ajustes. y Bright Whites™ - Para prendas blancas (véase página 24) y Allergiene™ - Para algodón, ropa interior (véase página 24) y Sanitary ...
Page 59 - Pantalla
10 INTRODUCCIóN A LA LAVADORA Funcionamiento (continuación) Botón Descripción y (Seleccione antes de iniciar el ciclo de lavado) Utilice esta opción para agregar vapor para mayor potencia en el lavado (Véase página 26). y (Seleccione y mantenga pulsado antes de iniciar el ciclo de lavado) Gira la ro...
Page 60 - INSTRUCCIONES DE INSTALACIóN; vista previa del orden de instalación
11 ESP AÑOL INSTRUCCIONES DE INSTALACIóN INSTRUCCIONES DE INSTALACIóN vista previa del orden de instalación ADVERTENCIA y La lavadora es pesada. Se necesitan dos o más personas para instalar y trasladar el electrodoméstico. Si esto no se cumple se podrán sufrir heridas en la espalda u otras herida. ...
Page 61 - Comprobación y elección de la; Requisitos de espacio; Instalación sobre un suelo; Instalación sobre un pedestal o kit de torre
12 INSTRUCCIONES DE INSTALACIóN Comprobación y elección de la ubicación adecuada Instale la lavadora sobre un suelo con la resistencia y rigidez suficiente para soportar el peso de la máquina, incluso con la carga completa, sin que se flexione o rebote. Si el suelo tiene una flexibilidad excesiva, q...
Page 62 - Desempaque y retiro de los tornillos de
13 ESP AÑOL INSTRUCCIONES DE INSTALACIóN Desempaque y retiro de los tornillos de transporte Al retirar la lavadora de la base de cartón, asegúrese de quitar el soporte del tambor de foam colocado en la mitad de la base de cartón. Si debe acostar la lavadora para quitar los materiales de empaque de l...
Page 63 - Conexión de las tuberías de agua
14 INSTRUCCIONES DE INSTALACIóN Conexión de las tuberías de agua 1 Revise las juntas herméticas de goma de ambos extremos de la manguera. - Inserte una junta de goma en los acoples roscados de cada manguera para evitar fugas. Junta hermética de goma Manguera de agua (Al grifo) Junta hermética de gom...
Page 64 - Conexión del tubo de desagüe; Uso de un tubo de subida
15 ESP AÑOL INSTRUCCIONES DE INSTALACIóN Conexión del tubo de desagüe Fije el tubo de desagüe para evitar que se mueva y que se produzcan fugas. NOTA y La manguera de desagüe debe fijarse correctamente. En caso contrario, podría resultar en inundación o funcionamiento incorrecto y La longitud total ...
Page 65 - Nivelación de la lavadora; PRECAUCIóN; Utilización de apoyos antideslizantes (opcionales)
16 INSTRUCCIONES DE INSTALACIóN Nivelación de la lavadora El tambor de su nueva lavadora gira a alta velocidad . Para reducir las vibraciones, el ruido y los movimientos no deseados, el suelo debe estar nivelado y debe ser una superficie sólida. 1 Compruebe que la lavadora esté nivelada. - Compruebe...
Page 66 - Conexión del enchufe y la toma de; Utilización de una toma de 3 clavijas; Prueba de funcionamiento
17 ESP AÑOL INSTRUCCIONES DE INSTALACIóN Conexión del enchufe y la toma de tierra Conecte a tierra la lavadora para evitar un cortocircuito o descargas eléctricas durante la conexión. Utilización de una toma de 3 clavijas Conecte el enchufe en la toma sin conexión a tierra adicional. PRECAUCIóN y El...
Page 67 - PREPARACIóN; Clasificación de las cargas de lavado
18 PREPARACIóN PREPARACIóN Clasificación de las cargas de lavado Precauciones para el cuidado de los tejidos antes del ciclo de lavado Lea y cumpla con las siguientes instrucciones para evitar que la ropa se encoja o se dañe. Revise todos los bolsillos para asegurarse de que esten vacios. - Articu...
Page 68 - Etiquetas de cuidado de las telas; Uso de la tapa del dispensador de; Apertura de la tapa; Cierre de la tapa
19 ESP AÑOL PREPARACIóN Categoría Etiqueta Instrucciones Lavado Lavado a mano Lavado a máquina, ciclo normal Utilice el ajuste de planchado permanente/ resistente a las arrugas (la cual tiene un enfriado o rociado con agua fría antes del centrifugado reducido)Utilice el ajuste de prendas delicadas (...
Page 69 - Cargando el dispensador; Utilización de detergente/; Detergente recomendado
20 Cargando el dispensador El cajón dispensador de detergente de la lavadora tiene un compartimiento dispensador para cada tipo de detergente.Añada los detergentes adecuados en sus compartimentos respectivos 1 Saque el cajón dispensador de detergente. 2 Añada el detergente apropiado en el compartime...
Page 70 - Compartimiento de blanqueador líquido; Compartimiento del suavizante; Compartimiento de detergente para prelavado; Compartimiento de detergente para el lavado principal
21 ESP AÑOL PREPARACIóN Compartimiento de blanqueador líquido Este compartimiento alberga blanqueador liquido, que se dispensará automáticamente en el momento adecuado del ciclo de lavado. NOTA y No agregue blanqueador compatible con la ropa de color liquido o en polvo a este compartimiento. y Siga ...
Page 71 - UTILIZACIóN DE LA LAvADORA; Funcionamiento básico
22 UTILIZACIóN DE LA LAVADORA UTILIZACIóN DE LA LAvADORA Funcionamiento básico Cargue la ropa en la lavadora y cierre la puerta. 1 2 3 4 5 6 Pulse . - Las luces alrededor del dial selector de ciclos se iluminarán y sonará una señal acústica. Gire al ciclo deseado. - Se selecciona automáticamente la ...
Page 72 - Guía de ciclos
23 ESP AÑOL UTILIZACIóN DE LA LAVADORA Guía de ciclos La guía de ciclos indicada más abajo muestra las opciones y tipos de telas recomendadas para cada ciclo. = Opcion disponible - Para proteger sus prendas de vestir, no todas las temperaturas de lavado/enjuague, velocidades de centrifugado, nivel...
Page 73 - Ciclo principal
24 UTILIZACIóN DE LA LAVADORA Ciclo principal Puede lavar la ropa de forma más intensiva seleccionando el ciclo de lavado más adecuado para el tipo de prendas que se van a lavar. Gire el al ciclo deseado. Cuando seleccione un ciclo de lavado, se iluminará la luz para el ciclo de lavado correspondien...
Page 74 - Ajuste de la velocidad de centrifugado,; Ajuste del nivel de suciedad de la colada,; Botones de ajuste de ciclo; Ajuste de la temperatura del agua,
25 ESP AÑOL Ajuste de la velocidad de centrifugado, Spin Puede seleccionar la velocidad de centrifugado que desee.Utilice esta función correctamente, según las características de la carga. 1 Pulse y gire al ciclo deseado. 2 Pulse repetidamente para seleccionar la velocidad de centrifugado deseada.- ...
Page 75 - Ajuste la the melodía y los tonos de los; Opciones de ajuste antes del ciclo
26 UTILIZACIóN DE LA LAVADORA Ajuste la the melodía y los tonos de los botones, Signal La lavadora reproduce una melodía cuando ha terminado el ciclo de lavado. Los botones emiten un sonido cuando se pulsan. Puede cambiar y apagar la melodía y los tonos de los botones según lo desee. 1 Pulse . 2 Gir...
Page 76 - Preajuste del tiempo de inicio,; Para recuperar el ciclo; Añadiendo ciclo de enjuague extra,
27 ESP AÑOL UTILIZACIóN DE LA LAVADORA Preajuste del tiempo de inicio, Delay Wash Puede ajustar el tiempo de inicio deseado. 1 Pulse y gire al ciclo deseado. 2 Pulse el botón de la opción deseada para utilizar otras opciones. 3 Pulse repetidamente para seleccionar el tiempo de inicio deseado. - Se i...
Page 77 - Función de bloqueo de botones,; Para activar el bloqueo infantil; Para desactivar el bloqueo infantil; Opciones de ajuste durante el ciclo; Gira la ropa para evitar arrugas,; Como guardar ciclo personalizado,; Para guardar un ciclo
28 Alumbrado tambor, Drum Light El tambor está equipado con una luz LED blanca que se enciende cuando la lavadora se pone en marcha. La luz se apaga automáticamente cuando se cierra la puerta y se inicia el ciclo. Para encender la luz durante un ciclo. 1 Pulse y gire para seleccionar el ciclo desead...
Page 78 - Aplicación Smart ThinQ; Funciones de la aplicación Smart ThinQ; Usando el ciclo de lavado
29 ESP AÑOL FUNCIONES INTELIGENTES Aplicación Smart ThinQ La aplicación Smart ThinQ le permite comunicarse con el electrodoméstico usando un teléfono inteligente. Cómo instalar la aplicación Smart ThinQ Busque la aplicación LG Smart ThinQ desde la tienda Google Play o Apple App Store en un teléfono ...
Page 79 - Especificaciones módulo LAN inalámbrico; Aviso FCC; Declaración sobre exposición a la radiación de; Información de anuncio de programas de
30 FUNCIONES INTELIGENTES Especificaciones módulo LAN inalámbrico Modelo LCW-003 Rango de frecuencia 2412~2462 MHz Rango de frecuencia (max.) IEEE 802.11 b : 17.56 dBmIEEE 802.11 g : 25.53 dBmIEEE 802.11 n : 25.29 dBm Aviso FCC Este equipo fue probado y se determinó que cumple con los límites para l...
Page 80 - Función Smart DiagnosisTM; Smart DiagnosisTM a través del Centro de
31 ESP AÑOL FUNCIONES INTELIGENTES Función Smart Diagnosis™ (Diagnóstico Inteligente) En caso de experimentar algún problema con el aparato, el mismo tiene la capacidad de transmitir datos a través de su teléfono al Centro de información del cliente de LG. Los modelos equipados con NFC o Wi-Fi puede...
Page 81 - MANTENIMIENTO; Cuidados; Cuidados tras el lavado; Cuidados en climas fríos
32 MANTENIMIENTO MANTENIMIENTO Cuidados Cuidados tras el lavado Una vez finalizado el ciclo, limpie la puerta y el interior de la junta hermética de la puerta para eliminar la humedad. Deje la puerta abierta para secar el interior del tambor. Limpie el cuerpo de la lavadora con un trapo seco para el...
Page 82 - Cuando se congela el tubo de desagüe; Limpieza
33 ESP AÑOL MANTENIMIENTO Cuando se congela el tubo de desagüe 1 Vierta agua caliente en el tambor de la lavadora y cierre la puerta.- Deje el agua adentro durante 10 minutos. 2 Pulse después de 10 minutos. 3 Pulse . 4 Pulse . - Verifique si se vacía el agua. Limpieza Periódicamente limpie su lavado...
Page 83 - Eliminación de la cal acumulada en acero inoxidable; Limpieza del cajón dispensador de
34 Alerta automática para la limpieza de la lavadora Cuando se enciende la lavadora y se parpadea el mensaje tcL, significa que el tambor de la lavadora necesita ser limpiado. Utilice la Limpieza de tambor. La alerta de indicación automática para la limpieza de tambor depende en la frecuencia de uso...
Page 84 - Limpieza de los filtros de entrada de
35 ESP AÑOL MANTENIMIENTO Limpieza de los filtros de entrada de agua Limpie periódicamente los filtros de agua para evitar que se obstruyan.Ponga especial cuidado en la limpieza de los filtros si vive en áreas con agua dura. El agua podría no suministrarse correctamente si hay objetos extraños, como...
Page 85 - Limpieza del filtro de la bomba de
36 MANTENIMIENTO Limpieza del filtro de la bomba de desagüe La lavadora no se vaciará correctamente si el filtro de la bomba de desagüe está obstruido. Limpie periódicamente el filtro para evitar obstrucciones por objetos extraños. 1 Pulse para apagar la lavadora y desconecte el enchufe. 2 Abra la t...
Page 86 - Limpieza de la junta de la puerta
37 ESP AÑOL MANTENIMIENTO Limpieza de la junta de la puerta Limpie la junta hermética de la puerta una vez al mes para evitar la acumulación de suciedad. 1 Utilice guantes de goma y gafas de protección. 2 Diluya 3/4 de taza (177 mL) de blanqueador líquido con lejía en 1 galón (3.8 litros) de agua. 3...
Page 87 - Mensaje; SOLUCIóN DE PROBLEMAS; Comprobación de los mensajes de error
38 SOLUCIóN DE PROBLEMAS Mensaje Causas posibles Solución No hay suficiente ropa en la lavadora. y ¿Se ha acumulado la ropa en una zona o la carga es demasiado pequeña? y ¿Estaba lavando un peluche, una alfrombrilla o ropa de punto? y ¿Estaba lavando dos mantas juntas? y Reorganice la ropa para equi...
Page 88 - Antes de llamar al servicio técnico; Problema
39 ESP AÑOL SOLUCIóN DE PROBLEMAS Antes de llamar al servicio técnico Haga las siguientes comprobaciones antes de llamar al servicio técnico. Problema Causas posibles Solución Sonido de clic y ¿Oye un sonido cuando cierra y bloquea o desbloquea la puerta? y Este sonido es normal cuando se cierra, se...
Page 89 - ESPECIFICACIONES
40 ESPECIFICACIONES Modelo WM5000H*A / WM5005H*A Descripción Lavadora de carga frontal Requisitos eléctricos 120 VAC @ 60 Hz. Presión máx. de agua 20 y 120 psi (138 - 827 kPa) Medidas 68,6 cm (An) X 83,2 cm (F) X 99 cm (Al), 139,6 cm (D con la puerta abierta)27”(An) X 32 13 / 16 ”(F) X 38 13 / 16 ”(...
Page 91 - ESTA GARANTÍA LIMITADA NO CUBRE LOS
42 GARANTÍA Con respecto a los daños o fallas ocasionados por un uso indebido, una instalación inadecuada, mantenimiento, un desastre natural o una reparación (realizados por un técnico no autorizado o con partes no autorizadas, tal como lo especifica LG), al Cliente se le cobrará la reparación. Vib...