Page 2 - TABLE OF CONTENTS
TABLE OF CONTENTS This manual is produced for a group of products and may contain images or content different from the model you purchased.This manual is subject to revision by the manufacturer. SAFETY INSTRUCTIONS ......................................03 Important Safety Instructions .................
Page 3 - SAFETY INSTRUCTIONS; ensure that they do not play with the appliance.; WARNING
03 ENGLISH SAFETY INSTRUCTIONS The following safety guidelines are intended to prevent unforeseen risks or damage from unsafe or incorrect operation of the product. The guidelines are separated into ‘WARNING’ and ‘CAUTION’ as described below. This symbol is displayed to the indicate matters and oper...
Page 4 - Important Safety Instructions; Installation; outlet, have a proper outlet installed by a qualified electrician.
04 Important Safety Instructions To reduce the risk of fire, electric shock, or injury to persons when using your product, basic safety precautions should be followed, including the following: Installation • Never attempt to operate this appliance if it is damaged, malfunctioning, partially disassem...
Page 5 - Operation
05 ENGLISH Operation • Do not attempt to separate any panels or disassemble the appliance. Do not apply any sharp objects to the control panel in order to operate the appliance. • Do not repair or replace any part of the appliance. All repairs and servicing must be performed by qualified service per...
Page 6 - Maintenance; plug firmly and pull straight out from the socket outlet.; Disposal; appliance to prevent misuse.
06 Maintenance • Securely plug the power plug in the socket outlet after completely removing any moisture and dust. • Disconnect the power cord before cleaning the appliance. Turning the unit off into stand by mode from the front panel will not isolate the mains supply from the appliance. • Never un...
Page 7 - INSTALLATION; Parts; Accessories
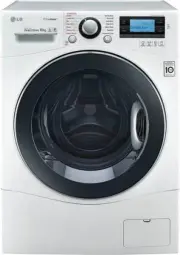
07 ENGLISH INSTALLATION Parts Transit bolts Power plug Drawer Control panel Drum Door Drain hose Drain plug Drain pump filter Cover cap (Location may vary depending on products) Adjustable feet Accessories Cold supply hose (1EA) (Option: Hot (1EA)) Spanner Caps for covering transit bolt holes Anti–s...
Page 8 - Specifications; Model; Wash Capacity
08 Specifications Model WD1410SBW Wash Capacity 10 kg Power Supply 220 - 240 V~, 50 Hz Size 600 mm (W) x 640 mm (D) x 850 mm (H) Product Weight 72 kg Permissible Water pressure 0.1 - 0.8 MPa (1.0 - 8.0 kgf / cm²) • Appearance and specifications may change without notice to improve the quality of the...
Page 9 - Installation Place Requirements; Location; Additional Clearance :; Positioning; Electrical Connection
09 ENGLISH Installation Place Requirements Location 10 cm 2 cm 2 cm Level Floor : Allowable slope under the entire appliance is 1°. Power Outlet : Must be within 1.5 meters of either side of the location of the appliance. • Do not overload the outlet with more than one appliance. Additional Clearanc...
Page 10 - NOTE
10 Unpacking and Removing Transit Bolts 1 Lift the appliance off the foam base. • After removing the carton and shipping material, lift the appliance off the foam base. Make sure the tub support comes off with the base and is not stuck to the bottom of the appliance. • If you must lay the appliance ...
Page 11 - Wooden Floors (Suspended
11 ENGLISH Using Anti-Slip Sheets (Optional) If you install the appliance on a slippery surface, it may move because of excessive vibration. Incorrect leveling may cause malfunction through noise and vibration. If this occurs, install the anti-slip sheets under the leveling feet and adjust the level...
Page 12 - Leveling the Appliance; Diagonal Check; Connecting Supply Hose; Checking the Rubber Seal on the Supply
12 Leveling the Appliance If the floor is uneven, turn the adjustable feet as required (Do not insert pieces of wood etc. under the feet). Make sure that all four feet are stable and resting on the floor and then check that the appliance is perfectly level (Use a spirit level). • Once the appliance ...
Page 13 - Connecting Hose to Water Tap
13 ENGLISH Connecting Hose to Water Tap Connecting Screw-Type Hose to Tap with Thread Screw the hose connector onto the water supply tap. Connecting Screw-Type Hose to Tap Without Thread 1 Loose the four fixing screws. Upper connector Rubber seal Fixing screw 2 Remove the guide plate if the tap is t...
Page 14 - Connecting Hose to Appliance
14 3 Push the adapter onto the end of the tap so that the rubber seal forms a watertight connection. Tighten the four fixing screws and the adapter ring plate . 4 Pull the connector latch plate down, push the supply hose onto the adapter, and release the connector latch plate. Make sure the adapter ...
Page 15 - Installing the Drain Hose; Electrical Connections (In the UK; Green and Yellow: Earth
15 ENGLISH Installing the Drain Hose • The drain hose should not be placed higher than 100 cm above the floor. Water in the appliance may not drain or may drain slowly. • Securing the drain hose correctly will protect the floor from damage due to water leakage. • If the drain hose is too long, do no...
Page 16 - OPERATION; Using the Washing Machine; Power
16 OPERATION Using the Washing Machine Before the first wash, select a washing programme, allow the washing machine to wash without clothing. This will remove residue and water from the drum that may have been left during manufacturing. 1 Sort laundry and load items. • Sort laundry by fabric type, s...
Page 17 - Sorting Laundry; CAUTION
17 ENGLISH Sorting Laundry 1 Look for a care label on your clothes. • This will tell you about the fabric content of your garment and how it should be washed. • Symbols on the care labels. Wash temperature Normal machine wash Permanent press Delicate Hand wash Do not wash 2 Sorting laundry. • To get...
Page 18 - Adding Cleaning Products; Detergent Dosage; Adding Detergent and Fabric Softener; Adding Detergent
18 Adding Cleaning Products Detergent Dosage • Detergent should be used according to the instruction of the detergent manufacturer and selected according to type, colour, soiling of the fabric and washing temperature. • If too much detergent is used, too many suds can occur and this will result in p...
Page 19 - Using Tablet
19 ENGLISH • Do not leave the fabric softener in the detergent drawer for more than 2 days (Fabric softener may harden). • Softener will automatically be added during the last rinse cycle. • Do not open the drawer when water is being supplied. • Solvents (benzene, etc.) must not be used. NOTE • Do n...
Page 20 - Control Panel; Power Button
20 Control Panel Power Button • Press the Power button to turn the washing machine on. Start/Pause Button • This Start/Pause button is used to start the wash cycle or pause the wash cycle. • If a temporary stop of the wash cycle is needed, press the Start/Pause button. Display • The display shows th...
Page 21 - Programme Table; Washing Programme
21 ENGLISH Programme Table Washing Programme Programme Description Fabric Type Proper Temp. Maximum Load Weight Cotton Provides better performance by combining various drum motions. Coloured fast garments (shirts, nightdresses, pajamas, etc) and normally soiled cotton load (underwear). 40 °C (Cold t...
Page 23 - Extra Options
23 ENGLISH Extra Options Programme Time Delay Steam Steam Softener Pre Wash Favorite Turbo Clean Intensive Medic Rinse Rinse+Spin Cotton ● ● ● ● ● ● ● ● ● Cotton Eco ● ● ● ● ● ● ● ● Easy Care ● ● ● ● ● ● ● ● ● Mix ● ● ● ● ● ● ● ● ● Allergy Care ● ●* ● ● ● ● Silent Wash ● ● ● ● Steam Refresh ●* ● Duv...
Page 24 - Operating Data
24 Operating Data Programme Max RPM Cotton 1400 Cotton Eco 1400 Easy Care 1200 Mix 1400 Allergy Care 1400 Silent Wash 1000 Steam Refresh - Duvet 1000 Sports Wear 800 Dark Wash 1400 Speed 14 800 Wool+ 800 Stain Care 1400
Page 25 - Option Programme; Time Delay; Steam
25 ENGLISH Option Programme Time Delay You can set a time delay so that the washing machine will start automatically and finish after a specified time interval. 1 Press the Power button. 2 Select a washing programme. 3 Press the Time Delay button to set time required. 4 Press the Start/Pause button....
Page 26 - Favorite; Pre Wash; Wash; Turbo Clean; Intensive; Rinse; Rinse
26 Favorite Favorite programme allows you to store a customized wash programme for future use. 1 Press the Power button. 2 Select a washing programme. 3 Select the cycle (Washing method, number of rinses, spin speed, water temperature etc.). 4 Press and hold the Favorite button for three seconds. Th...
Page 27 - Spin
27 ENGLISH Spin • The Spin speed can be selected by pressing the Spin button repeatedly. • Spin Only 1 Press the Power button. 2 Press the Spin button to select desired RPM. 3 Press the Start/Pause button. NOTE • When you select ‘No Spin’, it will still rotate slowly for a short time to drain quickl...
Page 28 - SMART FUNCTION; Using the Tag On Function; Installation of the Application; Using the Application
28 SMART FUNCTION Using Smart Function (Optional) Using the Tag On Function The Tag On function allows you to conveniently use the LG Smart Diagnosis™ and Cycle Download features to communicate with your appliance right from your own smart phone. • The Tag On function can only be used with most smar...
Page 29 - Using the Smart DiagnosisTM
29 ENGLISH Using the Smart Diagnosis™ Function Use this function if you need an accurate diagnosis by an LG Electronics service centre when the product malfunctions or fails. Use this function only to contact the service representative, not during normal operation. 1 Press the Power button to turn o...
Page 30 - MAINTENANCE; Cleaning Your Washing Machine; Care After Wash; Cleaning the Exterior; Cleaning the Water Inlet Filter
30 MAINTENANCE WARNING • Unplug the washing machine before cleaning to avoid the risk of electric shock. Failure to follow this warning may result in serious injury, fire, electric shock, or death. • Never use harsh chemicals, abrasive cleaners, or solvents to clean the washing machine. They may dam...
Page 31 - Cleaning the Drain Pump Filter
31 ENGLISH Cleaning the Drain Pump Filter • The drain filter collects threads and small objects left in the laundry. Check regularly that the filter is clean to ensure smooth running of your washing machine. • Allow the water to cool down before cleaning the drain pump, carrying out emergency emptyi...
Page 32 - Cleaning the Dispenser Drawer; Tub Clean
32 Cleaning the Dispenser Drawer Detergent and fabric softener may build up in the dispenser drawer. Remove the drawer and inserts and check for buildup once or twice a month. 1 Remove the detergent dispenser drawer by pulling it straight out until it stops. • Press down hard on the disengage button...
Page 33 - Caution on Freezing During; How to Keep the Product from Freezing; Check for Freezing
33 ENGLISH Caution on Freezing During Winter • When frozen, the product does not operate normally. Install the product where it will not freeze during winter. • Do not install the washer in any outdoor or sheltered outdoor location as this will contribute water freezing within the unit. How to Keep ...
Page 34 - How to Handle Freezing
34 How to Handle Freezing • Make sure to empty the drum, pour warm water of 50–60 °C up to the rubber part inside the drum, close the door, and wait for 1–2 hours. 50‒60 °C CAUTION • When the drain hose is installed in a curved shape, the inner hose may freeze. • Open the cover cap and drain tube pl...
Page 35 - TROUBLESHOOTING; Diagnosing Problems; Symptoms
35 ENGLISH TROUBLESHOOTING The appliance is equipped with an automatic error-monitoring system to detect and diagnose problems at an early stage. If the appliance does not function properly or does not function at all, check the following before you call for service: Diagnosing Problems Symptoms Rea...
Page 36 - Water supply tap is not turned on.; Check that the door is firmly shut.; Door does not open; Dry problem
36 Symptoms Reason Solution Washing machine does not start Electrical power cord may not be plugged in or connection may be loose. • Make sure plug fits tightly in wall outlet. House fuse blown, circuit breaker tripped,or a power outage has occurred. • Reset circuit breaker or replace fuse. Do not i...
Page 37 - Error Messages; The drain filter is clogged.; Feet are not adjusted correctly.
37 ENGLISH Error Messages Symptoms Reason Solution Water supply pressure is not adequate in area. • Check another tap in the house. Water supply taps are not completely open. • Fully open tap. Water supply hose(s) are kinked. • Straighten hose(s). The filter of the supply hose(s) are clogged. • Chec...
Page 38 - Thermistor control error.; Malfunction of water level sensor.
38 Symptoms Reason Solution Ensure door is not open. • Close the door completely. If ‘ , , ’ is not released, call for service. Thermistor control error. • Unplug the power plug and call for service. Water overfills due to a malfunction or excessively high water pressures. • Close the water tap. • U...
Page 39 - Memo