Page 2 - Contents; Adding detergent; Maintenance
Contents 2 Contents ....................................2 Product Features ......................3 Important safety instructions Important safety instructions .................4 Basic safety precautions .......................5 Save these instructions .........................6 Specifications .........
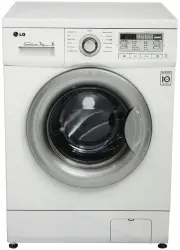
Page 3 - Product Features
Product Features 3 Inverter Direct Drive system The advanced Brushless DC motor directly drives the drum without belt and pulley. More economical with Intelligent Wash system Intelligent Wash System detects the size of load and water temperature,and then determines the optimum water level and washin...
Page 4 - Your Safety and the safety of others are very important.; WARNING
4 Important safety instructions For your safety, the information in this manual must be followed to minimize the risk of fire orexplosion, electric shock, or to prevent property damage, injury to persons, or death. READ ALL INSTRUCTIONS AND EXPLANATION OF THE INSTALLATIONBEFORE USE. WARNING You can ...
Page 5 - Basic safety precautions
5 Important safety instructions To reduce the risk of fire, electric shock, or injury to persons when using the washer, follow basicprecautions, including the following: WARNING • Before installation, check for exterior damages. If it has, do not install. • Do not install or store the washer where i...
Page 6 - Important safety instructions
6 Important safety instructions ■ Basic safety precautions ■ Save these instructions To reduce the risk of fire, electric shock, or injury to persons when using the washer, follow basicprecautions, including the following: WARNING Improper connection of the equipment-grounding conductor can result i...
Page 7 - Specifications; Accessories
7 Specifications ■ Accessories (For detergent and fabric softener) Drawer Power plug Control panel Drain pump filter Lower cover cap • If the supply cord is damaged, it must be replaced by themanufacturer or its service agentsor a similarly qualified person inorder to avoid a hazard. Drum Door Drain...
Page 8 - Installation; Removing packing; Keep all packaging well away from children.; NOTE
8 Installation ■ Removing packing 1 . Remove the cardboard box and styrofoam packing. 2 . Lift the washing machine and remove the base packing. This will require 2 ormore people or a lifting device. 3 . Remove the tape securing the power supply cord and drain hose. 4 . Remove the inlet hoses from th...
Page 9 - Additional Clearance :; Installation place requirements
9 Installation Washer approx. 2cm • Level floor : Allowable slope under entire washer is 1˚. • Power outlet : Must be within 1.5 meters of either side of locationof washer. Do not overload the outlet with morethan one appliance. • Additional Clearance : For Wall, 10cm:rear / 2cm : right & left s...
Page 10 - CAUTION concerning the Power cord; CAUTION; Electrical connection
10 Installation CAUTION CAUTION concerning the Power cord • Most appliances recommend they be placed upon a dedicated circuit; that is, a single outlet circuit which powers only that appliance and has no additional outlets or branch circuits. Check the specification page of this owner's manual to be...
Page 11 - Connecting water supply hose
11 Installation 1 . Unscrew the adapter ring plate and the 4 adapter retaining screws. 2 . Push the adapter onto the end of the tap so that the rubber seal forms awatertight connection. Tighten theadapter ring plate and the 4 screws. 3 . Push the water supply hose vertically upwards so that the rubb...
Page 12 - Please use the horizontal tap; Step3: Connect hose to washer
12 Installation 1 . Unscrew the adapter ring plate and the 4 adapter retaining screws. 2 . Remove the guide plate if the tap is too large to fit the adapter. 3 . Push the adapter onto the end of the tap so that the rubber seal forms a watertight connection. Tighten the adapter ring plate and the 4 s...
Page 13 - Installation of drain hose
13 Installation of drain hose • The drain hose should not be placed higher than 100 cm above the floor.Water in the washer does not drain ordrains slowly if above this height. • Securing the drain hose correctly will protect the floor from damage due towater leakage. • If the drain hose is too long,...
Page 14 - Leveling
14 • Diagonal Check When pushing down the edges of thewashing machine top plate diagonally, the machine should not move up and downat all (Please, check both directions). Ifmachine rocks when pushing the machinetop plate diagonally, adjust the feet again. 2. If the floor is uneven, turn the adjustab...
Page 15 - Concrete floors
15 Concrete floors Wooden floors (Suspended floors) • The installation surface must be clean, dry and level. • Install washer on a flat hard floor. Tile floors (Slippery floors) • Position each foot on the Tread Mate and level the machine to suit. (Cut Tread Mate into 70x70 mm sections and sti...
Page 16 - How to use washer; Operating washing machine
16 How to use washer Operating washing machine 2 . Open the door and load laundry. 1 . Sort Laundry. (Refer to 17 page) 3 . Press the Power button. 4 . Select a Program. (Refer to 18 ~ 20 page) 5. Add detergent.(Refer to 26 ~ 27 page) 6 . Press the Start/Pause button. Select options at this time(Ref...
Page 17 - Care before washing
17 ■ Care before washing 3 . Caring before loading Combine large and small items in a load. Load large items first.Large items should not be more than half the total wash load. Donot wash single items. This may cause an out-of-balance load. Add one or two similaritems. • Check all pockets to make su...
Page 18 - Washing program table
18 Washing program table • Recommended courses according to the laundry type. How to use washer Cotton Eco Easy Care Mix Provide optimized washingperformance with less energyconsumption. This cycle is suitable for casualshirts that do not need ironing afterwashing. Enables various fabrics to bewashe...
Page 19 - Extra options
19 • Water Temperature: Select water temperature to suit wash cycles. Always follow garment manufacture’s care label or instructions when washing. • Set program at “Cotton Eco, 40°C, Intensive, 1200RPM” is for normally soiled load and test in accordance or in conformity with AS/NZS 2040.1 for 7 kg. ...
Page 20 - Operating data
20 Operating data How to use washer Cotton Cotton Eco Easy Care Mix Baby Care ( ) Skin Care Duvet Sports Wear Delicate Wool Quick 30 Intensive 60 Rinse+Spin 1200 1200 800 1200 800 1200 800 800 800 800 1200 1200 1200 Max RPM Program
Page 24 - Child Lock
24 The Beep on/off function can be set only during the washing cycle. 1 . Press the Power button. 2 . Press the Start/Pause button. 3 . Press and hold the Time Delay button simultaneously for three seconds to set Beep on/off function. Once the Beep on/off function is set, the settingis memorized eve...
Page 25 - Tub Clean; • If there is a child, be careful not to leave the door open for too long.
25 Tub Clean is a special cycle to help clean the inside of the washing machine. A higher water level and higher spin speed is used in this cycle. Perform this cycle regularly. 1 . Remove any clothing or items from the washer and close the door. 2 . Open the dispenser drawer and add Anti limescale(e...
Page 26 - The dispenser drawer; • Keep all washing detergents away from
26 Adding detergent • Main wash only ➔ • Pre Wash + Main Wash ➔ • Do not exceed the maximum fill line. Overfilling can cause early dispensing of thefabric softener which could stain clothes. Close the dispenser drawer slowly. • Do not leave the fabric softener in the detergent drawer for more than 2...
Page 27 - Detergent dosage; • Do not let the detergent harden.
27 Adding detergent • A water softener, such as Anti-limescale (e.g. Calgon) can be used to cut down on the use ofdetergent in extremely hard water areas.Dispense according to the amount specified onthe packaging. First add detergent and then thewater softener. • Use the quantity of detergent as for...
Page 28 - The water inlet filter
28 The water inlet filter • " " icon will be displayed on the control panel when water does not enter the detergent drawer. • If water is very hard or contains traces of lime deposit, the water inlet filter may become clogged. It is therefore a good idea to clean it from time to time. • Befo...
Page 29 - The drain pump filter; Be careful when draining if the water is hot.
29 Maintenance • Allow the water to cool down before cleaning the drain pump, carrying out emergency emptying or opening the door in an emergency. • The drain filter collects threads and small objects left in the laundry. Check regularly that the filter is clean to ensure smooth running of your mach...
Page 30 - Dispenser drawer
30 Maintenance Dispenser drawer • After a while, detergents and fabric softeners leave a deposit in the drawer. • It should be cleaned from time to time with a jet of running water. • If necessary it can be removed completely from the machine by pressing the catch downwards and by pulling it out. • ...
Page 32 - Diagnosing Problem; Troubleshooting guide
32 • This washing machine is equipped with automatic safety functions which detect and diagnose faults at an early stage and react appropriately.When the machine does not function properly or does not function at all, check thefollowing points before you contact your service provider. Symptom Possib...
Page 33 - Symptom
33 Troubleshooting guide Washer does notstart Washer will notspin Door does notopen Wash cycle timedelayed Fabric softener overflow Softenersdispensed too early • Electrical power cord may not be plugged in or connection may beloose. • House fuse blown, circuit breaker tripped,or a power outage haso...
Page 34 - Error Messages
34 Troubleshooting guide Symptom Possible Cause Solution • Water supply is not adequate in area.• Water supply taps are not completely open.• Water inlet hose(s) are kinked.• The filter of the inlet hose(s) are clogged. • Drain hose is kinked or clogged.• The drain filter is clogged. • Load is too s...
Page 35 - Using SMARTDIAGNOSISTM
35 Troubleshooting guide • Only use this feature when instructed to do so by the call center. The transmission sounds similar to a fax machine, and so has no meaning except to the call center. • SMARTDIAGNOSIS™ cannot be activated if the washer does not power up. If this happens, then troubleshootin...