LG LSWD305ST - Manual
LG LSWD305ST Oven – Manual, read for free online in PDF format. We hope this helps you resolve any issues you may have. If you have further questions, please contact us through the contact form.


Table of Contents:
- Page 2 – SAFETY; BEFORE YOU BEGIN; WARNING; The information in this manual should be followed exactly.; CAUTION; DO NOT remove spacers on the side walls of the built-in oven.; excess heat buildup that may result in heat damage or fire.; DO NOT block the oven air exhaust located at the bottom of the oven.
- Page 3 – ENGLISH; IMPORTANT NOTE; • The information in this manual; • DO NOT put any weight on the oven; • The electrical power must be shut off; PREPARE TO INSTALL THE OVEN
- Page 4 – INSTALLATION REQUIREMENTS; INSTALLATION DRAWINGS; Product dimensions
- Page 7 – PREPARATION FOR MOVING THE OVEN; • Make sure the cabinets and wall; • DO NOT remove spacers on the side
- Page 8 – ELECTRICAL CONNECTION REQUIREMENTS; • New branch-circuit installations; • Improper connection of aluminum
- Page 9 – ELECTRICAL CONNECTIONS; ELECTRICAL CONNECTION
- Page 10 – Junction Box; -wire circuit connection
- Page 11 – INSTALL THE OVEN; CABINET INSTALLATION; • DO NOT block the oven air exhaust; • Mounting screws must be used.
- Page 12 – OPERATION CHECKLIST; CHECKING OPERATION
ENGLISH
www.lg.com
ENGLISH
ESPAÑOL
INSTALLATION MANUAL
ELECTRIC CONVECTION
BUILT-IN OVEN
Please read these instructions thoroughly before
installing and operating the oven.
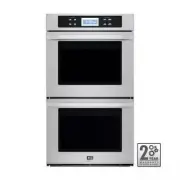
LSWS305ST
LSWD305ST
MFL51224803
"Loading the manual" means you need to wait until the file loads and becomes available for online reading. Some manuals are very large, and the time they take to appear depends on your internet speed.
Other Manuals for LG LSWD305ST
Summary
- 2 - SAFETY Part 1 BEFORE YOU BEGIN Remove all tape and packing materials before using the oven. Dispose all plastic bags after unpacking the oven.Never allow children to play with packing materials. You can download an Installation manual at http://www.lg.com. • Home > Region Selection > Sup...
- 3 - ENGLISH SAFETY Part 1 IMPORTANT NOTE This installation must be completed by a qualified installer or technician. • Please read the entire Installation Instructions prior to installation. • Remove all packing materials from the oven compartments before connecting the electrical supply to the ov...
INSTALLATION REQUIREMENTS Part 2 INSTALLATION DRAWINGS (FOR 30” SINGLE BUILT- IN OVEN) The first step of your installation should be to measure your current cutout dimensions and compare them to thecutout dimensions shown below. You may find little or no cabinet work will be necessary. IMPORTANT NOT...