Page 3 - KENMORE VACUUM CLEANER WARRANTY; KENMORE LIMITED WARRANTY
- 3 - KENMORE VACUUM CLEANER WARRANTY KENMORE LIMITED WARRANTY FOR ONE YEAR from the date of sale this product is warranted against defects in material or workmanship. WITH PROOF OF SALE a defective product will be replaced free of charge. The Kenmore brand is used under license. Direct all claims f...
Page 5 - PARTS AND FEATURES; safe use. Review these before using your vacuum cleaner.; REPLACEMENT PARTS
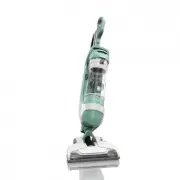
PARTS AND FEATURES It is important to know your vacuum cleaner’s parts and features to assure its proper and safe use. Review these before using your vacuum cleaner. REPLACEMENT PARTS - 5 - Part Part No. Exhaust Filter 561014108 Primary Filter KC44KDMTZ000 Belt KC28SEDCZ000 To order a replacement pa...
Page 6 - ASSEMBLY INSTRUCTIONS; PACKING LIST
ASSEMBLY INSTRUCTIONS B efore assembling the vacuum cleaner, check the PACKING LIST (page 2). Use this list to verify that you have received all the components of your new Kenmore vacuum cleaner. Please pay special attention to these hazard alert boxes, and follow any instruc- tions given. WARNING s...
Page 7 - Electrical Shock and Personal Injury Hazard
ATTACHMENTS Insert the combination tool into the holder on the back of the vacuum cleaner as shown. POWER CORD - WRAPPING WARNING Electrical Shock and Personal Injury Hazard Wrapping the cord too tightly puts stress on the cord and can cause cord damage. A damaged cord is an electrical shock hazard ...
Page 9 - UPRIGHT MODE; OPERATION MODES
1. Release the handle by placing foot on the nozzle and pull back to change handle position. When using the vacuum cleaner on bare floors, press the BARE FLOOR selector to turn off the agitator. Pressing the BARE FLOOR selector again will turn the agitator on. UPRIGHT MODE CROSSOVER MODE 2. Press and ...
Page 10 - USING ATTACHMENTS ON HANDLE
1. Place the vacuum cleaner in the upright locked position. 2. Remove the handle from the wand by pressing the HANDLE RELEASE button. 3. Slide attachment collar over open end of handle. Use attachments as needed. See ATTACHMENT USE TABLE (page 11). CAUTION When using attachments, be careful not to o...
Page 11 - ATTACHMENTS; COMBINATION TOOL; PET HANDIMATE; ATTACHMENT USE TABLE; ATTACHMENT; CLEANING AREA; Rotating Dusting Brush
ATTACHMENTS COMBINATION TOOL The combination tool can be attached to either the handle or the wand. Slide the collar of the tool over the open end of the handle or wand. Use the combination tool in crevice tool mode for cleaning in tight spaces such as furniture, between cushions, and stairs. See AT...
Page 12 - MOTOR PROTECTION SYSTEM; THERMAL PROTECTOR; PERFORMANCE/SAFETY FEATURES
MOTOR PROTECTION SYSTEM THERMAL PROTECTOR This vacuum cleaner has a thermal protector which automatically trips to protect the vacuum cleaner suction motor. If a clog prevents the normal flow of air to the motor, the thermal protector turns the motor off automatically. This allows the motor to cool in...
Page 15 - EMPTYING DUST CUP; TO REMOVE DUST CUP; WARNING; Always unplug power cord from
- 15 - EMPTYING DUST CUP TO REMOVE DUST CUP 1. Lift dust cup handle located at the top of the dust cup. 2. Pull the dust cup handle up and lift dust cup up and out of the vacuum cleaner. 3. Remove any clogs that might be located in the suction port or filter port area. TO EMPTY DUST CUP 1. Raise dust...
Page 16 - TO REINSTALL DUST CUP
- 16 - TO REINSTALL DUST CUP 1. Place dust cup back into vacuum cleaner by inserting the bottom first and tilting back with the dust cup handle raised. 2. Lower the dust cup handle to lock dust cup in place. A noticeable “click” should be heard.
Page 18 - PRIMARY FILTER CLEANING
- 18 - PRIMARY FILTER CLEANING The primary filter is located inside the dust cup lid. It is recommended to clean the primary filter with cold water at least once a month. Check the primary filter frequently and clean when dirty. NOTE: When the cleaning of the filter no longer restores vacuum cleaner suc...
Page 19 - HEPA MEDIA EXHAUST FILTER; EXHAUST FILTER
- 19 - HEPA MEDIA EXHAUST FILTER EXHAUST FILTER The exhaust filter must be replaced when it becomes dirty. The timing between replacement intervals will depend on the use conditions the vacuum cleaner is exposed to. The filter should be checked when emptying the dust cup. The filter CANNOT be washed as...
Page 21 - AGITATOR CLEANING; NOZZLE; CAUTION; To reduce the risk of injury from
- 21 - AGITATOR CLEANING NOZZLE To maintain efficient cleaning, the agitator must be kept free of carpet fiber, string, or hair build-up. After every 7 to 10 uses, unplug and turn vacuum cleaner over and check agitator for fiber and hair build-up. Use scissors to remove any build-up entangled around the...
Page 23 - PROBLEM; TROUBLESHOOTING; to do so could result in electrical shock or personal injury.
- 23 - Vacuum cleaner 1. Unplugged at wall outlet. 1. Plug in firmly, press the won’t run. ON/OFF switch. 2. Tripped circuit breaker 2. Reset circuit breaker or or blown fuse. replace fuse. 3. Thermal protector tripped. 3. Allow vacuum cleaner to cool 50 minutes (page 12). 4. Defective wall outlet. 4...
Page 25 - TABLA DE CONTENIDO; ANTES DE USAR SU ASPIRADORA NUEVA; LISTA DE EMBALAJE
- 1 - TABLA DE CONTENIDO Antes de usar su aspiradora nueva .............................................................................................. 1 Lista de embalaje ............................................................................................................................. ...
Page 26 - e los filt
GARANTÍA DE LA ASPIRADORA DE KENMORE - 2 - GARANTÍA LIMITADA KENMORE DURANTE UN AÑO a contar de la fecha de venta, este producto está garantizado contra defectos en sus materiales o fabricación.Un producto defectuoso recibirá una reparación gratuita con la única condición de presentar una PRUEBA DE ...
Page 27 - INSTRUCCIONES IMPORTANTES DE SEGURIDAD; GUARDE ESTAS INSTRUCCIONES
- 3 - INSTRUCCIONES IMPORTANTES DE SEGURIDAD Lea todas las instrucciones en este manual antes de armar o usar su aspiradora. Su seguridad es muy importante para nosotros. Para reducir el riesgo de incendio, choque eléctrico, lesión corporal o daños al utilizar su aspiradora, actúe de acuerdo con las...
Page 28 - PIEZAS Y CARACTERÍSTICAS; adecuado y seguro. Examínelas antes de usar su aspiradora.; PARTES DE REEMPLAZO
- 4 - PIEZAS Y CARACTERÍSTICAS Es importante concer las piezas y características de su aspiradora para asegurar su uso adecuado y seguro. Examínelas antes de usar su aspiradora. PARTES DE REEMPLAZO Parte Pieza No. Filtro de escape 561014108 Filtro primario KC44KDMTZ000 Correa KC28SEDCZ000 Para or de...
Page 29 - INSTRUCTIONS DE ENSAMBLE
- 5 - 6. Coloque el cepillo de piso en el socket. 4. Inserte el tubo en el cepillo de piso hasta que embone en su lugar. INSTRUCTIONS DE ENSAMBLE Por favor ponga atención especial a los cuadros que le alertaran de posibles peligros Advertencia: Este información le alertará de peligro de fuego, choqu...
Page 32 - MODALIDAD VERTICAL; MODALIDADES DE OPERACIÓN
- 8 - 1. Coloque su pie izquierdo en la boquilla de la aspiradora. Jale hacia atrás el manija para desenganchar el manija. Cuando utilice la aspiradora en pisos duros, pulse el selector de BARE FLOOR para apa- gar el agitador. Vuelve a pulsar el selector de BARE FLOOR se encenderá el agitador. MODAL...
Page 33 - USANDO ACCESORIOS EN EL
- 9 - 1. Colocar la aspiradora en posición vertical. 2. Retire la manija de la extensión pulsando el botón de HANDLE RELEASE. 3. Deslice el anillo de sujeción sobre el extremo abierto de la manija. Use los accesorios de acuerdo a como los necesite. Ver la tabla de USO DE LOS ACCESORIOS (pág 10). CUI...
Page 34 - ACCESORIOS; USO DE LOS; ÁREA A LIMPIAR; USO DE LOS ACCESORIOS; Cepillo giratorio para polvo
- 10 - ACCESORIOS COMBINATION TOOL La herramienta de combinación puede utilizarse en la manija o el tubo de extensión Deslice el anillo de sujeción sobre el extremo abierto de la manija or el tubo. Utilice la herramienta de combinación en el modo de herramienta para hendiduras para limpieza en espac...
Page 35 - CARACTERÍSTICAS DE RENDIMIENTO/SEGURIDAD; filt; CUIDADO
- 11 - VÁLVULA DE ESCAPE Esta aspiradora contiene una válvula de paso de aire que sirve como Válvula de paso y cuando un bloqueo impida que circule el aire al motor se abre automáticamente para proveer un flujo de aire fresco al motor. Así esta válvula impide el sobre calentamiento del motor y como c...
Page 36 - BOTÓN DE BELT RESET; cnico calificado que haga el se; CONTROL DE ASPIRATIÓN
- 12 - BOTÓN DE BELT RESET El motor del agitador tiene una protección incorporada contra daño del motor en caso de que el agitador se bloquee. Si el agitador se pone lento o se detiene, el protector de sobrecarga del agitador apaga el motor del agitador. El motor de succión continuará funcionando. P...
Page 37 - , limpie la superficie
- 13 - Reemplace la manguera y el tube si es necesario (ver pág 5 & 6). Re co ja el cordón y enrollarlo en los sujetadores superior e inferior, sin que quede muy apreta do. Asegure la ranura del enchufe sobre el cordón de poder (ver pág 6). Guar de la aspira do ra bajo techo en un lugar seco, co...
Page 38 - VACIAR EL CONTENEDOR DE POLVO; ADVERTENCIA
- 14 - VACIAR EL CONTENEDOR DE POLVO PARA REMOVER EL CONTENEDOR DE POLVO 1. Levante la manija ubicada al tope del contenedor de polvo. 2. Tire la manija hacia arriba y levante el contenedor de polvo y afuera de la aspiradora. 3. Remueva cualquier obstáculo que pudiera estar ubicado en la entrada de ...
Page 40 - LIMPIEZA DEL PRE-FILTRO
- 16 - 2. Gire el pr e-filt ro como se muestra para asegurarlo en su lugar. LIMPIEZA DEL PRE-FILTRO 3. Vuelva a colocar la parte inferior del contenedor de polvo alineando las marcas como se muestra, UNLOCK (para limpieza). 4. Gire mientras presiona hacia abajo hasta que las marcas queden alineadas c...
Page 41 - LIMPIEZA DEL FILTRO PRIMARIO; a sin el filt
- 17 - LIMPIEZA DEL FILTRO PRIMARIO El filt ro primario se encuentra dentro de la tapa del contenedor de basura. Es re comendable limpiar el filt ro con agua fría por lo menos una vez al mes. Re visar el filt ro primario y limpiarlo cuando sea necesario. NOTA: Una vez que haya limpiado el filt ro, y la ...
Page 42 - FILTRO DE ESCAPE
- 18 - FILTRO DE ESCAPE FILTRO DE ESCAPE El filt ro de escape se debe reemplazar cuando este sucio. El tiempo de reemplazo depende de las condiciones de uso . El filt ro de escape de debe de revisas cada ves que se cambie la bolsa. El filt ro de escape no puede ser lavado, perdería su capacidad de atra...
Page 44 - LIMPIEZA DEL AGITADOR; BOQUILLA; Para reducir el riesgo de daños
- 20 - LIMPIEZA DEL AGITADOR BOQUILLA Para un aspirado eficient e, el agitador deber ser mantenido libre de fib ras de alfombra, hilos, o acumulación de pelo. Luego de 7 a 10 usos, desenchufe y dé vuelta a la aspiradora y revise el agitador para ver si tiene acumulación de hilos, fib ras o pelo. Use ti...
Page 46 - PROBLEMA; Peli gro de cho que eléc trico; RECONOCIMIENTO DE PROBLEMAS
- 22 - La aspiradora no 1. Está desconectada. 1. Conecte bien, seleccione la enciende función deseada en el control manual. 2. Cortacircuitos botado o fusible 2. Restablezca el cortacircuitos quemado en el tablero de o cambie el fusible. servicio de la residencia. 3. Protector termal activado. 3. De...