Kenmore BU4021 - User Manual
Kenmore BU4021 Vacuum – User Manual, read for free online in PDF format. We hope this helps you resolve any issues you may have. If you have further questions, please contact us through the contact form.


Table of Contents:
- Page 2 – BEFORE USING YOUR NEW VACUUM CLEANER
- Page 3 – IMPORTANT SAFETY INSTRUCTIONS
- Page 4 – SAVE THESE INSTRUCTIONS
- Page 5 – KENMORE VACUUM CLEANER WARRANTY
- Page 7 – ASSEMBLY INSTRUCTIONS
- Page 8 – WARNING
- Page 14 – ATTACHMENTS
- Page 15 – ATTACHMENT USE TABLE; ATTACHMENT; CLEANING AREA
- Page 19 – DUST BAG REPLACEMENT
- Page 21 – HEPA MEDIA EXHAUST FILTER CLEANING
- Page 24 – TROUBLESHOOTING
- Page 26 – ANTES DE USAR SU NUEVA ASPIRADORA
- Page 27 – ADVERTENCIA; INSTRUCCIONES DE SEGURIDAD IMPORTANTES
- Page 28 – GUARDE ESTAS INSTRUCCIONES
- Page 29 – GARANTÍA DE LA ASPIRADORA KENMORE
- Page 31 – INSTRUCCIONES DE ENSAMBLAJE
- Page 39 – TABLA DE USO DE ACCESORIOS; ACCESORIO; ÁREA DE LIMPIEZA
- Page 45 – LIMPIEZA DEL FILTRO DE ESCAPE DE MEDIOS HEPA
- Page 48 – RESOLUCIÓN DE PROBLEMAS
Use & Care Guide
Manual de Uso y Cuidado
Model/Modelo: BU4021
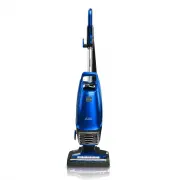
Bagged Upright Vacuum
ASPIRADORA CON BOLSA
www.kenmore.com
Kenmore and the Kenmore logo are registered
trademarks of KCD IP, LLC and/or Transform SR
Brands LLC and are used under license.
Vacuum Cleaner Help Line:
1-844-608-3080
8:00am-5:00pm EST, M-F
"Loading the manual" means you need to wait until the file loads and becomes available for online reading. Some manuals are very large, and the time they take to appear depends on your internet speed.
Summary
- 2 - Before Using Your New Vacuum Cleaner ........................................................................ 2Packing List ..................................................................................................................... 2Important Safety Instructions ........................
- 3 - WARNING! Your safety is important to us. To reduce the risk of fire, electrical shock, injury to persons or damage when using your vacuum cleaner, follow basic safety precautions including the following: IMPORTANT SAFETY INSTRUCTIONS • Use your vacuum cleaner only as described in this Use &...
- 4 - IMPORTANT SAFETY INSTRUCTIONS SAVE THESE INSTRUCTIONS Proper assembly and safe use of your vacuum cleaner are your responsibilities. Your vacuum cleaner is intended for Household use. Read this Use & Care Guide carefully for important use and safety information. This guide contains safety ...