Page 2 - PACKING LIST
- 2 - TABLE OF CONTENTS Before Using Your New Vacuum Cleaner .................................................................................. 2 Packing List ....................................................................................................................................... 2 Ken...
Page 3 - KENMORE ELITE VACUUM CLEANER WARRANTY; KENMORE ELITE LIMITED WARRANTY
- 3 - KENMORE ELITE VACUUM CLEANER WARRANTY KENMORE ELITE LIMITED WARRANTY FOR ONE YEAR from the date of sale this product is warranted against defects in material or workmanship when it is assembled, operated and maintained according to all supplied instructions. WITH PROOF OF SALE, a defective app...
Page 4 - IMPORTANT SAFETY INSTRUC; TIONS; SAVE THESE INSTRUCTIONS; urn off
IMPORTANT SAFETY INSTRUC TIONS SAVE THESE INSTRUCTIONS Proper assembly and safe use of your vacuum cleaner are your responsibilities. Your vacuum cleaner is intended for Household use . Read this Use & Care Guide carefully for important use and safety information. This guide contains safety stat...
Page 5 - PARTS AND FEATURES; REPLACEMENT PARTS; Part Part No.
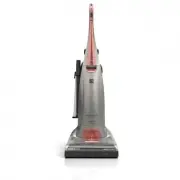
PARTS AND FEATURES It is important to know your vacuum cleaner’s parts and features to assure its proper and safe use.Review these before using your vacuum cleaner. REPLACEMENT PARTS - 5 - Part Part No. Exhaust Filter 20-53296 Dust Bag (2-pack) 20-53293 Dust Bag (6-pack) 20-53294 To order a replacem...
Page 6 - firmly; HANDLE
ASSEMBLY INSTRUCTIONS B efore assembling the vacuum cleaner, check the PACKING LIST (page 2). Use this list to verify that you have received all the components of your new Kenmore Elite vacuum cleaner. Please pay special attention to these hazard alert boxes, and follow any instruc- tions given. WAR...
Page 7 - WARNING; Electrical Shock and Personal Injury Hazard
1. Place the telescoping wand and crevice tool into attachement holder. ATTACHMENTS POWER CORD Kenm ore Crevice Tool Telescoping Wand Attachment Holder 2. Insert the combination brush into the holder on the back of the vacuum cleaner as shown. Combination Brush WARNING Electrical Shock and Personal ...
Page 8 - CAUTION; off; OPERATING INSTRUCTIONS; d off the; POWER CORD; • The plug will fit in a polari
CAUTION Moving parts! To reduce the risk of personal injury, DO NOT touch the agitator when vacuum cleaner is on. Contacting the agitator while it is rotating can cut, bruise or cause other injuries. Always turn off and unplug from electrical outlet before servicing. Use caution when operating near c...
Page 9 - ds the floor to change; HANDLE RELEASE; ood, tile floors and delicate
Release the handle by pressing down on the handle release pedal with your foot and pulling back and down on the handle with your hand. Use low position for cleaning under furniture. Press the pedal and lower handle towar ds the floor to change from normal use position to low position. HANDLE RELEASE ...
Page 10 - PILE HEIGHT SELECTION AND SETTINGS; d off to; DIRT SENSOR
- 10 - Select a pile height setting by turning the height adjust selector located on the nozzle. PILE HEIGHT SELECTION AND SETTINGS Height Adjust Selector CAUTION Do not allow vacuum cleaner to remain in one spot for any length of time when the agitator is turning. Damage to carpet may occur. Attent...
Page 11 - CHECK BAG INDICATOR; normal air fl; ATTACHMENTS
- 11 - CHECK BAG INDICATOR When the vacuum cleaner is running with normal air fl ow, the light on the CHECK BAG indicator is o ff . NOTE: It is normal for the CHECK BAG indicator to come on when using certain attachments, due to reduce d airfl ow through attachment. No maintenance is required. The ligh...
Page 12 - ATTACHMENT USE TABLE; ATTACHMENT; CLEANING AREA; TELESCOPING WAND; ess firml; SUCTION CONTROL
* Always clean attachments before using on fabrics. ** Use the combination brush without the brush for greater suction on furniture cushions or stairs. ***See the Pet HandiMate ® Use & Care Guide for detailed belt changing and other instructions. Use combination brush with brush for cleaning loo...
Page 13 - ater air fl
- 13 - MOTOR PROTECTION SYSTEM BY-PASS VALVE Thermal Protector - Suction Motor This vacuum cleaner has a thermal protector which automatically trips to protect the vacuum cleaner suction motor. If a clog prev ents the normal fl ow of air to the motor, the thermal protector turns the motor off automati...
Page 14 - VACUUM CLEANER CARE; urn off and unplug; AGITATOR OVERLOAD PROTECTOR
The agitator has built-in protection against motor damage should the agitator jam. If the agitator slows down or stops, the agitator overload protector shuts off the agitator motors. The vacuum cleaner suction motor will continue to run. To correct problem: T urn off and unplug vacuum cleaner, remove ...
Page 15 - a, on the floor with the handle loc; the cord and can cause cord damage. A
- 15 - VACUUM CLEANER STORAGE TO CLEAN DIRT SENSOR OPTICS Replace hose and wand in storage position if necessary (page 6 & 7). Gather the cord and wrap it loosely around the upper and lower cord hooks. Lock power cord plug onto the power cord. Store the vacuum cleaner in a dry, indoor are a, on ...
Page 16 - fin; CHANGING DUST BAG; DUST BAG STYLE O; fits on the dust; ety filter
- 16 - 3. Tuck the bag into the dust bag chamber. Be sure all sides of the dust bag are completely within bag cavity prior to closing the bag cover. 4. Place the tab on the dust bag cover in the slot on the vacuum cleaner. 5. Press the dust bag cover into place. You will hear a distinct snap when co...
Page 17 - y filte
- 17 - MOTOR SAFETY FILTER Check motor saf ety filter f requently and clean when dirty.Remove the dust bag as outlined in the CHANGING DUST BAG section (page 16). Lift the filter c over door located at the bottom of the dust container and che ck the filter (see illustration). If the filter is di rty, re...
Page 18 - HEPA MEDIA EXHAUST FILTER; EXHAUST FILTER STYLE EF-9
- 18 - HEPA MEDIA EXHAUST FILTER EXHAUST FILTER STYLE EF-9 The e xhaust filter must be replaced when it becomes dirty. The timing between replacement intervals will depend on the use conditions the vacuum cleaner is exposed to . The filter should be ch ecked when changing the dust bag. The filter CANNO...
Page 19 - quate suction, first ch; ess firmly to ensu
- 19 - REMOVING CLOGS WARNING Electrical Shock Or Personal Injury HazardDisconnect electrical supply before performing maintenance to the vacuum cleaner. Failure to do so could result in electrical shock or personal injury from the vacuum cleaner suddenly starting. Always follow all safety precautio...
Page 20 - AGITATOR CLEANING; efficient
- 20 - TO REMOVE CLOG FROM CLEAN-OUT PORT 1. Lift the clean-out port cover to access the clean-out port. 2. Remove any debris or build-up. 3. Reinstall cover. Make sure it is completely secured in place. Clean out port TO REMOVE CLOG FROM PET HANDIMATE Frequently check air path to make sure it is fr...
Page 21 - PROBLEM; TROUBLESHOOTING; ure to do so could result in electrical shock or personal injury.
- 21 - Vacuum cleaner 1. Unplugged at wall outlet. 1. Plug in firml y, select the won’t run. desired setting on the touch control. 2. Tripped circuit breaker 2. Reset circuit breaker or or blown fuse. replace fuse. 3. Thermal protector tripped. 3. Allow vacuum cleaner to cool 50 minutes (page 13). 4....
Page 23 - NOTES
Page 26 - GARANTÍA DE LA ASPIRADORA DE KENMORE ELITE; Garantía limitada de Kenmore Elite
- 2 - GARANTÍA DE LA ASPIRADORA DE KENMORE ELITE Garantía limitada de Kenmore Elite DURANTE un año a partir de la fecha de compra este producto está garantizado contra defectos de materiales o mano de obra cuando se es ensamblado correctamente, operado y mantenido según las instrucciones suministrad...
Page 27 - INSTRUCCIONES IMPORTANTES DE SEGURIDAD; ADVERTENCIA
INSTRUCCIONES IMPORTANTES DE SEGURIDAD Lea todas las instrucciones en este manual antes de armar o usar su aspiradora. Use su aspiradora solamente como se describe en este manual. Use solamente con los accesorios recomendados por Kenmore. Desconecte la fuente de electricidad antes de hacer el servic...
Page 28 - PIEZAS Y CARACTERÍSTICAS; y seguro. Examínelas antes de usar su aspiradora.; PARTES DE REEMPLAZO; Nombre de parte Pieza No.
PIEZAS Y CARACTERÍSTICAS Es importante concer las piezas y características de su aspiradora para asegurar su uso adecuado y seguro. Examínelas antes de usar su aspiradora. PARTES DE REEMPLAZO - 4 - Nombre de parte Pieza No. Filtro de escape 20-53296 Bolsa para polvo (2-Paquete) 20-53293 Bolsa para p...
Page 29 - erificar que ha; INSTRUCCIONES DE ENSAMBLE; los orificios pa; firmemente
Antes de armar la aspiradora, revise la LISTA DE EMBALAJE (pág 1). Use esta lista para v erificar que ha recibido todos los componentes de su nueva aspiradora Kenmore Elite. INSTRUCCIONES DE ENSAMBLE Por favor ponga atención especial a los cuadros que le alertaran de posibles peligros Advertencia: Es...
Page 30 - fijo en su luga
1. Inserte el tubo telscopico y la herramienta para hendiduras en el soporte como se muestra. ACCESORIOS CORDÓN ELÉCTRICO Kenm ore Herramienta para hendiduras Tubo telescopico Soporte de accesorios 2. Inserte el cepillo de combinación en el contenedor de atrás de la aspiradora como se muestra. Cepil...
Page 32 - CUIDADO; efié
Libere el mango pisando el pedal de liberación y tirando del mango hacia abajo con la mano. Mueva la aspiradora a la posición mediana para el uso normal. Pise el pedal de liberación y baje la manija hacia el suelo para cambiar de la posición normal a la posición baja. Nota: El agitador no girará cua...
Page 33 - INDICADOR DE POLVO
OPERACIÓN Cuando utilizando la aspirador, la luz se encenderá y permanecerá encendido mientras el sensor detecta una alta concentración de partículas que pasan a través de la aspiradora. Para limpie opticas celadas de indicador de polvo ver la página 14. El indicador eléctrico de polvo es una ca- ra...
Page 34 - de acoplar al final del tube telesópico; INDICADOR DE CHECK BAG
CUIDADO NO tire de la as pi ra do ra por la man gue - ra en la ha bi ta ción. Po drí an ocu rrir da - ños a sus per te nen cias. - 10 - CUIDADO NO USE la manguera cuando la aspiradora este en uso Siempre regrese la aspiradora a la posición vertical antes de usar la manguera y los accesorios. CUIDADO...
Page 35 - a limpiar superficies sueltas; ACCESORIO; ÁREA A LIMPIAR; TUBO TELESCÓPICO; CEPILLO PARA COMBINACIÓN; CONTROL DE ASPIRATIÓN; y apriete con firmeza.; CUADRO DE USO DE LOS ACCESORIOS
- 11 - * Siempre limpie los accesorios antes de usar sobre telas. ***Consulte la Guía de uso y cuidado del dispositivo Pet HandiMate para obtener instrucciones detalladas sobre el cambio de la correa y otros procedimientos. ** Use el sujetador del cepillo sin el cepillo para una mayor succión en mue...
Page 37 - cnico calificado que haga el Kenmore; CUIDADO DE LA ASPIRADORA; arranca de manera impre vista.; CUI DADO; deben usarse en otras super; LIMPIEZA DEL EXTERIOR Y DE LOS ACCESORIOS
- 13 - El motor del agitador tiene una protección incorporada contra daño del motor en caso de que el agitador se bloquee. Si el agitador se pone lento o se detiene, el protector de sobrecarga del agitador apaga el motor del agitador. El motor de succión continuará funcionando. Para corregir el prob...
Page 38 - ALMACENAMIENTO DE LA ASPIRADORA
- 14 - Reemplace la manguera y el tube si es necesario (ver pág 5 & 6). Re co ja el cordón y enrollarlo en los sujetadores superior e inferior, sin que quede muy apreta do. Asegure la clavija sobre el cordón de poder (ver pág 6). Guar de la aspira do ra bajo techo en un lugar seco, con el mango ...
Page 39 - BOLSA DE POLVO ESTILO O; CAMBIO DE LA BOLSA PARA POLVO
- 15 - 3. Coloque la bolsa en la cámara de la bolsa de polvo. Asegúrese de que todas las partes de la bolsa para polvo esté completamente dentro de la cavidad para la bolsa antes de cerrar la cubierta de la bolsa. 4. Reinstale la lengüeta de la cubierta de polvo en la ranura en la aspiradora. 5. Rei...
Page 40 - el filt; FILTRO DE PROTECCIÓN AL MOTOR
- 16 - ADVERTENCIA Peligro de choque eléctricoDesenchufe el cable de poder del tomacorriente. No opere la aspiradora sin el filt r o primario o el filt ro de escape. Este segur e que los filt ros estén instalados apropiadamente para prevenir alguna falla del motor y/o sacudida eléctrica. Re vise el filt...
Page 41 - CAMBIO DEL FILTRO DE ESCAPE
- 17 - FILTRO DE ESCAPE ESTILO No. EF-9 El filt ro de escape se debe reemplazar cuando este sucio. El tiempo de reemplazo depende de las condiciones de uso . El filt ro de escape de debe de revisas cada ves que se cambie la bolsa. El filt ro de escape no puede ser lavado, perdería su capacidad de atrap...
Page 42 - o está llena o si el filt; CÓMO ELIMINAR LOS RESIDUOS DE BASURA EN LOS CONDUCTOS
- 18 - ADVERTENCIA Peli gro de cho que eléc trico o lesión cor po ralDes co necte la uni dad antes de efectuar el mantenimiento a su aspiradora. De lo con tra - rio podría pro du cirse un choque eléc trico o cau sar lesión cor po ral si la aspira dora arranca de manera impre vista. Pro ceda siem pre...
Page 43 - ado eficient
- 19 - PARA REMOVER LA OBSTRUCCIÓN DE LA CUBIERTA 1. Levante la cubierta para ceder a limpiar el conducto de limpieza. 2. Remover cualquier clase de pelusa o es- combro acumulado. 3. Reemplace la cubierta. Asegúrese de que esté completamente asegurado en su lugar. PARA REMOVER LA OBSTRUCCIÓN DEL PET...
Page 44 - PROBLEMA; Peli gro de cho que eléc trico; RECONOCIMIENTO DE PROBLEMAS
- 20 - La aspiradora no 1. Está desconectada. 1. Conecte bien, seleccione la enciende función deseada en el control manual. 2. Cortacircuitos botado o fusible 2. Restablezca el cortacircuitos quemado en el tablero de o cambie el fusible. servicio de la residencia. 3. Protector termal activado. 3. De...
Page 46 - NOTAS