Ikea HUTTRA- User Manual

Ikea HUTTRA– User Manual, read for free online in PDF format. We hope this helps you resolve any issues you may have. If you have further questions, please contact us through the contact form.


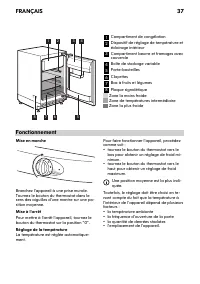

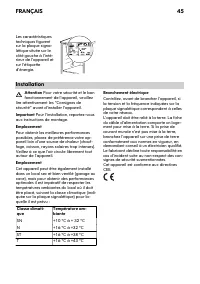
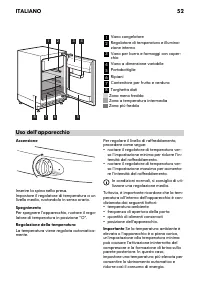


Table of Contents:
- Page 4 – Children and vulnerable people safety; ENGLISH
- Page 6 – Product description
- Page 7 – Operation; Switching on; First use; Cleaning the interior
- Page 8 – Daily use; Accessories
- Page 10 – Hints for storage of frozen food; Care and cleaning; Periodic cleaning
- Page 14 – Installation; Location; Environmental concerns
- Page 18 – Sicherheit von Kindern; DEUTSCH
- Page 19 – Täglicher Gebrauch
- Page 20 – Gerätebeschreibung
- Page 21 – Betrieb; Einschalten des Geräts
- Page 22 – Erste Inbetriebnahme; Reinigung des Innenraums; Zubehör
- Page 23 – Praktische Tipps und Hinweise; Energiespartipps
- Page 25 – Reinigung und Pflege; Regelmäßige Reinigung
- Page 29 – Technische Daten; gen; Montage; Standort
- Page 34 – Sécurité des enfants et des personnes; FRANÇAIS
- Page 36 – Description de l'appareil
- Page 37 – Fonctionnement; Mise en marche
- Page 49 – Sicurezza dei bambini e delle persone; ITALIANO
- Page 51 – Descrizione del prodotto
- Page 55 – Pulizia e cura; Attenzione
- Page 59 – Chiusura della porta; Dati tecnici; stallazione; Installazione
HUTTRA
GB
DE
FR
IT
"Loading the manual" means you need to wait until the file loads and becomes available for online reading. Some manuals are very large, and the time they take to appear depends on your internet speed.
Summary
Contents Safety instructions 4 Product description 6 Operation 7 First use 7 Daily use 8 Helpful hints and tips 9 Care and cleaning 10 What to do if… 12 Technical data 13 Installation 14 Environmental concerns 14 IKEA GUARANTEE 15 Subject to change without notice. Safety instructions In the interest...
• It is advisable to wait at least four hours before connecting the appliance to allow the oil to flow back in the compressor. • Adequate air circulation should be around the appliance, lacking this leads to overheating. To achieve sufficient ven- tilation follow the instructions relevant to install...
2 Temperature regulator and interior lighting 3 Butter and cheese compartment with lid 4 Variable storage box 5 Bottle holder 6 Storage shelves 7 Fruit and vegetable bin 8 Rating plate Least cold zone Intermediate temperature zone Coldest zone Operation Switching on Insert the plug into the wall soc...