Ikea KALLNAT- User Manual

Ikea KALLNAT– User Manual, read for free online in PDF format. We hope this helps you resolve any issues you may have. If you have further questions, please contact us through the contact form.


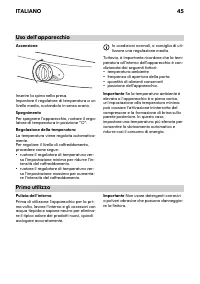

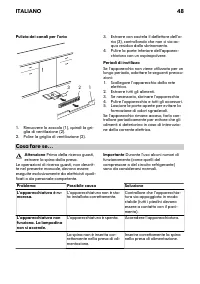
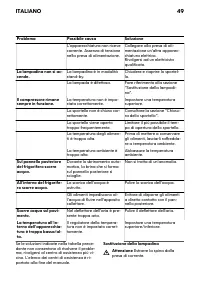
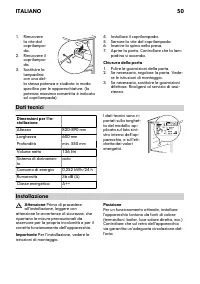

Table of Contents:
- Page 4 – Children and vulnerable people safety; ENGLISH
- Page 6 – Product description
- Page 7 – Operation; Switching on; First use; Cleaning the interior
- Page 9 – Care and cleaning; Periodic cleaning
- Page 13 – Environmental concerns; Packaging materials; IKEA GUARANTEE; How long is the IKEA guarantee valid?
- Page 16 – Sicherheit von Kindern; DEUTSCH
- Page 18 – Gerätebeschreibung
- Page 19 – Betrieb; Einschalten des Geräts; Erste Inbetriebnahme; Reinigung des Innenraums
- Page 21 – Reinigung und Pflege; Regelmäßige Reinigung
- Page 25 – Montage; Standort
- Page 29 – Sécurité des enfants et des personnes; FRANÇAIS
- Page 31 – Description de l'appareil
- Page 32 – Fonctionnement; Mise en marche
- Page 35 – En cas d'anomalie de fonctionnement; Attention
- Page 42 – Sicurezza dei bambini e delle persone; ITALIANO
- Page 44 – Descrizione del prodotto
- Page 45 – Primo utilizzo; Importante
- Page 47 – Pulizia e cura; Attenzione
- Page 50 – Chiusura della porta; Dati tecnici; stallazione; Installazione
KALLNAT
GB
DE
FR
IT
"Loading the manual" means you need to wait until the file loads and becomes available for online reading. Some manuals are very large, and the time they take to appear depends on your internet speed.
Summary
Contents Safety instructions 4 Product description 6 Operation 7 First use 7 Daily use 8 Helpful hints and tips 8 Care and cleaning 9 What to do if… 10 Technical data 12 Installation 12 Environmental concerns 13 IKEA GUARANTEE 13 Subject to change without notice. Safety instructions In the interest ...
Service • Any electrical work required to do the servicing of the appliance should be car- ried out by a qualified electrician or com- petent person. • This product must be serviced by the Af- ter Sales Service, and only genuine spare parts must be used. The service numbers are listed in the Service...
Operation Switching on Insert the plug into the wall socket. Turn the temperature regulator clockwise to a medium setting. Switching off To turn off the appliance, turn the tempera- ture regulator to the "O" position. Temperature regulation The temperature is automatically regulated. To oper...