Epson WF 7310 - Installation Manual

The Epson WF-7310 Series multifunction printer is designed as a comprehensive user manual, covering essential topics like initial setup, hardware installation, and software configuration. This guide highlights basic printer operation–such as unpacking, powering on, and loading paper–along with safety precautions. It also addresses ink cartridge management, including insertion, protection tape removal, and leakage prevention. Additionally, the document covers connectivity options (wireless and USB), troubleshooting common issues like network or print quality problems, and mobile/voice printing capabilities. Support resources, replacement parts, and recycling information are included for maintenance and user assistance.


Table of Contents:
- Page 1 – Initial Setup and Unpacking
- Page 2 – Ink Cartridge Installation and Paper Loading
- Page 3 – Software Setup and Troubleshooting
- Page 4 – Support Resources and Cartridge Compatibility
Start Here
4
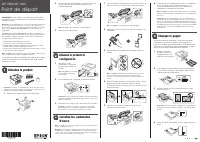
Load paper
See the online User’s Guide for information about loading
capacity, available paper types and sizes, loading envelopes,
and using the rear paper feed slot.
1
Make sure the product is done charging the ink, then pull
out the paper cassette.
2
Slide the side edge guides all the way out and set the
front edge guide to the paper size you are using.
3
Insert paper with the glossy or printable side down.
Note:
Make sure the paper is under the arrow mark for your
paper type and loaded against the front edge of the cassette.
4
Slide the edge guides against the paper, but not too
tightly.
IMPORTANT: Before using this product, make sure you read
these instructions and the safety instructions in the online User’s
Guide.
Note:
This printer is designed for use with Epson
®
cartridges only, not
third-party cartridges or ink. For important ink information, visit
www.epson.com/epsonink (U.S.) or www.epson.ca/epsonink (Canada)
or see your printer box.
1
Unpack
Note:
Do not open the ink cartridge packages until you are ready to
install the ink. Cartridges are vacuum packed to maintain reliability.
1
Remove all protective materials from the product.
2
Open the printer cover until it locks into place and remove
all protective materials from inside the product.
Caution:
Do not touch the flat white cable.
3
Close the printer cover.
3
Remove only the yellow tape from each ink cartridge.
Caution:
Do not remove any seals, or ink will leak. Do not touch
the areas shown above. Doing so may prevent normal operation
and printing.
4
Insert the cartridge in the holder for each color. Press each
cartridge down until it clicks. Make sure all cartridges are
pushed down into place.
5
Close the ink cartridge cover, then lower the printer cover.
6
The product starts charging the ink. Ink charging takes
approximately 5 minutes. When you see a completion
message on the product’s LCD screen, charging is
complete.
Caution:
Don’t turn off the printer or raise the printer cover while
the printer is charging or you’ll waste ink.
Note:
• The cartridges included with the printer are designed for
printer setup and not for resale. After some ink is used for
charging, the rest is available for printing.
• As part of setup, your product’s serial number will be sent to a
secure Epson server so that you can be eligible to participate
in programs we may offer from time to time, including the
Epson ink replenishment program. You will have a separate
opportunity to consent to participating in such programs.
2
Turn on and configure
1
Connect the power cord to the back of the product and to
an electrical outlet.
Caution:
Do not connect to your computer yet.
2
Raise the control panel and turn on the product.
Note:
If an error code appears, turn off the product and check
that no protective material has been left inside the product.
3
Select your language and time on the LCD screen.
Note:
You can change these settings later using the product’s
control panel. For more information, see the online User’s Guide.
3
Install ink cartridges
Caution:
Keep the ink cartridges out the reach of children and do not
drink the ink.
Note:
The included initial cartridges are designed for reliable printer
setup and cannot be used as replacement cartridges or resold. After
setup, the remaining ink is available for printing.
1
Open the printer cover, then open the ink cartridge cover.
2
Gently shake th
e ink cartridges, and remove them from the
packaging.
WF-7310 Series
4141293 Rev.0
1-F
K
"Loading the manual" means you need to wait until the file loads and becomes available for online reading. Some manuals are very large, and the time they take to appear depends on your internet speed.
Was this manual helpful?
About this manual
- Brand
- Epson
- Model
- WF 7310
- Document type
- Installation Manual
- Language(s)
- English
- Pages
- 4
- File size
- 1.9 MB
- Format
Other Manuals for Epson WF 7310
Summary
Instructions for unpacking the printer, powering on, configuring basic settings, and installing included ink cartridges, including safety notes.
Procedure for installing ink cartridges, loading paper with specific orientation, removing protective tape, cautions regarding leakage and charging, and serial number registration.
Instructions for installing printer software, establishing wireless and USB connections, and troubleshooting common issues such as network setup failures, print quality problems, and screen errors.
Ask a question
Related manuals
Popular Epson Other
 Epson PictureMate Flash - PM 280 - PictureMate Flash Compact Photo Printer User Manual
 Epson TM-T70II Troubleshooting Guide
 Epson U925 - TM B/W Dot-matrix Printer User Manual
 Epson RR 70W User Manual
 Epson 9890 Manual
 Epson 206636 - PocketJet 3 Plus User Manual
 Epson Printer TM-H5000II User Manual
 Epson TM-T88V User Manual
More Epson Other models
 Epson WF 2830 User Manual
 Epson WF 3820 Manual
 Epson WF 4820 User Manual
 Epson WF 4830 User Manual
 Epson WF5690 Manual
 Epson WF 7210 Installation Manual
 Epson WF 7720 User Manual
 Epson WF 7820 User Manual
 Epson WF 7840 Manual
 Epson WorkForce 30 Manual
 Epson WorkForce 320 User Manual
 Epson WorkForce 435 User Manual