Page 2 - Downloaded From ManualsPrinter.com Manuals
❧❧❧❧❧❧❧❧❧❧❧❧❧❧❧❧❧❧❧❧❧❧❧❧❧❧❧❧❧❧❧❧❧❧❧❧❧❧❧ ❧❧❧❧❧❧❧❧❧❧❧❧ ❧ ❧ ❧❧❧❧❧❧❧❧❧❧❧❧ ❧❧ ❧❧❧❧❧❧❧❧❧❧❧❧ ❧❧❧❧❧❧❧❧❧❧❧❧ ❧ ❧❧❧❧❧❧❧❧❧❧❧❧ ❧ ❧ The power switch positions are marked “I” to indicate power “ON” and“ ” to indicate stand-by. In the stand-by position, power is being supplied to a drying heater withinthe optical s...
Page 3 - CONTENTS
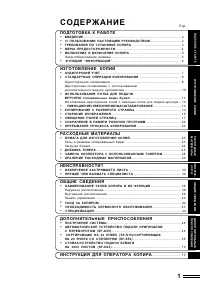
1 CONTENTS Page GETTING STARTED ● INSTALLATION REQUIREMENTS .................. 2 ● CAUTIONS .................................... 3 ● LOADING COPY PAPER ...................... 4 ● ADDING TONER ............................ 6 GETTING STARTED INTRODUCTION The SF-2530 has been designed to givehigh produc...
Page 4 - INSTALLATION REQUIREMENTS
2 GETTING STARTED INSTALLATION REQUIREMENTS To ensure safety and proper machine perfor mance, please note thefollowing before initial installation and whenever the machine is to berelocated. 1. The copier should be installed near an accessible power outletfor easy connection. 2. Be sure to connect t...
Page 5 - CAUTIONS
3 GETTING STARTED CAUTIONS 1. Do not touch the photoconductive drum. Scratches orsmudges on the drum will cause dirty copies. 2. The fusing unit is extremely hot. Exercise care in this area. 3. Installation adjusters are provided on the optional stand/500-sheet paper drawer or stand/1000-sheet paper...
Page 6 - 00-sheet paper drawer; Gently lift and pull out the paper tray.; Push the paper tray firmly back into the copier.; LOADING COPY PAPER
4 GETTING STARTED The paper required ( ) indicator will light up when there is no copy paper in a selected paper feed stationor when a selected paper tray is not installed or isimproperly installed.For best results, use only Sharp recommended paper.The copy paper size for the 500-sheet paper drawera...
Page 7 - Changing the lower paper tray’s inner cassette; Gently lift and pull out the lower paper tray.; Place the inner cassette into the tray.; Place the paper size plate in the front of the paper tray.
5 GETTING STARTED Changing the lower paper tray’s inner cassette The lower paper tray can accommodate five different paper sizes. Tochange the paper size, simply change the inner cassette. (The innercassettes are optional.) 1 Gently lift and pull out the lower paper tray. 2 Grasp the inner cassette ...
Page 8 - Open the front cover.; GENUINE SUPPLIES; ADDING TONER
6 GETTING STARTED 1 Open the front cover. 2 Pull down the toner hopper lock lever and pull the tonerhopper out slowly until it stops. 3 Hold the toner cartridge vertically and vigorously shakeit up and down about 20 times to loosen the toner. Thiswill allow the toner to flow more easily into the ton...
Page 9 - Close the front cover .
7 GETTING STARTED 4 Place the new toner cartridge with the tabs in thenotches as shown. 5 Slide the toner cartridge along the guides over the tonerhopper. 6 Hold the toner cartridge with one hand while pulling onthe sealing tape to remove it. 7 Tap on the top of the toner cartridge 5 times to releas...
Page 10 - AUDITING ACCOUNTS; Enter your account number using the 10-key pad.; CLEAR ALL
8 MAKING COPIES Auditing accounts AUDITING ACCOUNTS If this copier has been programmed in the auditing mode, it will notfunction until an assigned 3-digit account number has been entered.See page 37 for setting the auditing mode. If the copier has been programmed in the auditing mode, “ –– ” will ap...
Page 11 - NORMAL COPYING; Turn the power switch on.; Close the document cover.; Ensure that the desired paper tray is selected.
9 MAKING COPIES One-sided copying NORMAL COPYING Normal copying 1 Turn the power switch on. ● It will take about 60 seconds for the copier to warm up. Afterwarm-up, the START key indicator will light up, indicating thatcopying is possible. ● If the copier has been programmed in the auditing mode, th...
Page 12 - START
10 MAKING COPIES NORMAL COPYING ● For manual copy density adjustment, press the EXPOSUREkey to select MANUAL and adjust with the LIGHT and DARKkeys as desired. ● For photographs, select PHOTO and then adjust with the LIGHTand DARK keys as desired. 6 Use the 10-key pad to enter the desired number ofc...
Page 13 - Two-sided copying with optional duplex module
11 MAKING COPIES NORMAL COPYING 1 Place the first original face down on the document glassand close the document cover. 2 Press the ORIGINAL TO COPY key to select EVENNUMBER. ● ODD NUMBER copying is only possible when copying from anoptional automatic document feeder (ADF) or reversing automaticdocu...
Page 14 - USING THE MANUAL FEED TRAY (special paper); Open the manual feed tray.
12 MAKING COPIES USING THE MANUAL FEED TRAY (special paper) The manual feed tray is used to copy onto transparency film, labels,tracing paper, and other special purpose papers. Up to 50 sheets ofstandard copy paper can be set in the manual feed tray. ● Automatic duplex copying will not work when a n...
Page 15 - Two-sided copying with manual feed tray
13 MAKING COPIES Two-sided copying with manual feed tray Two-sided copies can be made using the manual feed tray. 1 Place the first original face down on the document glassand make a copy. ● The first side of the copy can be made using any of the paperfeed stations. 2 Replace the first original with...
Page 16 - Automatic; Press the AUTO IMAGE key.; Enter the number of copies.; AUTO IMAGE
14 MAKING COPIES REDUCTION/ENLARGEMENT/ZOOM Reduction and enlargement ratios can be selected either auto-matically with the AUTO IMAGE key or manually with the reduction( ) key, enlargement ( ) key, or ZOOM keys. The zoom function enables precise copy ratio selection from 50% to 200% in1% increments...
Page 17 - Manual; keys to set the desired copy ratio.
15 MAKING COPIES Manual 1 Place the original face down on the document glass andclose the document cover. 2 Use the reduction ( ), enlargement ( ) and ZOOM keys to set the desired copy ratio. A. Preset reduction ratios are: 95%, 77%, 64%, and 50%. B. Preset enlargement ratios are: 121%, 129%, 141%, ...
Page 18 - DUAL PAGE COPYING; Press the DUAL PAGE COPY key.
16 MAKING COPIES DUAL PAGE COPYING The DUAL PAGE COPY feature produces separate copies of twodocuments placed side by side on the document glass. It isespecially useful when copying books and other bound documentsand can be used with the MARGIN SHIFT feature. If an optionalduplex module is installed...
Page 19 - Press the EDGE ERASE key.; EDGE ERASE
17 MAKING COPIES 1 Place the original face down on the document glass andclose the document cover. ● If an optional document feeder (ADF or RADF) is installed, placethe originals face up in the document feeder tray. NOTE:When an optional ADF or RADF is used, the amount of edge erasewill vary dependi...
Page 20 - MARGIN SHIFT; Press the MARGIN SHIFT key.
18 MAKING COPIES MARGIN SHIFT The MARGIN SHIFT feature automatically shifts the text or image tothe right on one-sided copies to increase the left margin by ap-proximate 1/4". If two-sided copying is made possible by using anoptional duplex module, the image is shifted to the right on the fronts...
Page 21 - INTERRUPTING A COPY RUN; Press the INTERRUPT key.; Select the desired available copier functions.; INTERRUPT
19 MAKING COPIES Interrupt INTERRUPTING A COPY RUN INTERRUPT can be used to temporarily stop a long copy run so thatanother job can be run. ● Reduction/enlargement/zoom, exposure adjustments, dual pagecopying, edge erase, and margin shift can be selected duringinterrupt copying. ● Duplex copying, so...
Page 22 - AUTOMATIC EXPOSURE ADJUSTMENT; Ensure that the copier is in the AUTO exposure mode.; LIGHT
20 MAKING COPIES Automatic exposure adjustment AUTOMATIC EXPOSURE ADJUSTMENT The automatic exposure level can be adjusted to suit your copyingneeds. 1 Ensure that the copier is in the AUTO exposure mode. 2 Open the front cover. 3 Press and hold the EXPOSURE key for more than 3seconds. ● One or two e...
Page 23 - TONER SAVE MODE; Press the EXPOSURE key to select the PHOTO mode.
21 MAKING COPIES Toner save mode TONER SAVE MODE This mode reduces toner consumption, increasing cost effective-ness, with only a slight loss in copy density. Follow the procedurebelow for setting the toning level. 1 Press the EXPOSURE key to select the PHOTO mode. 2 Open the front cover. 3 Press an...
Page 24 - Misfeed in the manual feed tray; Gently pull the misfed paper out.; MISFEED REMOVAL
22 STATUS INDICATORS When a misfeed occurs, the copier will stop.The misfeed ( ) indicator will blink and blinking red misfeed location indicators will indicate theapproximate misfeed location. If paper becomes accidentally torn during removal,be sure to remove all pieces. Be careful not todamage th...
Page 25 - Misfeed in a paper tray; Remove the misfed paper.; Close the paper tray and the side cover.; Misfeed in the transport area
23 STATUS INDICATORS MISFEED REMOVAL Misfeed removal Misfeed in a paper tray 1 Open the side cover. NOTE:If the transport area misfeed indicator is lighted, clear the transportarea first. (See below, “Misfeed in the transport area.”) 2 Remove the misfed paper. ● Be careful not to tear the misfed pap...
Page 26 - Turn the transport lever to the left.
24 STATUS INDICATORS 2 Turn the transport lever to the left. 3 Turn the roller rotating knob in the direction of the arrowto remove the misfed paper. 4 Turn the transport lever back into place. 5 Close the front cover. ● Confirm that the indicator has gone out. MISFEED REMOVAL Misfeed around the fus...
Page 27 - Close the exit area cover.
25 STATUS INDICATORS 2 Turn the roller rotating knob in the direction of the arrowand remove the paper from the fusing unit area. CAUTION The fusing unit is hot! Use care in removing paper. 3 If the misfed paper is in the exit area, open the exit areacover carefully. ● Open the cover by pulling the ...
Page 28 - Pull out the duplex module.
26 STATUS INDICATORS MISFEED REMOVAL Misfeed in the duplex module ● The duplex module is optional. NOTE:If any other misfeed locations are indicated, be sure to remove anymisfed paper from these locations before performing the proceduredescribed below. If not, a sheet of paper in another location ma...
Page 29 - Open the toner collecting container cover.; USED TONER DISPOSAL
27 STATUS INDICATORS 1 Open the toner collecting container cover. 2 Disengage and remove the container from the copier bypushing downward and then pulling it out. ● Toner cannot be reused. Do not transfer used toner to the tonerhopper. ● Remove the cap from a new toner collecting container and useit...
Page 30 - DEVELOPER REQUIRED
28 STATUS INDICATORS When the developer replacement required ( ) indicator lights up, the developer should be replaced.DEVELOPER REPLACEMENT SHOULD ONLY BE DONE BY ANAUTHORIZED SHARP SERVICE TECHNICIAN. Contact yourService Center as soon as possible. NOTE:If the indicator and the copy quantity displ...
Page 31 - MAINTENANCE REQUIRED
29 STATUS INDICATORS MAINTENANCE REQUIRED When the maintenance required ( ) indicator lights up, service by an authorized Sharp Service Technician is required. Contact yourService Center as soon as possible. Maintenance required Downloaded From ManualsPrinter.com Manuals
Page 32 - PART NAMES AND FUNCTIONS; Exterior
30 GENERAL INFORMATION PART NAMES AND FUNCTIONS Exterior q Document holder w Exit trayFinished copies are deposited in the exit tray. e Document cover (optional in some areas)Place the original on the document glass andclose the document cover before copying starts. r Operation panelAll copier contr...
Page 34 - Operation Panel
32 GENERAL INFORMATION q EDGE ERASE key and indicator (p.17)Use to erase dark areas from copy edges. w MARGIN SHIFT key and indicator (p.18)Shifts text or image on the copy to leave abinding margin on the left side of the copy. e DUAL PAGE COPY key and indicator (p.16)Makes individual copies of two ...
Page 36 - USER PROGRAMS; List of user programs
34 GENERAL INFORMATION USER PROGRAMS The user programs allow the parameters of certain functions to be set,changed, or cancelled as desired. List of user programs This copier has the following user programs. Program No. Program name Description 1 Auto clear time Sets the auto clear time. The copier ...
Page 37 - Setting the user programs; Enter a program number using the 10-key pad.
35 GENERAL INFORMATION Setting the user programs 1 Press and hold the TRAY SELECT key for more than 5seconds until all the alarm indicators* blink and “– –”appears in the copy quantity display. * The alarm indicators are the , , , , and indicators. 2 Enter a program number using the 10-key pad. ● Th...
Page 38 - Select the desired parameter using the 10-key pad.
36 GENERAL INFORMATION USER PROGRAMS 4 Select the desired parameter using the 10-key pad. ● The entered parameter number will blink on the right side of thecopy quantity display. ● The parameters are shown in the table below. For example, to change the setting of the auto power shut-offtimer to “30 ...
Page 39 - AUDITING PROGRAMS; Auditor code number; Enter the auditor code number using the 10-key pad.
37 GENERAL INFORMATION Program No. Program name Description 10 Auditing mode Enables or disables the auditing mode, which controls access tocopier. See page 8. 11 Account number Registers accounts for auditing mode. entry 12 Account number Changes account numbers for auditing mode. change 13 Account...
Page 40 - Setting for auditing accounts
38 GENERAL INFORMATION 3 Enter the number 16 using the 10-key pad and press theSTART key. 4 Choose a new 3-digit code number and enter it using the10-key pad. 5 Press the START key. ● The code number will change from the previous setting to thenew setting. ● “ – – ” will appear again in the copy rat...
Page 41 - To continue with other auditing programs, enter the; Repeat steps 1 and 2 for other account numbers.
39 GENERAL INFORMATION POWER SAVE START 1 2 3 4 5 6 7 0 C 8 9 AUDITING PROGRAMS Auditing programs Program No. 10: Auditing mode If the auditing mode is enabled, copying is limited to operators with anassigned 3-digit account number. A maximum of 49, 3-digit accountnumbers can be assigned. Use progra...
Page 43 - Program No. 14: Number of copies per account; ) key to select the account
41 GENERAL INFORMATION 100% ZOOM 4 5 6 7 0 C 8 9 Program No. 14: Number of copies per account Program No. 14 is used to display the total number of copies madeagainst each account number. When program No. 14 is entered, anaccount number will appear in the copy quantity display. 1. Use a ZOOM ( , ) k...
Page 45 - POWER SAVE MODES
43 GENERAL INFORMATION POWER SAVE MODES The copier has two power save modes to reduce overall power consumptionand thereby reduce the cost of operation. In addition, these modes conservenatural resources and help reduce environmental pollution. The two powersave modes are preheat mode and auto power...
Page 47 - USER MAINTENANCE; Document glass and document cover
45 GENERAL INFORMATION User maintenance USER MAINTENANCE The document glass and document cover must be kept clean toavoid dirty areas from being copied onto the copies. Document glass and document cover Wipe the document glass and document cover with asoft, clean cloth. ● If necessary, dampen the cl...
Page 50 - Self-diagnostic function
48 GENERAL INFORMATION Problem Solution ● Is steadily lit in the copy The copier is in the auditing mode. Enter quantity display? your account number using the 10-keypad. See page 8. ● Is the indicator blinking? Toner is required. See page 6, ADDING Power is on but copying TONER. is not possible. ● ...
Page 51 - SUPPLIES; Types and sizes of copy paper
49 GENERAL INFORMATION SUPPLIES Types and sizes of copy paper ORDINARY PAPER ● A u t o m a t i c f e e d i n g f r o m t h e p a p e r t r a y s o rmanual feed tray (max. 50 sheets) ● Manual feed tray (single sheet feed) Size: Size: Weight: Weight: ● 5-1/2" x 8-1/2" size paper can only be se...
Page 52 - Proper storage; Store the supplies in a location that is:; Store copy paper in the wrapper and lying flat.; Photoconductive drum
50 GENERAL INFORMATION Supplies SUPPLIES Genuine supplies statement Standard SF-2530 supplies replaced by the user include copypaper, toner, toner collecting container, and staple cartridgesfor an optional staple sorter. For best copying results, be sure to use onlySharp products.The package of Shar...
Page 53 - SPECIFICATIONS; COPIER
51 GENERAL INFORMATION SPECIFICATIONS Specifications COPIER Type Desktop Copy system Dry, electrostatic transfer system Originals Sheets, bound documents Original sizes Max. 11" x 17" Copy sizes Max. 11" x 17", min. 5-1/2" x 8-1/2"Image loss: Max. 5/32" (4 mm) (leading an...
Page 57 - PART NAMES
55 ADF (SF-A17)/RADF (SF-A56) ADF (SF-A17)/RADF (SF-A56) OPTIONAL EQUIPMENT AUTOMATIC DOCUMENT FEEDER (SF-A17)REVERSING AUTOMATIC DOCUMENT FEEDER (SF-A56) An automatic document feeder (ADF) and reversing automaticdocument feeder (RADF) will handle 5-1/2" x 8-1/2" to 11" x 17"original...
Page 58 - Using the ADF or RADF
56 ADF (SF-A17)/RADF (SF-A56) OPTIONAL EQUIPMENT ADF (SF-A17)/RADF (SF-A56) Stream feeding modeThe stream feeding mode allows easy operation of continuouscopying from the ADF or RADF. If the stream feeding mode hasbeen enabled using user program No. 5, the original feedindicator will continue to bli...
Page 60 - Enter the desired number of copies.; Use the ORIGINAL TO COPY key to select
58 ADF (SF-A17)/RADF (SF-A56) OPTIONAL EQUIPMENT ADF (SF-A17)/RADF (SF-A56) 3 Enter the desired number of copies. ● The maximum number of copies in the two-sided copy mode is50 for 8-1/2" x 11" and 8-1/2" x 11"R and 30 for 8-1/2" x 14" and11" x 17" paper. If the speci...
Page 61 - APLE
59 ADF (SF-A17)/RADF (SF-A56) ADF (SF-A17)/RADF (SF-A56) OPTIONAL EQUIPMENT 3 Enter the desired number of copies. ● The maximum number of copies in the two-sided copy mode is50 for 8-1/2" x 11" and 8-1/2" x 11"R and 30 for 8-1/2" x 14" and11" x 17" paper. If the speci...
Page 62 - (A) Open the feeding roller cover and pull the original gently
60 ADF (SF-A17)/RADF (SF-A56) OPTIONAL EQUIPMENT ADF (SF-A17)/RADF (SF-A56) Misfeed removal Location C Location B Location A An original misfeed may occur at one of three locations:(A) in the feed section, (B) in the exit roller, or (C) underthe transport belt. (A) Open the feeding roller cover and ...
Page 64 - Using a sorter; Press the SORTER key to select the SORT mode.; GROUP; Press the SORTER key to select the GROUP mode.
62 OPTIONAL EQUIPMENT 10-BIN SORTER (SF-S18)/ 20-BIN SORTER (SF-S15) GROUP SORT Using a sorter 10-bin sorter (SF-S18) 20-bin sorter (SF-S15) Press the SORTER key to select the desired mode.(The STAPLE SORT mode cannot be selected for either theSF-S18 or SF-S15.) To cancel the mode, press the SORTER ...
Page 65 - SORTER CAPACITIES
63 OPTIONAL EQUIPMENT SORTER CAPACITIES SF-S18 SF-S15 Top bin Top bin 100 sheets in the NON-SORT mode 100 sheets in the NON-SORT mode Sort binsSORT mode: Paper size Bin capacity (max.) 5-1/2" x 8-1/2",8-1/2" x 11", 30 8-1/2" x 11"R 8-1/2" x 14", 15 11" x 17" G...
Page 67 - Open the top cover and remove the misfed paper.
65 OPTIONAL EQUIPMENT 20-BIN SORTER (SF-S15) 20-bin sorter (SF-S15) SF-S15 20-bin sorter 1 Open the top cover and remove the misfed paper. 2 Close the top cover. ● Confirm that the indicator has gone out. 3 If the indicator is still blinking or the misfed paper cannot be seen from the top, slide the...
Page 70 - SORT mode; STAPLE SORT mode; GROUP mode
68 OPTIONAL EQUIPMENT 10-bin staple sorter (SF-S54N) 20-bin staple sorter (SF-S56) 10-BIN STAPLE SORTER (SF-S54N)/ 20-BIN STAPLE SORTER (SF-S56) GROUP SORT (ORIGINALS) EVEN NUMBE ODD NUMBER PRE-COUNTORIGINALS SORT STAPLESORT GROUP (ORIGINALS) EVEN NUMBE ODD NUMBER PRE-COUNTORIGINALS SORT STAPLESORT ...
Page 72 - Staple sort; Set the number of copies.
70 OPTIONAL EQUIPMENT Stapling location 10-bin staple sorter (SF-S54N) 20-bin staple sorter (SF-S56) Staple sort The STAPLE SORT mode staples copies of 5-1/2" x 8-1/2", 8-1/2" x11", 8-1/2" x 11"R, 8-1/2" x 14", and 11" x 17" sizes (SF-S54N) orcopies of 8-1/2&#...
Page 74 - Align the edges of the copies to be stapled.
72 OPTIONAL EQUIPMENT 1 Align the edges of the copies to be stapled. 2 Place the set of copies into the top bin, making sure theedges are flush with the inner right corner, as shown inthe figure. ● Make sure that there is no paper in the other sort bins. If thereis, the manual staple key will not li...
Page 75 - Staple cartridge replacement; Open the stapler cover.
73 OPTIONAL EQUIPMENT STAPLE TEAR line Staple cartridge replacement The CHECK STAPLER indicator will blink when the staple cartridgeis empty and the copier is in the STAPLE SORT mode. Replace thestaple cartridge as follows. ● If there are still many staples left, then staples have jammed in thestapl...
Page 77 - Remove the rear paper and tape from the cartridge.
75 OPTIONAL EQUIPMENT 5 Remove the rear paper and tape from the cartridge. ● Pull them straight. If they are pulled obliquely, the tape may betorn. 6 Insert the staple box into the stapler until it clicks inplace. 7 Close the stapler cover. 8 Place a sheet of paper into the top bin. Press the manual...
Page 78 - Staple jam removal; Remove all copies from the bins of the staple sorter.
76 OPTIONAL EQUIPMENT Staple jam removal If staples become jammed in the stapler, the CHECK STAPLERindicator and the STAPLE SORT mode indicator will blink. Removethe jammed staples in the manner described below. SF-S54N 10-bin staple sorter 1 Open the stapler cover. 2 Close the stapler cover. ● Jamm...
Page 80 - Close the stapler cover.
78 OPTIONAL EQUIPMENT 5 Insert the staple box into the stapler unit until it clicks inplace. 6 Close the stapler cover. 7 Following the stapling procedure on page 72, staple acopy to check that the stapler works properly. ● If it does not, repeat this procedure until it does. 20-bin staple sorter (S...
Page 85 - Gently lift and pull out the 500-sheet paper drawer.; Push the paper drawer firmly back into the copier.; Push the paper drawer firmly back into the copier.
83 OPTIONAL EQUIPMENT Stand/500-sheet paper drawer (SF-D20) 1 Gently lift and pull out the 500-sheet paper drawer. 2 Fan the copy paper and insert it in the paper drawer. ● The 500-sheet paper drawer holds up to 500 sheets of 20 lb.paper. ● Do not load paper above the maximum height line. 3 Push the...
Page 86 - Open the side cover and remove any misfed paper.; Close the paper drawer and the side cover.
84 OPTIONAL EQUIPMENT 1 Open the side cover and remove any misfed paper. ● Be sure to perform this step before pulling out either of the paperdrawers. If not, the paper may be torn as a drawer is opened. ● Be sure not to tear the misfed paper during removal. 2 Gently lift and pull out the paper draw...
Page 88 - MEMO
86 OPTIONAL EQUIPMENT MEMO Downloaded From ManualsPrinter.com Manuals
Page 91 - NOTICE
WARNING: FCC Regulations state that any unauthor ized changes or modifications tothis equipment not expressly approved by the manufacturer could void theuser's authority to oper ate this equipment. Note:This equipment has been tested and found to comply with the limits for aClass A digital device, p...
Page 92 - PRINTED IN HONG KONG; SHARP ELECTRONICS CORPORATION; SHARP CORPORATION
PRINTED IN HONG KONG 99A KS q TINSE1807FCZZ SF-2530 SHARP ELECTRONICS CORPORATION Sharp Plaza, Mahwah, New Jersey 07430-2135. SHARP CORPORATION SF-2530 PLAIN PAPER COPIER Downloaded From ManualsPrinter.com Manuals


 Sharp AR-151
Manual
Sharp AR-151
Manual
 Sharp AR-156
Manual
Sharp AR-156
Manual
 Sharp AR-201
User Manual
Sharp AR-201
User Manual
 Sharp AR-206
User Manual
Sharp AR-206
User Manual
 Sharp AR-235
Manual
Sharp AR-235
Manual
 Sharp AR-5015N
User Manual
Sharp AR-5015N
User Manual
 Sharp AR-5120
User Manual
Sharp AR-5120
User Manual
 Sharp AR-M160
User Manual
Sharp AR-M160
User Manual
 Sharp SF-2040
User Manual
Sharp SF-2040
User Manual
 Sharp Z-810
User Manual
Sharp Z-810
User Manual
 Sharp AR-507
Manual
Sharp AR-507
Manual
 Sharp AR-505
User Manual
Sharp AR-505
User Manual
 Sharp AR-5015
User Manual
Sharp AR-5015
User Manual
 Sharp AR-405
User Manual
Sharp AR-405
User Manual
 Sharp AR-287
Manual
Sharp AR-287
Manual
 Sharp AR-275-2
User Manual
Sharp AR-275-2
User Manual