Page 2 - SPECIFICATIONS; SAFETY WARNINGS; General power tool safety warnings; Save all warnings and instruc-
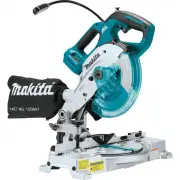
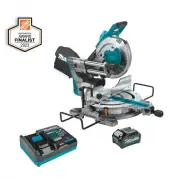
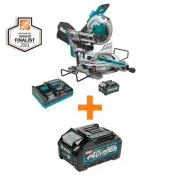
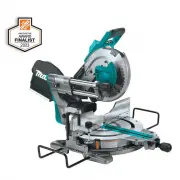
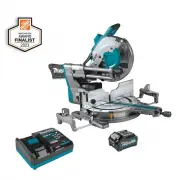
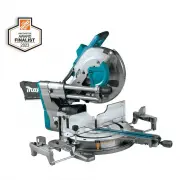
2 ENGLISH ENGLISH (Original instructions) SPECIFICATIONS Model: XSL05 Blade diameter 165 mm (6-1/2") Hole (arbor) diameter 15.88mm (5/8") Max. miter angle Left 52°, Right 52° Max. bevel angle Left 45° (46° when using release lever), Right 45° (46° when using release lever) No load speed (RPM...
Page 4 - Safety instructions for mitre saws
4 ENGLISH 6. Do not expose a BATTERY pack or tool to fire or excessive temperature. Exposure to fire or temperature above 130 °C may cause explosion. 7. Follow all charging instructions and do not charge the BATTERY pack or tool outside the temperature range specified in the instruc - tions. Chargin...
Page 5 - SAVE THESE INSTRUCTIONS.
5 ENGLISH 16. If the workpiece or blade becomes jammed, turn the mitre saw off. Wait for all moving parts to stop and disconnect the plug from the power source and/or remove the battery pack. Then work to free the jammed material. Continued sawing with a jammed workpiece could cause loss of control ...
Page 6 - Symbols; Important safety instructions for; Tips for maintaining maximum
6 ENGLISH Symbols The followings show the symbols used for tool. volts direct current no load speed revolutions or reciprocation per minute Do not place hand or fingers close to the blade. Important safety instructions for battery cartridge 1. Before using battery cartridge, read all instruc- tions ...
Page 7 - PARTS DESCRIPTION
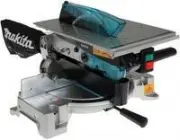
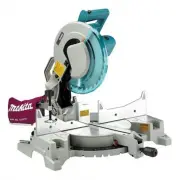
7 ENGLISH PARTS DESCRIPTION 1 2 3 4 5 6 9 10 11 12 13 14 15 7 8 8 1 Lock-off button 2 Switch trigger 3 Handle 4 Blade case 5 Blade 6 Blade guard 7 Sub-fence 8 Small sub-fence 9 Base 10 Turn base 11 Guide fence 12 Vertical vice 13 Dust bag 14 Dust nozzle 15 Center cover - -
Page 8 - INSTALLATION; Bench mounting
8 ENGLISH 16 17 18 19 20 21 22 23 24 16 Lamp 17 Battery cartridge 18 Hex wrench 19 Release lever 20 Lever (for bevel angle adjustment) 21 Kerf board 22 Lower limit adjusting bolt 23 Lamp switch 24 Laser switch - - - - - - INSTALLATION Bench mounting WARNING: Ensure that the tool does not move on the...
Page 9 - FUNCTIONAL; Installing or removing battery; Tool / battery protection system; Overdischarge protection; Indicating the remaining battery
9 ENGLISH FUNCTIONAL DESCRIPTION WARNING: Always be sure that the tool is switched off and the battery cartridge is removed before adjusting or checking the functions on the tool. Failure to switch off and remove the battery cartridge may result in serious personal injury from accidental start-up. I...
Page 10 - Indicating the remaining battery capacity; Automatic speed change function
10 ENGLISH When you pull the switch trigger, the battery indicator indicates the remaining battery capacity. Battery indicator status Remaining battery capacity On Off Blinking 50% to 100% 20% to 50% 0% to 20% Charge the battery Indicating the remaining battery capacity Only for battery cartridges w...
Page 13 - Adjusting the miter angle; Adjusting the bevel angle
13 ENGLISH 1 ► 1. Sub-fence When performing cuts except for bevel cuts, use the sub-fence to support the workpiece. Small sub-fence CAUTION: When performing right bevel cuts, fold the small sub-fences. Otherwise, they may contact the blade or a part of the tool, and may result in serious injury to t...
Page 15 - Laser beam action
15 ENGLISH Switch action WARNING: Before installing the battery car- tridge on the tool, always check to see that the switch trigger actuates properly and returns to the "OFF" position when released. Operating a tool with a switch that does not actuate properly can lead to loss of control an...
Page 16 - Electric brake; ASSEMBLY; Hex wrench storage
16 ENGLISH 1 ► 1. Laser switch NOTE: Be sure to turn off the switch as turning on the switch consumes the battery power. Laser line can be shifted to either the left or right side of the saw blade by turning the adjusting screw as follows. 1 ► 1. Adjusting screw 1. Loosen the adjusting screw by turn...
Page 17 - Installing or removing saw blade
17 ENGLISH Installing or removing saw blade WARNING: Always be sure that the tool is switched off and the battery cartridge is removed before installing or removing the blade. Accidental start up of the tool may result in serious personal injury. CAUTION: Use only the Makita hex wrench provided to i...
Page 19 - Attaching the shoulder strap; OPERATION; Press cutting (cutting small
19 ENGLISH 1 2 3 4 3 5 6 7 ► 1. Vise arm 2. Vise knob 3. Guide fence 4. Turn base 5. Lower screw 6. Upper screw 7. Vise rod Position the vise arm according to the thickness and shape of the workpiece and secure the vise arm by tightening the upper screw. If the upper screw contacts the guide fence, ...
Page 20 - Cutting aluminum extrusion
20 ENGLISH Bevel cut WARNING: After setting the blade for a bevel cut, before operating the tool ensure that the saw head and blade will have free travel throughout the entire range of the intended cut. Interruption of the saw head or blade travel during the cutting operation may result in kickback ...
Page 21 - Carrying tool; MAINTENANCE; Adjusting the cutting angle
21 ENGLISH Align the cutting line on your workpiece with either the left or right side of the groove in the kerf board, and while holding the workpiece, move the set plate flush against the end of the workpiece. Then secure the set plate with the screw. When the set plate is not used, loosen the scr...
Page 22 - Bevel angle; ° bevel angle
22 ENGLISH 1 2 ► 1. Guide fence 2. Hex socket bolt 1 2 ► 1. Guide fence 2. Hex socket bolt 5. Lower the handle fully and lock it in the lowered position by pushing in the stopper pin. 6. Adjust the guide fence until it makes a perpendic - ular angle with the blade using a triangular rule, try- squar...
Page 23 - 5° bevel angle; Adjusting the laser line position
23 ENGLISH 5. Make sure that the pointer on the arm indicates 0° on the bevel scale. If it does not indicate 0°, loosen the screw which secures the pointer and adjust the pointer so that it indicates 0°. 1 2 3 ► 1. Screw 2. Pointer 3. Bevel scale 45° bevel angle Adjust the 45° bevel angle only after...
Page 24 - Cleaning the laser light lens
24 ENGLISH 1 ► 1. Vise 5. Install the battery cartridge to the tool and turn on the laser switch. 6. Loosen the adjusting screw. To move the laser line away from the blade, turn the range adjustment screws counterclockwise. To move the laser line close to the blade, turn the range adjustment screw c...
Page 25 - After use; OPTIONAL; MAKITA LIMITED ONE YEAR; Warranty Policy
25 ENGLISH 1 ► 1. Lens NOTICE: Do not remove the screw which secures the lens. If the lens does not come out, loosen the screw further. NOTICE: Do not use solvents or any petro- leum-based cleaners on the lens. After use After use, wipe off chips and dust adhering to the tool with a cloth or the lik...
Page 26 - ESPECIFICACIONES; ADVERTENCIAS DE; Advertencias generales de; Conserve todas las advertencias
26 ESPAÑOL ESPAÑOL (Instrucciones originales) ESPECIFICACIONES Modelo: XSL05 Diámetro del disco 165 mm (6-1/2″) Diámetro del orificio (eje) 15,88 mm (5/8") Ángulo de inglete máximo Izquierda 52°, Derecha 52° Ángulo de bisel máximo Izquierdo a 45° (a46° al usar la palanca de liberación), Derecho ...
Page 30 - GUARDE ESTAS; Símbolos
30 ESPAÑOL 4. No utilice la sierra sin los protectores pues- tos. Verifique que el protector del disco cierre debidamente antes de cada uso. No utilice la sierra si el protector del disco no se mueve libremente y se cierra instantáneamente. No sujete ni ate el protector del disco en la posi- ción ab...
Page 31 - Consejos para alargar al máximo
31 ESPAÑOL Instrucciones importantes de seguridad para el cartucho de batería 1. Antes de utilizar el cartucho de batería, lea todas las instrucciones e indicaciones de precaución en el (1) el cargador de batería, (2) la batería, y (3) el producto con el que se utiliza la batería. 2. No desarme el c...
Page 32 - DESCRIPCIÓN DE LAS PIEZAS
32 ESPAÑOL DESCRIPCIÓN DE LAS PIEZAS 1 2 3 4 5 6 9 10 11 12 13 14 15 7 8 8 1 Botón de desbloqueo 2 Gatillo interruptor 3 Empuñadura 4 Caja del disco 5 Disco 6 Protector del disco 7 Guía auxiliar 8 Guía auxiliar pequeña 9 Base 10 Base giratoria 11 Guía lateral 12 Prensa vertical 13 Bolsa recolectora ...
Page 33 - INSTALACIÓN; Montaje en un banco de trabajo
33 ESPAÑOL 16 17 18 19 20 21 22 23 24 16 Lámpara 17 Cartucho de batería 18 Llave hexagonal 19 Palanca de liberación 20 Palanca (para ajustar el ángulo de bisel) 21 Panel de corte 22 Perno de ajuste del límite inferior 23 Interruptor de la lámpara 24 Interruptor para el láser - - - - - - INSTALACIÓN ...
Page 34 - Instalación o extracción del; Sistema de protección para la
34 ESPAÑOL DESCRIPCIÓN DEL FUNCIONAMIENTO ADVERTENCIA: Asegúrese siempre de que la herramienta esté apagada y el cartucho de batería haya sido extraído antes de realizar cual- quier ajuste o revisión del funcionamiento de la herramienta. El no apagar y extraer el cartucho de batería puede provocar l...
Page 36 - Posicionamiento del panel de corte
36 ESPAÑOL Clavija de retención PRECAUCIÓN: Siempre sostenga la empu- ñadura al liberar la clavija de retención. De lo contrario, la empuñadura se levanta de golpe y puede provocar una lesión. Para liberar la clavija de retención, continúe aplicando una ligera presión hacia abajo sobre la empuñadura...
Page 37 - Manteniendo la máxima capacidad
37 ESPAÑOL 2 2 1 ► 1. Panel de corte 2. Tornillo 2. Vuelva a apretarlos sólo hasta el punto en que los paneles de corte puedan aún moverse manualmente con facilidad. 3. Baje la empuñadura por completo y empuje la clavija de retención para bloquear la empuñadura en la posición baja. 4. Ajuste los pan...
Page 39 - Ajuste del ángulo de bisel; Ajuste del ángulo de bisel a 46°
39 ESPAÑOL Ajuste del ángulo de bisel Para ajustar el ángulo de bisel, gire hacia abajo la palanca en la parte trasera de la herramienta. 1 ► 1. Palanca Para inclinar el disco hacia la izquierda, sostenga la empuñadura e incline la cabeza de la sierra. Use la escala de bisel y el marcador como guía....
Page 41 - Acción del rayo láser
41 ESPAÑOL 2 1 ► 1. Lámpara 2. Interruptor de la lámpara NOTA: Utilice un paño seco para quitar la suciedad de la lente de la lámpara. Tenga cuidado de no rayar la lente de la lámpara ya que la iluminación podría disminuir. NOTA: Asegúrese de desactivar el interruptor ya que el activarlo consume la ...
Page 42 - Freno eléctrico; MONTAJE; Almacenamiento de la llave
42 ESPAÑOL Freno eléctrico La herramienta está equipada con un freno eléctrico para el disco. Si la herramienta falla constantemente en detener el disco tras soltar el gatillo interruptor, lleve la herramienta a mantenimiento a un centro de servicio Makita. PRECAUCIÓN: El sistema de frenado del disc...
Page 43 - Bolsa recolectora de polvo
43 ESPAÑOL 1 2 3 ► 1. Eje de bloqueo 2. Perno de cabeza hexagonal 3. Brida exterior 4. Si la brida interior es extraída, instálela en el eje con su protuberancia no orientada hacia el disco. Si la brida se coloca incorrectamente, ésta rozará contra la máquina. 1 2 3 4 5 ► 1. Brida exterior 2. Disco ...
Page 44 - Prensa vertical; Colocación de la correa para
44 ESPAÑOL Aseguramiento de la pieza de trabajo ADVERTENCIA: Es extremadamente importante asegurar siempre la pieza de trabajo correctamente con la prensa. El no hacerlo podría ocasionar lesiones personales graves y causar daños a la herramienta y/o la pieza de trabajo. ADVERTENCIA: Cuando corte una...
Page 45 - OPERACIÓN; Corte con prensa (corte de piezas
45 ESPAÑOL 2 1 2 ► 1. Correa para hombro 2. Gancho OPERACIÓN ADVERTENCIA: Asegúrese de que el disco no esté haciendo contacto con la pieza de trabajo u otro material antes de activar el interruptor. Encender la herramienta mientras el disco esté haciendo contacto con la pieza de trabajo puede ocasio...
Page 46 - Corte compuesto; Corte de extrusión de aluminio
46 ESPAÑOL 1. Afloje la palanca e incline el disco de la sierra para ajustar el ángulo de bisel (consulte la sección “Ajuste del ángulo de bisel” descrita anteriormente). Asegúrese de volver a ajustar con firmeza la palanca para fijar bien el ángulo de bisel seleccionado. 2. Asegure la pieza de trab...
Page 47 - MANTENIMIENTO; Ajuste del ángulo de corte
47 ESPAÑOL 1. Retire el cartucho de batería. 2. Fije el disco a un ángulo de bisel de 0° y la base giratoria por completo hasta la posición angular dere- cha de inglete. 1 ► 1. Base giratoria 3. Baje completamente la empuñadura y trábela en la posición inferior empujando la clavija de retención. 4. ...
Page 48 - Ángulo de bisel; Ángulo de bisel de 0°
48 ESPAÑOL 1 2 ► 1. Guía lateral 2. Perno de cabeza hexagonal 5. Baje completamente la empuñadura y trábela en la posición inferior empujando la clavija de retención. 6. Ajuste la guía lateral hasta que haga un ángulo perpendicular con el disco usando una regla triangular, escuadra, etc. Luego aprie...
Page 49 - Ángulo de bisel de 45°; Ajuste de la posición de la línea de
49 ESPAÑOL 1 2 3 ► 1. Tornillo 2. Marcador 3. Escala de bisel Ángulo de bisel de 45° Ajuste el ángulo de bisel de 45° sólo después de ajustar el ángulo de bisel de 0°. 1. Afloje la palanca e incline el disco completamente hacia la izquierda. 2. Asegúrese de que el marcador en el brazo indi - que 45°...
Page 50 - Limpieza del lente de luz láser
50 ESPAÑOL 1 ► 1. Prensa 5. Instale el cartucho de batería en la herramienta y active el interruptor para el láser. 6. Afloje el tornillo de ajuste. Para dirigir la línea de láser lejos del disco, gire los tornillos de ajuste de rango en sentido inverso al de las manecillas del reloj. Para dirigir l...
Page 51 - Luego del uso; ACCESORIOS; GARANTÍA LIMITADA DE UN AÑO; Ésta Garantía no aplica para México
51 ESPAÑOL 1 ► 1. Lente AVISO: No retire el tornillo que fija el lente. Si el lente no sale, afloje el tornillo todavía más. AVISO: No utilice disolventes ni limpiadores a base de petróleo en el lente. Luego del uso Luego de utilizar la herramienta, limpie los restos de astillas y polvo con un paño ...
Page 52 - WARNING; productos químicos son:; Makita Corporation
Some dust created by power sanding, sawing, grinding, drilling, and other construction activities contains chemicals known to the State of California to cause cancer, birth defects or other reproductive harm. Some examples of these chemicals are: • lead from lead-based paints, • crystalline silica f...


 Makita GSL02Z
User Manual
Makita GSL02Z
User Manual
 Makita GSL03M1
User Manual
Makita GSL03M1
User Manual
 Makita GSL03M1-BL4040
User Manual
Makita GSL03M1-BL4040
User Manual
 Makita GSL03Z
User Manual
Makita GSL03Z
User Manual
 Makita GSL04M1
User Manual
Makita GSL04M1
User Manual
 Makita GSL04Z
User Manual
Makita GSL04Z
User Manual
 Makita LH1040
User Manual
Makita LH1040
User Manual
 Makita LH1040F
User Manual
Makita LH1040F
User Manual
 Makita LS0815F
User Manual
Makita LS0815F
User Manual
 Makita LS1018
User Manual
Makita LS1018
User Manual
 Makita LS1018A-93681
User Manual
Makita LS1018A-93681
User Manual
 Makita LS1019L
User Manual
Makita LS1019L
User Manual
 Makita LS1019LX
User Manual
Makita LS1019LX
User Manual
 Makita LS1040
User Manual
Makita LS1040
User Manual
 Makita LS1219L
User Manual
Makita LS1219L
User Manual
 Makita LS1219L-WST06
User Manual
Makita LS1219L-WST06
User Manual
 Makita LS1219LX
User Manual
Makita LS1219LX
User Manual
 Makita LS1221
User Manual
Makita LS1221
User Manual